
As I stood in my kitchen, surrounded by the delightful aroma of summer fruits, I felt a burst of inspiration wash over me. That’s when the idea for Homemade Rainbow Sherbet struck—a perfect way to combine my love for fruity flavors with the joy of creating something refreshing. This delightful treat not only adds a colorful splash to any gathering but also allows for endless customization with flavors like raspberry, orange, and lime. Best of all, it’s a wonderful make-ahead dessert, perfect for barbecues or lazy afternoons on the porch. Each scoop is a celebration of summer, sure to impress family and friends alike. Curious about how to craft this deliciously vibrant frozen dessert at home? Let’s dive into the simple steps together!
Why is Rainbow Sherbet a Must-Try?
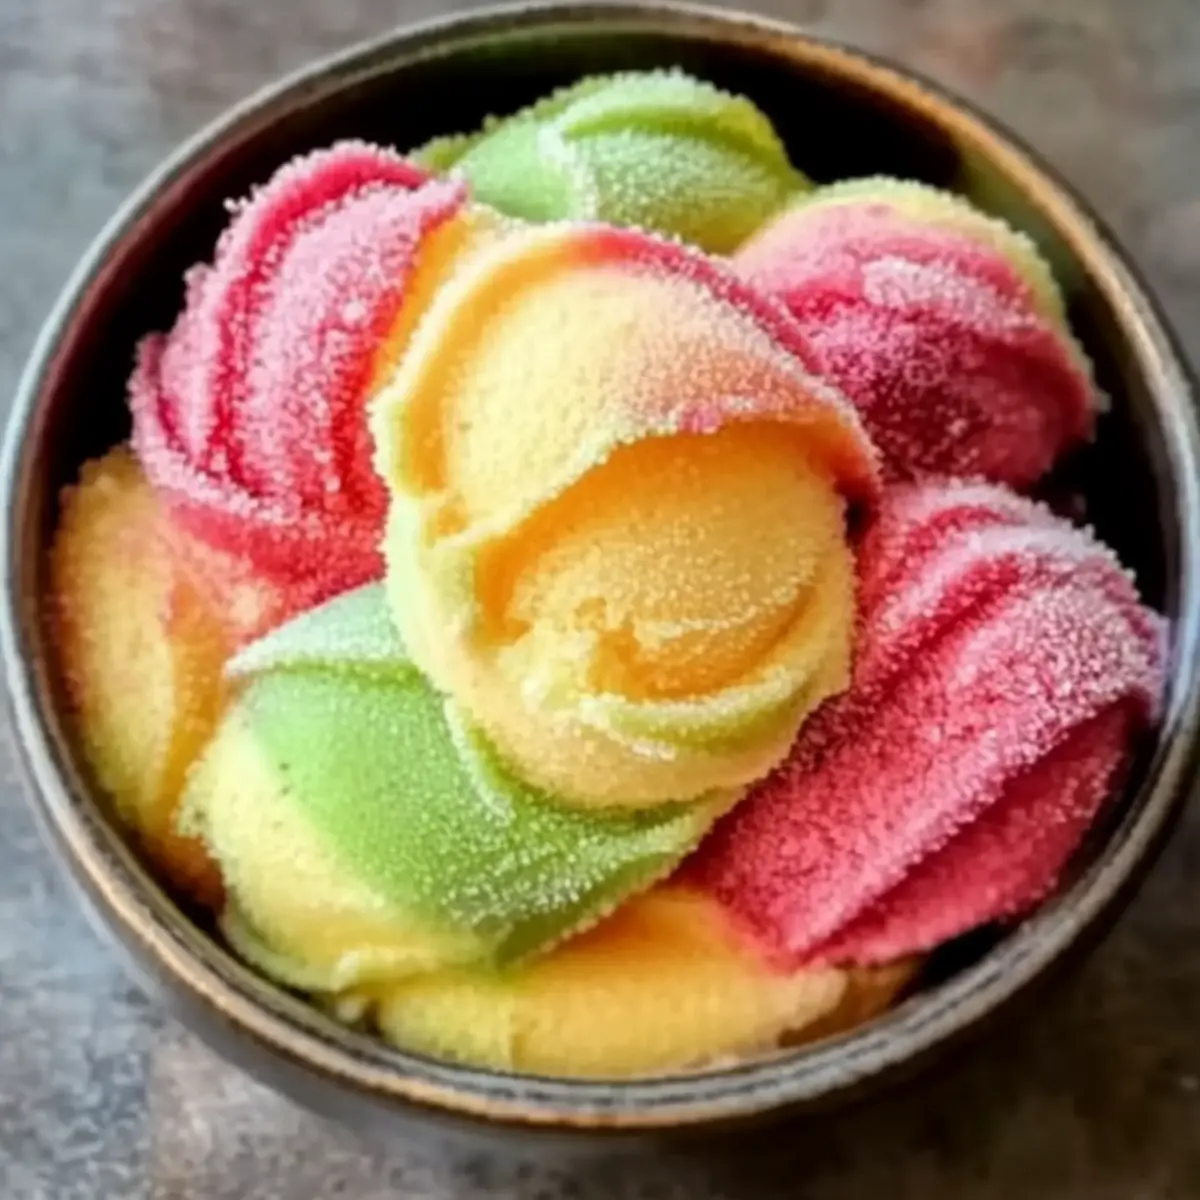
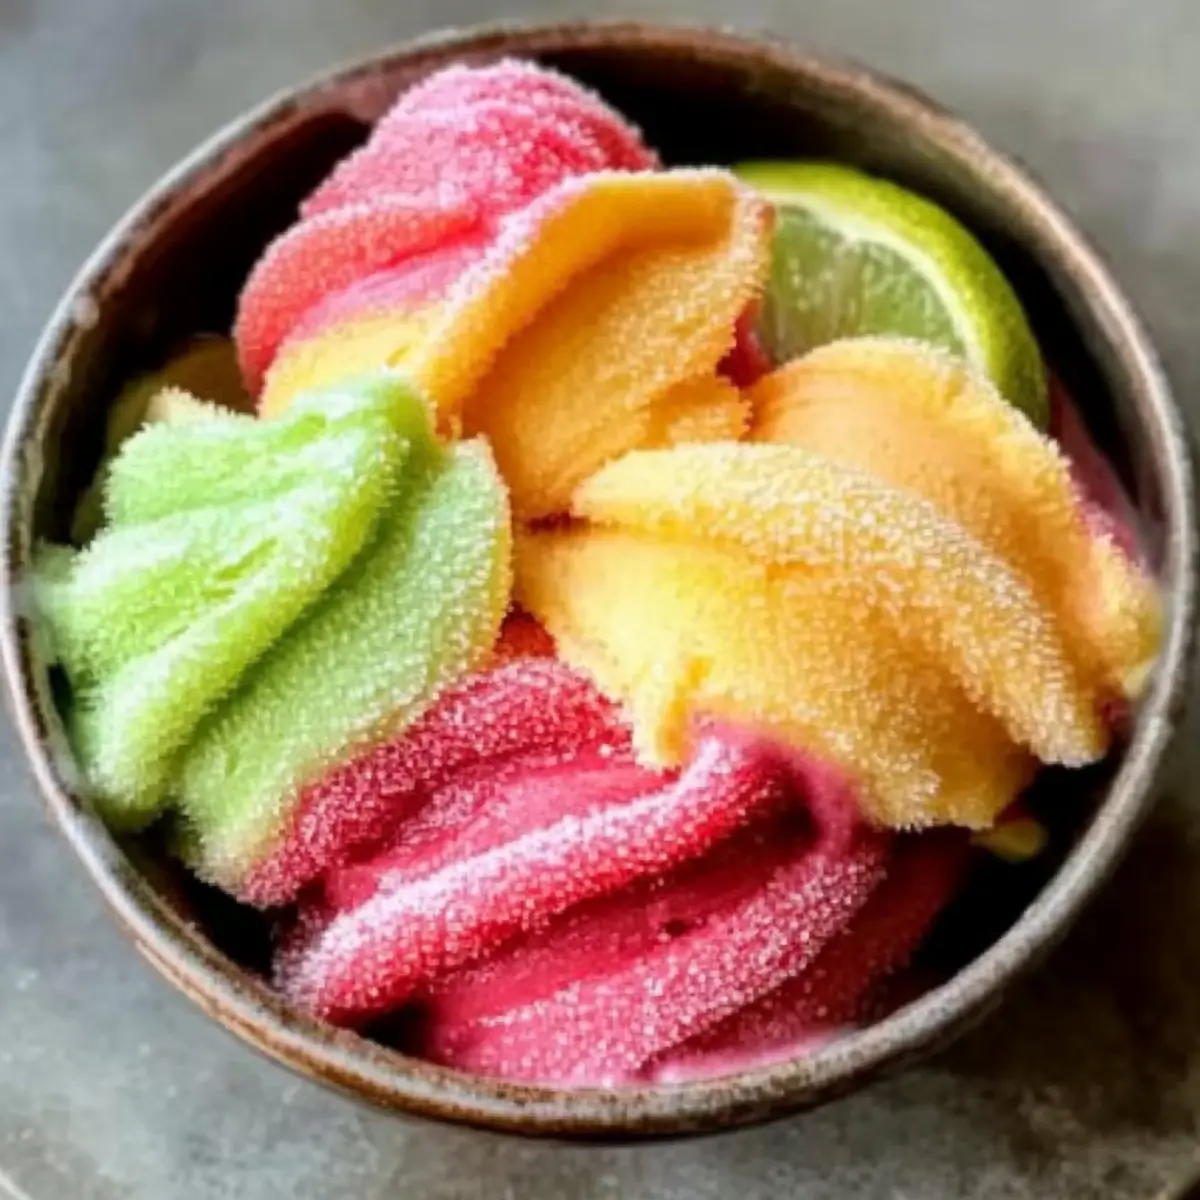
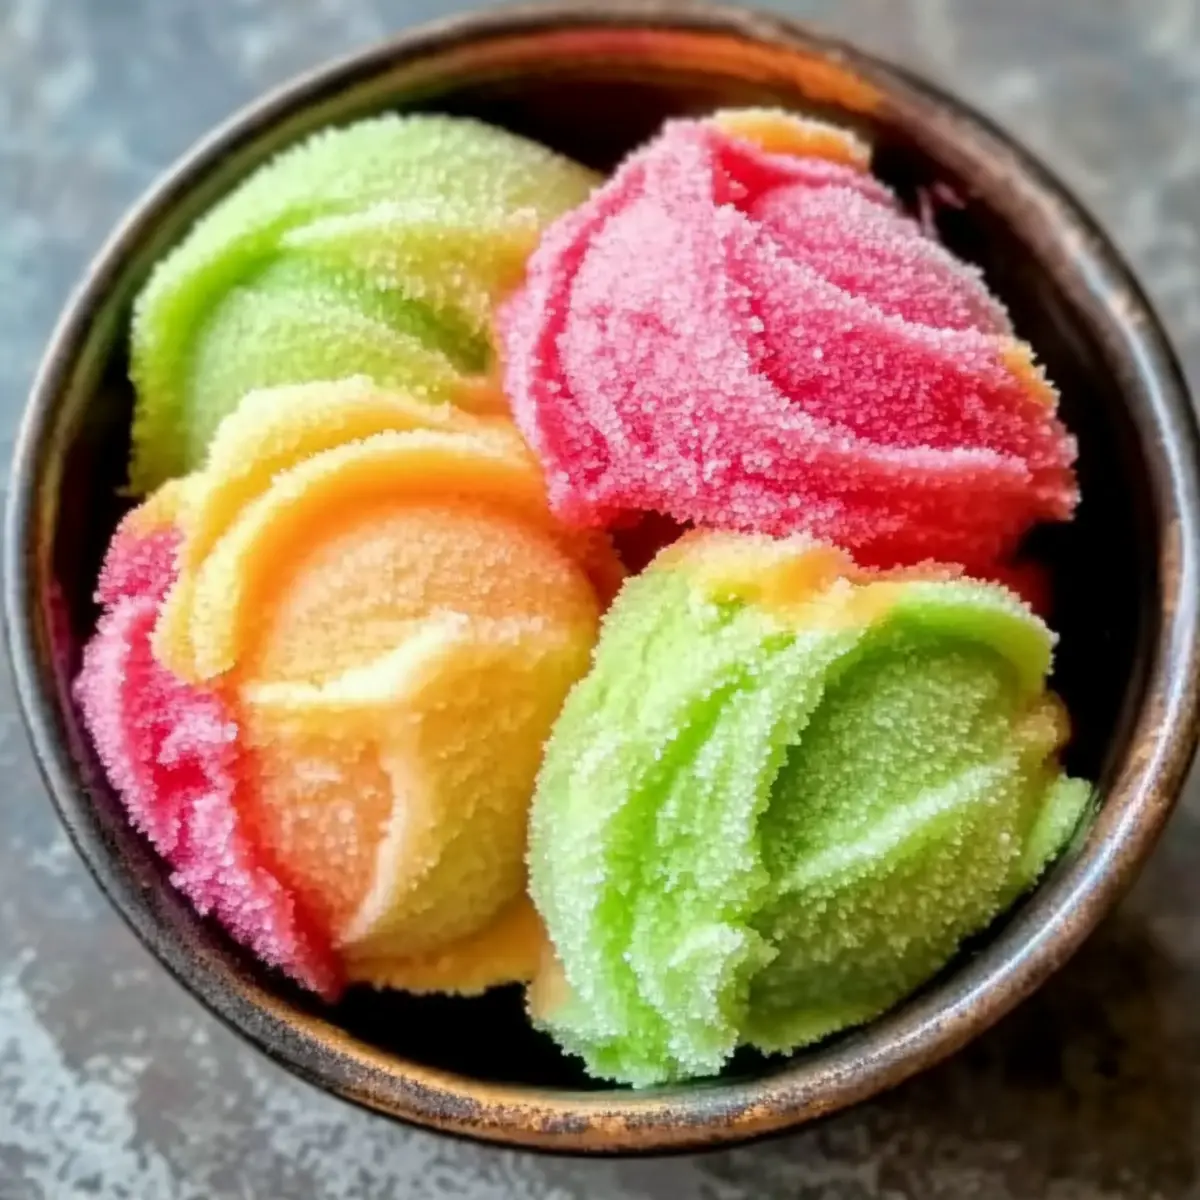
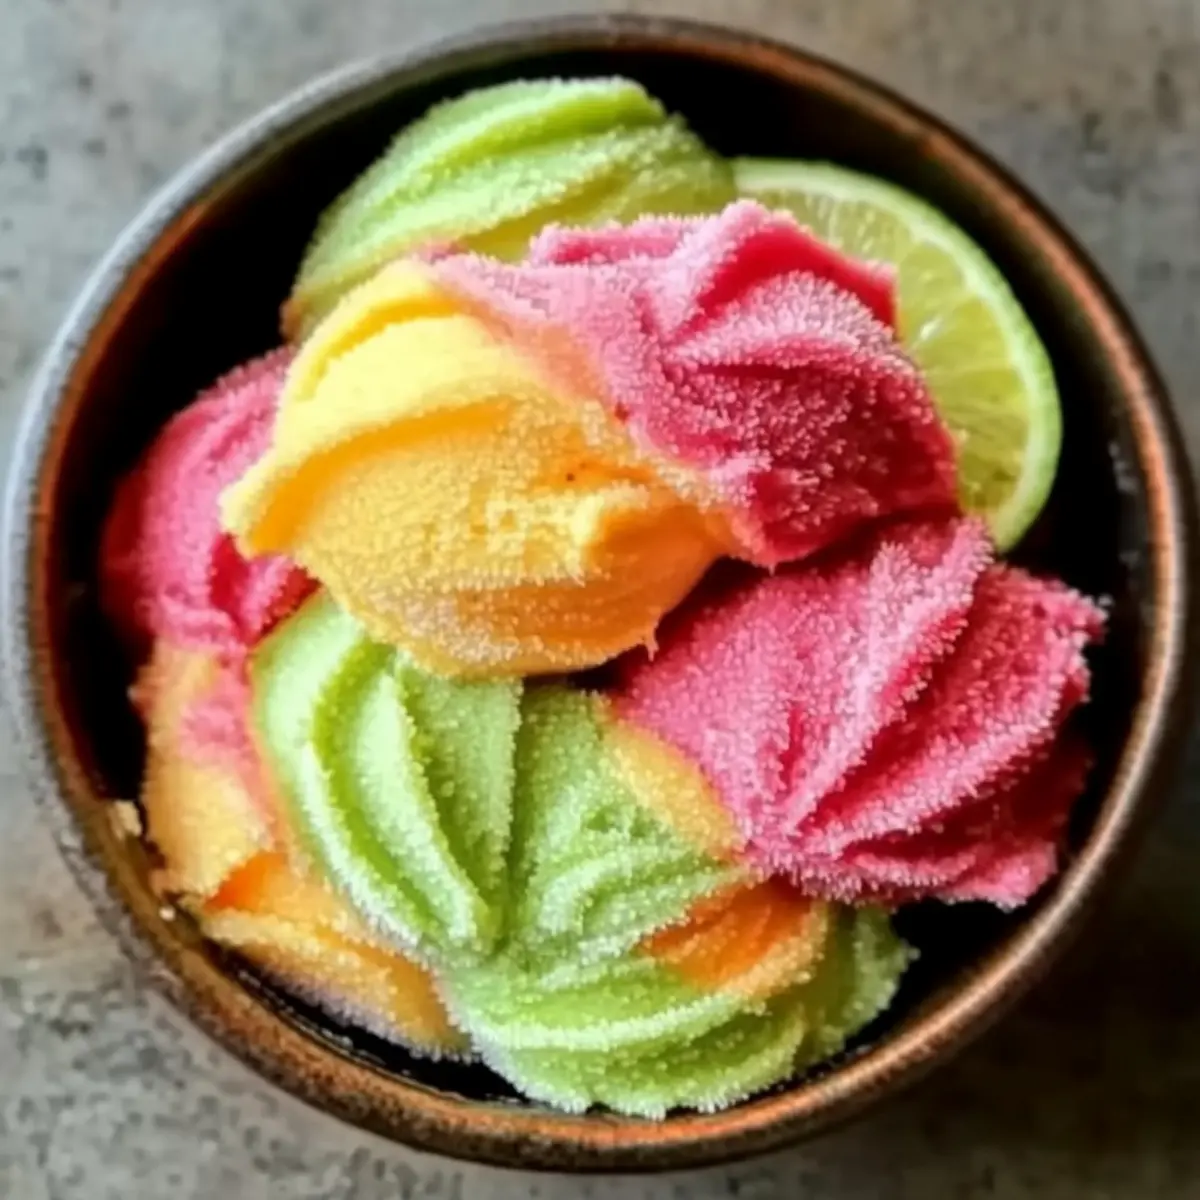
Refreshing and Fruity: Each scoop of this colorful treat captures the vibrant essence of summer. With flavors like raspberry, orange, and lime, it’s a delightful feast for the senses that will cool you off on hot days.
Endless Customization: The beauty of this recipe lies in its versatility. Feel free to swap in your favorite fruits like blueberries or mangoes for a personalized twist.
Easy to Make Ahead: Perfect for gatherings, this sorbet can be made in advance, allowing you to enjoy quality time with your guests rather than being tied to the kitchen.
Crowd-Pleasing Appeal: Kids and adults alike will be enchanted by its bright colors and refreshing taste, making this sherbet a definite hit at any summer gathering.
Simple Ingredients: With just a handful of pantry staples, this homemade dessert is an easy way to avoid store-bought options while guaranteeing freshness. For more fun summer treats, check out my Frozen Fruit Pops and Chilled Fruit Soup recipes!
Rainbow Sherbet Ingredients
For the Base
- Heavy Cream – Provides a rich and creamy texture; substitute with coconut milk for a delightful dairy-free option.
- Milk – Enhances creaminess and integrates flavors; use almond milk for a lighter alternative.
- Granulated Sugar – Sweetens the sherbet; can be replaced with honey or agave syrup for a more natural sweetness.
- Vanilla Extract – Adds depth of flavor; almond extract offers an interesting twist if you’re feeling adventurous.
For the Raspberry Layer
- Raspberries – Fresh or frozen, these give a bold flavor; if using frozen, allow them to thaw slightly for easier blending.
For the Orange Layer
- Orange Juice – Offers a refreshing citrus boost; you can customize by using other citrus juices such as lemon or lime.
- Orange Zest – Provides an aromatic enhancement; this is optional but highly recommended for extra flavor.
For the Lime Layer
- Lime Juice – Delivers tanginess that perfectly balances the sweetness; lemon juice can be an effective substitute.
- Green Food Coloring – This adds visual appeal to the lime layer; omit if you prefer a more natural expression of your rainbow sherbet.
Now that you’re equipped with all the essential rainbow sherbet ingredients, get ready to create a stunning and refreshing summer treat that’s bound to impress!
Step‑by‑Step Instructions for Homemade Rainbow Sherbet
Step 1: Prepare the Base
In a medium saucepan, combine heavy cream, milk, and granulated sugar over medium heat. Stir continuously for 5 to 7 minutes until the sugar has fully dissolved and the mixture is warm but not boiling. Remove from heat, then stir in vanilla extract. Allow the mixture to cool completely at room temperature, about 30 minutes, or refrigerate to speed up the process.
Step 2: Create Raspberry Puree
While the base cools, prepare the raspberry layer. In a blender, combine fresh or thawed raspberries with a bit of sugar, then blend until smooth. Pour the mixture through a fine-mesh strainer to remove the seeds, resulting in a vibrant raspberry puree. Set this aside for later use in your rainbow sherbet.
Step 3: Churn the Base
Once the base has cooled, pour it into your ice cream maker. Churn according to the manufacturer’s instructions until it reaches a soft-serve consistency, which typically takes about 20 to 25 minutes. This step ensures a creamy texture in your homemade rainbow sherbet.
Step 4: Flavor Layers
Divide the churned base into three equal parts. For the orange flavor, mix one part with fresh orange juice and zest, then stir until well combined. In the second part, mix lime juice and green food coloring for a zesty lime layer. Finally, mix the last part with the prepared raspberry puree to create a lovely pink layer.
Step 5: Freeze
In a freezer-safe container, alternate spoonfuls of each vibrant flavor, swirling them together gently with a spatula to create a marbled effect. Cover the container with a lid or plastic wrap. Freeze for at least 4 to 6 hours, or until the rainbow sherbet is firm and scoopable, ready to delight your guests when the summer heat hits.
Rainbow Sherbet Variations & Substitutions
Customize your rainbow sherbet to suit your taste buds and dietary preferences with these delightful twists!
- Dairy-Free: Replace heavy cream and milk with coconut milk for a luscious, dairy-free version.
- Sweetener Swap: Use honey or agave syrup instead of granulated sugar for a more natural sweetness.
- Citrus Medley: Mix various citrus juices, like lemon and grapefruit, for a zesty flavor explosion that sings of summer.
- Herb Infusion: Stir in minced fresh herbs like mint or basil into your fruit layers for a refreshing herbal note.
- Creamy Yogurt Base: Substitute yogurt for cream to create a lighter, tangy sherbet that’s just as indulgent.
- Tropical Twist: Swap raspberries and oranges with tropical fruits like mango or pineapple for a sunny vibe.
- Berry Bliss: Combine different berries, like blueberries and strawberries, for colorful layers that burst with flavor.
- Chili Kick: For those who love heat, add a pinch of chili powder or cayenne to the raspberry or lime layers for a sweet-spicy combo.
Feel free to explore these suggestions, and don’t hesitate to check out my Chilled Fruit Soup for another refreshing dessert idea!
Storage Tips for Rainbow Sherbet
-
Freezer: Store your rainbow sherbet in an airtight container for optimal freshness. It can keep well in the freezer for up to 2 months, ensuring you have this delightful treat on hand for those hot summer days.
-
Thawing: When you’re ready to enjoy, let the rainbow sherbet sit at room temperature for about 10-15 minutes before scooping. This will make it easier to serve without sacrificing texture.
-
Refreezing: If you have leftovers and the sherbet has softened, it’s safe to refreeze. Just be aware that it may lose some creaminess upon thawing each time.
-
Serving: For best results, serve scoops immediately after scooping to maintain the vibrant flavors and creamy texture of your homemade rainbow sherbet.
What to Serve with Homemade Rainbow Sherbet?
Indulge in a blissful summer experience by pairing your vibrant rainbow sherbet with delightful accompaniments that enhance its refreshing flavors.
-
Fresh Berries: Juicy strawberries, blueberries, and blackberries add a burst of natural sweetness that complements the fruity notes in the sherbet.
-
Chilled Fruit Salad: A medley of seasonal fruits like melon, kiwi, and pineapple brings a refreshing crunch that harmonizes beautifully with the creamy textures.
-
Crispy Waffle Cones: The light crunch of a waffle cone provides a satisfying contrast to the softness of rainbow sherbet. It’s the perfect vessel for serving and scooping!
-
Mint Sprigs: A sprinkle of fresh mint not only adds a pop of color but also enhances the sherbet’s flavors, especially the lime layer, with a burst of freshness.
-
Creamy Yogurt: A dollop of vanilla or fruit-flavored yogurt alongside the sherbet creates a luscious twist, turning your dessert into a delightful sundae experience.
-
Sparkling Lemonade: A glass of bubbly, zesty lemonade pairs perfectly with this frozen treat, offering a refreshing sip between scoops and enhancing the overall summer vibe.
For those looking to indulge even further, consider serving the rainbow sherbet as part of a delightful summer dessert bar featuring various toppings and flavors!
Make Ahead Options
These Homemade Rainbow Sherbet layers are perfect for meal prep enthusiasts! You can prepare the sherbet base up to 24 hours in advance by following the initial steps of cooling the mixture completely and refrigerating it overnight. The raspberry puree can also be made ahead; simply blend and strain it, then store it in an airtight container for up to 3 days in the fridge. When you’re ready to assemble, pour the chilled base into your ice cream maker, churn, and layer the flavors as directed. This way, you’ll enjoy a refreshing frozen treat with minimal effort, allowing you to savor the summer vibes while saving time for relaxation!
Expert Tips for Making Rainbow Sherbet
-
Chill Well: Ensure the base is completely cooled before churning; this step is crucial for achieving a creamy texture in your rainbow sherbet.
-
Perfect Consistency: Avoid over-churning your mixture in the ice cream maker, as this can lead to a hard, icy sherbet instead of a smooth treat.
-
Thaw Frozen Fruit: If using frozen fruit, let it thaw slightly before blending to make processing easier and maintain a vibrant flavor.
-
Flavoring Balance: When mixing in fruit purees, balance sweetness and tartness by tasting; adjust with sugar or lemon/lime juice as needed to enhance flavor.
-
Layering Technique: For a beautifully marbled effect, alternate spoonfuls of each flavor gently instead of fully mixing, allowing colorful layers to shine through.
Homemade Rainbow Sherbet Recipe FAQs
What fruits can I use for different flavors?
Absolutely! You can easily swap in your favorite fruits to customize your rainbow sherbet. Blueberries and mangoes work beautifully, creating unique flavors. If you’re looking for a more tropical twist, consider using passion fruit or pineapple juice. Feel free to experiment!
How do I store homemade rainbow sherbet?
To keep your rainbow sherbet fresh, store it in an airtight container in the freezer. It will maintain its delightful taste and texture for up to 2 months. Just remember to let it sit at room temperature for about 10-15 minutes before scooping to ensure easy serving!
Can I freeze this dessert for later?
Yes, you can freeze your homemade rainbow sherbet for future enjoyment! Once it’s churned and layered in your freezer-safe container, cover it tightly with a lid or plastic wrap. It will stay delicious for up to 2 months. If it softens too much upon thawing, it can be refrozen, though some texture might be lost.
What should I do if my sherbet is too icy or hard?
If your rainbow sherbet turns out too icy or hard, this may be due to over-churning or insufficient cooling of the base. To fix it, let the sherbet sit at room temperature for 10-15 minutes to soften. Additionally, ensure that the base is chilled well before churning—this is crucial for a creamy texture.
Can I make this dessert dairy-free?
Very! For a dairy-free version of rainbow sherbet, simply substitute the heavy cream with coconut milk and use almond or oat milk instead of regular milk. You can maintain the sweetness by using natural sweeteners like honey or maple syrup. Enjoying a homemade frozen treat while accommodating dietary preferences is absolutely doable!
How can I enhance the flavors of my sherbet?
Great question! To amplify the flavors, taste each fruit mixture before layering and adjust the sweetness or acidity as needed. A squeeze of lemon or lime can brighten up the fruit flavors beautifully. For an added twist, try infusing fresh herbs, like mint, into your fruit purees for a refreshing surprise!
These FAQs will help you navigate the art of making and enjoying your fabulous homemade rainbow sherbet. Dive in and savor every colorful scoop!
Delightful Rainbow Sherbet: Your Ultimate Summer Treat
Ingredients
Equipment
Method
- In a medium saucepan, combine heavy cream, milk, and granulated sugar over medium heat. Stir continuously for 5 to 7 minutes until the sugar dissolves and the mixture is warm but not boiling. Remove from heat, then stir in vanilla extract. Allow to cool completely at room temperature.
- In a blender, combine fresh or thawed raspberries with a bit of sugar, then blend until smooth. Strain through a fine-mesh strainer to remove seeds.
- Pour the cooled mixture into your ice cream maker. Churn according to the manufacturer's instructions until it reaches a soft-serve consistency, about 20 to 25 minutes.
- Divide churned base into three parts. For orange, mix one part with orange juice and zest. For lime, mix lime juice and green food coloring. For raspberry, mix with the raspberry puree.
- In a freezer-safe container, alternate spoonfuls of each flavor, swirling gently with a spatula. Cover and freeze for 4 to 6 hours until firm.
Leave a Reply