
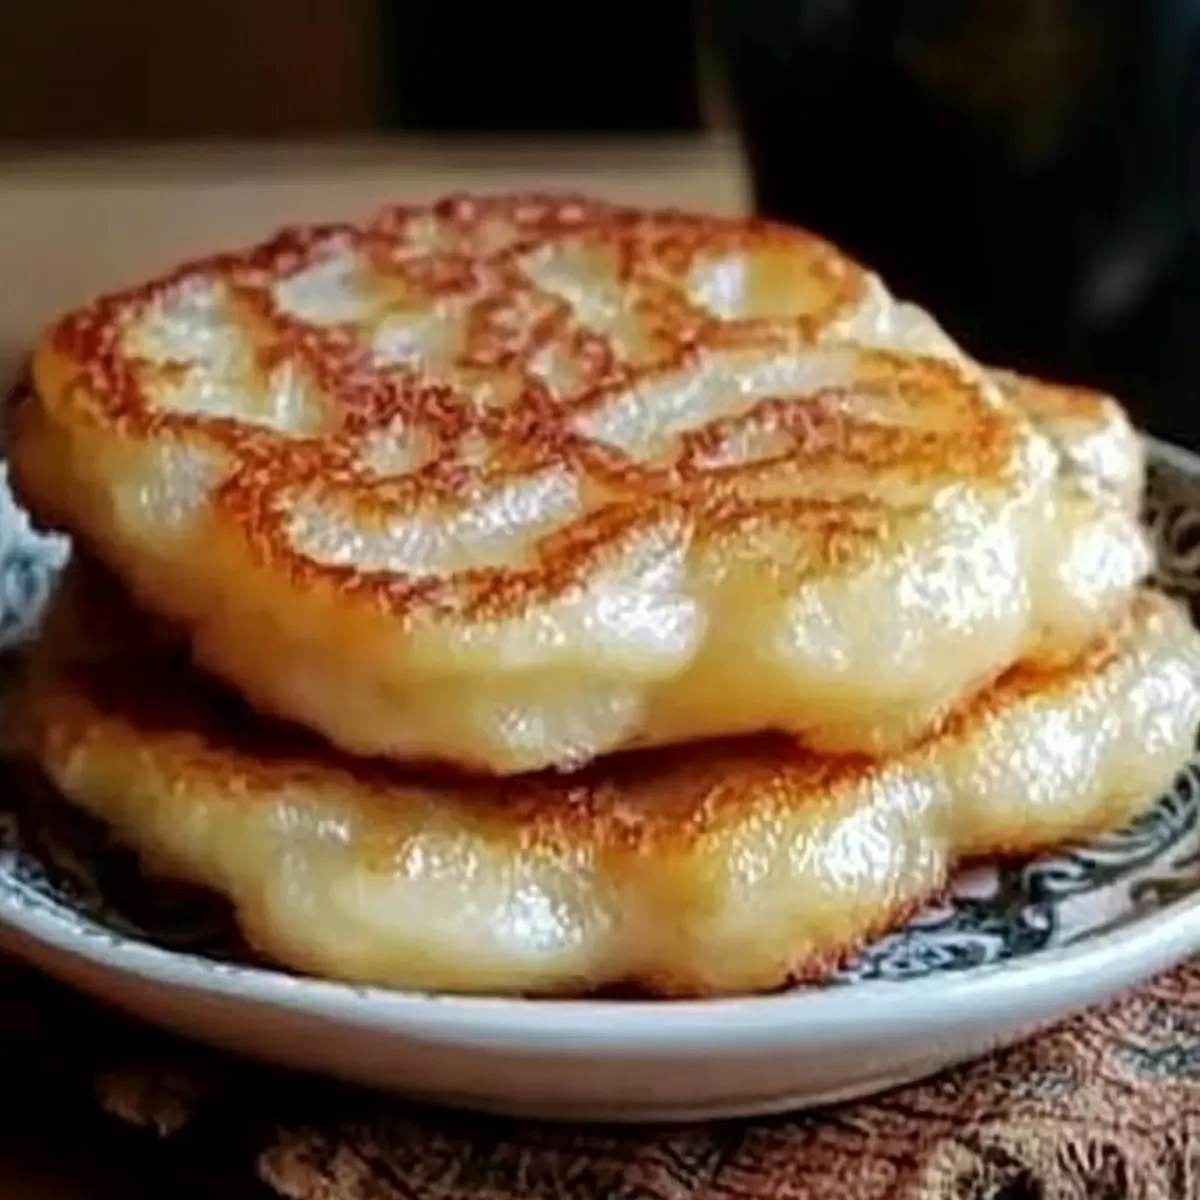
With the aroma of golden potatoes wafting through the air, I found myself transported to the heart of Ireland, savoring the comfort of Traditional Irish Potato Farls. These delightful potato cakes strike an irresistible balance between crispy and creamy, making them a perfect addition to breakfast or a satisfying snack anytime. Crafted simply from mashed potatoes and a few pantry staples, this Irish potato recipe is not only quick to whip up but is also a crowd-pleaser that will warm hearts and bellies alike. Whether enjoyed slathered in butter or served alongside hearty breakfast favorites, these farls promise to become a cherished comfort food in your kitchen. Are you ready to indulge in a taste of Ireland that’s easy to recreate at home? Let’s dive in!
Why are Irish Potato Farls a must-try?
Irresistible Comfort: These potato farls embody the essence of comfort food, offering a warm, homey flavor that makes any meal feel special.
Easily Accessible: With just a handful of simple ingredients, you can enjoy the taste of Ireland without searching high and low for complex components.
Crispy Yet Fluffy: The golden, crispy exterior juxtaposed with a tender, fluffy interior creates a delightful texture that will have everyone reaching for seconds.
Versatile Pairing Options: These farls are perfect for breakfast, lunch, or dinner; enjoy them with a pat of butter and jam, or served alongside your favorite breakfast dishes like Green Beans Potatoes.
Quick Preparation: Whip them up in less than 30 minutes, making them an excellent choice for busy weekdays or last-minute gatherings with friends and family.
Crowd-Pleaser: Guaranteed to impress your guests, serve these farls as a fun, shareable treat that sparks joy and conversation.
Irish Potato Farls Ingredients
• A few simple staples turn into delicious comfort food!
For the Dough
- Mashed Potatoes – The star of the recipe; use creamy mashed potatoes for the best texture in your Irish potato farls.
- All-Purpose Flour – A crucial binding agent; substitute with gluten-free flour for a delightful gluten-free version.
- Baking Powder – This added lift makes your farls light and airy.
- Salt – Elevates flavors; adjust using less if your butter is salted.
- Unsalted Butter – Brings rich flavor without overpowering; preferred for better salt control.
For Dusting
- Additional Flour – Keep your work surface dusted to prevent sticking while shaping your dough.
Get ready to enjoy these delightful Irish potato farls, a cozy dish that invites warm memories and heartwarming conversations!
Step‑by‑Step Instructions for Irish Potato Farls
Step 1: Prepare the Dough
In a mixing bowl, combine creamy mashed potatoes, all-purpose flour, baking powder, and salt. Use a fork or a spatula to blend the ingredients until well incorporated, forming a rustic dough. Aim for a uniform consistency, as this will be the foundation of your Irish potato farls. This process should take about 3-5 minutes.
Step 2: Incorporate the Butter
Add softened unsalted butter into the potato mixture, using your hands or a wooden spoon to knead it in until the dough is smooth and slightly sticky. This step enriches the farls, adding richness and flavor. Once the butter is fully integrated, it should take around 2-3 minutes to achieve a soft dough that holds together without crumbling.
Step 3: Roll Out the Dough
Lightly flour your work surface to prevent sticking, then transfer the dough onto it. Roll out the dough gently with a rolling pin to about ½ inch thickness. Make sure to flour your rolling pin too to avoid adhesion. This step should take around 5 minutes, as you press and smooth the dough into a uniform layer suitable for cutting.
Step 4: Cut into Shapes
Using a knife or a biscuit cutter, cut the rolled dough into rounds or triangles based on your preference. Aim for pieces that are about 3-4 inches in diameter for even cooking. Place the shaped farls on a floured surface, ensuring they don’t touch. This step will take roughly 5 minutes, as you carefully cut and arrange the shapes for frying.
Step 5: Fry the Farls
Heat a non-stick skillet over medium heat and add a small pat of butter to coat the pan. Once melted and sizzling, gently place the shaped Irish potato farls into the skillet and fry them for about 5 minutes on each side. Cook until they are golden brown and slightly puffed, providing that inviting aroma of comfort food. Keep an eye on them to prevent burning, flipping only when the first side achieves a perfect golden hue.
Step 6: Serve Warm
Once both sides are golden brown and crispy, remove the farls from the skillet and place them on a paper towel-lined platter to absorb any excess butter. Serve your delicious Irish potato farls warm, using them as a base for butter, jam, or alongside your favorite breakfast items like eggs or bacon. Enjoy the comforting flavors and inviting textures of these delightful potato cakes!
Expert Tips for Irish Potato Farls
-
Use Creamy Mashed Potatoes: Ensure your mashed potatoes are smooth and free of excess water; this helps achieve the perfect texture in your Irish potato farls.
-
Adjust Flour as Needed: Be mindful of the dough consistency; too much flour can make farls dense. Add it gradually until you reach a soft, pliable dough.
-
Non-Stick Skillet Essential: Always use a non-stick skillet for frying; this prevents the farls from sticking and ensures they cook evenly without burning.
-
Monitor Cooking Time: Keep an eye on the cook time, flipping the farls only when the first side is perfectly golden brown for a balanced crispiness.
-
Creative Twists: Don’t shy away from experimenting! Incorporate herbs or spices to elevate the flavors of your Irish potato farls and make them uniquely yours.
What to Serve with Traditional Irish Potato Farls
Warm up your kitchen with the delightful aroma of crispy potato farls, perfect for creating a hearty meal experience.
- Creamy Mashed Peas: Their velvety texture and subtle sweetness provide a vibrant contrast, enhancing the earthy flavor of the farls.
- Smoked Salmon: Adding a touch of luxury, this savory fish pairs beautifully with the fluffy interior for a gourmet touch. Serve it with a sprinkling of capers for extra zing.
- Sautéed Mushrooms: Earthy and rich, these mushrooms add depth to your dish, making every bite an explosion of flavors.
- Breakfast Sausages: The spiced, savory notes of sausage balance the mildness of the farls perfectly—a beloved classic breakfast combo!
- Herbed Yogurt Sauce: A refreshing condiment made with Greek yogurt, herbs, and lemon, it brightens up the dish and adds a creamy element to complement the crispiness.
- Fresh Garden Salad: Crisp greens dressed lightly with vinaigrette offer a refreshing contrast to the warm potato cakes, making your meal feel vibrant and fulfilling.
- Irish Breakfast Tea: A soothing cup of tea adds warmth and coziness to your meal, grounding the heavy flavors of the farls with its light, fragrant notes.
- Apple Crumble: End your meal with this sweet, comforting dessert—the soft fruit and crunchy topping create a delightful conclusion to your comforting feast.
Storage Tips for Irish Potato Farls
-
Room Temperature: Keep freshly made Irish potato farls at room temperature for up to 1 hour if serving immediately. Avoid covering them while they cool to maintain crispness.
-
Fridge: Store leftovers in an airtight container in the refrigerator for up to 3 days. Ensure they cool completely before sealing to prevent condensation and sogginess.
-
Freezer: For longer storage, freeze the cooled farls in a single layer, then transfer to a freezer-safe bag for up to 3 months. This preserves their texture for later enjoyment.
-
Reheating: Reheat frozen or refrigerated potato farls in a skillet over medium heat for a few minutes per side until warmed through and crispy. You can also pop them in a toaster for a quick, delicious snack!
Irish Potato Farls Variations & Substitutions
Feel free to get creative with your Irish Potato Farls and make them your own!
-
Sweet Potato: Swap in mashed sweet potatoes for a sweeter, vibrant alternative that brings a lovely color and flavor twist.
Transforming this dish can be fun, elevating the taste while keeping it comforting. -
Herb-Infused: Stir in fresh herbs like chives or parsley for a fragrant, earthy touch that brightens the dish.
A handful of herbs not only enhances flavor but also adds a beautiful pop of green to your farls. -
Cheesy Goodness: Add shredded cheese, such as cheddar or feta, to the dough for an extra savory dimension.
The melted pockets of cheese create a decadent experience sure to impress friends and family. -
Spice It Up: Toss in a pinch of smoked paprika or cayenne pepper for a hint of heat that contrasts beautifully with the creamy potatoes.
A little spice can take your farls from ordinary to extraordinary in no time. -
Creamy Addition: Mix in a tablespoon or two of sour cream into the dough for a creamy, tangy flavor that adds richness.
This small change can completely transform the texture, making it luscious and irresistible. -
Gluten-Free Option: Use gluten-free flour instead of all-purpose flour to make these farls suitable for gluten-sensitive guests.
You’ll enjoy the same delicious taste and texture with just a simple swap. -
Oven-Baked Farls: For a healthier alternative, bake your farls in the oven at 400°F until golden and crispy, about 20 minutes.
This method provides an equally delightful flavor while cutting down on oil. -
Pairing Inspiration: Serve your farls with a delightful side of poached eggs or alongside breakfast favorites like Garlic Butter Potatoes for a complete morning feast.
Combining these elements creates an inviting brunch spread that everyone will enjoy!
Make Ahead Options
These Traditional Irish Potato Farls are fantastic for meal prep enthusiasts looking to save time during busy mornings! You can prepare the potato dough up to 24 hours in advance; simply combine the ingredients and refrigerate the shaped farls covered in plastic wrap to prevent drying out. If you prefer, you can also freeze the uncooked farls for up to 3 months—just layer them between parchment paper before storing in an airtight container. When you’re ready to enjoy your delicious Irish potato farls, fry them straight from the fridge or freezer, adding a couple of extra minutes of cooking time as needed. This way, you’ll still have that crispy exterior and fluffy interior with minimal effort!
Irish Potato Farls Recipe FAQs
What type of potatoes should I use for Irish potato farls?
Absolutely! For the best texture, use creamy, well-prepared mashed potatoes. Ideally, they should be made from starchy potatoes like Russets or Yukon Golds, which create that ideal balance of fluffiness and moisture.
How should I store leftover Irish potato farls?
Store your leftover farls in an airtight container in the refrigerator for up to 3 days. Be sure to let them cool completely before sealing to avoid moisture buildup, which can make them soggy.
Can I freeze Irish potato farls?
Yes, you can! To freeze, place the cooled farls in a single layer on a baking sheet, then freeze until solid. After that, transfer them to a freezer-safe bag for up to 3 months. This way, you can enjoy a taste of Ireland any time!
What should I do if my farls turn out too dense?
If your farls are dense, it’s likely that too much flour was added during the mixing process. For next time, add flour gradually until the dough is soft but still holds together. Also, ensure you’re using creamy mashed potatoes with minimal moisture.
Are there any dietary considerations for Irish potato farls?
While the traditional recipe is naturally gluten-containing due to all-purpose flour, it’s easily adaptable! Use a good gluten-free flour alternative to make them gluten-free. Always check your ingredients for any allergens if you have specific dietary requirements.
Crispy Irish Potato Farls: The Ultimate Comfort Treat
Ingredients
Equipment
Method
- In a mixing bowl, combine creamy mashed potatoes, all-purpose flour, baking powder, and salt. Blend until well incorporated, forming a rustic dough.
- Add softened unsalted butter into the potato mixture and knead until the dough is smooth and slightly sticky.
- Lightly flour your work surface, transfer the dough, and roll out to about ½ inch thickness.
- Cut the rolled dough into rounds or triangles about 3-4 inches in diameter.
- Heat a non-stick skillet over medium heat with a small pat of butter. Fry the farls for about 5 minutes on each side until golden brown.
- Remove from the skillet and place on a paper towel-lined platter to absorb excess butter. Serve warm.
Leave a Reply