
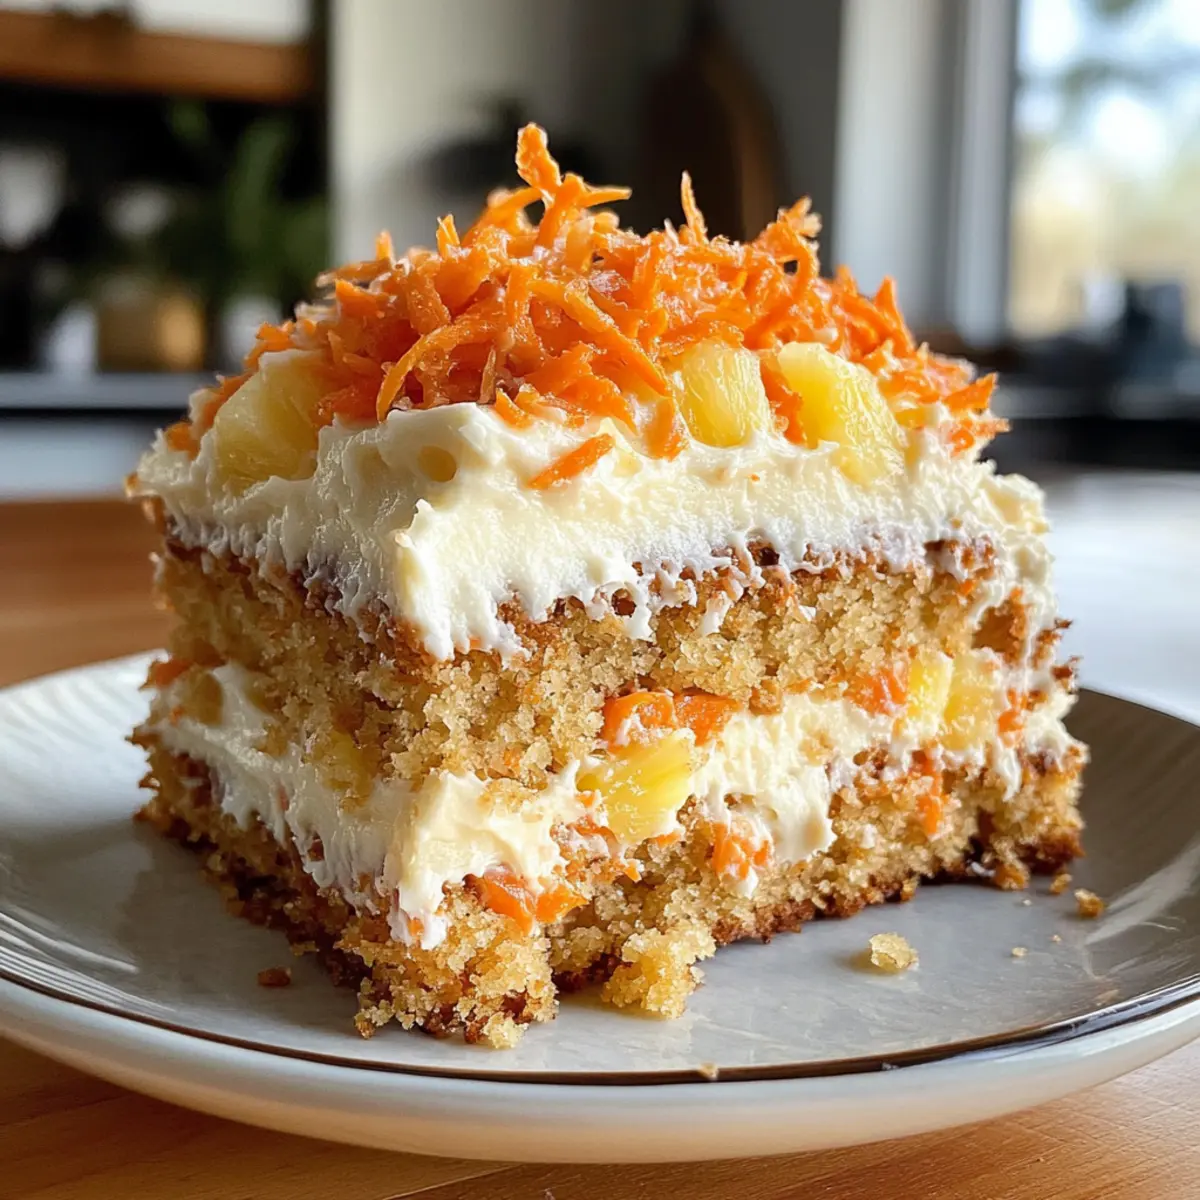
As I pulled my Hawaiian Carrot Pineapple Cake from the oven, the sweet aroma of caramelized pineapple and warm spices enveloped my kitchen like a cozy hug. This delightful dessert is a perfect blend of tropical flavors, making it an instant crowd-pleaser for those family gatherings or potlucks where homemade treats reign supreme. Not only is the Hawaiian Carrot Pineapple Cake quick to whip up, but it also boasts customizable options, including vegan and gluten-free versions to suit any dietary preference. With layers of moist cake and rich cream cheese frosting, this cake captures the essence of paradise in every bite. Ready to make your taste buds dance? Let’s dive into the details of this enchanting recipe!
Why is this cake a must-try?
Tropical Flavors: The Hawaiian Carrot Pineapple Cake is a refreshing twist on traditional desserts, blending the sweetness of pineapple with warm spices like cinnamon and nutmeg.
Customizable Goodness: Whether you’re aiming for a vegan treat or gluten-free option, this cake invites endless possibilities to cater to your needs.
Quick and Easy: With straightforward steps, this cake is perfect for busy bakers looking for a delicious homemade dessert.
Perfect for Sharing: Its vibrant flavors and stunning appearance make it a hit at any gathering, ensuring smiles all around.
A Slice of Paradise: Each bite transports you to a tropical getaway, making it a delightful escape from the ordinary. Enjoy it alongside options like Pumpkin Cupcakes with Maple Cream Cheese Frosting or a light salad of Roasted Beets and Carrots for a balanced meal!
Hawaiian Carrot Pineapple Cake Ingredients
For the Cake Base
- All-purpose flour – Provides structure to the cake; substitute with gluten-free all-purpose flour for a gluten-free version.
- Granulated sugar – Adds sweetness and moisture; reduce if you’d like a less sweet cake.
- Shredded carrots – Adds moisture, texture, and natural sweetness; shred finely for a uniform texture.
- Crushed pineapple – Contributes sweetness and moisture; drain well to avoid excess moisture.
- Large eggs – Binds ingredients and adds richness; for a vegan version, substitute with flax eggs.
- Vegetable oil – Adds moisture and keeps the cake tender; can be replaced with melted coconut oil.
- Chopped walnuts (optional) – Adds crunch and flavor; substitute with pecans or omit for a nut-free option.
- Baking powder & baking soda – Essential leavening agents to help the cake rise.
- Ground cinnamon & nutmeg – Enhance flavor with warm spices; can be adjusted or swapped with ginger.
- Salt – Essential to enhance flavor in baked goods.
- Vanilla extract – Adds depth of flavor; use pure extract for the best results.
For the Cream Cheese Frosting
- Cream cheese – Provides a rich base for the frosting; can use plant-based cream cheese for a vegan option.
- Unsalted butter – Adds creaminess; substitute with vegan butter for dairy-free.
- Powdered sugar – Sweetens and thickens the frosting; adjust to taste for desired sweetness.
- Vanilla extract – Elevates the frosting’s flavor profile.
- Milk (optional) – Used to adjust the frosting’s consistency; plant-based milk works for vegan versions.
Step‑by‑Step Instructions for Hawaiian Carrot Pineapple Cake
Step 1: Preheat the Oven and Prepare Pans
Start by preheating your oven to 350°F (175°C). While the oven warms up, generously grease two 9-inch round cake pans with butter or cooking spray, ensuring an even coating to prevent sticking. This preparation is crucial for the Hawaiian Carrot Pineapple Cake to release easily once baked.
Step 2: Mix the Dry Ingredients
In a large mixing bowl, whisk together the all-purpose flour, baking powder, baking soda, ground cinnamon, nutmeg, and salt. Make sure these dry ingredients are well combined, as this will contribute to the cake’s structure and flavor. A fine mix is important for even rising and distribution of spices throughout the Hawaiian Carrot Pineapple Cake.
Step 3: Combine Wet Ingredients
In a separate bowl, whisk together the granulated sugar, large eggs, and vegetable oil until the mixture is smooth and creamy. This step adds moisture and flavor, allowing the sugar to dissolve and blend seamlessly. You can feel the transformation as you whip these ingredients together, creating a delightful base for your cake.
Step 4: Fold in Carrots and Pineapple
Gently fold the shredded carrots and well-drained crushed pineapple into the wet mixture. Take your time to incorporate these ingredients, ensuring they are evenly distributed throughout the batter. The moisture from the pineapple and the texture of the carrots are key to achieving the signature richness of the Hawaiian Carrot Pineapple Cake.
Step 5: Combine Wet and Dry Mixtures
Carefully pour the dry ingredients into the bowl with the wet mixture, using a spatula to fold them together until just incorporated. Be cautious not to overmix, as this can prevent the cake from becoming fluffy. You’ll know it’s ready when no flour streaks remain, and the batter appears cohesive but slightly lumpy—a perfect sign of a tender Hawaiian Carrot Pineapple Cake.
Step 6: Add Optional Walnuts
If you’re using walnuts, gently fold them into the batter at this stage. The added crunch complements the soft texture of the cake beautifully. This step is optional, so feel free to omit the nuts for a nut-free variation of the Hawaiian Carrot Pineapple Cake if preferred.
Step 7: Pour the Batter into Pans
Divide the batter evenly between the two prepared cake pans, smoothing the tops with a spatula. Make sure both layers are of equal height for a balanced cake. The excitement builds as you see the delicious batter ready to transform into your Hawaiian Carrot Pineapple Cake in the oven.
Step 8: Bake the Cakes
Place the pans in the preheated oven and bake for 30 to 35 minutes. Check for doneness by inserting a toothpick into the center of the cakes; it should come out clean if they’re fully baked. As they bake, enjoy the warm aromas that fill your kitchen—a true indication of the tropical flavors about to shine through!
Step 9: Cool the Cakes Properly
Once done, remove the cakes from the oven and allow them to cool in the pans for about 10 minutes. Carefully run a knife around the edges to loosen them, then invert onto wire racks to cool completely. This step ensures your Hawaiian Carrot Pineapple Cake doesn’t become soggy and allows for easier frosting later on.
Step 10: Make the Cream Cheese Frosting
In a mixing bowl, beat the cream cheese and unsalted butter together until creamy and smooth. Gradually add in powdered sugar and vanilla extract, mixing well. If the frosting is too thick, feel free to adjust it with a splash of milk. This luscious frosting will complement the Hawaiian Carrot Pineapple Cake perfectly.
Step 11: Assemble and Frost the Cake
Once the cake layers have cooled completely, place one layer on a serving plate. Generously spread a layer of cream cheese frosting on top before adding the second layer. Frost the top and sides of the cake with the remaining frosting for a beautiful finish. Each slice of your Hawaiian Carrot Pineapple Cake is now ready to be enjoyed!

Expert Tips for Hawaiian Carrot Pineapple Cake
-
Fresh Ingredients Matter: Always use fresh carrots and ripe pineapple. Fresh ingredients magnify the flavors in your Hawaiian Carrot Pineapple Cake, giving it a delightful taste.
-
Cool Before Frosting: Allow the cake layers to cool completely before frosting. This prevents the cream cheese frosting from melting and creating a gooey mess.
-
Drain Pineapple Well: Ensure you drain the crushed pineapple thoroughly to avoid excess moisture in the batter. A soggy Hawaiian Carrot Pineapple Cake can dampen your delightful baking experience.
-
Finely Shredded Carrots: Shred the carrots finely for better integration into the batter. This ensures a lovely texture and consistent moisture throughout the cake.
-
Avoid Overmixing: When combining the wet and dry ingredients, mix gently until just combined. Overmixing can lead to a dense cake, and we want fluffy perfection!
Make Ahead Options
These Hawaiian Carrot Pineapple Cakes are perfect for meal prep enthusiasts! You can prepare the cake layers up to 24 hours in advance. Simply bake the cakes, allow them to cool completely, and then wrap them tightly in plastic wrap before refrigerating. The cream cheese frosting can also be made ahead and stored in the refrigerator for up to 3 days. When you’re ready to serve, simply frost the chilled cake layers and let it come to room temperature for about 30 minutes before slicing. This way, you can enjoy a deliciously moist cake that’s just as delightful as if it were fresh out of the oven, saving you precious time on busy days!
How to Store and Freeze Hawaiian Carrot Pineapple Cake
Airtight Container: Store your Hawaiian Carrot Pineapple Cake in an airtight container in the refrigerator for up to 4-5 days to keep it fresh and moist.
Freezing: Wrap slices in plastic wrap and aluminum foil and freeze for up to 3 months. This allows you to enjoy a slice of paradise anytime you crave it!
Thawing: To thaw, simply move the frozen cake to the fridge for a few hours or overnight. This gradual method preserves the flavors and keeps the cake moist.
Reheating: If you prefer warm cake, gently reheat individual slices in the microwave for 10-15 seconds. Enjoy the delightful aroma of the tropical flavors as they fill your kitchen again!
Hawaiian Carrot Pineapple Cake Customization
Inviting you to personalize this delightful cake, creating a version that speaks to your taste buds!
- Gluten-Free: Substitute all-purpose flour with gluten-free all-purpose flour for a deliciously accommodating version. This way, everyone can enjoy the tropical goodness!
- Lower Sugar: Reduce granulated sugar by half if you prefer a less sweet cake. You might be surprised at the vibrant flavors that still shine through!
- Vegan Delight: Swap large eggs for flax eggs and use plant-based cream cheese to craft a completely vegan Hawaiian Carrot Pineapple Cake. It’s an indulgent treat everyone will love!
- Tropical Twist: Incorporate diced mango or ripe bananas for an extra fruity kick. Each bite will elevate your taste experience, embracing the full essence of paradise!
- Nut-Free Option: Omit walnuts and let the cake shine on its own. This creates a lighter texture while still preserving that delicious flavor combination!
- Spice It Up: Experiment with adding a hint of ground ginger or cardamom for a flavor boost. This delightful twist will keep your taste buds guessing!
- Frosting Alternatives: Switch up the cream cheese frosting for a light coconut whipped cream for a fluffy new texture that pairs beautifully with the cake.
- Temperature Variation: Serve chilled for a refreshing twist or warm each slice slightly in the microwave to enhance the flavors—perfect for any occasion!
Ready to dive deeper into deliciousness? You can whip up refreshing treats like Pumpkin Cheesecake Muffins or crunchy Garlic Herb Roasted Potatoes, Carrots, and Zucchini as delightful side dishes to accompany your cake. Enjoy customizing your creation!
What to Serve with Hawaiian Carrot Pineapple Cake
Indulging in this tropical dessert invites a medley of delightful pairings that elevate your meal experience.
- Coconut Rice: The subtle sweetness of coconut rice enhances the tropical notes of the cake and adds a nice balance.
- Tropical Fruit Salad: A refreshing mix of pineapple, mango, and kiwi complements the cake’s flavors while offering a burst of freshness.
- Vanilla Ice Cream: Creamy vanilla ice cream provides a contrasting, cool texture, making every bite of cake even more indulgent.
- Creamy Coleslaw: A tangy, crunchy coleslaw adds a lovely texture and balances the cake’s sweetness with its crispness.
Nothing beats a hearty gathering when served alongside sparkling mocktails. Vibrant fruit juices and a splash of sparkling water create a festive, refreshing drink that pairs beautifully with the cake.
- Herbal Iced Tea: This soothing drink, served chilled, offers a herbal note that contrasts with the sweetness, offering delightful refreshment.
Hawaiian Carrot Pineapple Cake Recipe FAQs
What kind of pineapple should I use?
Absolutely! For the best flavor, use ripe, fresh pineapple if available. However, canned crushed pineapple works wonderfully too—just make sure to drain it well to avoid excess moisture in your cake.
How do I store leftover Hawaiian Carrot Pineapple Cake?
To keep your cake fresh, store it in an airtight container in the refrigerator for up to 4-5 days. Make sure it’s completely cooled before covering to preserve its moisture. If you find yourself with leftovers, don’t worry; it remains delicious for days!
Can I freeze Hawaiian Carrot Pineapple Cake?
Absolutely! Wrap individual slices tightly in plastic wrap, then in aluminum foil before placing them in a freezer-safe bag. It can be kept frozen for up to 3 months. To enjoy, simply thaw it in the refrigerator overnight for a delightful tropical treat!
What if my cake is too dense or soggy?
If your cake is dense, it may be due to overmixing the batter. Remember, mix just until combined! For sogginess, ensure you’ve drained the pineapple thoroughly and allowed the layers to cool properly before frosting. If the cake has dark spots, that’s a sign it may have been overbaked—use a toothpick to check for doneness next time.
Can I make this cake vegan?
The more the merrier! To create a vegan version of your Hawaiian Carrot Pineapple Cake, substitute the large eggs with flax eggs—combine 1 tablespoon of ground flaxseed with 2.5 tablespoons of water for each egg, letting it sit until it thickens. Also, opt for plant-based cream cheese and butter in the frosting. Enjoy a slice of paradise tailored to your lifestyle!
Hawaiian Carrot Pineapple Cake: A Tropical Escape in Every Bite
Ingredients
Equipment
Method
- Preheat the oven to 350°F (175°C) and grease two 9-inch round cake pans.
- In a large mixing bowl, whisk together the all-purpose flour, baking powder, baking soda, ground cinnamon, nutmeg, and salt.
- In a separate bowl, whisk together the granulated sugar, large eggs, and vegetable oil until smooth.
- Fold in the shredded carrots and well-drained crushed pineapple into the wet mixture.
- Pour the dry ingredients into the wet mixture, and fold together until just combined.
- If using walnuts, gently fold them into the batter.
- Divide the batter evenly between the prepared cake pans and smooth the tops.
- Bake for 30 to 35 minutes, checking for doneness with a toothpick.
- Remove the cakes from the oven and let cool in the pans for about 10 minutes before inverting onto wire racks.
- In a mixing bowl, beat the cream cheese and unsalted butter until creamy, then gradually mix in powdered sugar and vanilla.
- Once the cake layers are completely cooled, assemble with cream cheese frosting between and on top of the layers.
Leave a Reply