
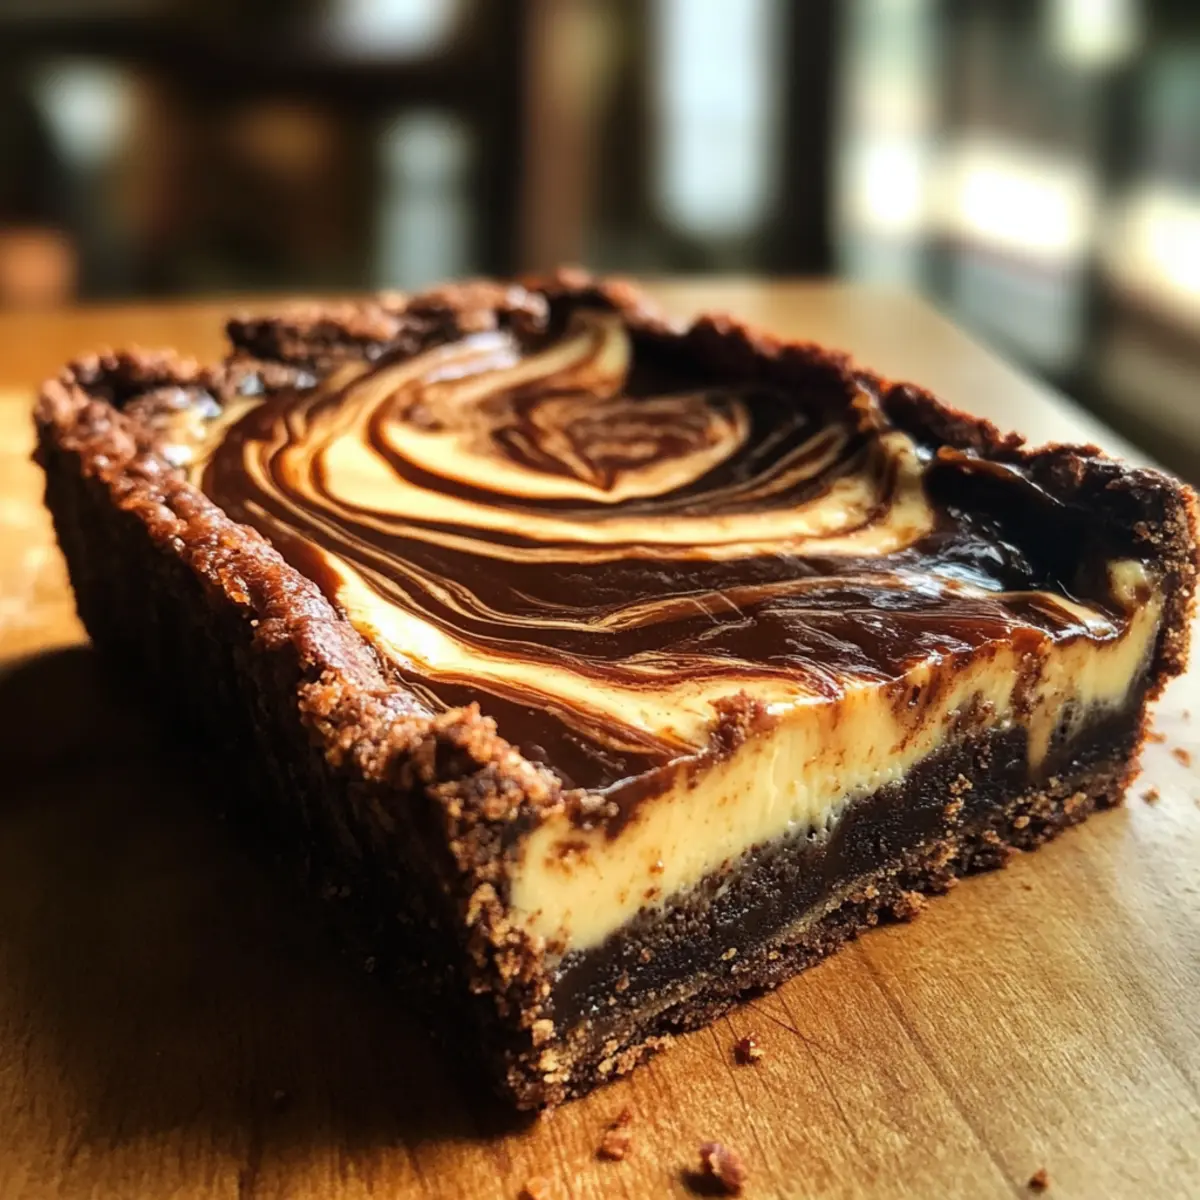
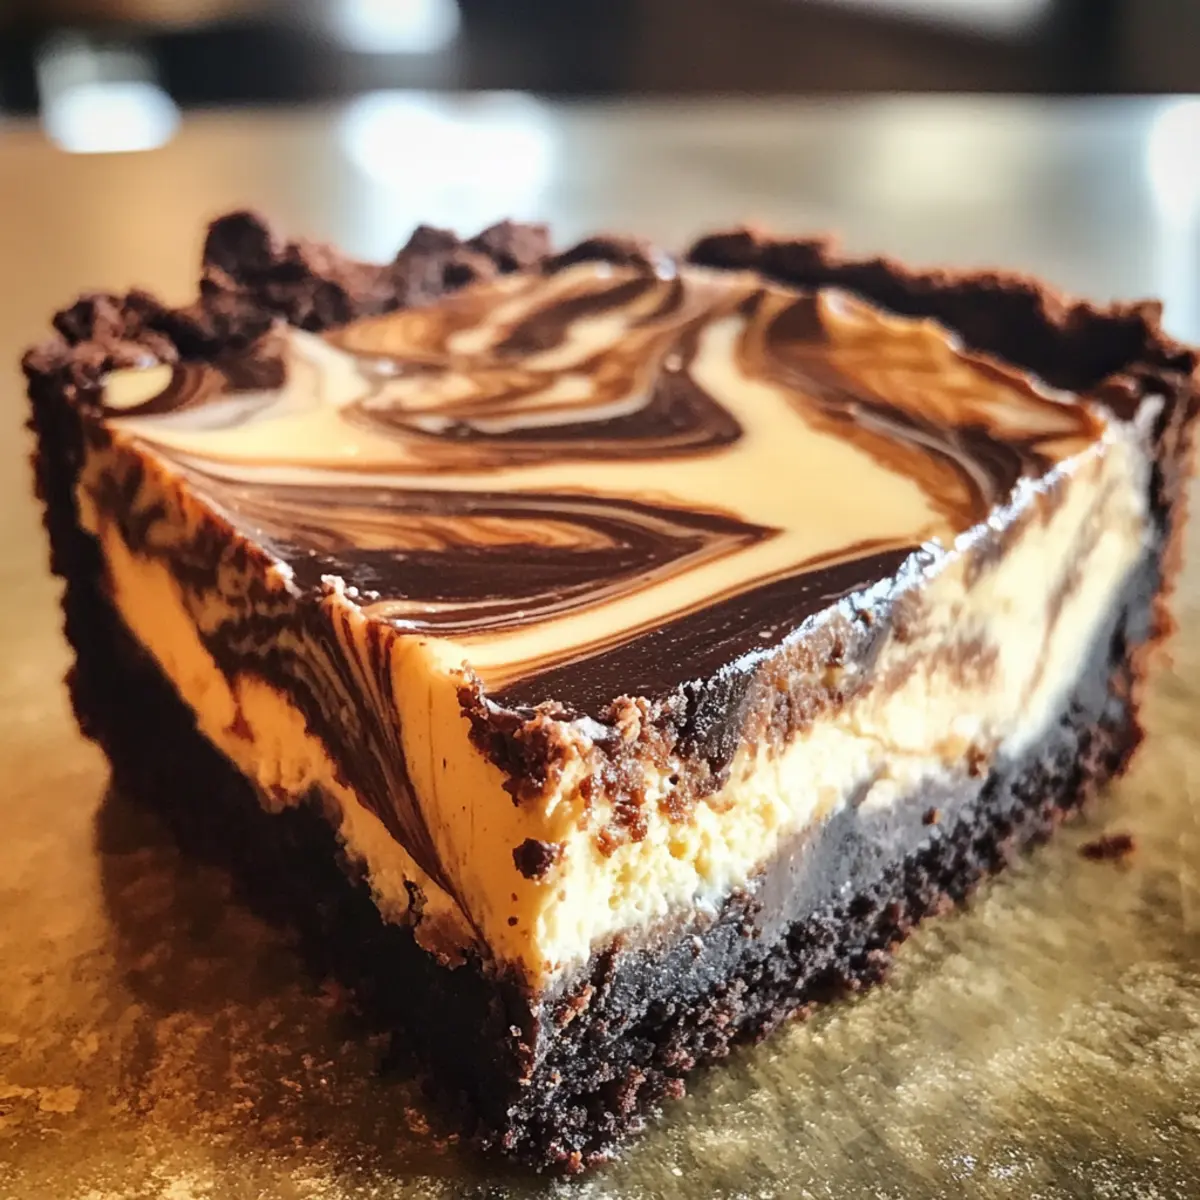
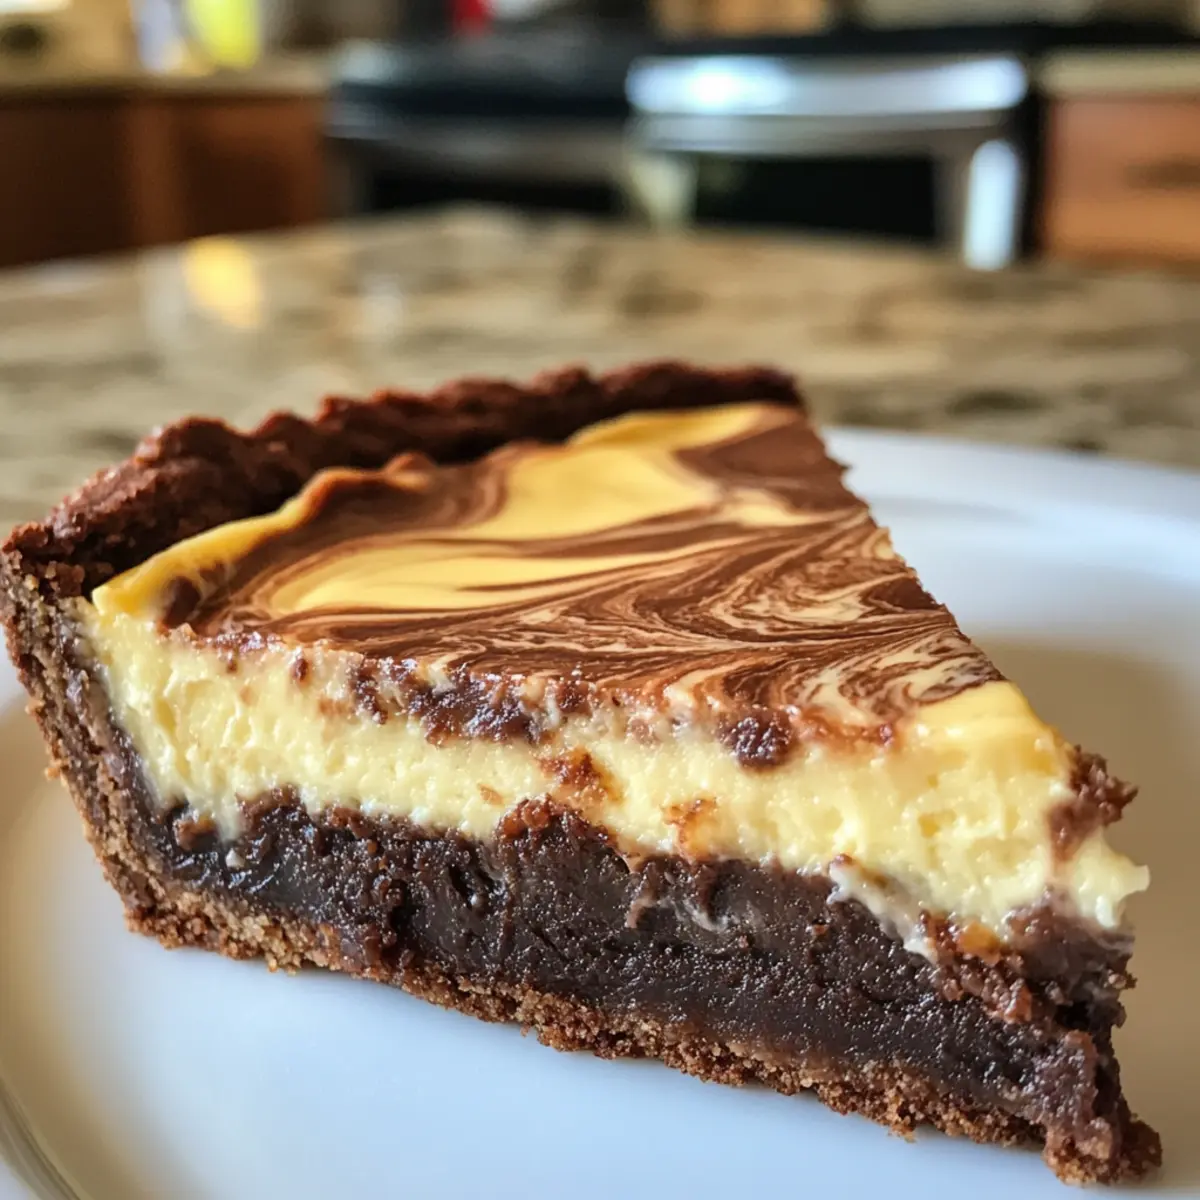
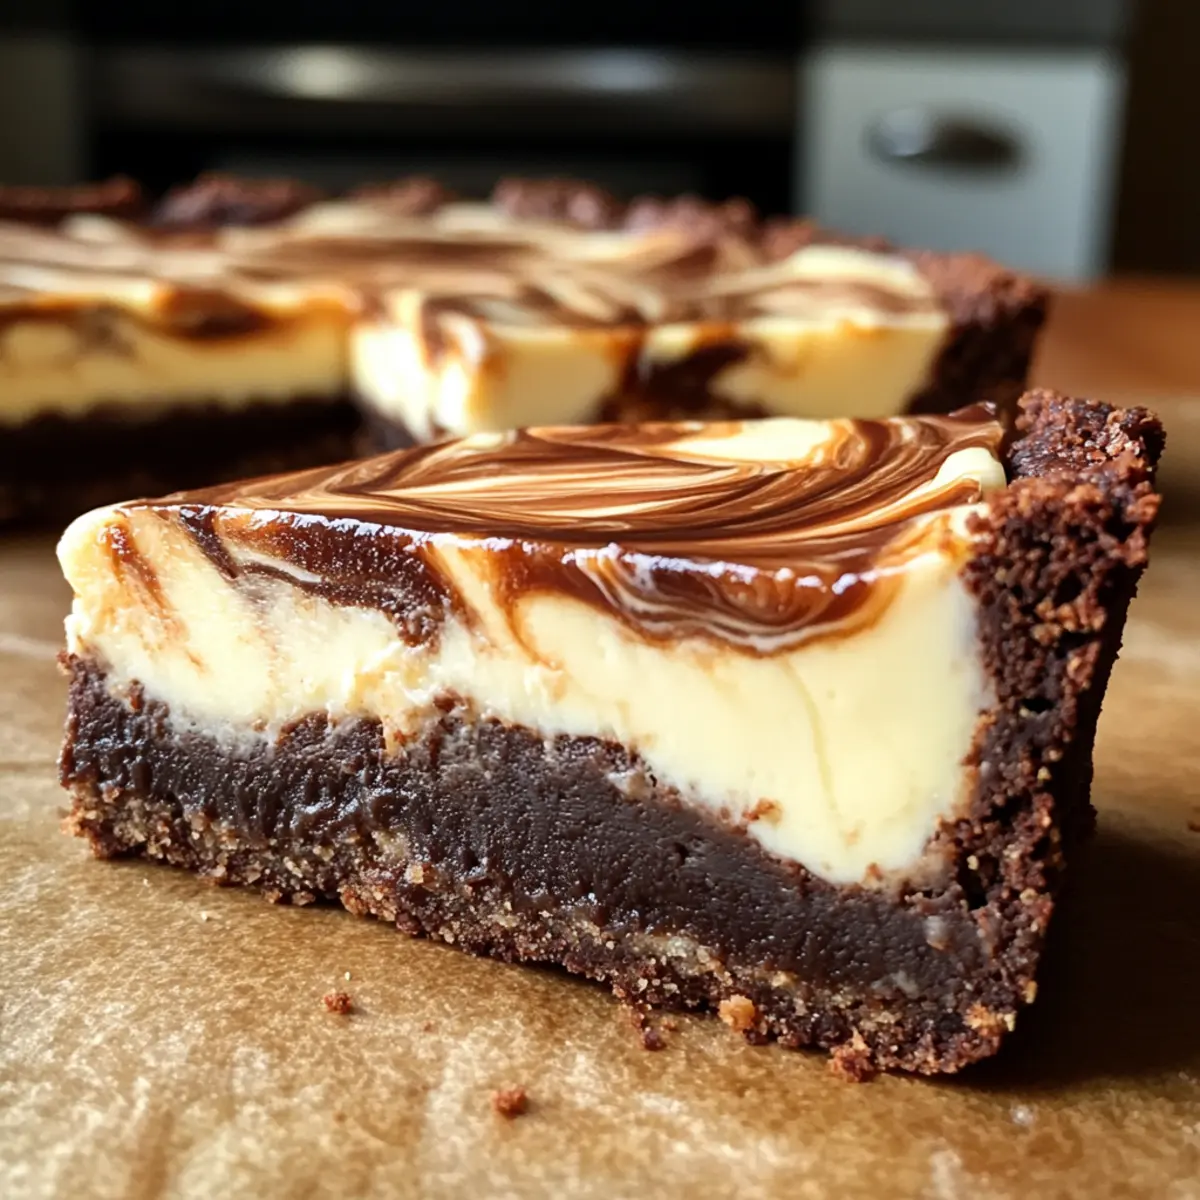
In a whirlwind of sweet sensations, I stumbled upon the ultimate indulgence: the Caramel Cream Cheese Brownie Tart. Picture this—an irresistible layer of fudgy chocolate brownie cradled by a creamy caramel and cheese swirl, begging to be savored. What’s astounding is how effortlessly you can whip up this show-stopping dessert in just 45 minutes. Perfect for dinner parties or a cozy night in, this ridiculously easy tart is bound to steal the spotlight. Plus, with options for gluten-free adaptations and customizable ingredients, it invites you to make it uniquely yours. Are you ready to impress your taste buds and those you love? Let’s dive into this delightful creation!
Why is this tart so irresistible?
Ridiculously Easy: This Cream Cheese Brownie Tart only takes 45 minutes to prepare, making it a breeze for any skill level.
Decadent Layers: The luscious combination of fudgy brownie and creamy caramel cheese swirls creates a dessert that is both visually stunning and indulgently delicious.
Customizable Options: With the possibility of using gluten-free flour or different caramel sauces, you can easily cater to dietary preferences and personal tastes.
Showstopper Appeal: Whether it’s a casual weeknight treat or a centerpiece for gatherings, this tart is guaranteed to impress your guests with its gourmet look and delightful flavor.
Crowd Favorite: Each slice offers a delightful mix of textures and flavors, ensuring everyone at the table will be left wanting more! Pair it with some fresh berries or a dollop of whipped cream for the perfect finishing touch.
Cream Cheese Brownie Tart Ingredients
For the Brownie Base
• Semi Sweet Baking Chocolate – Provides the rich chocolate flavor for the brownie base; feel free to swap for regular semi-sweet if needed.
• Room Temperature Coffee/Water – Melts the chocolate while enriching its flavor; using coffee enhances the chocolate essence.
• Granulated Sugar – Sweetens the brownie mixture; adjust the quantity for your desired sweetness level.
• Butter (Salted) – Adds moisture and richness; it’s best to stick with salted butter for optimal flavor.
• Vanilla Extract – Enhances the overall flavor profile; choose pure vanilla for the best results.
• Unsweetened Cocoa Powder – Intensifies the chocolate goodness; ensure using unsweetened to balance with sugar.
• Large Eggs – Contributes structure and moisture; beat until a pale yellow for the best texture.
• Kosher Salt – Balances sweetness and brings out flavors; no substitutes needed here.
• All-Purpose Flour – Gives structure to the brownies; can switch to a gluten-free blend for a gluten-free version.
For the Cream Cheese Swirl
• Very Soft Cream Cheese – Essential for creating that luscious caramel cream cheese swirl; avoid non-fat varieties for best consistency.
• Caramel Sauce – Adds sweetness and a beautiful swirl; both homemade and high-quality store-bought options work beautifully.
• Large Egg (for cream cheese layer) – Binds the cream cheese and caramel together; no substitutes necessary.
• Vanilla Extract (for cream cheese layer) – Compliments the caramel flavor; match the quality to the main batch of vanilla extract.
• Kosher Salt (for cream cheese layer) – Enhances the sweetness in the cream cheese mixture; again, no substitutions needed.
Now that you have your ingredients ready, it’s time to create a masterpiece that will leave everyone craving more. Let’s get to the baking!
Step‑by‑Step Instructions for Caramel Cream Cheese Brownie Tart
Step 1: Preheat the Oven
Begin by preheating your oven to 350ºF (175ºC). While the oven heats up, prepare a tart pan by greasing it lightly with butter and lining the bottom with parchment paper. This ensures your Cream Cheese Brownie Tart releases easily after baking, creating a smooth and beautiful presentation for serving.
Step 2: Make the Brownie Base
In a microwave-safe bowl, combine the coffee, semi-sweet chocolate, granulated sugar, and salted butter. Microwave this mixture in 30-second intervals, stirring each time, until melted—this should take about 2-3 minutes. Once melted, let it cool for 5 minutes, then stir in the cocoa powder, beaten eggs, vanilla extract, and kosher salt before gently incorporating the flour until just combined.
Step 3: Prepare Caramel Cream Cheese Swirl
In a mixing bowl, whisk the very soft cream cheese until smooth and creamy. Gradually add the caramel sauce, mixing until well blended. Stir in the additional large egg, vanilla extract, and a pinch of kosher salt to enhance the sweetness. This creamy mixture will create a delicious and rich swirl that complements the brownie layers perfectly.
Step 4: Assemble Tart
Pour the brownie batter into your prepared tart pan, making sure to reserve about ¼ cup for the swirl. Spread the cream cheese mixture evenly over the brownie base, and then dollop the reserved brownie batter on top. Use a skewer or knife to gently swirl the layers together, creating a marbled effect that enhances the visual appeal of your Cream Cheese Brownie Tart.
Step 5: Bake
Carefully place the assembled tart in the preheated oven and bake for 22 to 28 minutes. Keep an eye on it; the tart should be set and slightly puffed but not jiggly in the center. A toothpick inserted into the brownie base may come out with a few moist crumbs, which indicates it is perfectly baked and ready for cooling.
Step 6: Cool
Once baked, remove the tart from the oven and allow it to cool in the pan for about 10 minutes. Then, carefully transfer it to a wire rack to cool completely to room temperature. This cooling step is essential to achieve the perfect texture before you slice into this delightful Caramel Cream Cheese Brownie Tart.
How to Store and Freeze Cream Cheese Brownie Tart
Fridge: Store your leftover Cream Cheese Brownie Tart covered tightly with plastic wrap or in an airtight container for up to 3 days to maintain its freshness.
Freezer: For longer storage, freeze slices of the tart in an airtight container or freezer bag, layered with parchment paper for easy separation. They can be stored for up to 2 months.
Thawing: To enjoy frozen slices, simply transfer them to the fridge to thaw overnight. For a quick option, let them sit at room temperature for about an hour before serving.
Reheating: If desired, reheat individual slices in the microwave for about 10-15 seconds to bring back that fudgy warmth, enhancing the cream cheese and caramel flavors.
What to Serve with Caramel Cream Cheese Brownie Tart
Imagine the joy of sharing your lavish dessert while enriching the experience with delightful pairings that elevate every bite.
- Whipped Cream: A light dollop adds airiness, balancing the tart’s dense texture while adding a creamy touch.
- Fresh Raspberries: Their vibrant tartness complements the sweet, rich flavors, offering a burst of bright color and flavor contrast.
- Mint Leaves: A sprig of mint provides a refreshing finish, enhancing the overall flavor profile while adding a touch of elegance.
- Chocolate Sauce: Drizzling some warm chocolate sauce on top creates a chocolate lover’s dream, amplifying the dessert’s indulgent nature.
- Coffee or Espresso: A cup of rich coffee enhances the chocolate flavors, making each bite more decadent and enjoyable.
- Vanilla Ice Cream: Melting ice cream against the warm brownie tart creates a luscious, creamy experience that’s simply divine.
- Caramel Sauce: For those who can’t get enough, a drizzle of extra caramel sauce deepens the sweetness and richness, creating a luxurious layer.
- Chocolate Port: This dark, sweet wine pairs beautifully with the dessert, amplifying the chocolate while offering a new layer of indulgence.
- Chilled Milk: Simple yet effective, a glass of cold milk cools the palate and contrasts beautifully with the warm tart.
- Bourbon or Whiskey: A splash can bring warmth and earthiness, enhancing the dessert’s deep flavors for a more sophisticated finish.
Helpful Tricks for Cream Cheese Brownie Tart
-
Softened Cream Cheese: Ensure your cream cheese is very soft before mixing—microwaving it for a few seconds can help avoid lumps in your swirl.
-
Reserve Enough Batter: Don’t forget to reserve about ¼ cup of brownie batter for drizzling on top; this creates beautiful swirls and enhances the tart’s visual appeal.
-
Accurate Baking Time: Baking times can vary, so start checking around the 22-minute mark. Look for a slightly puffed tart that’s not jiggly in the center to prevent overbaking.
-
Ideal Tart Pan: Use a tart pan with a removable bottom for easy release after baking. This ensures your Cream Cheese Brownie Tart maintains its stunning shape!
-
Cooling Matters: Allow the tart to cool completely before slicing. This helps achieve perfect layers and prevents the creamy filling from falling apart.
-
Flavor Customization: Experiment with different types of caramel sauces or chocolate for a personalized touch to your cream cheese brownie tart!
Make Ahead Options
These Caramel Cream Cheese Brownie Tarts are perfect for busy home cooks looking to save time during the week! You can prepare the brownie base and the cream cheese swirl up to 24 hours in advance. Simply follow the first three steps of the recipe, then cover each component tightly and refrigerate them separately. When you’re ready to bake, layer them in the tart pan as described and proceed to bake and cool as instructed. This way, you maintain the tart’s delicious flavor and texture, ensuring it’s just as delightful when served. You’ll have a show-stopping dessert ready to impress guests or enjoy a cozy night in with minimal effort!
Cream Cheese Brownie Tart Variations
Feel free to unleash your creativity with this delightful tart, transforming it into a personalized masterpiece that tantalizes the senses!
-
Gluten-Free: Swap all-purpose flour for a gluten-free blend to make this tart safe for gluten-sensitive friends and family while still delivering a rich, chocolaty taste.
-
Dulce de Leche: Replace caramel sauce with dulce de leche for a creamier texture and a unique, luscious flavor. This swap adds a delightful twist that will keep your loved ones guessing!
-
Chocolate Ganache: For an extra indulgent layer, top the tart with a silky chocolate ganache instead of caramel. Simply melt chocolate with cream for a glossy finish that adds both richness and allure.
-
Nutty Delight: Add chopped nuts, like walnuts or pecans, into the brownie mix for a delightful crunch. The nuts introduce a new texture that elevates each bite, making it even more satisfying.
-
Extract Variations: Experiment with flavor by using almond or hazelnut extract instead of vanilla. These subtle changes will create surprising depths of flavor that take your tart to the next level.
-
Spicy Kick: Add a pinch of cayenne pepper or chili powder to the brownie batter for a surprising twist of warmth that contrasts beautifully with the sweet cream cheese swirl.
-
Seasonal Flavors: Use pumpkin puree and spice instead of caramel for a delightful fall-inspired tart. This autumn twist works wonderfully and pairs beautifully with a dollop of whipped cream.
For even more scrumptious ideas, consider pairing your tart with some stunning Pumpkin Oatmeal Cream Pies or serving it alongside comforting Mac Cheese Comfort. Enjoy exploring these variations!
Cream Cheese Brownie Tart Recipe FAQs
How do I choose ripe ingredients for this tart?
Absolutely! For a delicious Cream Cheese Brownie Tart, ensure your cream cheese is very soft, which makes mixing easier and results in a smoother texture. Choose semi-sweet baking chocolate with a glossy appearance and no visible defects for the best flavor. If using salted butter, make sure it’s fresh and the right temperature for optimal incorporation into the batter.
What are the best storage methods for leftovers?
I often recommend storing any leftover Cream Cheese Brownie Tart in the refrigerator, tightly covered with plastic wrap or in an airtight container. This way, it stays fresh for up to 3 days. Allow it to come to room temperature before serving again to enhance the flavor and texture of each slice.
Can I freeze the tart, and if so, how?
Yes! For freezing your Cream Cheese Brownie Tart, slice it into individual portions and place them in an airtight container, separated by layers of parchment paper to prevent sticking. The tart will freeze beautifully for up to 2 months. To thaw, place the slices in the refrigerator overnight or let them sit at room temperature for about an hour before enjoying!
What if my tart is undercooked or overbaked?
Very common! If your tart seems undercooked and is too jiggly in the center, return it to the oven for an additional 2-3 minutes, checking frequently. If you notice it has overbaked, the texture may become dry; always keep an eye on it during the last few minutes of baking—look for a slight puff and a set middle. Using a toothpick can help confirm doneness; it should come out with a few moist crumbs.
Are there any dietary considerations I should be aware of?
Definitely! If serving the Cream Cheese Brownie Tart to guests with dietary restrictions, you can easily make it gluten-free by swapping in a gluten-free flour blend. For allergies, keep in mind that this recipe includes eggs and dairy, so those needing alternatives should look for suitable substitutes, like egg replacers for a vegan option.
Irresistible Cream Cheese Brownie Tart for Sweet Indulgence
Ingredients
Equipment
Method
- Preheat the oven to 350ºF (175ºC) and grease a tart pan lightly with butter, lining the bottom with parchment paper.
- In a microwave-safe bowl, combine coffee, chocolate, sugar, and butter. Microwave in 30-second intervals until melted, about 2-3 minutes. Let cool for 5 minutes, then stir in cocoa powder, beaten eggs, vanilla extract, and kosher salt. Gently incorporate flour until just combined.
- In a mixing bowl, whisk the cream cheese until smooth. Gradually mix in the caramel sauce. Stir in the additional egg, vanilla extract, and kosher salt.
- Pour the brownie batter into the tart pan, reserving ¼ cup. Spread the cream cheese mixture over the brownie, then dollop reserved brownie batter on top and swirl gently for a marbled effect.
- Bake for 22 to 28 minutes until set and slightly puffed. A toothpick inserted may come out with a few moist crumbs.
- Allow to cool in the pan for 10 minutes, then transfer to a wire rack to cool completely before slicing.
Leave a Reply