
As I strolled through a bustling Japanese market, the aroma of grilled chicken wafted through the air, beckoning me to explore new flavors. This is the inspiration behind my Teriyaki Chicken Onigiri, a delightful treat that combines tender, sweet-and-savory chicken with perfectly sticky rice. This recipe not only makes for a great on-the-go snack but also introduces you to the beautiful simplicity of Japanese cuisine. What’s more, these rice balls are quick to prepare and naturally gluten-free if you choose the right soy sauce, making them an ideal choice for anyone tired of fast food. Curious about how to create these tasty bites? Let’s dive into a cooking adventure that’s sure to impress!
Why You’ll Crave Chicken Onigiri
Simplicity at Its Best: With just a few ingredients and straightforward steps, you can whip up these flavorful Japanese snacks in no time.
Rich, Umami Flavor: The teriyaki marinade infuses the chicken with a blend of sweet and savory notes, while the sushi rice provides a satisfying base.
Versatile Snack: Feeling adventurous? Customize your onigiri by substituting chicken with tofu or shrimp, or experiment with different fillings like pickled vegetables.
Portable & Convenient: Perfect for bento boxes or a quick lunch, these rice balls are an ideal on-the-go option that’s sure to satisfy cravings.
Crowd-Pleasing Appeal: Whether at home or a picnic, these Chicken Onigiri will surely impress family and friends. Pair it with some of your favorite side dishes like Street Corn Chicken for a delightful spread!
Chicken Onigiri Ingredients
• Dive into the flavors of Japanese cuisine with these simple Chicken Onigiri ingredients!
For the Rice
- Cooked Sushi Rice – Provides a sticky structure; opt for high-quality short-grain rice for the best flavor and texture.
- Salt – Enhances the rice’s flavor; fine salt works best as it dissolves easily.
- Furikake (optional) – This seasoning adds extra flavor and texture; feel free to replace it with sesame seeds if needed.
For the Chicken
- Boneless Skinless Chicken – Drumsticks are ideal for tenderness; chicken thighs or ground chicken can also work well.
- Soy Sauce – Adds umami; choose gluten-free soy sauce if necessary for a gluten-free option.
- Sake (or water) – Helps tenderize the chicken; rice vinegar can be a tangy substitute.
- Baking Soda – Softens the chicken for a better texture.
- Cornstarch – Creates a crispy exterior when sautéing the chicken.
- Mirin – Sweetens the teriyaki sauce; mix equal parts water and sugar in a pinch.
- Brown Sugar – Deepens the flavor of the teriyaki sauce; use white sugar if you’re in a rush.
- Oil – Necessary for cooking the chicken; use vegetable or canola oil for best results.
- Minced Garlic – Infuses aromatic flavor into the chicken; fresh garlic amplifies taste.
For the Wrapping
- Nori – Adds a umami flavor; can be omitted or replaced with rice paper for alternative textures.
These Chicken Onigiri ingredients promise a delightful blend of taste and texture, perfect for a satisfying snack!
Step‑by‑Step Instructions for Teriyaki Chicken Onigiri
Step 1: Prepare the Sushi Rice
Begin by cooking the sushi rice according to your rice cooker instructions, which typically takes about 20 minutes. Once cooked, transfer the rice to a large bowl and sprinkle in fine salt, mixing gently to enhance the flavor. If using furikake, add it now for extra flavor. Allow the rice to cool slightly while preparing the chicken.
Step 2: Marinate the Chicken
Cut the boneless skinless chicken into small bite-sized pieces, about 1-inch cubes. In a medium bowl, combine the chicken with soy sauce, sake, baking soda, and cornstarch, ensuring every piece is well-coated. Cover and refrigerate for 30 minutes to allow the flavors to meld and tenderize the chicken.
Step 3: Make the Teriyaki Sauce
While the chicken marinates, prepare the teriyaki sauce by whisking together soy sauce, mirin, and brown sugar in a small bowl until the sugar fully dissolves. Set aside this luscious glaze to add depth of flavor to your chicken once it cooks, creating that irresistible teriyaki essence for your Chicken Onigiri.
Step 4: Cook the Chicken
Heat a splash of oil in a large nonstick pan over medium-high heat. Once the oil shimmers, add the marinated chicken to the pan. Cook for about 2-3 minutes, stirring occasionally, until the chicken is browned and cooked through. You’ll know it’s ready when the chicken has a golden hue.
Step 5: Sauté with Garlic
Reduce the heat to medium and add minced garlic to the pan with the chicken. Stir constantly for about 30 seconds, until the garlic is fragrant but not burnt. This step enhances the dish’s aroma and infuses the chicken with a delightful garlicky flavor, bringing your Chicken Onigiri to life.
Step 6: Glaze the Chicken
Pour the prepared teriyaki sauce over the cooked chicken in the pan. Cook for an additional 2-3 minutes, stirring occasionally, until the sauce thickens and glazes the chicken. The color should become richer, creating that perfect coating which will beautifully complement the sushi rice in your Chicken Onigiri.
Step 7: Shape the Onigiri
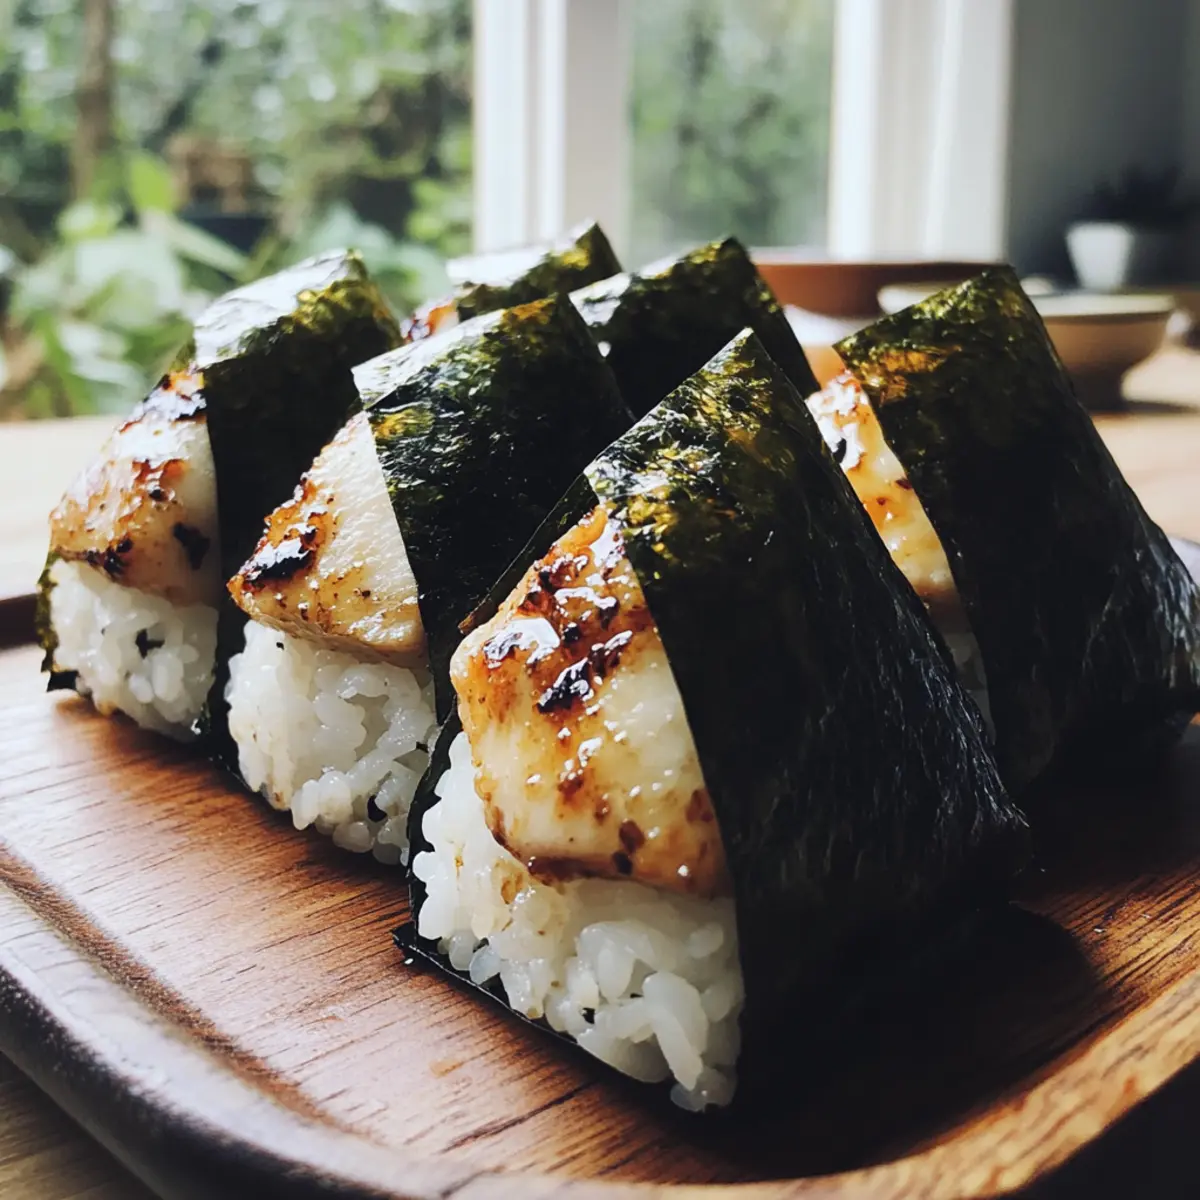
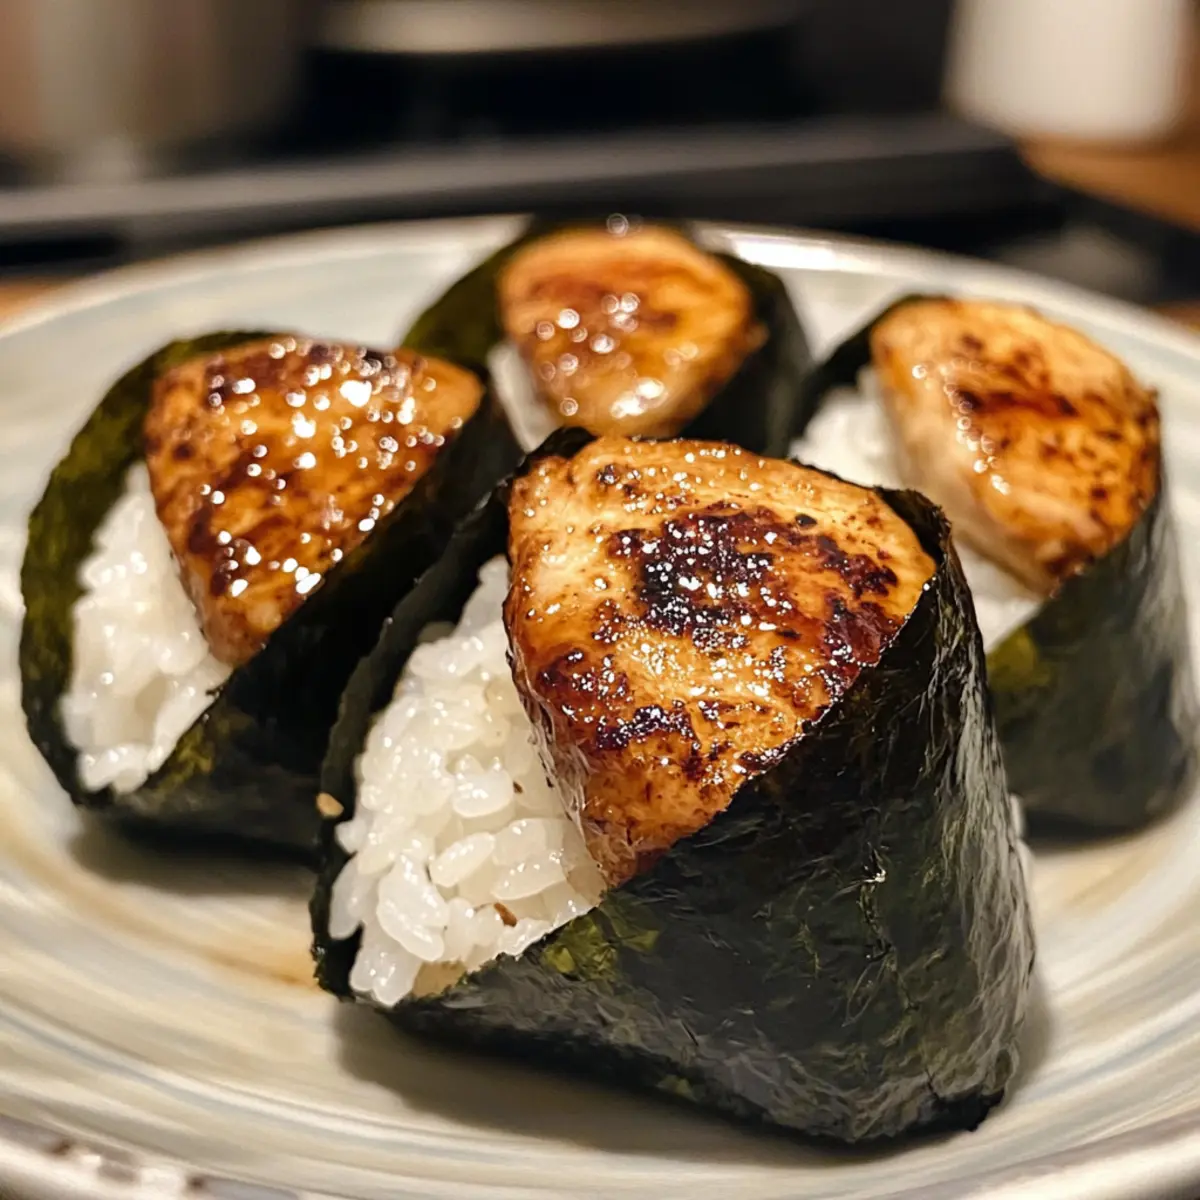
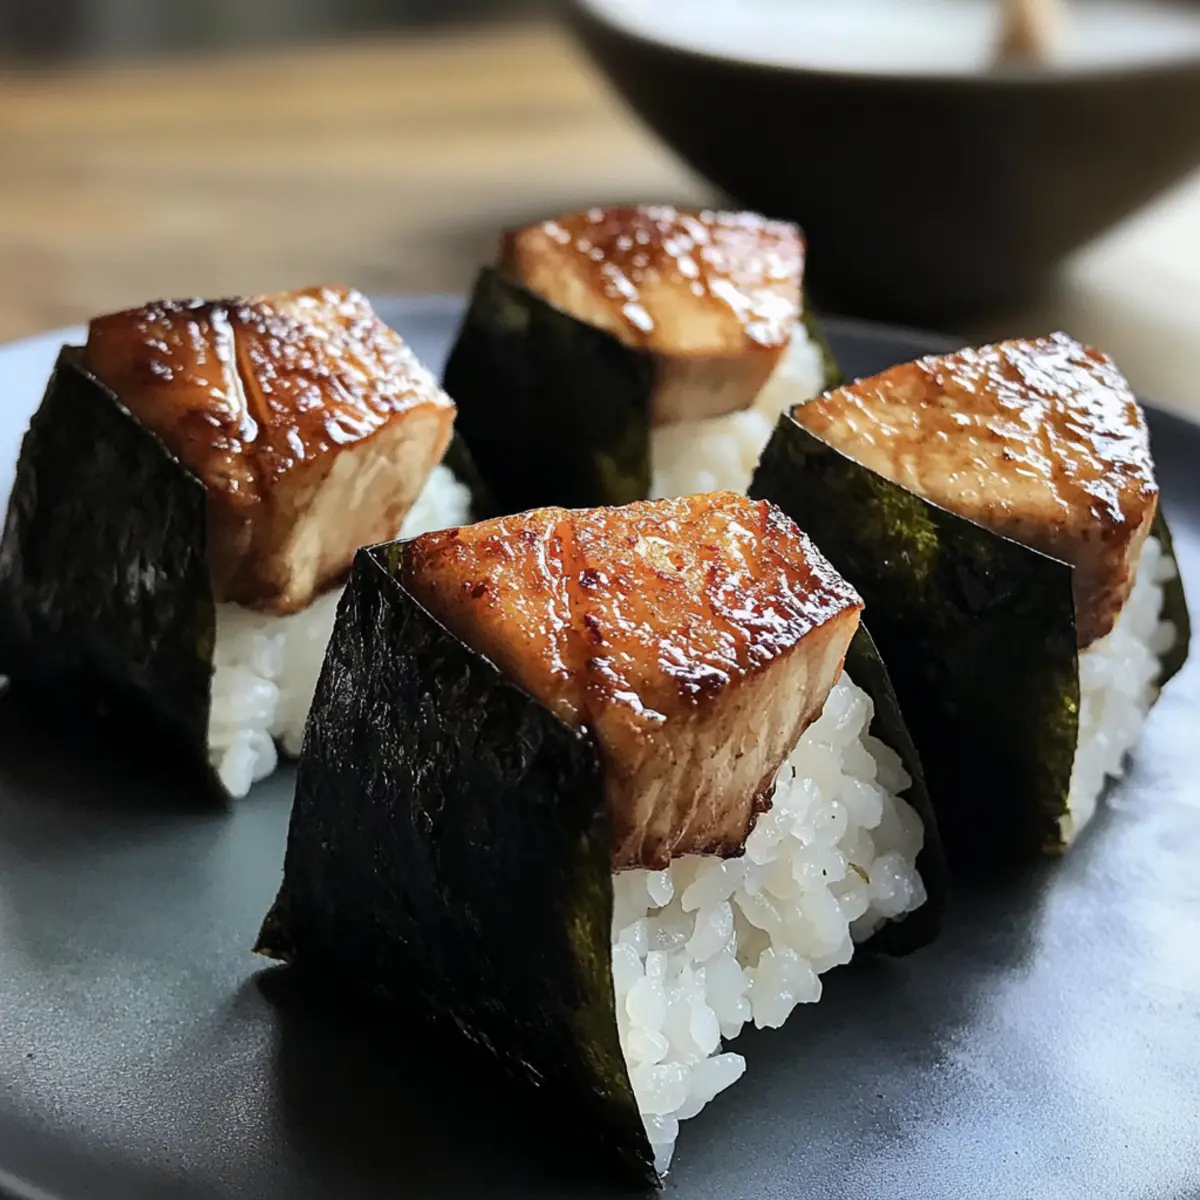
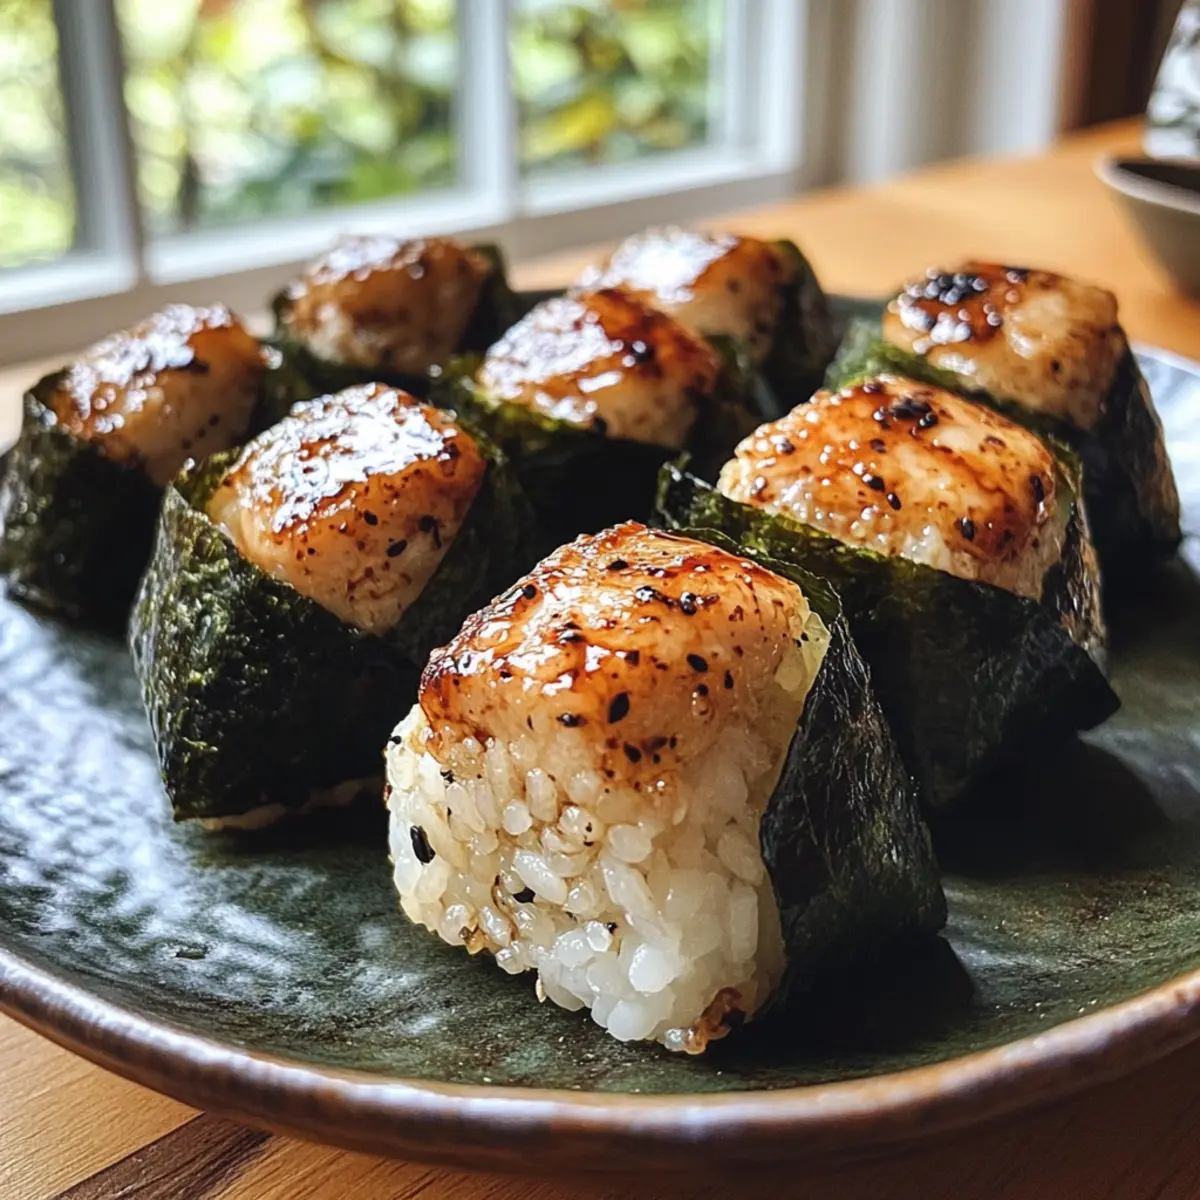
To form your onigiri, first, wet your hands with water to prevent the rice from sticking. Scoop about ⅓ cup of sticky sushi rice into one palm and create a small well in the center. Add a tablespoon of the flavorful chicken filling inside, then cover it with another ⅓ cup of rice. Shape the mixture into a triangle, pressing gently to hold it together.
Step 8: Wrap with Nori
Once shaped, take a strip of nori and wrap it around the bottom of each Chicken Onigiri. This will not only give your snack a beautiful presentation but also add a touch of umami flavor. Repeat the process until all rice and chicken are formed into delightful onigiri, ready to be served fresh and enjoyed!
What to Serve with Teriyaki Chicken Onigiri
The joy of creating a delightful meal doesn’t stop with onigiri; it invites exciting pairings that elevate the experience.
-
Fresh Edamame: A light and nutritious option, the slight saltiness enhances the overall flavor of the meal while offering a satisfying crunch.
-
Seaweed Salad: This bright and tangy salad adds an umami punch, beautifully contrasting the sweetness of the teriyaki glaze.
-
Miso Soup: Warm and comforting, a bowl of miso soup provides a savory backdrop that perfectly complements the bites of chicken and rice.
-
Pickled Vegetables: A burst of acidity balances the richness of the chicken, refreshing your palate with every bite. Plus, their vibrant colors add a lovely visual appeal to the plate.
Enjoying the onigiri with a light, fruity beverage like Japanese Green Tea can further elevate your meal experience, providing a delightful counterpoint to the savory flavors.
For a sweet finish, consider serving with Mochi Ice Cream, which offers a chewy, creamy delight that will leave everyone wanting more.
Tips for the Best Chicken Onigiri
-
Perfect Rice Texture: Always use short-grain sushi rice, as it provides the stickiness needed for shaping delicious Chicken Onigiri.
-
Marinade Time: Allow the chicken to marinate for at least 30 minutes; this enhances the flavor and tenderness of your filling.
-
Hand Moisture: Wet your hands before handling the rice; this prevents sticking and helps shape tightly packed onigiri that hold together.
-
Crispy Chicken Tips: Use cornstarch for a crispier chicken exterior, ensuring your teriyaki sauce clings beautifully without making it soggy.
-
Nori Handling: Wrap onigiri with nori just before serving; this keeps it crispy and prevents sogginess once packed away.
-
Experimentation Encouraged: Don’t hesitate to customize your Chicken Onigiri with different fillings or seasonings—explore flavors and satisfaction!
How to Store and Freeze Chicken Onigiri
Room Temperature: Store Chicken Onigiri at room temperature for up to 3 hours, ensuring they stay fresh and flavorful. Avoid leaving them out for longer, as they may lose their texture.
Fridge: Place leftover onigiri in an airtight container and store in the fridge for up to 1 day. The rice may harden, so it’s best to consume them fresh.
Freezer: For longer storage, freeze unwrapped onigiri individually in freezer-safe bags for up to 1 month. When ready to eat, thaw and reheat gently in the microwave.
Reheating: To reheat, place the Chicken Onigiri in the microwave for about 30 seconds, adding a damp paper towel to maintain moisture. Enjoy your savory snack as if freshly made!
Make Ahead Options
These Teriyaki Chicken Onigiri are a fantastic choice for meal prep, saving you valuable time on busy weeknights! You can prepare the sushi rice up to 24 hours in advance; simply refrigerate it in an airtight container to retain its texture. The chicken can also be marinated and stored in the fridge for up to 3 days prior to cooking, ensuring it remains flavorful and tender. When you’re ready to serve, just cook the marinated chicken as instructed and shape the onigiri with the prepped rice. This way, you’ll enjoy the delightful taste of homemade Chicken Onigiri without the stress on the day of serving!
Chicken Onigiri Variations & Substitutions
Feel free to get creative with your Chicken Onigiri and make it your own—there are so many delightful ways to explore!
- Vegetarian Option: Use tofu or tempeh marinated in the teriyaki sauce for a rich, plant-based alternative that’s still full of flavor.
- Seafood Twist: Try shrimp instead of chicken for an ocean-inspired fill; just adjust cooking times for tender, succulent bites.
- Spicy Kick: Incorporate a teaspoon of Sriracha or a sprinkle of chili flakes into the chicken mixture for an added zing.
- Different Fillings: Explore different flavors by swapping the chicken for pickled veggies or shredded beef; life’s too short for boring flavors!
- Flavorful Rice: Mix in some chopped scallions or additional furikake into the sushi rice for an extra layer of taste.
- Crispy Exteriors: Try using panko breadcrumbs for a crunchier coating when sautéing the chicken; they add a lovely texture that pairs beautifully with the rice.
- Gluten-Free Swap: Use gluten-free soy sauce and ensure all marinades are gluten-free certified for a safe and healthy option.
- Herby Delight: Add fresh herbs, like cilantro or basil, inside the onigiri for a refreshing twist on the classic. If you love herbs, you’ll be in flavor heaven!
With these variations, your Chicken Onigiri journey can be as unique as your taste preferences! For more inspiration, check out my recipe for Garlic Parmesan Chicken or whip up a batch of Grilled Chicken Sweet to satisfy all those flavors!
Chicken Onigiri Recipe FAQs
What kind of rice is best for Chicken Onigiri?
Absolutely! Use short-grain sushi rice for optimal stickiness, which is essential for shaping your onigiri. This type of rice creates a perfect moldable structure, ensuring that your rice balls stay intact.
How do I store leftover Chicken Onigiri?
To keep leftovers fresh, place them in an airtight container and store in the fridge for up to 1 day. The rice may become firmer, so enjoy them as soon as possible for the best taste and texture.
Can Chicken Onigiri be frozen?
Yes, you can freeze Chicken Onigiri! To do this, wrap each onigiri in plastic wrap or place them in a freezer-safe bag. They will keep well for up to 1 month. When ready to enjoy, thaw in the refrigerator overnight and reheat gently in the microwave for about 30 seconds.
What if my onigiri falls apart while shaping?
Very! If your onigiri falls apart, it could be due to the rice being too dry or not sticky enough. Ensure you’re using short-grain sushi rice, and remember to wet your hands before shaping. Additionally, pressing the rice firmly together will help it hold its shape better.
Is this recipe suitable for gluten-free diets?
Absolutely! Simply use gluten-free soy sauce in place of regular soy sauce for the marinade and teriyaki sauce. This way, you can enjoy the rich flavors of Chicken Onigiri without any gluten concerns.
Can I add other fillings to Chicken Onigiri?
The more the merrier! Feel free to get creative with fillings. You can use tofu, shrimp, or even pickled vegetables to suit your taste. Each option will add a unique twist to your Chicken Onigiri, making them even more exciting.
Savory Chicken Onigiri: Quick and Tasty Japanese Snack
Ingredients
Equipment
Method
- Cook the sushi rice according to your rice cooker instructions, taking about 20 minutes. Sprinkle salt and furikake, allowing it to cool.
- Cut chicken into small cubes. Combine with soy sauce, sake, baking soda, and cornstarch. Refrigerate for 30 minutes.
- Prepare teriyaki sauce by whisking soy sauce, mirin, and brown sugar until dissolved. Set aside.
- Heat oil in a large pan. Add marinated chicken and cook for 2-3 minutes until browned.
- Add minced garlic and stir for 30 seconds until fragrant.
- Pour teriyaki sauce over chicken. Cook for an additional 2-3 minutes until sauce thickens.
- Wet your hands, scoop about ⅓ cup of rice, add chicken filling, cover with more rice, and shape into a triangle.
- Wrap shaped onigiri with nori and serve fresh.
Leave a Reply