
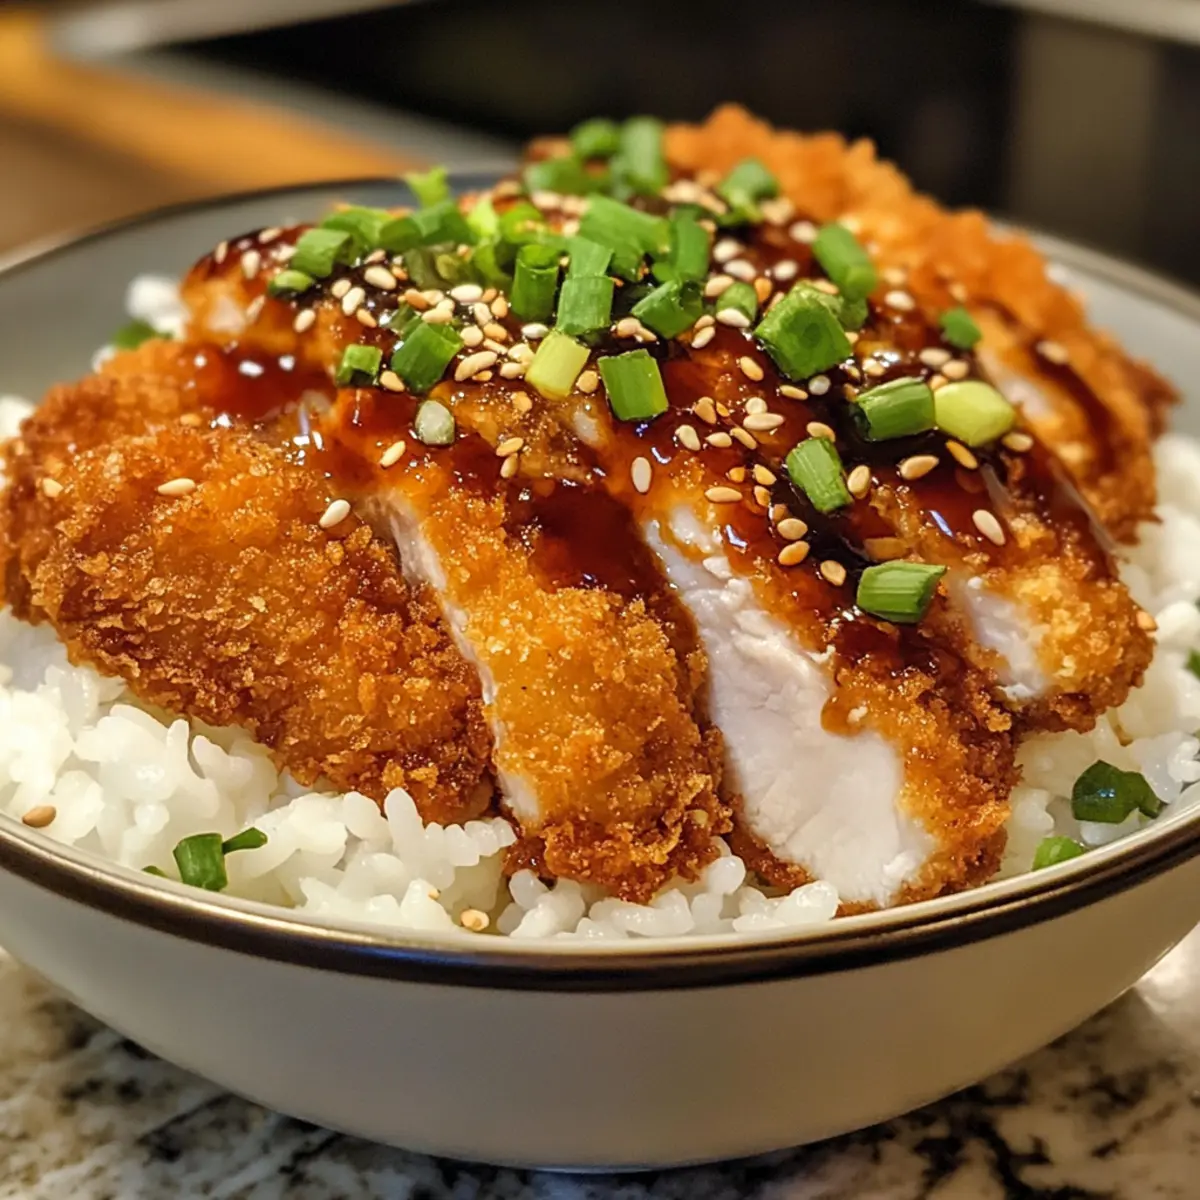
The aroma of sizzling chicken fills the kitchen, instantly transporting me to the bustling streets of Japan, where Katsu Bowls are a cherished staple. This Japanese comfort food showcases crispy golden chicken nestled atop a bed of warm rice, all drizzled with a homemade tonkatsu sauce that’ll have you craving more. What’s truly wonderful about these Japanese Katsu Bowls is their perfect blend of texture and flavor, making them a comforting meal that’s both satisfying and quick to whip up—ideal for busy weeknights or laid-back weekends. Plus, you get to indulge in the joy of cooking from scratch, rather than settling for takeout. Ready to create a delicious Katsu Bowl that’s sure to impress? Let’s get started!
Why are these Katsu Bowls irresistible?
Crispy Texture: The light and crunchy panko coating makes each bite of chicken utterly delightful.
Homemade Sauce: Whipping up your own tonkatsu sauce adds a personalized flavor that store-bought options can’t match.
Quick & Easy: Ready in just 30 minutes, you’ll have a delicious meal on the table without hours of preparation.
Family Favorite: Whether you’re cooking for kids or hosting friends, everyone will relish this comforting dish, bringing smiles all around.
Versatile Ingredients: Feel free to swap chicken for your favorite protein, like pork or tofu, to cater to all tastes!
Join the ranks of satisfied home cooks and learn more about Japanese cuisine that will elevate your meal game!
Japanese Katsu Bowls Ingredients
For the Chicken
- Chicken Breasts – Provides the main protein; you can substitute with chicken thighs for added flavor and juiciness.
- Panko Breadcrumbs – Adds a light, crispy texture; highly recommended for authenticity in your Japanese Katsu Bowls.
- Eggs – Binds the breadcrumbs to the chicken for a good coating.
- All-Purpose Flour – Ideal for dredging, as it provides texture to the coating.
For the Tonkatsu Sauce
- Low-Sodium Soy Sauce – The base for the sauce, imparting essential saltiness and depth of flavor.
- Mirin or Rice Vinegar – Adds the perfect blend of sweetness and acidity; vinegar can substitute if mirin is unavailable.
- Brown Sugar – Balances the savory flavors in the sauce beautifully.
For Frying
- Vegetable Oil – Essential for frying chicken; ensures that the katsu is crispy and golden.
For Serving
- Cooked Rice – Acts as the comforting base of the bowl; choose white or brown rice as per your preference.
- Green Onions – Adds a fresh crunch and brightness when garnished on top.
- Sesame Seeds – Sprinkles beautifully on top for added texture and visual appeal.
Embrace the joy of crafting these delightful Japanese Katsu Bowls! Each bite promises a warm and filling experience that transcends a typical meal.
Step‑by‑Step Instructions for Japanese Katsu Bowls
Step 1: Prepare the Chicken
Start by pounding each chicken breast to about 1/2 inch thick using a meat mallet or rolling pin. This ensures even cooking and helps achieve that crispy texture. Once flattened, season both sides lightly with salt and pepper to enhance the flavors in your Japanese Katsu Bowls.
Step 2: Dredge the Chicken
Set up a dredging station by placing all-purpose flour, whisked eggs, and panko breadcrumbs in separate shallow dishes. Coat each piece of chicken in flour, shaking off any excess, then dip it in the egg mixture, ensuring it’s fully covered. Finally, roll the chicken in panko breadcrumbs, pressing gently to secure a thick, crunchy coating.
Step 3: Heat the Oil
Add about 1/4 inch of vegetable oil to a large skillet or frying pan and heat over medium-high heat until it reaches 350°F (175°C). To check the oil temperature, drop a small piece of breadcrumb into the oil; it should sizzle immediately. This ensures your chicken will fry to a beautiful golden brown.
Step 4: Fry Until Golden Brown
Carefully place the breaded chicken in the hot oil, ensuring not to overcrowd the pan. Fry the chicken for about 3-4 minutes on each side, or until the coating is a deep golden brown and the chicken is cooked through, reaching an internal temperature of 165°F (74°C). Remove the cooked chicken and set it on a paper towel-lined plate to drain excess oil.
Step 5: Make the Tonkatsu Sauce
While the chicken is frying, prepare your homemade tonkatsu sauce. In a medium bowl, whisk together low-sodium soy sauce, mirin (or rice vinegar), brown sugar, and a splash of water until fully combined. Adjust the sweetness to your taste, creating a tangy sauce that perfectly complements your Japanese Katsu Bowls.
Step 6: Assemble Your Bowls
To serve, place a generous scoop of warm cooked rice in each bowl as the base. Slice the crispy chicken into strips and arrange it neatly on top of the rice. Drizzle the homemade tonkatsu sauce liberally over the chicken, then garnish with freshly chopped green onions and a sprinkle of sesame seeds for added flavor and visual appeal.
Variations & Substitutions for Japanese Katsu Bowls
Feel free to mix and match these ideas to create your perfect bowl of comfort goodness!
-
Vegetable Additions: Toss in steamed broccoli or vibrant carrots to elevate the nutrition and add a pop of color. They lend a satisfying crunch and make the meal even more wholesome.
-
Protein Alternatives: Switch out chicken for tender pork cutlets or crispy tofu to cater to different tastes. Tofu absorbs the flavors beautifully, making it a fantastic vegetarian choice.
-
Gluten-Free: Use gluten-free breadcrumbs for a celiac-friendly version of crispy Katsu. Your bowl will still be delicious and satisfying without the gluten!
-
Spicy Kick: Add a dash of sriracha or chili oil to your tonkatsu sauce for a fiery twist. It’ll ignite your taste buds and add excitement to your meal!
-
Savory Creaminess: Top your Katsu with a drizzle of creamy katsu mayo for a unique burst of flavor. It’s an unexpected treat that rounds out the dish elegantly!
-
Crispy Toppings: Sprinkle fried shallots or garlic chips on top for an extra layer of crunch and depth. These garnishes add a gourmet touch and take your Katsu Bowls to the next level.
-
Rice Substitutes: Swap out traditional rice for seasoned quinoa or cauliflower rice for a lighter, grain-free option that still offers great texture. Go for a colorful rice blend for added nutrition!
-
Sweetened Sauce: Experiment with your tonkatsu sauce by incorporating a splash of orange juice or a hint of pineapple for a fruity sweetness that beautifully complements the savory flavors.
Get creative and embrace the culinary joy of making vibrant dishes like these Japanese Katsu Bowls that bring your kitchen to life!
Expert Tips for Japanese Katsu Bowls
-
Choose the Right Chicken: Use chicken breasts pounded to even thickness for consistent cooking. Thighs can add juiciness if preferred.
-
Coating Technique: Ensure you coat the chicken thoroughly in flour, egg, and panko. Missing a step can lead to soggy katsu.
-
Oil Temperature Matters: Keep your oil at 350°F (175°C) to avoid greasy chicken. Use a thermometer or test with breadcrumbs to gauge readiness.
-
Fry in Batches: Avoid overcrowding the pan to ensure each piece gets crispy and golden. Overcrowding can lead to uneven cooking.
-
Rest Before Slicing: Allow the chicken to rest briefly after frying. This helps retain juices and prevents it from becoming dry when served.
-
Taste the Sauce: Adjust the tonkatsu sauce to your liking—add more sugar for sweetness or a splash of vinegar for tang. A great sauce makes for unforgettable Japanese Katsu Bowls!
What to Serve with Japanese Katsu Bowls
The delightful crunch of crispy chicken and savory sauce deserves delightful companions to create a heartfelt meal experience.
-
Pickled Vegetables: Bright and tangy, they add a refreshing contrast that complements the richness of the katsu, cleansing the palate beautifully.
-
Sesame Cucumber Salad: A light salad featuring thinly sliced cucumbers tossed in sesame oil adds a crisp, fresh contrast to the comforting bowl. The coolness balances and enhances the hearty flavors of the katsu.
-
Miso Soup: Warm and comforting, a simple miso soup acts as a perfect starter, soothingly embracing the soul like a hug in a bowl.
-
Steamed Broccoli: Providing a vibrant green touch with a bite of healthy greens, steamed broccoli introduces a lovely texture to the meal, enhancing both nutrition and flavor.
-
Japanese Rice Balls (Onigiri): These adorable rice balls offer a fun twist, providing a portable option that echoes the rice base of your Katsu Bowls. Fill them with your favorite ingredients for extra flavor!
-
Green Tea: A refreshing drink choice, green tea enhances the meal’s elegance while cleansing the palate between bites. Its subtle grassy notes pair well with the umami of tonkatsu sauce.
Enrich your dining experience with these cheerful side options, making each bite of your Japanese Katsu Bowls even more satisfying!
How to Store and Freeze Japanese Katsu Bowls
- Fridge: Store leftovers in an airtight container for up to 3 days. To maintain the crispy texture, keep the chicken and rice separate until ready to serve.
- Freezer: For longer storage, freeze the breaded and uncooked chicken. Wrap each piece tightly in plastic wrap and place in a freezer-safe bag. They can last up to 3 months.
- Reheating: Reheat cooked chicken in a preheated oven at 375°F (190°C) for about 10-15 minutes, or until heated through. This helps restore crunchiness for your Japanese Katsu Bowls.
- Sauce Storage: Keep any extra homemade tonkatsu sauce in the fridge for up to 1 week. It’s perfect to drizzle on other dishes too!
Make Ahead Options
These Japanese Katsu Bowls are perfect for meal prep and can be made ahead to save time during busy weekdays! You can prepare the chicken by breading it and storing it in the fridge for up to 24 hours before frying. Alternatively, you can fully cook the chicken and store it in an airtight container in the refrigerator for up to 3 days. To maintain its delicious crispy texture, reheat the chicken in a skillet over medium heat, ensuring it’s heated through but not dried out. For the tonkatsu sauce, make it ahead and refrigerate for up to a week. Just drizzle it over the warm chicken and rice before serving, and you’ll enjoy restaurant-quality Japanese Katsu Bowls with minimal effort!
Japanese Katsu Bowls Recipe FAQs
How do I choose the right chicken for my Katsu Bowls?
Absolutely! For the best results, select chicken breasts that are fresh and plump. Pounding the chicken to an even 1/2 inch thickness is key, as it ensures that they cook evenly and achieve that signature crispy texture. If you prefer more flavor and juiciness, chicken thighs are also a fantastic option!
What’s the best way to store leftover Katsu Bowls?
Store any leftovers in an airtight container in the fridge for up to 3 days. To keep that delightful crispiness, store the fried chicken and rice separately until you are ready to enjoy them again. When reheating, using a skillet or a preheated oven helps restore the chicken’s crunch.
Can I freeze Katsu Bowl components?
Very! You can freeze the breaded but uncooked chicken for up to 3 months. Wrap each piece tightly in plastic wrap, then place them in a freezer-safe bag to avoid freezer burn. When you’re ready to cook, simply thaw in the refrigerator overnight and fry as directed.
How can I ensure my fried chicken stays crispy?
To achieve that perfect crunch, monitor your oil temperature closely—aim for 350°F (175°C). Fry the chicken in batches, allowing enough space so they don’t steam instead of fry. After frying, let the chicken rest on a paper towel-lined plate to absorb excess oil and maintain crispiness.
Is there a dietary concern with Katsu Bowls?
If you’re hosting someone with food allergies, be mindful of the ingredients. This recipe contains gluten due to the panko breadcrumbs and soy sauce. For a gluten-free option, substitute with gluten-free breadcrumbs and tamari instead of soy sauce. And remember, avoid giving any fried chicken or tonkatsu sauce to pets, as cooked chicken bones can be harmful!
Crispy Japanese Katsu Bowls: Your New Favorite Comfort Meal
Ingredients
Equipment
Method
- Prepare the Chicken by pounding each chicken breast to about 1/2 inch thick and season with salt and pepper.
- Set up a dredging station with flour, whisked eggs, and panko breadcrumbs. Coat the chicken first in flour, then dip in egg, and finally roll in panko.
- Heat vegetable oil in a large skillet to 350°F (175°C).
- Fry the chicken for 3-4 minutes on each side until golden brown and cooked through.
- Make the Tonkatsu Sauce by whisking together soy sauce, mirin (or vinegar), brown sugar, and water in a medium bowl.
- Assemble your bowls by placing rice in bowls, topping with sliced chicken, drizzling sauce, and garnishing with green onions and sesame seeds.
Leave a Reply