
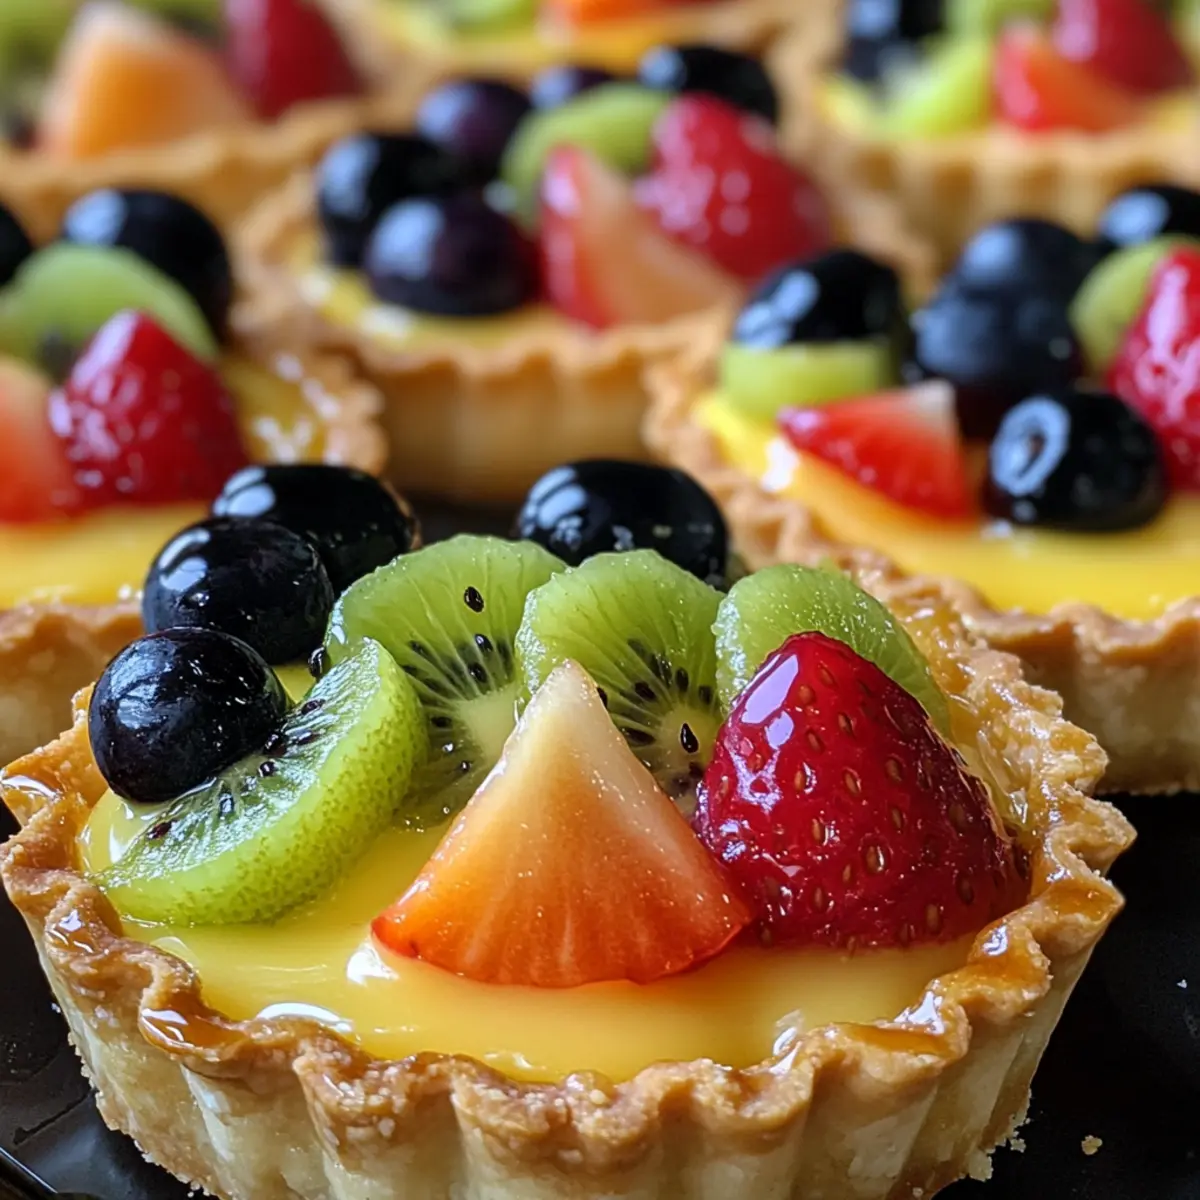
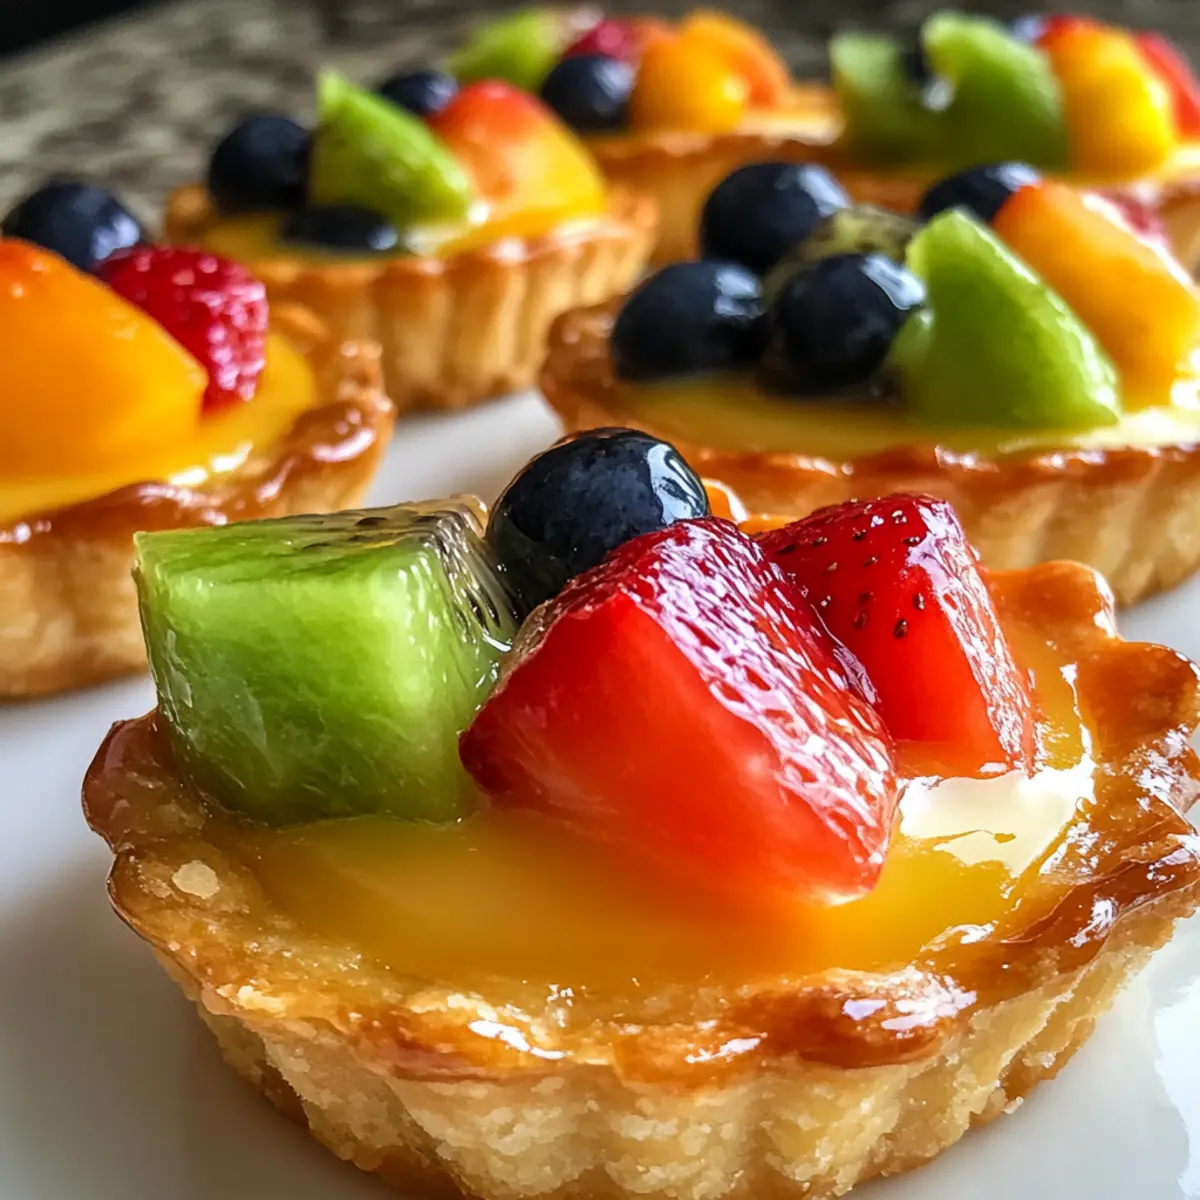
As I was rummaging through my fridge last week, a vibrant array of fresh fruit sparked an idea that transformed into my latest obsession: Mini Fruit Tarts. These delightful bites are not only a feast for the eyes but also a mouthwatering way to celebrate the sweetness of seasonal fruits. With a buttery, crisp crust cradling a silky custard filling, this recipe for Mini Fruit Tarts is incredibly versatile, allowing you to choose your favorite fruits and truly make it your own. Beyond their charm, these tarts are a fantastic make-ahead option—perfect for impressing guests or simply treating yourself after a long day. Trust me, there’s nothing quite like the satisfaction of serving a dessert that looks as stunning as it tastes. Curious about how to whip up these little wonders? Let’s dive into the delicious details!
Why are Mini Fruit Tarts So Irresistible?
Visual Appeal: Each mini fruit tart is a stunning work of art, showcasing a kaleidoscope of fresh fruits that will wow your guests.
Easy to Customize: You can mix and match fruits based on what you have on hand or what’s in season, ensuring every tart is uniquely yours.
Make-Ahead Friendly: Prepare the tart shells in advance and fill them with the silky custard just before serving for effortless entertaining.
Flavors That Shine: The buttery crust perfectly complements the rich custard and bright fruit flavors, creating an unforgettable taste experience.
A Versatile Treat: These mini tarts make for an ideal dessert for gatherings or a special treat to brighten up your everyday meals. Plus, if you’re a fan of personal-sized desserts, you might also enjoy trying out my Mini Turkey Meatloaf recipe for a savory twist!
Mini Fruit Tarts Ingredients
Get ready to create your own delightful Mini Fruit Tarts with this carefully chosen ingredient list!
For the Tart Shells
• All Purpose Flour – Provides structure and texture in the tart shell; can substitute with gluten-free flour for a gluten-free version.
• Salt – Enhances flavor; no substitution needed.
• Powdered Sugar – Adds sweetness and helps create a smooth dough; granulated sugar can work as a substitute but may change dough texture.
• Unsalted Butter – Creates richness and flakiness in the pastry; for a dairy-free option, use vegan butter.
For the Custard Filling
• Egg Yolks – Contributes to custard richness and helps emulsify ingredients; egg substitutes like silken tofu may alter the texture.
• Vanilla Extract – Adds flavor depth; you can use almond extract as a flavorful substitute.
• Heavy Cream – Adds richness to the custard; can substitute with coconut cream for a lighter, dairy-free option.
• Whole Milk – Base for the custard ensuring creaminess; almond milk or another milk alternative can be used, but custard texture may vary.
• White Sugar – Sweetens the custard; brown sugar can provide a deeper flavor.
• All Purpose Flour & Cornstarch – Thickeners for the custard providing the desired texture; can be replaced with an appropriate cornstarch alternative.
For the Topping
• Assorted Fresh Fruit – Provides vibrant freshness and color; use any preferred fruit like berries, kiwi, or seasonal fruits.
• Apricot Jelly – Gives a lovely glaze that adds sheen and prevents the tart from getting soggy; other jellies or jams can be used as substitutions.
• Water – Used to thin the glaze; no substitutions needed.
Now that you’re equipped with the perfect ingredients, you’re just a step away from crafting these magical Mini Fruit Tarts!
Step‑by‑Step Instructions for Mini Fruit Tarts
Step 1: Prepare the Dough
In a stand mixer, combine all-purpose flour, salt, powdered sugar, and cold unsalted butter. Mix on low speed until the mixture resembles coarse crumbs, about 2 minutes. Then, add egg yolks, heavy cream, and vanilla extract, mixing until the dough forms a sandy consistency. This should take about 1-2 minutes; don’t overmix.
Step 2: Mold the Tarts
Shape the dough into small balls, about the size of a golf ball, and press each ball into tart molds, creating an even layer that covers the sides. Prick the bottoms with a fork to prevent bubbling during baking, then place the molds in the freezer for at least 1 hour to firm up, ensuring that the tart shells will hold their shape.
Step 3: Bake the Shells
Preheat your oven to 375°F (190°C). Remove the chilled tart shells from the freezer and bake for 12-15 minutes, or until the edges are lightly golden brown. Keep an eye on them to prevent burning. Once baked, allow the shells to cool completely on a wire rack before filling them with the creamy custard.
Step 4: Make the Custard
In a medium saucepan, whisk together egg yolks and white sugar until well combined. Sift in all-purpose flour and cornstarch, mixing until there are no lumps. Gradually stir in whole milk and vanilla extract, then cook over medium heat. Whisk constantly for about 8-10 minutes or until the mixture thickens to a pudding-like consistency, then remove from heat and cool for at least 30 minutes.
Step 5: Assemble the Tarts
Once the custard has cooled, slice your assorted fresh fruits into bite-sized pieces. In a small saucepan, gently heat the apricot jelly with a tablespoon of water until melted and smooth. Brush the warm glaze onto the tart shells to prevent sogginess, then spoon the silky custard into the shells. Top with the beautifully arranged fruit, and brush again with the glaze for a shiny finish.
Step 6: Serve or Chill
Your delightful Mini Fruit Tarts are now ready to be served! For immediate enjoyment, serve them right away while the custard is fresh. Alternatively, you can chill them in the refrigerator for up to 4 hours to allow the flavors to meld beautifully, making these mini tarts an impressive dessert for any gathering.
How to Store and Freeze Mini Fruit Tarts
Fridge: Store assembled mini fruit tarts in an airtight container in the refrigerator for up to 4 hours to maintain freshness without compromising the crust’s quality.
Tart Shells: If you want to prepare ahead, the tart shells can be made in advance and stored in an airtight container in the fridge for up to 3 days before filling.
Freezer: Unbaked tart shells can also be frozen for up to 2 months. Just wrap them tightly in plastic wrap and place them in a freezer-safe container. Bake directly from frozen; add a few extra minutes to the baking time.
Reheating: If the tart shells feel soft after thawing, you can re-crisp them in a preheated oven at 350°F (175°C) for about 5 minutes before assembling your mini fruit tarts.
Expert Tips for Mini Fruit Tarts
-
Chill Thoroughly: Always chill the dough for at least one hour; this helps the tart shells maintain their shape during baking and results in a crisper texture.
-
Avoid Overbaking: Watch the crust closely as it bakes. A light golden color indicates that your tart shells are perfectly baked. Overbaking can lead to a dry crust.
-
Sieve for Smoothness: Ensure your custard is ultra-smooth by sifting the flour and cornstarch together; this helps prevent lumps and results in a velvety filling for your mini fruit tarts.
-
Fruit Freshness: Use only fresh, ripe fruit for topping. Avoid overly ripe fruits, as they may become mushy and affect the overall texture of your tarts.
-
Glaze Tip: Apply the apricot glaze while still warm; this helps it adhere better and provides a beautiful shiny finish while preventing sogginess.
-
Experiment with Flavors: Don’t hesitate to get creative! Adding citrus zest or different extracts to your custard can elevate the flavors of your mini fruit tarts and make them even more delightful.
Make Ahead Options
These Mini Fruit Tarts are perfect for busy home cooks looking to save time while impressing with a delicious dessert! You can prepare the tart shells up to 3 days in advance and store them in an airtight container in the refrigerator to maintain their crispiness. The silky custard filling can be made up to 24 hours ahead; simply cool it completely before refrigerating to keep it fresh. When you’re ready to serve, spoon the custard into the tart shells, top with your favorite fresh fruits, and brush with apricot jelly for that gorgeous glaze. This way, you can enjoy a stunning and delightful dessert with minimal last-minute effort!
Mini Fruit Tarts Variations & Substitutions
Feel free to get creative with these mini fruit tarts to make them uniquely yours, bursting with flavors and colors!
- Gluten-Free: Substitute all-purpose flour with a gluten-free flour blend to make these tarts accessible for everyone.
- Dairy-Free: Use coconut cream instead of heavy cream to create a light yet rich custard without any dairy. This adds an interesting flavor twist, enhancing the tarts.
- Sugar-Free: Replace white sugar with a sugar substitute like erythritol for a lower-calorie option without sacrificing sweetness.
- Chocolate Delight: Stir in melted chocolate into the custard for a decadently rich chocolate version that will satisfy any chocolate lover.
- Citrus Zest Boost: Add lemon or orange zest to the custard base for a refreshing zing that complements the sweetness of the fruits beautifully.
- Savory Twist: Consider using herbs like basil or mint in your fruit topping. This unexpected addition pairs wonderfully with strawberries and adds depth to your dish.
- Seasonal Fruit Variation: Switch up your fruit with whatever is in season. For example, try peaches in the summer or figs in the fall for a delightful seasonal treat.
- Custard Infusion: Experiment with different extracts, like almond or lemon, to create unique custard flavors that elevate your mini tarts.
These variations can take your classic mini fruit tarts to another level, ensuring there’s a version for everyone! If you’re looking for ease of preparation, don’t forget my Mini Turkey Meatloaf recipe for another delightful make-ahead option!
What to Serve with Mini Fruit Tarts
Elevate your dessert experience by pairing these delightful treats with captivating accompaniments that tantalize the taste buds.
- Fresh Whipped Cream: A dollop of lightly sweetened whipped cream adds a soft, airy contrast to the rich custard and tart fruit.
- Vanilla Ice Cream: Creamy vanilla ice cream melts alongside the warm custard, creating a harmonious blend of flavors and textures.
- Chocolate Sauce: Drizzle some rich chocolate sauce over the tarts for an indulgent twist that beautifully complements the sweetness.
- Mint Tea: The refreshing aroma of mint tea offers a light counterpoint that enhances the vibrant flavors of the tarts.
- Lemon Sorbet: This zesty sorbet refreshes the palate and balances the sweetness of the fruit tarts perfectly.
- Fruit Salad: A colorful bowl of mixed seasonal fruits adds freshness and variety, making for a delightful, fruity ensemble.
- Coffee or Espresso: A rich, bold cup of coffee provides a delightful contrast that enhances the smoothness of the custard while making each bite feel like an occasion.
- Sparkling Water: A bubbly, citrus-flavored sparkling water cleanses the palate and refreshes your senses after each bite of tartness.
These pairings will create a well-rounded dessert experience that captivates and delights your guests with every bite.

Mini Fruit Tarts Recipe FAQs
What fruits are best for mini fruit tarts?
Absolutely! You can use any of your favorite fruits for these mini fruit tarts, such as berries, strawberries, kiwi, peaches, or seasonal fruits. Just ensure they are fresh and not overly ripe, as overripe fruits can become mushy and affect your tart’s texture.
How do I store leftover mini fruit tarts?
For optimal freshness, store your assembled mini fruit tarts in an airtight container in the refrigerator for up to 4 hours. If you have extra tart shells, they can be kept in an airtight container in the fridge for up to 3 days before being filled.
Can I freeze the mini fruit tarts?
Certainly! You can freeze the unbaked tart shells for up to 2 months. Just wrap them tightly in plastic wrap and place them in a freezer-safe container. When you’re ready to bake, you can bake them directly from frozen, adding a few extra minutes to the baking time for best results.
What should I do if my custard curdles while cooking?
The best way to handle curdled custard is to whisk it vigorously, then blend it in a food processor until smooth. However, to prevent curdling from happening, always cook the custard over medium heat, whisking constantly, and avoid letting it boil. This gentle cooking process helps create that silky smooth texture we love.
Are mini fruit tarts suitable for people with dietary restrictions?
Very! You can make these mini fruit tarts vegetarian-friendly and, with the right substitutions, gluten-free and dairy-free too. For a gluten-free version, use a gluten-free flour blend, and opt for vegan butter and almond milk instead of traditional dairy products. Always check the labels of your ingredients to ensure they meet specific dietary needs.
How long can I keep the tart shells before filling them?
You can prepare the tart shells in advance and store them in an airtight container in the fridge for up to 3 days. This is a great time-saver for parties or gatherings, allowing you to fill and assemble them just before serving for that fresh taste!

Delicious Mini Fruit Tarts with Creamy Custard Delight
Ingredients
Equipment
Method
- In a stand mixer, combine flour, salt, powdered sugar, and butter. Mix until coarse crumbs form.
- Add egg yolks, heavy cream, and vanilla. Mix until sandy consistency forms. Don't overmix.
- Shape dough into balls and press into tart molds. Prick bottoms to prevent bubbling. Freeze for 1 hour.
- Preheat oven to 375°F (190°C). Bake tart shells for 12-15 minutes until lightly golden. Cool on a wire rack.
- In a saucepan, whisk egg yolks and sugar. Sift in flour and cornstarch. Gradually add milk and vanilla. Cook until thickened.
- Once cooled, slice fruits. Heat apricot jelly with water until melted. Brush glaze on shells, fill with custard, and top with fruit.
- Serve immediately or chill for up to 4 hours.
Leave a Reply