
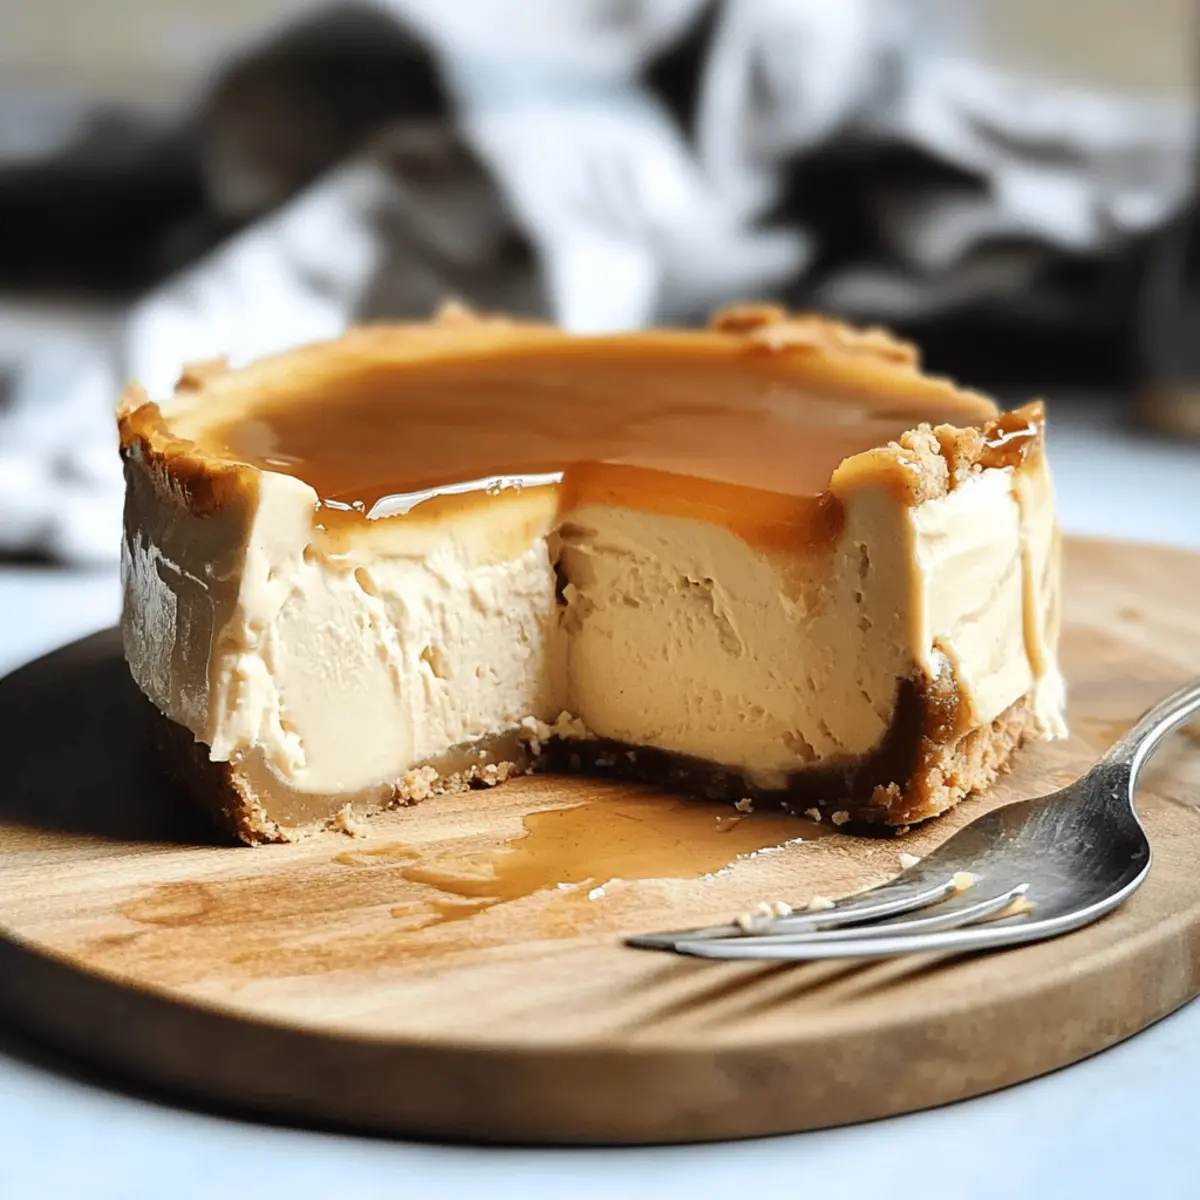
As the crisp autumn air settles in, the aroma of simmering apple cider always brings back beautiful memories of harvest celebrations. This Creamy Apple Cider Cheesecake captures that essence perfectly, offering a delightful twist on traditional desserts. Infused with reduced fresh apple cider, this cheesecake boasts a smooth, creamy texture that dances between sweet and tart, making it an ideal fall treat. Not only is it a stunning centerpiece for your holiday gatherings, but its lighter consistency thanks to sour cream also means you can enjoy every slice without guilt. Ready to impress your loved ones and create some delicious memories around the dessert table? Let’s dive into this seasonal delight and elevate your fall baking!
What makes this cheesecake a fall favorite?
Unique Flavors: The use of fresh apple cider brings a delightful twist, setting this cheesecake apart from the typical pumpkin desserts.
Creamy Texture: Infused with sour cream, it delivers a rich yet airy consistency that’ll have everyone asking for seconds.
Simple Steps: This recipe is easy to follow, so even novice bakers can create a stunning dessert that impresses.
Time-Saving: Prepare ahead; it can be made a day in advance, allowing you to spend more time with loved ones.
Versatile Toppings: Enhance it with caramel or whipped cream for an extra indulgent touch. Serve it chilled, and your guests will be raving! Explore more fall flavors with options like Pumpkin Cheesecake Muffins or Apple Crisp Warm to pair perfectly with this cheesecake.
Apple Cider Cheesecake Ingredients
• For the Crust
- Digestive Cookies or Graham Crackers – Base for the crust; opt for gluten-free alternatives if needed.
- Butter – Binds the cookie crumbs together; use unsalted for better seasoning control.
- Salt – Enhances crust flavor; choose Kosher or fine sea salt.
- Powdered Sugar – Adds subtle sweetness; granulated sugar can be substituted if preferred.
• For the Filling
- Fresh Apple Cider – Provides the unique flavor for the cheesecake; Honeycrisp cider is recommended for a tart taste.
- Mulling Spices – Optional spices like cinnamon or cloves enhance cider flavors during reduction.
- Cream Cheese – Essential for a creamy filling; must be at room temperature for easy blending.
- Brown Sugar – Adds depth and sweetness; light or dark varieties work well.
- Sour Cream – Contributes to the creamy texture and tanginess; full-fat is preferred.
- Reduced Apple Cider – Concentrated flavor for the filling, created by boiling fresh cider until thickened.
- Cinnamon – Complements the apple flavor perfectly.
- Eggs – Provide structure; ensure they’re at room temperature for optimal mixing.
- All-Purpose Flour – Helps set the cheesecake firmly, providing stability to the final result.
Enjoy crafting this Apple Cider Cheesecake and let the flavors of fall whisk you away!
Step‑by‑Step Instructions for Apple Cider Cheesecake
Step 1: Reduce the Cider
In a medium saucepan, bring 3 cups of fresh apple cider to a boil over medium heat. Optionally, add mulling spices like cinnamon or cloves to enhance flavor. Allow the cider to simmer until it thickens to about 1/3 cup, which should take 20-30 minutes. Once reduced, take it off the heat and let it cool completely.
Step 2: Prepare Crust
Preheat your oven to 350°F (175°C) while you prepare the crust for the Apple Cider Cheesecake. In a food processor, grind digestive cookies or graham crackers into fine crumbs. Combine these crumbs with melted unsalted butter, a pinch of salt, and powdered sugar until crumbly. Press this mixture evenly into the bottom of a greased 9″ springform pan, then bake for 10 minutes. Let it cool once out of the oven.
Step 3: Mix Filling
In a stand mixer, beat softened cream cheese and brown sugar on medium speed until smooth and creamy. Add in the cooled reduced apple cider, sour cream, vanilla extract, and a sprinkle of cinnamon. Continue mixing until fully combined and no lumps remain. The filling should be light and airy, perfectly suited for the Apple Cider Cheesecake.
Step 4: Combine Eggs & Flour
Add the room temperature eggs to the mixture one at a time, mixing on low just until incorporated after each addition. Sift in the all-purpose flour, continuing to blend on low speed only until the flour is fully combined with the filling. Be cautious not to overmix in this step to ensure a smooth cheesecake without cracks.
Step 5: Bake
Pour the cheesecake filling into the cooled crust, smoothing it gently with a spatula. To create a water bath, place the springform pan inside a larger pan filled with hot water, ensuring the water reaches halfway up the sides of the springform pan. Bake the Apple Cider Cheesecake at 325°F (163°C) for 80-90 minutes, until the edges are set and the center has a slight jiggle.
Step 6: Cool Slowly
After baking, turn off the oven while leaving the cheesecake inside. Crack the oven door with a wooden spoon to allow gradual cooling, and let it rest for about 30 minutes. Once cooled, transfer the cheesecake to the countertop to cool completely before refrigerating. Chill for at least 8 hours or overnight for the best flavors before serving your delightful Apple Cider Cheesecake.
How to Store and Freeze Apple Cider Cheesecake
- Fridge: Store the cheesecake wrapped in plastic wrap or in an airtight container for up to 4 days. This will keep it fresh and maintain its creamy texture.
- Freezer: If you wish to freeze the dessert, wrap it tightly in plastic wrap and aluminum foil. It can last for up to 2 months in the freezer.
- Thawing: To enjoy your frozen Apple Cider Cheesecake, transfer it to the fridge and let it thaw overnight before serving.
- Serving: For best results, serve the cheesecake chilled. If you plan to add toppings, do so just before serving for optimal freshness.
Expert Tips for the Best Apple Cider Cheesecake
-
Room Temperature Ingredients: Ensure all dairy ingredients, like cream cheese and eggs, are at room temperature for a smooth, lump-free filling.
-
Mixing Caution: Avoid overmixing the eggs once added to the filling; this prevents cracks in your cheesecake and keeps it looking perfect.
-
Water Bath Wisdom: Wrap the bottom of your springform pan in foil to prevent water from leaking in during the baking process.
-
Cooling Techniques: Allow the cheesecake to cool slowly in the oven with the door ajar. This helps to maintain its creamy texture and prevents sudden temperature changes.
-
Storage Savvy: Make your Apple Cider Cheesecake a day in advance for improved flavor; it will keep well in the fridge for 3-4 days, perfect for gatherings!
Make Ahead Options
These Apple Cider Cheesecake are perfect for busy home cooks looking to save time without sacrificing flavor! You can prepare the crust and filling up to 24 hours in advance. Start by making the crust and refrigerate it overnight to keep it fresh. Next, mix the filling and store it separately in an airtight container in the fridge. When you’re ready to bake, simply pour the filling over the crust and bake as directed. To maintain the cheesecake’s creamy texture, chill it in the refrigerator for at least 8 hours after baking before serving. With these make-ahead options, you can easily impress your loved ones with a stunning dessert that feels effortless!
Apple Cider Cheesecake Variations & Substitutions
Feel free to make this recipe your own with exciting twists and delicious swaps!
-
Gluten-Free: Use a gluten-free cookie blend or almond flour for the crust to make it suitable for gluten-sensitive friends.
A gluten-free cheesecake can still be indulgent and flavor-packed—everyone deserves a slice! -
Vegan: Substitute cream cheese with cashew or tofu cream cheese and use flax eggs instead of regular eggs.
This way, you’ll surprise your vegan guests with a delightful dessert that doesn’t compromise on flavor! -
Less Sweet: Reduce the brown sugar in the filling or use a sugar alternative like stevia for a lighter, less sweet version.
This option allows the natural apple cider flavor to shine, making every bite a little more refreshing. -
Spice It Up: Add a pinch of nutmeg or ginger to the filling for an extra flavor boost.
These spices will elevate the aroma and make your kitchen smell like a cozy autumn afternoon. -
Nutty Crust: Try substituting half of the digestive cookies with finely chopped nuts like almonds or pecans for a crunchy texture.
A nutty base adds depth to the dessert, making it all the more satisfying! -
Cider Caramel Topping: Drizzle some homemade apple cider caramel sauce over the cooled cheesecake for a decadent finish.
Your guests will rave about the luscious combination, making this dessert unforgettable. -
Fruit Compote: Top with a warm apple compote for an added fruity layer that’ll delight the palate.
A compote not only adds sweetness but also beautifully complements the apple flavor of the cheesecake. -
Apple Shavings: Garnish with thinly sliced apples for a fresh, crunchy element that enhances the fall vibe.
The vibrant colors create a stunning presentation and engage the senses with every bite.
Looking to explore more fall flavors? Check out these delightful treats like Pumpkin Cheesecake Cookies or Apple Cinnamon Cookies to inspire your seasonal baking adventures!
What to Serve with Apple Cider Cheesecake
As you prepare to delight in every creamy bite of this seasonal masterpiece, consider the perfect pairings to elevate your dessert experience.
-
Cinnamon Whipped Cream: This sweet garnish adds a fluffy textural contrast that complements the cheesecake’s creamy consistency and echoes the warm spices within.
-
Caramel Sauce: A drizzle of rich caramel enhances the apple flavors while adding a luscious sweetness. This pairing is a match made in dessert heaven!
-
Fresh Fruit Salad: A vibrant medley of apples, pears, and berries offers a refreshing burst of flavor and a crisp texture to balance the cheesecake’s richness.
-
Spiced Apple Cider: Enjoy a warm glass of this simmering drink alongside your cheesecake. The comforting spices mirror the flavors of the dessert, making every bite even more delightful.
-
Gingersnap Cookies: These crunchy treats bring a zesty kick that contrasts beautifully with the soft, creamy cheesecake, creating a delicious combination that will have your taste buds dancing.
-
Hot Chocolate: This cozy drink is perfect for warming up on a chilly fall evening, providing a sweet, chocolaty complement to the cheesecake’s apple and cinnamon notes.
Create memorable moments around the table by considering these delightful pairings, ensuring your Apple Cider Cheesecake stands out even more!
Apple Cider Cheesecake Recipe FAQs
What kind of apple cider should I use?
For the best flavor, I recommend using fresh apple cider, specifically Honeycrisp cider, as it has a delightful tartness that pairs beautifully with the cheesecake. If you can’t find Honeycrisp cider, any fresh apple cider will work, but be sure to avoid the sugary commercial varieties to keep it natural and flavorful.
How long can I store the Apple Cider Cheesecake?
You can store your Apple Cider Cheesecake in the refrigerator for up to 4 days. Just be sure to wrap it tightly in plastic wrap or keep it in an airtight container to maintain its creamy texture. If you’re planning to enjoy it later, you can always prepare it a day in advance!
Can I freeze the cheesecake?
Absolutely! To freeze your Apple Cider Cheesecake, wrap it tightly in plastic wrap followed by aluminum foil to prevent freezer burn. It can stay fresh in the freezer for up to 2 months. When you’re ready to enjoy it, simply transfer it to the refrigerator to thaw overnight.
What’s the best way to avoid cracks in my cheesecake?
To prevent cracks, ensure your eggs are at room temperature and avoid overmixing once they’re added to the mixture. Mixing just until combined will help maintain the smooth texture. Also, remember to bake it in a water bath; this gentle cooking method provides even heat and moisture which aids in a perfect bake without unsightly cracks.
Is this cheesecake suitable for those with dietary restrictions?
For those with gluten sensitivities, you can easily make the crust gluten-free by using gluten-free digestive cookies or graham crackers. If you’re concerned about dairy, consider trying dairy-free cream cheese alternatives, and for vegans, look for substitutes like flax eggs in place of traditional eggs. Always check labels for allergy information to ensure the recipe meets your dietary needs.
Can I use a different type of crust?
Certainly! If you want to mix things up, try using an Oreo crust for a chocolatey twist or a nut-based crust for a grain-free option. Just remember to adjust the baking time as needed for different crust types.
Creamy Apple Cider Cheesecake to Celebrate Fall Flavors
Ingredients
Equipment
Method
- In a medium saucepan, bring 3 cups of fresh apple cider to a boil over medium heat. Optionally, add mulling spices like cinnamon or cloves. Allow the cider to simmer until it thickens to about 1/3 cup, which should take 20-30 minutes. Once reduced, take it off the heat and let it cool completely.
- Preheat your oven to 350°F (175°C). In a food processor, grind digestive cookies or graham crackers into fine crumbs. Combine these crumbs with melted unsalted butter, a pinch of salt, and powdered sugar until crumbly. Press this mixture evenly into the bottom of a greased 9" springform pan, then bake for 10 minutes. Let it cool.
- In a stand mixer, beat softened cream cheese and brown sugar on medium speed until smooth and creamy. Add in the cooled reduced apple cider, sour cream, vanilla extract, and a sprinkle of cinnamon. Continue mixing until fully combined and no lumps remain.
- Add the room temperature eggs to the mixture one at a time, mixing on low just until incorporated after each addition. Sift in the all-purpose flour, continuing to blend on low speed only until the flour is fully combined.
- Pour the cheesecake filling into the cooled crust, smoothing it gently with a spatula. To create a water bath, place the springform pan inside a larger pan filled with hot water, ensuring the water reaches halfway up the sides of the springform pan. Bake at 325°F (163°C) for 80-90 minutes.
- After baking, turn off the oven while leaving the cheesecake inside. Crack the oven door with a wooden spoon to allow gradual cooling, and let it rest for about 30 minutes. Once cooled, transfer the cheesecake to the countertop to cool completely before refrigerating.
Leave a Reply