
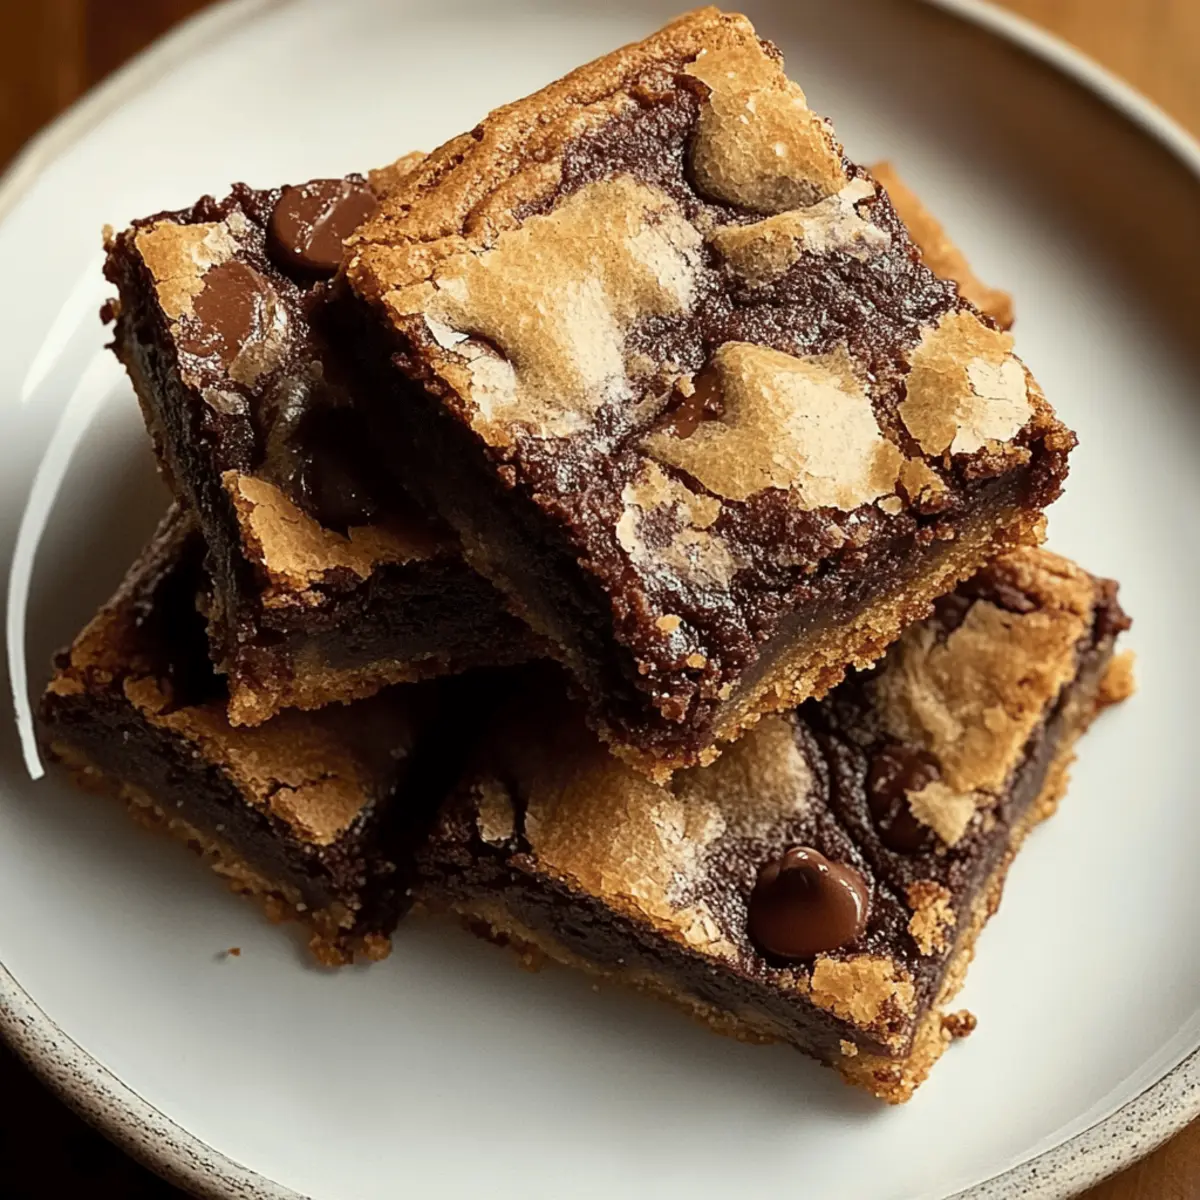
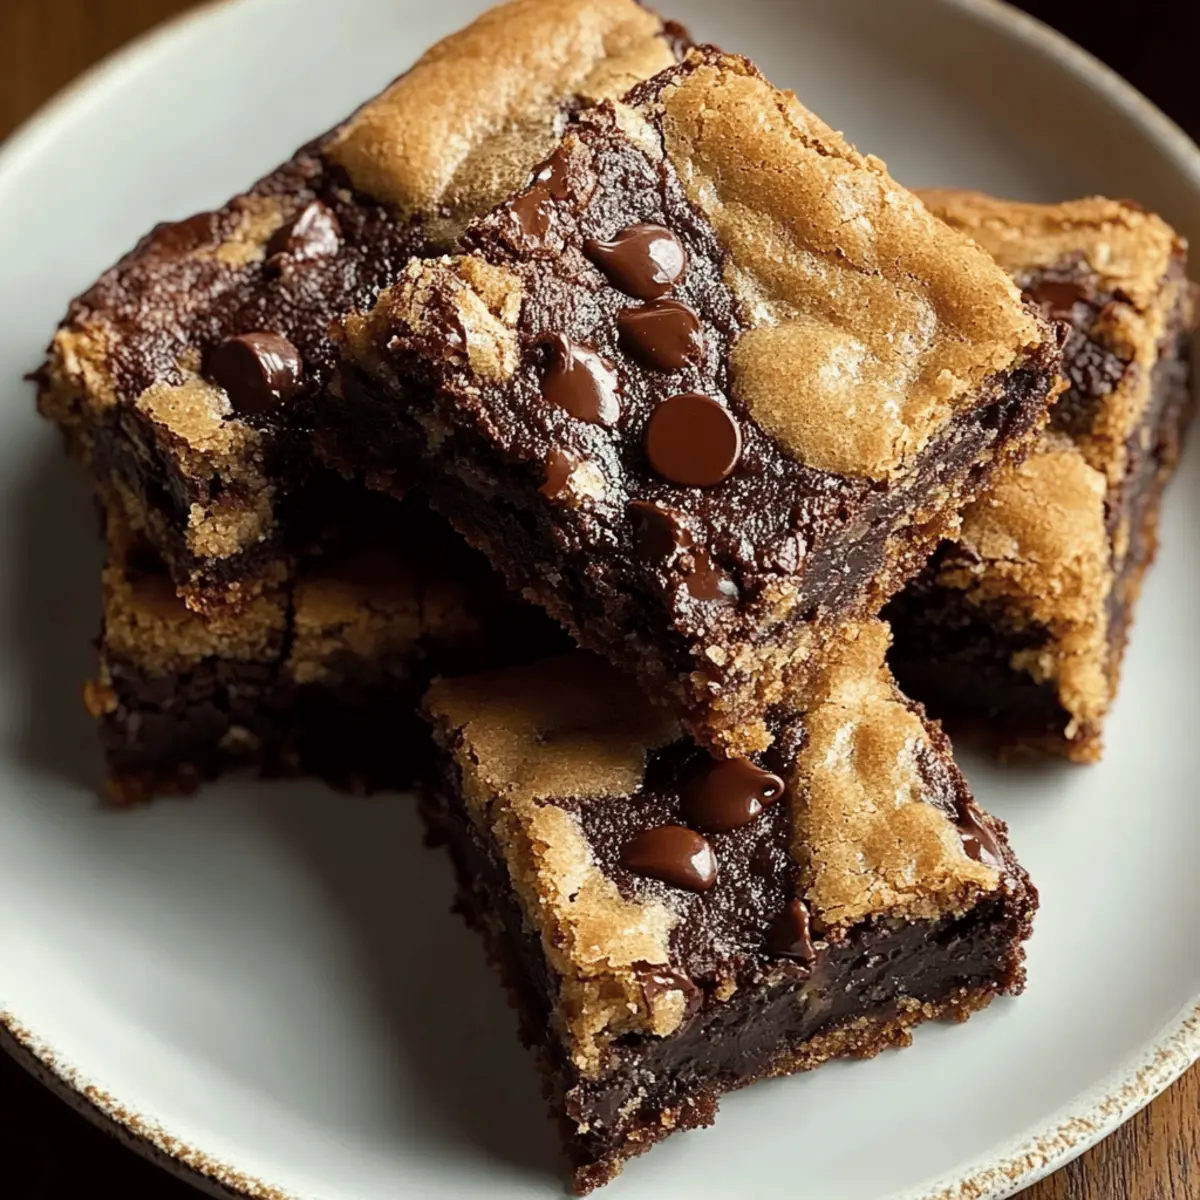
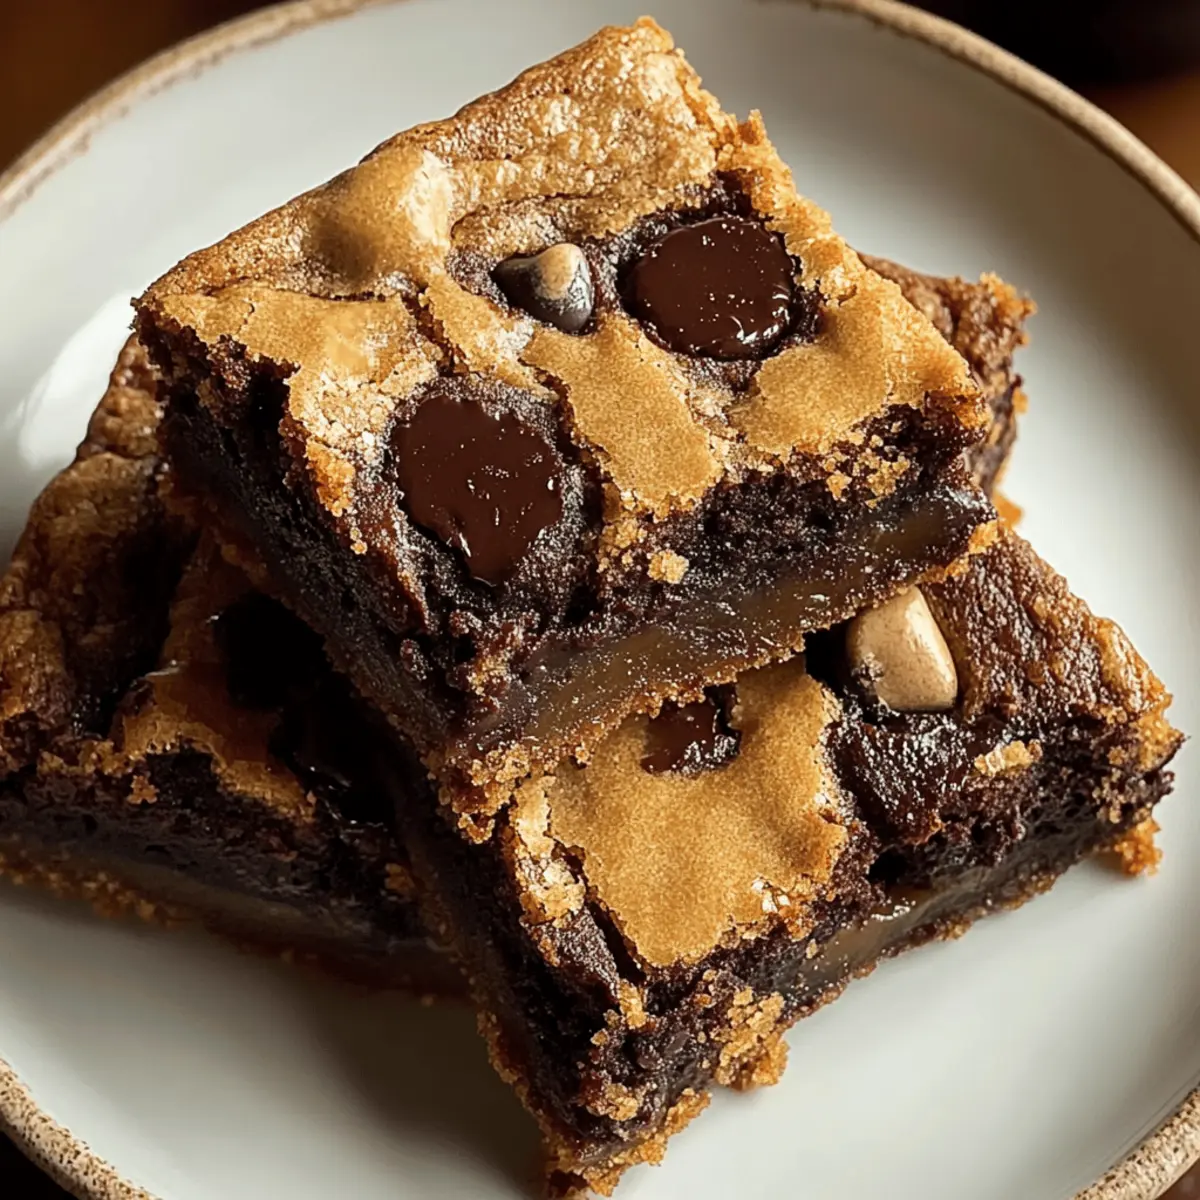
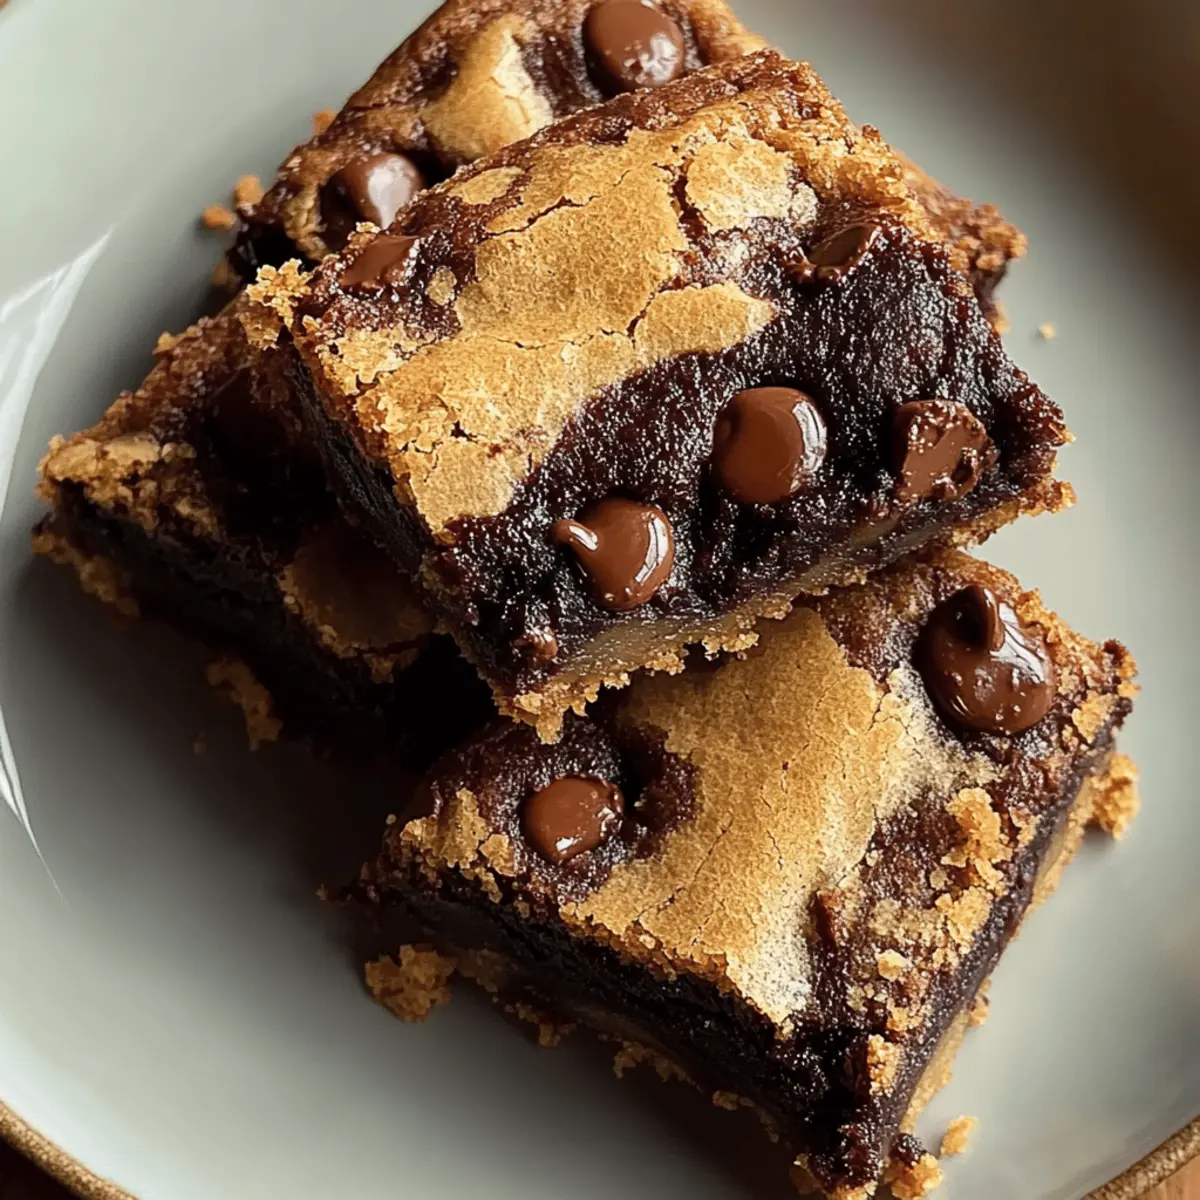
The moment I first pulled a tray of Brown Butter Brookies from the oven, the kitchen transformed into a comforting haven of nutty aromas and sweet anticipation. This delightful fusion of chewy cookies and fudgy brownies offers an indulgent experience that makes my heart sing. Crafted with the exquisite depth of brown butter, these brookies come together in just under an hour—perfect for a last-minute dessert or an afternoon treat. Not only are they straightforward to whip up, but they’re also a guaranteed crowd-pleaser that will leave everyone reaching for seconds! Ready to dive into a chocolatey adventure that satisfies both cookie lovers and brownie aficionados alike? Let’s get baking!
Why Are Brown Butter Brookies So Special?
Decadent fusion of flavors: The combination of chewy cookie and fudgy brownie brings a unique dessert experience that’s simply irresistible. Nutty aroma wafts through your kitchen, transforming it into a cozy haven. Quick prep time means you can indulge in gourmet goodness in under an hour—perfect for a busy day! Versatile options allow for personalization, whether you prefer classic chocolate chips, or want to experiment with spices. Crowd-pleaser status ensures that these Brookies will disappear faster than you can say “dessert.” Pair them with a scoop of ice cream or drizzle of caramel for an added touch of indulgence!
Brown Butter Brookies Ingredients
• Dive into this easy indulgence with a blend of cookie and brownie elements!
For the Batter
- Unsalted Butter – Provides rich, nutty flavor through browning; you can substitute with salted butter, just reduce the added salt.
- Granulated Sugar – Adds sweetness and structure to the cookie layer; coconut sugar is a great low-glycemic substitute.
- Light Brown Sugar – Introduces moisture and a subtle caramel flavor; for a deeper taste, opt for dark brown sugar.
- Eggs – Essential for structure and richness; replace with ¼ cup unsweetened applesauce per egg for an egg-free option.
- Vanilla Extract – Enhances the overall flavor depth, making your Brown Butter Brookies even more delightful.
- All-Purpose Flour – Crucial for chewiness; a gluten-free blend works well for those avoiding gluten.
- Baking Powder and Baking Soda – These leavening agents help achieve a tender crumb; always check for freshness to get the best results.
- Salt – Balances the sweetness and enhances flavors; consider using sea salt for an added flavor dimension.
- Unsweetened Cocoa Powder – Imparts a rich chocolate flavor without added sweetness; dark cocoa can really intensify those chocolate notes.
- Semi-Sweet Chocolate Chips – Create luscious pockets of gooey chocolate; feel free to swap for milk or dark chocolate chips based on your taste.
- Chopped Nuts (Optional) – Introduces a crunchy texture and accentuates the nutty profile; walnuts or pecans are highly recommended.
Get ready to indulge in these Brown Butter Brookies—your taste buds won’t know what hit them!
Step‑by‑Step Instructions for Brown Butter Brookies
Step 1: Preheat the Oven
Begin by preheating your oven to 350°F (175°C). While the oven warms up, grab a 9×13-inch baking dish and lightly grease it or line it with parchment paper for easy removal later. This preparation ensures your Brown Butter Brookies will bake evenly and develop a beautiful golden color.
Step 2: Brown the Butter
Next, place unsalted butter in a medium saucepan over medium heat. Allow it to melt, stirring occasionally until it turns golden brown and emits a nutty aroma, which should take about 5-7 minutes. Once achieved, remove from heat and let it cool slightly, as this will enhance the flavor of your brookies while keeping your batter at the right temperature.
Step 3: Combine Sugars and Butter
In a large mixing bowl, combine the granulated sugar, light brown sugar, and your slightly cooled browned butter. Using a whisk or a hand mixer, mix them together until the mixture is smooth and creamy, taking about 1-2 minutes. This step creates a rich base for your Brown Butter Brookies, ensuring they’re sweet and decadent.
Step 4: Add Eggs and Vanilla
Now, crack in the eggs one at a time, mixing well after each addition to ensure they’re fully incorporated. Then, stir in the vanilla extract until the mixture is cohesive and silky. This will add richness to your batter and deepen the flavors of your brookies delightfully.
Step 5: Mix Dry Ingredients
In another bowl, whisk together the all-purpose flour, baking powder, baking soda, salt, and unsweetened cocoa powder. This will help ensure your leavening agents are evenly distributed. Once combined, it’s time to introduce these dry ingredients to the wet mixture, setting the stage for your delicious Brown Butter Brookies.
Step 6: Combine Wet and Dry Ingredients
Gradually add the dry ingredients to the wet mixture, folding them together with a spatula or wooden spoon until just combined. Be careful not to overmix; a few dry streaks are okay. This gentle approach maintains the fudgy texture of your brookies, ensuring they’re tender and chewy.
Step 7: Fold in Chocolate Chips and Nuts
Gently fold in the semi-sweet chocolate chips and chopped nuts, if you’re using them. This step adds delightful pockets of chocolate and a crunchy texture to your Brown Butter Brookies, enhancing their overall indulgence. Aim for even distribution while being careful to keep the batter light and fluffy.
Step 8: Spread the Batter
Pour the batter into your prepared baking dish, using a spatula to spread it evenly across the bottom. This ensures uniform baking and a lovely texture in every bite of your Brown Butter Brookies. Take a moment to smooth out the top, which helps them rise evenly in the oven.
Step 9: Bake to Perfection
Transfer the baking dish to your preheated oven and bake for 25-30 minutes. Keep an eye on your brookies; they’re done when a toothpick inserted in the center comes out with a few moist crumbs. The edges should look set while the center remains soft, promising that fudgy texture everyone loves.
Step 10: Cool and Slice
Once baked, remove your Brown Butter Brookies from the oven and let them cool in the pan for about 15 minutes. Then, slice them into squares while they’re still warm for the best texture. Allowing them to cool slightly before serving will enhance their flavor and ease of slicing, making each piece perfectly indulgent.
Brown Butter Brookies: Customize Your Treats
Indulge your culinary creativity and make these Brown Butter Brookies perfectly yours with these delicious variations!
-
Dairy-Free: Substitute unsalted butter with coconut oil or vegan butter for an easy dairy-free twist, keeping the texture luscious.
-
Nut-Free: Skip the chopped nuts altogether, or swap them for sunflower seeds for a delightful crunch without allergens.
-
Flavored Brookies: Add 1-2 teaspoons of espresso powder or a pinch of cinnamon for a warm, aromatic depth—perfect for coffee lovers!
-
Candy-Coated: Fold in crushed candies like Oreos or M&M’s instead of chocolate chips; this gives a fun twist and bursts of color.
-
Caramel Swirl: For an ooey-gooey experience, swirl in dollops of caramel sauce before baking; imagine that delightful mix of salty-sweet!
-
** Gluten-Free:** Use a high-quality gluten-free flour blend to maintain the same delicious texture while catering to gluten sensitivities.
-
Chunky Monkey: Incorporate sliced bananas and walnuts for a crunchy, fruity twist that pays homage to that beloved classic flavor combo.
-
Decadent Chocolate: Go for dark chocolate chips or even a mix of semi-sweet and dark for those die-hard chocolate fans.
These suggestions are sure to inspire you as you bake! Still looking for more delightful recipes? Check out my Honey Butter Skillet Corn for a sweet-savory side or dive into some Peanut Butter Spider Cookies for a Halloween treat everyone will love!
Expert Tips for Brown Butter Brookies
- Perfect Browning: Ensure the butter is browned properly to develop that rich, nutty flavor without burning. Keep an eye on it—it can go from perfect to burnt quickly!
- Avoid Overmixing: Mix the ingredients until just combined to maintain a fudgy texture. Overmixing can lead to dense brookies—nobody wants that!
- Cooling Time Matters: Allow your brookies to cool in the pan before slicing. This enhances the texture and makes for cleaner cuts, elevating your delicious Brown Butter Brookies.
- Customization Options: Feel free to experiment with different types of chocolate chips or nuts. Just remember to adjust the ratios to maintain the perfect balance of flavors!
- Fresh Ingredients: Always check the freshness of your baking powder and soda; old ingredients can lead to a less fluffy result. Freshness ensures those brookies rise beautifully!
What to Serve with Brown Butter Brookies
Indulging in Brown Butter Brookies is just the beginning; let’s complement these delightful treats with perfect pairings for an unforgettable experience.
- Vanilla Ice Cream: A scoop of creamy vanilla ice cream adds a delightful contrast to the warm, fudgy brookies, enhancing their rich chocolate flavor beautifully.
- Espresso: Sipping on a bold espresso brings out the nutty notes of the brown butter, transforming dessert time into a chic café experience.
- Fresh Berries: Juicy raspberries or strawberries provide a fresh, tart contrast, cutting through the sweetness and adding a pop of color to your plate.
- Caramel Sauce: Drizzling warm caramel over the brookies creates a luscious experience, bringing an indulgent sweetness that complements the rich chocolate.
- Milk: A tall glass of cold milk is the classic companion, perfectly balancing the sweetness of the brookies and making each bite feel nostalgic.
- Whipped Cream: A dollop of lightly sweetened whipped cream adds a cloud-like texture that enhances the overall indulgence of your dessert.
- Chocolate Ganache: Thick, rich chocolate ganache drizzled over each slice elevates the brookie experience, making it even more sumptuous.
- Nutty Flavored Coffee: Sipping on a cup of hazelnut or almond coffee harmonizes beautifully with the nutty essence of the brown butter, providing a robust flavor.
- Chopped Nuts: Sprinkling chopped nuts on top yields an added crunch, enhancing texture while tying in with the brookies’ nutty notes.
- Chocolate Martini: For a grown-up twist, pair the brookies with a chocolate martini, creating an elegant dessert experience that’s perfect for special occasions.
Storage Tips for Brown Butter Brookies
Room Temperature: Store your Brown Butter Brookies in an airtight container at room temperature for up to 3 days to maintain their chewy texture and flavor.
Fridge: If you’d like to keep them a bit longer, refrigerate the brookies in an airtight container for up to a week. They’ll be just as scrumptious when enjoyed chilled!
Freezer: For extended storage, wrap individual pieces tightly in plastic wrap and freeze for up to 3 months. Thaw at room temperature or warm them briefly in the microwave to enjoy that fresh-baked taste.
Reheating: To revive that gooey goodness, simply place a brookie in the microwave for 10-15 seconds before serving. The chocolate chips will become melty again, making for a delightful treat!
Make Ahead Options
These Brown Butter Brookies are perfect for busy home cooks who want to save time without sacrificing flavor! You can prepare the batter up to 24 hours in advance by mixing the wet and dry ingredients separately. Just store the wet mixture in the refrigerator and the dry mixture in a cool, dry place. This way, you’ll keep the ingredients fresh and maintain that delectable fudgy texture. When you’re ready to bake, simply combine the mixtures, fold in the chocolate chips and nuts, then spread the batter into your prepared baking dish. Bake as directed, and you’ll enjoy fresh, indulgent brookies with minimal effort!
Brown Butter Brookies Recipe FAQs
What type of butter should I use for the best flavor?
Absolutely! Using unsalted butter is ideal as it allows you to control the saltiness in your recipe. Brown the butter until it’s golden and has a nutty aroma. If you don’t have unsalted butter, you can substitute it with salted butter and reduce the added salt in the recipe to taste.
How long do these brookies last, and how should I store them?
I recommend storing your Brown Butter Brookies in an airtight container at room temperature for up to 3 days. If you want to keep them longer, you can refrigerate them for up to a week. Make sure they’re well-sealed to prevent them from drying out!
Can I freeze my Brown Butter Brookies, and if so, how?
Very! To freeze, wrap individual pieces tightly in plastic wrap or aluminum foil, and then place them in a freezer-safe bag or container to prevent freezer burn. These can be stored for up to 3 months. When you’re ready to enjoy them, thaw at room temperature or pop them in the microwave for about 10-15 seconds for that fresh-out-of-the-oven taste!
Can I make adjustments for dietary restrictions, like allergies or gluten intolerance?
Certainly! For gluten-free options, swap the all-purpose flour for a gluten-free flour blend, which works nicely in this recipe. If you need it to be egg-free, substitute each egg with ¼ cup of unsweetened applesauce. Always check the chocolate chips for allergens, as some brands may contain dairy or other allergens.
What should I do if my brookies come out too dense?
If your Brown Butter Brookies turn out too dense, it’s likely due to overmixing the batter. To achieve that perfect fudgy texture, mix the wet and dry ingredients until just combined. Additionally, ensure your baking powder and baking soda are fresh; old leavening agents can prevent the brookies from rising properly.
Brown Butter Brookies That Will Make You Forget Fast Food
Ingredients
Equipment
Method
- Preheat your oven to 350°F (175°C) and prepare a 9x13-inch baking dish.
- Melt unsalted butter in a medium saucepan over medium heat until golden brown, about 5-7 minutes.
- In a large bowl, mix granulated sugar, light brown sugar, and cooled browned butter until smooth.
- Mix in eggs one at a time and add vanilla extract until the mixture is cohesive.
- In another bowl, whisk together flour, baking powder, baking soda, salt, and cocoa powder.
- Gradually fold dry ingredients into wet mixture until just combined.
- Gently fold in chocolate chips and nuts, if using, ensuring even distribution.
- Spread the batter evenly into the prepared baking dish.
- Bake for 25-30 minutes; they’re done when a toothpick comes out with a few moist crumbs.
- Cool in the pan for 15 minutes before slicing into squares.
Leave a Reply