
As I rummaged through old family recipes, a delightful memory floated to the surface: the joy of decorating cookies every Halloween. This year, I’m thrilled to share my version of Mini Halloween Sugar Cookies, small yet mighty treats that are not only easy to make but also bring a playful spirit to your festivities. These cookies are soft and chewy, reminiscent of those nostalgic Circus Animal Cookies we loved as kids, but with a colorful twist that captures the essence of Halloween. With their vibrant hues and charming sprinkles, they’re the perfect addition to any Halloween gathering, offering both a creative outlet for decorating and a crowd-pleasing snack for all ages. So, are you ready to conjure up some spooky sweetness in your kitchen? Let’s dive into the fun!

Why Are Mini Halloween Sugar Cookies So Special?
Joyful nostalgia: These cookies evoke fond memories of childhood, making them more than just a treat.
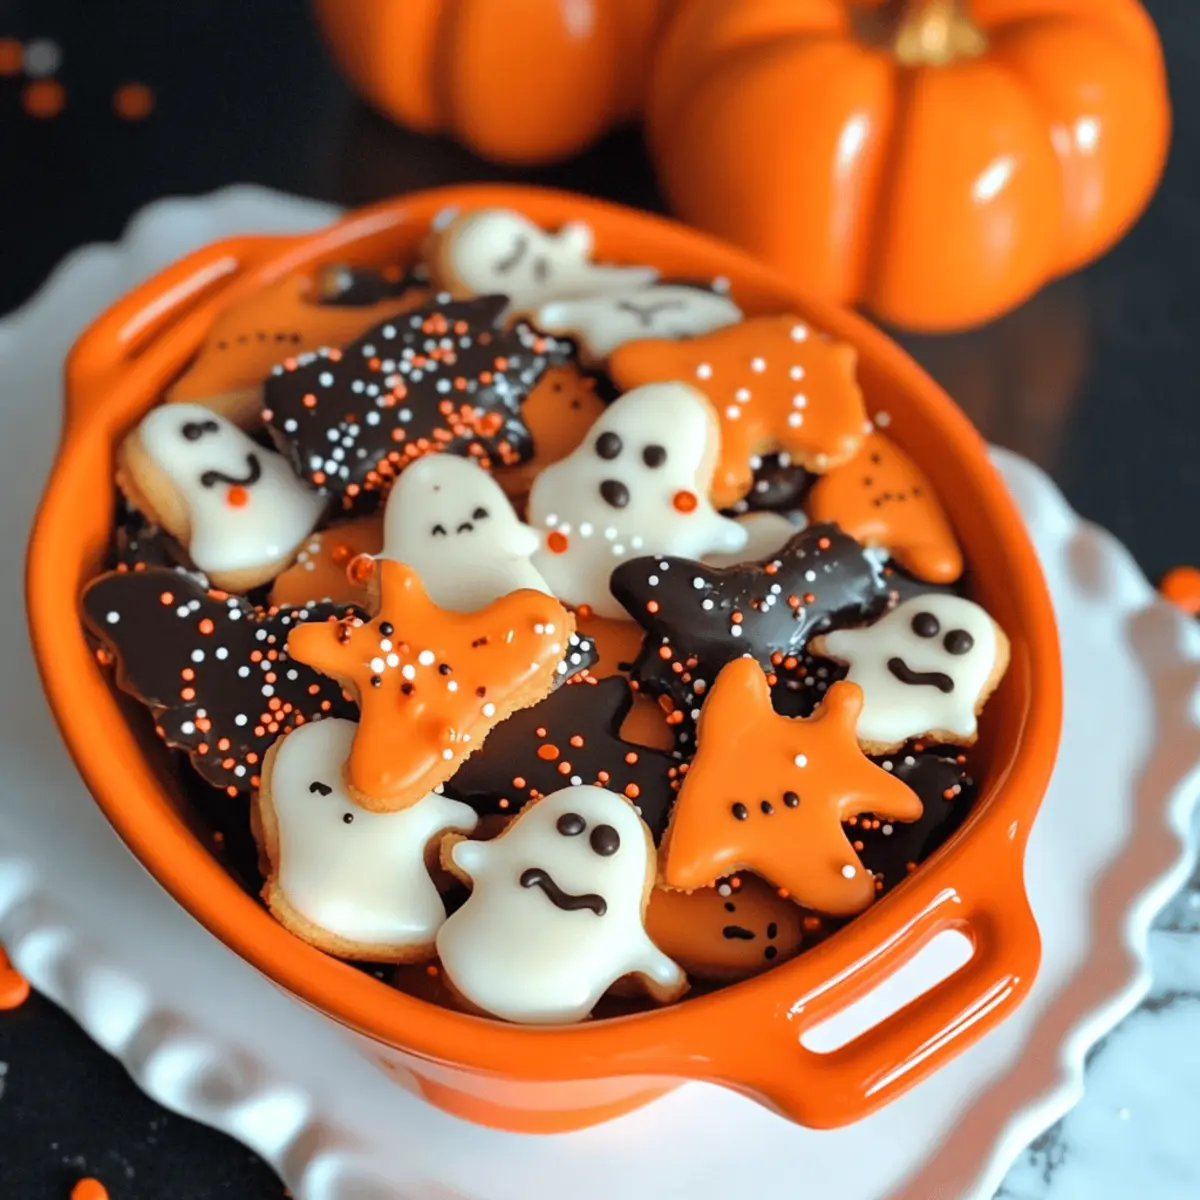
Vibrant colors: Bright orange and white candy melts give these cookies a festive touch that delights the eyes.
Easy to decorate: With simple steps, both novice bakers and seasoned chefs can unleash their creativity, just like you would with Pumpkin Cheesecake Cookies or Meringue Ghost Cookies.
Versatile shapes: Use various cookie cutters for any holiday or theme, making these cookies perfect year-round.
Perfect for sharing: Their bite-sized nature means they’re just right for parties, making them a hit among friends and family!
Mini Halloween Sugar Cookies Ingredients
Here’s everything you need to create these fun, festive treats!
For the Cookies
- All-Purpose Flour – The backbone of your cookies; feel free to substitute with gluten-free flour for a delightful alternative.
- Salt – A pinch enhances the overall flavor; it’s essential for a balanced cookie.
- Baking Powder – This vital leavening agent gives your cookies that perfect rise; avoid substituting it with baking soda.
- Butter – Adds richness and moisture; unsalted butter allows better control over the sweet and salty balance.
- Sugar – Sweetens the mix beautifully while also aiding in browning; brown sugar gives a deeper, caramel-like flavor.
- Egg (room temperature) – Acts as a binder for your ingredients; replace with a flax egg for a vegan option.
- Vanilla Extract – This classic flavor booster is essential; opt for pure vanilla extract for the best taste.
For the Decoration
- Orange Candy Melts – Perfect for that festive Halloween color; white chocolate also works well for a different look.
- White Candy Melts (or white chocolate) – Adds a lovely contrast and can be substituted as desired.
- Brown Candy Melts (or semi-sweet chocolate) – Provides decoration and added flavor; consider using semi-sweet chocolate chips for a delightful twist.
These Mini Halloween Sugar Cookies aren’t just easy to make but also a wonderful way to celebrate the spooky season!
Step‑by‑Step Instructions for Mini Halloween Sugar Cookies
Step 1: Prepare Dough
In a large mixing bowl, whisk together 2 cups of all-purpose flour, 1/2 teaspoon of salt, and 1 teaspoon of baking powder until well combined. This dry mix will form the base of your Mini Halloween Sugar Cookies, ensuring a light and fluffy texture. Set it aside while we get to the next step.
Step 2: Cream Butter and Sugar
In a separate bowl, beat 1/2 cup of room temperature butter and 3/4 cup of sugar together until the mixture is fluffy and light in color, about 2–3 minutes. Next, add in one egg and 1 teaspoon of vanilla extract, continuing to beat until everything is well incorporated. This creates a deliciously rich flavor for your cookies.
Step 3: Combine Ingredients
Gradually add the dry flour mixture to the creamed butter and sugar, mixing on low speed until a soft dough forms. This usually takes about 1–2 minutes. You should see the dough pull away from the sides of the bowl as it comes together, indicating it’s ready for chilling.
Step 4: Chill Dough
Wrap the freshly mixed cookie dough in plastic wrap and refrigerate for at least 30 minutes. Chilling the dough is crucial for maintaining shape during baking, so it won’t spread too much. Your dough will firm up nicely, making it easier to roll out when you’re ready.
Step 5: Cut Shapes
Once the dough has chilled, preheat your oven to 350°F (175°C). Lightly flour your work surface and roll out the dough to about 1/4 inch thickness. Use mini Halloween cookie cutters to cut out various shapes, placing them on a parchment-lined baking sheet. Ensure they are spaced about an inch apart to allow for spreading.
Step 6: Bake
Carefully place the baking sheet in the preheated oven and bake for 8–10 minutes. Keep a watchful eye on them; the edges should be lightly golden while the centers remain soft. Once done, remove them from the oven and let them cool on the baking sheet for a few minutes before transferring them to a wire rack.
Step 7: Cool
Allow the cookies to cool completely on the wire rack, which should take around 10–15 minutes. This cooling step prevents the cookies from becoming soggy when you begin decorating them. The result will be soft, chewy Mini Halloween Sugar Cookies ready for their delightful toppings.
Step 8: Decorate
While your cookies cool, melt your chosen candy melts in separate bowls according to the package instructions. Dip the cooled cookies into the melted candy and add your favorite sprinkles while the chocolate is still warm. This will create a festive and colorful finish that captures the spirit of Halloween!
Mini Halloween Sugar Cookies Variations & Substitutions
Feel free to get creative with these Mini Halloween Sugar Cookies to match your mood and dietary needs.
- Gluten-Free: Substitute all-purpose flour with a 1:1 gluten-free baking blend to accommodate gluten sensitivities.
- Vegan: Replace the egg with a flax egg by mixing 1 tablespoon ground flaxseed with 3 tablespoons water. It binds well and adds a slight nutty flavor.
- Nutty Twist: Add 1/2 cup of almond flour to your dough for a delightful nutty flavor, enhancing both taste and texture.
- Flavor Variations: Experiment with flavored extracts like almond or orange in place of vanilla to create a unique cookie essence that surprises the palate.
- Colorful Candy Melts: Use a rainbow of candy melts to match your theme or mood. Your cookies can reflect a cheerful palette for any festive occasion, not just Halloween!
- Spiced Delight: Add 1 teaspoon of cinnamon or pumpkin spice to the dry ingredients for a warm, comforting flavor that perfectly fits the season.
- Sprinkle Power: Try using different types of sprinkles or nonpareils for added texture and a playful look. Festive sprinkles can make these cookies the star of Halloween parties.
- Chocolate Drizzle: Elevate your cookies by drizzling melted semi-sweet chocolate over the top after they’ve been dipped in candy melts. This extra layer adds elegance and flavor.
Whether you’re inspired by the charming designs of Pumpkin Cheesecake Cookies or the spookiness of Meringue Ghost Cookies, these variations invite you to create cookies that delight and surprise. Enjoy customizing your treats and watch them become a family favorite!
Expert Tips for Mini Halloween Sugar Cookies
- Chill the Dough: Proper chilling of the dough is crucial. It helps maintain shape and prevents the cookies from spreading too much during baking.
- Don’t Overbake: Aim for a light golden edge. Overbaking can lead to dried-out cookies; remember, they will continue to firm up after cooling.
- Use Room Temperature Ingredients: Ensure your butter and egg are at room temperature for an easier, smoother dough—this will aid in creating perfect Mini Halloween Sugar Cookies.
- Experimenting with Colors: For more vibrant decorations, add a few drops of food coloring to your melted candy melts before dipping the cookies.
- Storage Made Easy: Keep cookies fresh by storing them in an airtight container at room temperature for up to a week—if they last that long!
Make Ahead Options
These Mini Halloween Sugar Cookies are perfect for busy home cooks looking to save time during the hectic holiday season! You can prepare the cookie dough up to 24 hours in advance by wrapping it tightly in plastic wrap and refrigerating. Alternatively, for even longer storage, freeze the dough for up to 3 months—just make sure to thaw it in the refrigerator overnight before rolling and cutting. If you’re in a hurry, the decorated cookies can be stored in an airtight container at room temperature for up to 1 week. When it’s time to enjoy, simply bake as directed, and you’ll have freshly made, soft cookies that taste just as delightful as if they were made that day!
What to Serve with Mini Halloween Sugar Cookies
Set the stage for a delightful Halloween gathering with these whimsical cookies that bring joy to both young and old alike.
- Warm Apple Cider: The sweet and spicy notes of apple cider complement the sweetness of the cookies, creating a cozy fall treat.
- Creamy Pumpkin Soup: This savory addition balances the sweetness, providing a comforting contrast that warms the soul.
- Caramel Dipping Sauce: A luscious dip that enhances the festive spirit, perfect for dunking those cheerful cookies for extra decadence.
- Chocolate Milk: A classic pairing that captures nostalgia, making it a deliciously fun beverage choice for cookie lovers of all ages.
- Rice Krispie Treat Pumpkins: These chewy, colorful treats create a playful contrast in texture and add to the festive allure of your dessert table.
- Ghostly Meringue Cookies: Light and airy, they make a delightful counterpart, allowing for more creativity and charm throughout your Halloween festivities.
- S’mores Dip: With graham crackers and chocolate gooeyness, this indulgent dip turns snack time into a lively Halloween experience.
- Vanilla Ice Cream: A scoop of this cool, creamy delight is the perfect finishing touch, making a whimsical combination when paired with warm cookies.
- Almond Butter: Spread this on the cookies to introduce a nutty flavor, enhancing their sweetness while adding a delicious twist.
How to Store and Freeze Mini Halloween Sugar Cookies
Room Temperature: Store the cookies in an airtight container at room temperature for up to 1 week. This keeps them fresh and chewy, perfect for snacking!
Fridge: If you want to extend their freshness, you can refrigerate the Mini Halloween Sugar Cookies for up to 2 weeks in an airtight container. Just let them sit at room temperature for a few minutes before enjoying.
Freezer: To freeze, wrap each cookie individually in plastic wrap, then place them in a freezer-safe bag or container for up to 3 months. Thaw at room temperature when you’re ready to indulge!
Reheating: If you prefer warm cookies, reheat them in the microwave for about 10-15 seconds. This revives their softness and brings back that freshly baked comfort!

Mini Halloween Sugar Cookies Recipe FAQs
How do I select ripe ingredients for my Mini Halloween Sugar Cookies?
Absolutely! For optimal results, ensure your butter is soft and at room temperature before creaming it with sugar. This will create a nice fluffy mixture. As for your egg, it should also be at room temperature to help the dough blend smoothly. Using fresh ingredients like pure vanilla extract instead of imitation will enhance the flavor of your cookies, making them a real treat!
What’s the best way to store my Mini Halloween Sugar Cookies?
Keep your cookies in an airtight container at room temperature for up to one week. This method keeps them soft and chewy, perfect for snacking! If you want to chill them, place them in the fridge for up to two weeks. Just remember to let them come back to room temperature before diving in for the full chewy experience!
Can I freeze my Mini Halloween Sugar Cookies?
Yes, you can! I recommend wrapping each cookie individually in plastic wrap and then placing them in a freezer-safe bag or container. They can be frozen for up to three months. When you’re ready to indulge, simply thaw them at room temperature or pop them in the microwave for about 10-15 seconds to warm them up!
What are some common troubleshooting tips for Mini Halloween Sugar Cookies?
If your cookies are spreading too much during baking, it might be because the dough wasn’t chilled adequately. Always remember to chill the dough for at least 30 minutes. On the other hand, if they come out too dry, it could be that they were overbaked, so keep a close eye on them as they bake—lightly golden edges are perfect!
Are Mini Halloween Sugar Cookies suitable for those with dietary restrictions?
Very! You can customize the recipe to fit dietary needs. To make them gluten-free, substitute all-purpose flour with a gluten-free blend. If you’re catering to vegans, replace the egg with a flax egg (1 tablespoon of ground flaxseed mixed with 2.5 tablespoons of water, left to sit for a few minutes until gel-like). Always double-check all ingredients for potential allergens!
How long can I keep the cookie dough before baking?
You can keep the cookie dough wrapped in plastic wrap in the refrigerator for up to 3 days before baking. If you want to prepare it ahead of time, I often freeze my dough! Just wrap it well, and it can stay in the freezer for up to three months. When you’re ready, let it thaw in the fridge overnight and continue with the recipe as normal!

Mini Halloween Sugar Cookies That Bring Festive Joy
Ingredients
Equipment
Method
- In a large mixing bowl, whisk together 2 cups of all-purpose flour, 1/2 teaspoon of salt, and 1 teaspoon of baking powder until well combined.
- In a separate bowl, beat 1/2 cup of room temperature butter and 3/4 cup of sugar together until fluffy and light in color, about 2–3 minutes. Add 1 egg and 1 teaspoon of vanilla extract, continuing to beat until well incorporated.
- Gradually add the dry flour mixture to the creamed butter and sugar, mixing on low speed until a soft dough forms, about 1–2 minutes.
- Wrap the cookie dough in plastic wrap and refrigerate for at least 30 minutes.
- Preheat your oven to 350°F (175°C). Roll out the chilled dough to about 1/4 inch thickness and cut out shapes with mini Halloween cookie cutters.
- Bake for 8–10 minutes until the edges are lightly golden and the centers remain soft. Cool on the baking sheet for a few minutes before transferring to a wire rack.
- Allow cookies to cool completely which should take around 10–15 minutes.
- Melt the candy melts in separate bowls and dip the cooled cookies into the melted candy, adding sprinkles while the chocolate is still warm.
Leave a Reply