
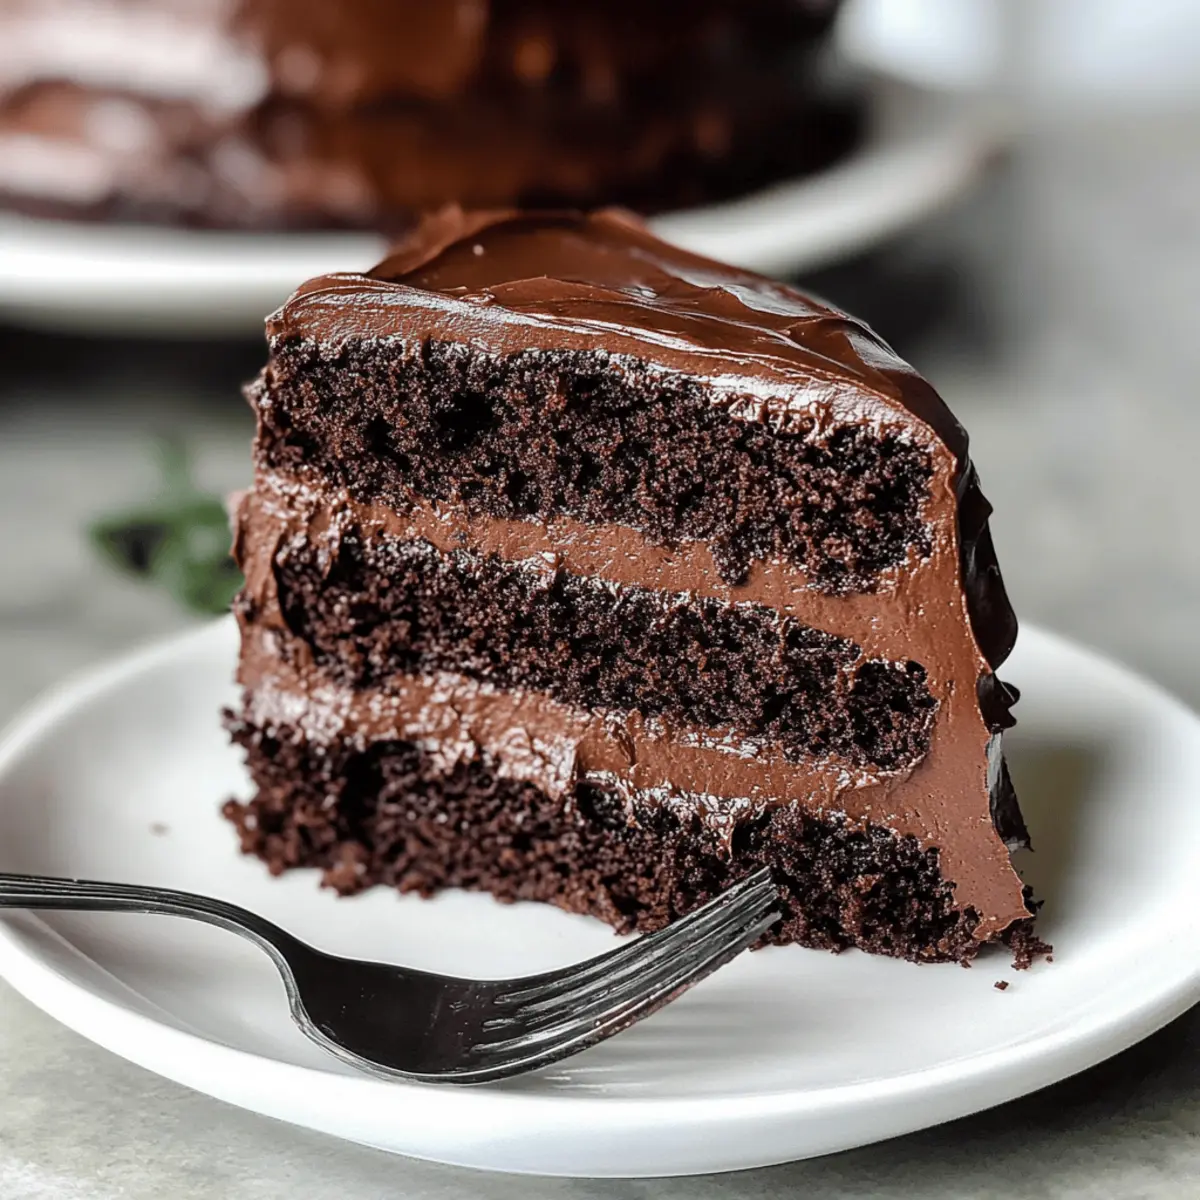
As I stood in my kitchen, the rich aroma of baking chocolate danced through the air, stirring my senses with sweet anticipation. This Ultimate Moist Chocolate Cake is my go-to recipe for transforming any ordinary day into a celebration. With its melt-in-your-mouth silky fudge frosting, this cake is not just a dessert; it’s an experience that invites everyone to indulge a little. What I love most about this recipe is its adaptability—whether you want to swap in olive oil for a twist or make it gluten-free, it’s all about enjoying delicious homemade goodness. Perfect for birthdays, holidays, or just a Wednesday that needs a sprinkle of joy, this cake is sure to impress family and friends alike. Are you ready to dive into a world of chocolatey bliss?
Why is this cake so irresistible?
Moist Chocolate Cake at its finest: Every slice of this cake delivers pure decadence, combining deep cocoa flavors with a silky, fudge frosting. Versatile and Adaptable: Whether you’re aiming for gluten-free or looking to switch out oils, this recipe has options that cater to everyone’s taste. Quick and Easy: With straightforward steps, you can whip this up in no time—perfect for those unexpected dessert cravings! Perfectly Festive: Ideal not just for birthdays, but for any gathering where you want to impress. Plus, pair it with a scoop of vanilla ice cream for an extra treat!
Moist Chocolate Cake Ingredients
For the Cake
- All-purpose flour – Adds structure; substitute with cake flour for a lighter crumb.
- Granulated sugar – Provides sweetness; using brown sugar can enhance moisture.
- Cocoa powder – Infuses rich chocolate flavor; opt for Dutch-process for deeper color.
- Baking powder – Acts as a leavening agent; ensure it’s fresh for the best rise.
- Baking soda – Offers additional leavening; can be replaced with extra baking powder if needed.
- Salt – Elevates overall flavor.
- Eggs – Bind ingredients together and add moisture; aquafaba is a great vegan swap.
- Buttermilk – Contributes moisture and acidity; mix whole milk with lemon juice as a substitute.
- Vegetable oil – Ensures moisture; can be replaced with canola or mild olive oil for variety.
- Vanilla extract – Enhances flavor depth.
- Coffee (optional) – Boosts the chocolate flavor without adding a coffee taste.
For the Frosting
- Confectioners’ sugar – Sweetens the frosting; sift for a smoother texture.
- Unsweetened cocoa powder – Adds rich chocolate flavor; use high-quality for best results.
- Butter – Creates a creamy base; let it soften for easier mixing.
- Heavy cream – Adds silkiness; adjust for desired consistency.
- Vanilla extract – Deepens flavor; use pure extract for the best taste.
Unlock the sweet, indulgent journey of creating a Moist Chocolate Cake that will melt in your mouth—perfect for any occasion!
Step‑by‑Step Instructions for Moist Chocolate Cake
Step 1: Preheat Oven and Prepare Pans
Preheat your oven to 350°F (175°C). While it heats up, generously grease and flour two round 9-inch cake pans. This step is crucial to prevent sticking and ensures your Moist Chocolate Cake releases easily after baking. Set the pans aside and get ready for the mixing!
Step 2: Mix Dry Ingredients
In a large mixing bowl, whisk together the all-purpose flour, granulated sugar, cocoa powder, baking powder, baking soda, and salt. Make sure to incorporate the dry ingredients well to avoid any lumps, as this will impact the texture of your Moist Chocolate Cake.
Step 3: Combine Wet Ingredients
In a separate medium bowl, whisk together the eggs, buttermilk, vegetable oil, and vanilla extract. If you’re including the optional coffee to enhance the flavor, add it now. Ensure everything is well blended, creating a smooth and rich wet mixture that will elevate the batter’s moisture.
Step 4: Combine Wet and Dry Mixtures
Gradually pour the wet mixture into the bowl with dry ingredients, stirring gently until just combined. Avoid overmixing; a few lumps are fine, as this will help keep your Moist Chocolate Cake tender and light. The batter should be thick and luscious, ready for the pans.
Step 5: Pour Batter into Pans
Divide the batter evenly between the prepared cake pans, smoothing the tops with a spatula for an even bake. This ensures each layer of the Moist Chocolate Cake bakes consistently, resulting in a beautiful, level cake that’s perfect for frosting later.
Step 6: Bake the Cake
Place the pans in the preheated oven and bake for about 30 minutes. Keep an eye out for the cakes to rise beautifully; they’re done when a toothpick inserted into the center comes out with a few moist crumbs attached.
Step 7: Cool the Cakes
Once baked, remove the pans from the oven and let them cool in the pans for 10 minutes. Afterward, carefully transfer the cakes to a wire rack to cool completely. This cooling step is vital before frosting your Moist Chocolate Cake to ensure the frosting doesn’t melt off.
Step 8: Frost the Cake
When the cakes are completely cool, generously spread the silky fudge frosting over the top of one layer, then place the second layer on top and frost the top and sides. This scrumptious layer of frosting elevates your Moist Chocolate Cake, turning it into a decadent dessert masterpiece.
How to Store and Freeze Moist Chocolate Cake
-
Room Temperature: Store your Moist Chocolate Cake covered at room temperature for up to 3 days. This keeps it fresh and delicious, ready for your next sweet craving.
-
Fridge: If you want to extend the life of your cake, refrigerate it for up to 1 week. Be sure to wrap it well in plastic wrap to prevent it from drying out.
-
Freezer: For longer storage, freeze layers of the cake (without frosting) in airtight containers or wrapped tightly in plastic wrap for up to 3 months. Thaw in the fridge before frosting or serving.
-
Reheating: If you prefer your cake warm, microwave individual slices for about 10-15 seconds. This brings back the melt-in-your-mouth quality of the Moist Chocolate Cake!
Expert Tips for Moist Chocolate Cake
-
Fresh Ingredients: Ensure your baking soda and baking powder are fresh for maximum rise; stale leavening agents can lead to a dense cake.
-
Mixing Technique: Avoid overmixing the batter to keep your Moist Chocolate Cake light and airy; just mix until the ingredients are combined.
-
Cooling Time: Let the cakes cool completely before frosting them. A warm cake can cause the frosting to melt, losing that silky texture.
-
Layering Frosting: Apply a thin layer of frosting between the cake layers first to trap crumbs, then finish with a thicker outer layer for a polished look.
-
Flavor Boost: Incorporate a tablespoon of espresso powder into the batter. It enhances the chocolate flavor without tasting like coffee, making each bite richer.
What to Serve with Moist Chocolate Cake
There’s nothing quite like a slice of decadent chocolate cake to evoke feelings of joy, especially when paired with delightful accompaniments.
- Whipped Cream: A light and fluffy dollop balances the cake’s richness, adding a creamy texture that enhances every bite.
- Fresh Berries: Juicy strawberries or raspberries introduce a refreshing tartness that beautifully contrasts the sweet chocolate flavor.
- Vanilla Ice Cream: The classic pairing of warm cake with cold ice cream creates a heavenly melt-in-your-mouth experience, elevating the indulgence.
- Mint Leaves: A few sprigs of fresh mint provide a pop of color and a refreshing hint, perfect for cutting through the cake’s richness.
- Espresso: A small cup of espresso complements the chocolate, intensifying its flavor and making the dessert feel even more indulgent.
- Chocolate Ganache: For the ultimate chocolate lover, drizzling extra ganache on top creates a decadent finish that’s simply irresistible.
Imagine serving your Moist Chocolate Cake with these delightful additions, turning a simple dessert into a luxurious experience that everyone will cherish!
Moist Chocolate Cake Variations
Feel free to get creative with this recipe and make it your own—there are so many delicious possibilities!
-
Gluten-Free: Swap all-purpose flour for a gluten-free blend, ensuring everyone can enjoy a slice without worry.
-
Dairy-Free: Replace buttermilk with almond milk mixed with vinegar for a silky texture, perfect for lactose intolerant friends.
-
Flavor Boost: Add espresso powder to the batter to elevate that rich chocolate flavor brilliantly—it’s a game changer!
-
Oil Swap: Use coconut oil instead of vegetable oil for a subtle tropical twist in both flavor and texture.
-
Alternative Frosting: Try an indulgent cream cheese frosting instead of chocolate to give it a tangy sweetness that complements the chocolate.
-
Extra Moisture: Incorporate apple sauce in place of half the oil for a moist cake that adds a hint of fruity flavor—so delightful!
-
Nut Crunch: Add chopped walnuts or pecans into the batter for a delightful texture contrast and added depth.
-
Heat It Up: Spice up your cake with a pinch of cayenne pepper or chili powder—just a little can bring a wonderful warmth that elevates the chocolate flavor.
Feel inspired? With these variations, you might discover a new favorite version of your Moist Chocolate Cake! And if you’re looking for other delicious dessert options, don’t forget to check out Moist Banana Bread or Chocolate Pumpkin Cupcakes. Happy baking!
Make Ahead Options
These Moist Chocolate Cake layers are perfect for meal prep enthusiasts! You can bake the cakes up to 3 days in advance; simply let them cool completely, wrap each layer tightly in plastic wrap, and refrigerate to maintain freshness. If you’re planning to serve them later, consider making the silky fudge frosting a day ahead as well—store it in an airtight container in the refrigerator, allowing it to come to room temperature before frosting. When you’re ready to serve, just layer and frost the cakes, and you’ll have a stunning dessert that tastes as though it was made fresh that day, saving you valuable time for other preparations!
Moist Chocolate Cake Recipe FAQs
What type of cocoa powder should I use for the best flavor?
I recommend using Dutch-process cocoa powder for a deeper chocolate flavor and richer hue. It elevates the overall taste of your Moist Chocolate Cake, making each bite a decadent experience.
How should I store my Moist Chocolate Cake?
To keep your cake fresh, cover it and store it at room temperature for up to 3 days. For longer storage, wrap it tightly in plastic wrap and refrigerate it for up to 1 week. If you want to keep it for longer, freeze the layers without frosting for up to 3 months.
Can I freeze the Moist Chocolate Cake?
Absolutely! To freeze, wrap each layer of cake tightly in plastic wrap or place it in an airtight container. Thaw the cake overnight in the fridge before frosting it. This ensures you maintain that irresistible moistness when you’re ready to indulge.
What if my cake doesn’t rise properly?
If your cake doesn’t rise, ensure your baking powder and baking soda are fresh; stale leavening agents can lead to a dense cake. Also, make sure to mix the batter just until combined; overmixing can deflate the batter and affect its rise.
Are there any allergy considerations with the Moist Chocolate Cake?
Yes, if you’re making this cake for someone with allergies, you can substitute eggs with aquafaba to make it vegan. For those avoiding gluten, swap all-purpose flour with a certified gluten-free flour blend. Always check for cross-contamination with allergens when purchasing ingredients.
Moist Chocolate Cake That Melts in Your Mouth Every Time
Ingredients
Equipment
Method
- Preheat your oven to 350°F (175°C) and grease and flour two 9-inch cake pans.
- In a large mixing bowl, whisk together the flour, sugar, cocoa powder, baking powder, baking soda, and salt.
- In a separate bowl, whisk the eggs, buttermilk, vegetable oil, and vanilla extract. Add coffee if using.
- Pour the wet mixture into the dry ingredients and stir until just combined.
- Divide the batter between prepared pans and smooth the tops.
- Bake for about 30 minutes or until a toothpick comes out with moist crumbs.
- Let the cakes cool in the pans for 10 minutes, then transfer to a wire rack to cool completely.
- Once cooled, frost one layer with the fudge frosting, place the second layer on top, and frost the top and sides.
Leave a Reply