
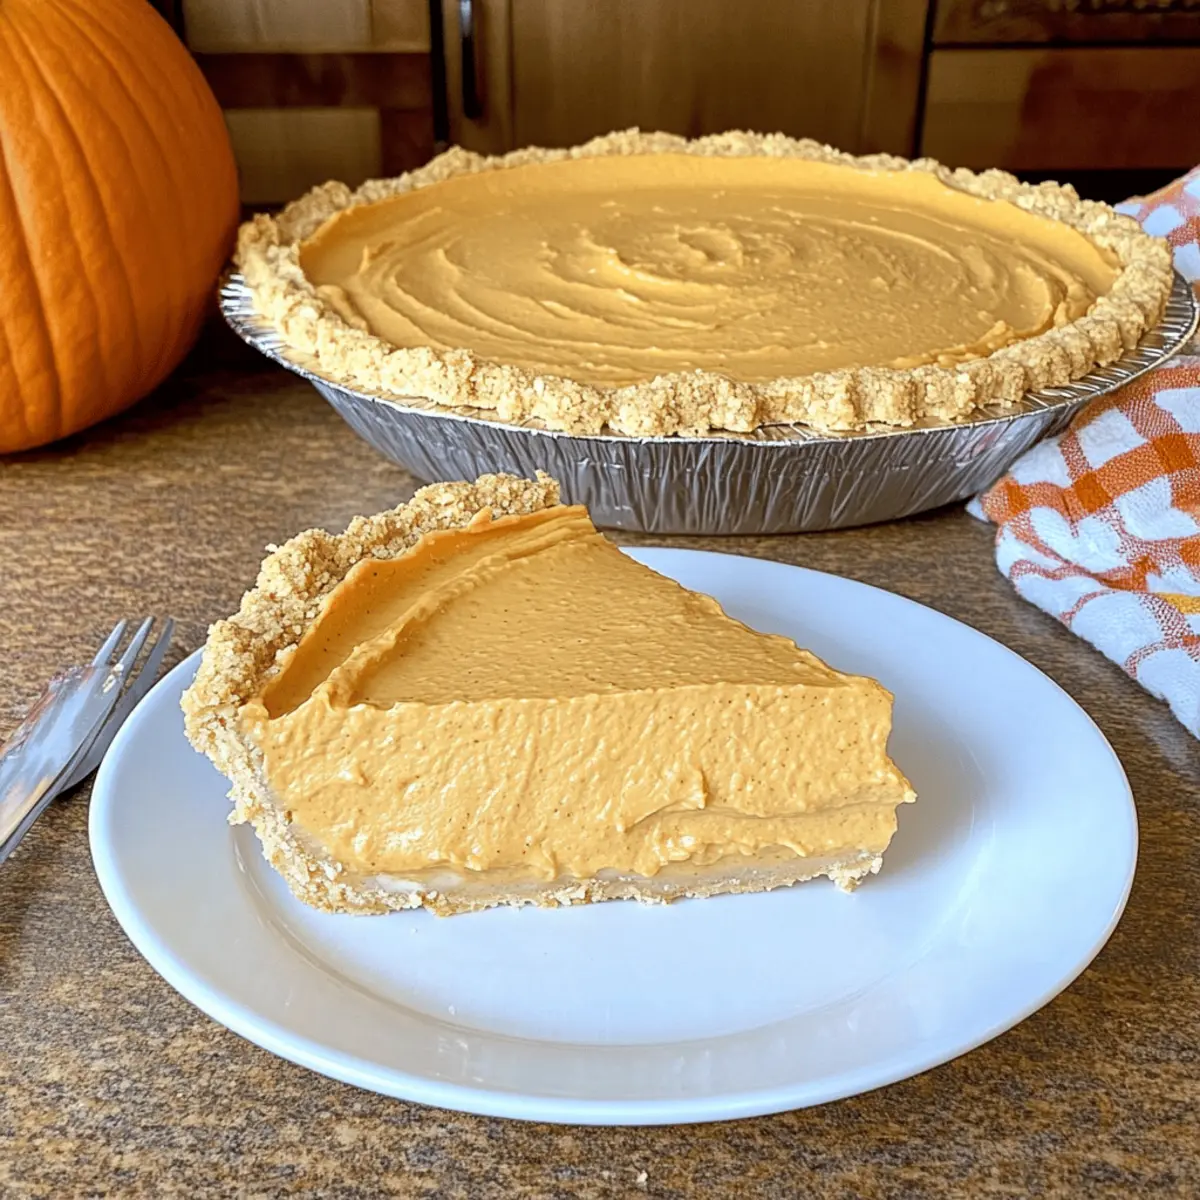
A whisper of autumn fills the air, and with it comes the delightful allure of pumpkin-flavored treats. As the leaves crunch underfoot, I can’t help but crave something easy yet indulgent to celebrate the season. Enter my No-Bake Pumpkin Pie, a dessert that beautifully captures the essence of fall with just four simple ingredients. This effortless recipe is ready in a mere five minutes—perfect for those busy holiday gatherings when you want to impress without the hassle. Imagine serving a light, fluffy pie that’s not only a crowd-pleaser but also a breeze to whip up. With its creamy texture and warm spices, it’s a festive staple for Thanksgiving and beyond. Curious about how this no-bake delight transforms into a showstopper at any gathering? Let’s dive into the recipe!
Why is No-Bake Pumpkin Pie a Must-Try?
Simplicity at its Finest: This no-bake dessert requires only four ingredients and just five minutes of your time. You’ll be amazed at how easy it is to whip up a delicious fall treat!
Fluffy, Creamy Texture: Combining pumpkin puree with vanilla pudding and Cool Whip yields a light and airy pie that melts in your mouth.
Versatile Presentation: Feel free to experiment with different crusts, such as gingersnap or pecan, to elevate this recipe and keep your taste buds excited!
Perfect Party Pleaser: Ideal for any gathering, this pie is sure to be a conversation starter. Friends and family will be asking for seconds!
For an extra seasonal touch, try pairing it with Pumpkin Cupcakes Maple for a delightful dessert spread. Enjoy this modern twist on a classic holiday favorite!
No-Bake Pumpkin Pie Ingredients
For the Filling
- Pumpkin Puree – Use 15 ounces of canned pumpkin puree (not pumpkin pie filling) for an authentic fall flavor.
- Instant Vanilla Pudding Mix – A 5-ounce box thickens the mixture and adds a touch of sweetness; avoid using prepared pudding.
- Pumpkin Pie Spice – Enhances the flavor with warm spices; if unavailable, ground cinnamon makes a great substitute.
- Cool Whip (Thawed) – Use 16 ounces for a fluffy texture; adjust to 8 ounces for a denser pie or try homemade whipped cream as an alternative.
For the Crust
- Graham Cracker Crust – The classic choice to complement the filling; experiment with a gingersnap or pecan crust for added flavor!
Get ready to enjoy this No-Bake Pumpkin Pie, where simplicity meets warmth and flavor in every delightful slice!
Step‑by‑Step Instructions for No-Bake Pumpkin Pie
Step 1: Combine the Base Ingredients
In a mixing bowl, pour in 15 ounces of pumpkin puree, ensuring it’s the pure variety, not pumpkin pie filling. Sprinkle 5 ounces of instant vanilla pudding mix and 1 teaspoon of pumpkin pie spice over the top. Using a whisk or electric mixer, blend the ingredients together for about 2-3 minutes until the mixture is smooth and well combined, displaying a rich orange color.
Step 2: Incorporate the Cool Whip
Next, gently fold in 16 ounces of thawed Cool Whip into the pumpkin mixture. Use a spatula to carefully combine the two mixtures, ensuring you don’t deflate the whipped cream. This process will take about 1-2 minutes, and you’ll notice the filling becoming airy and light. Aim for a uniform blend with a creamy texture that embodies the spirit of a No-Bake Pumpkin Pie.
Step 3: Prepare the Crust
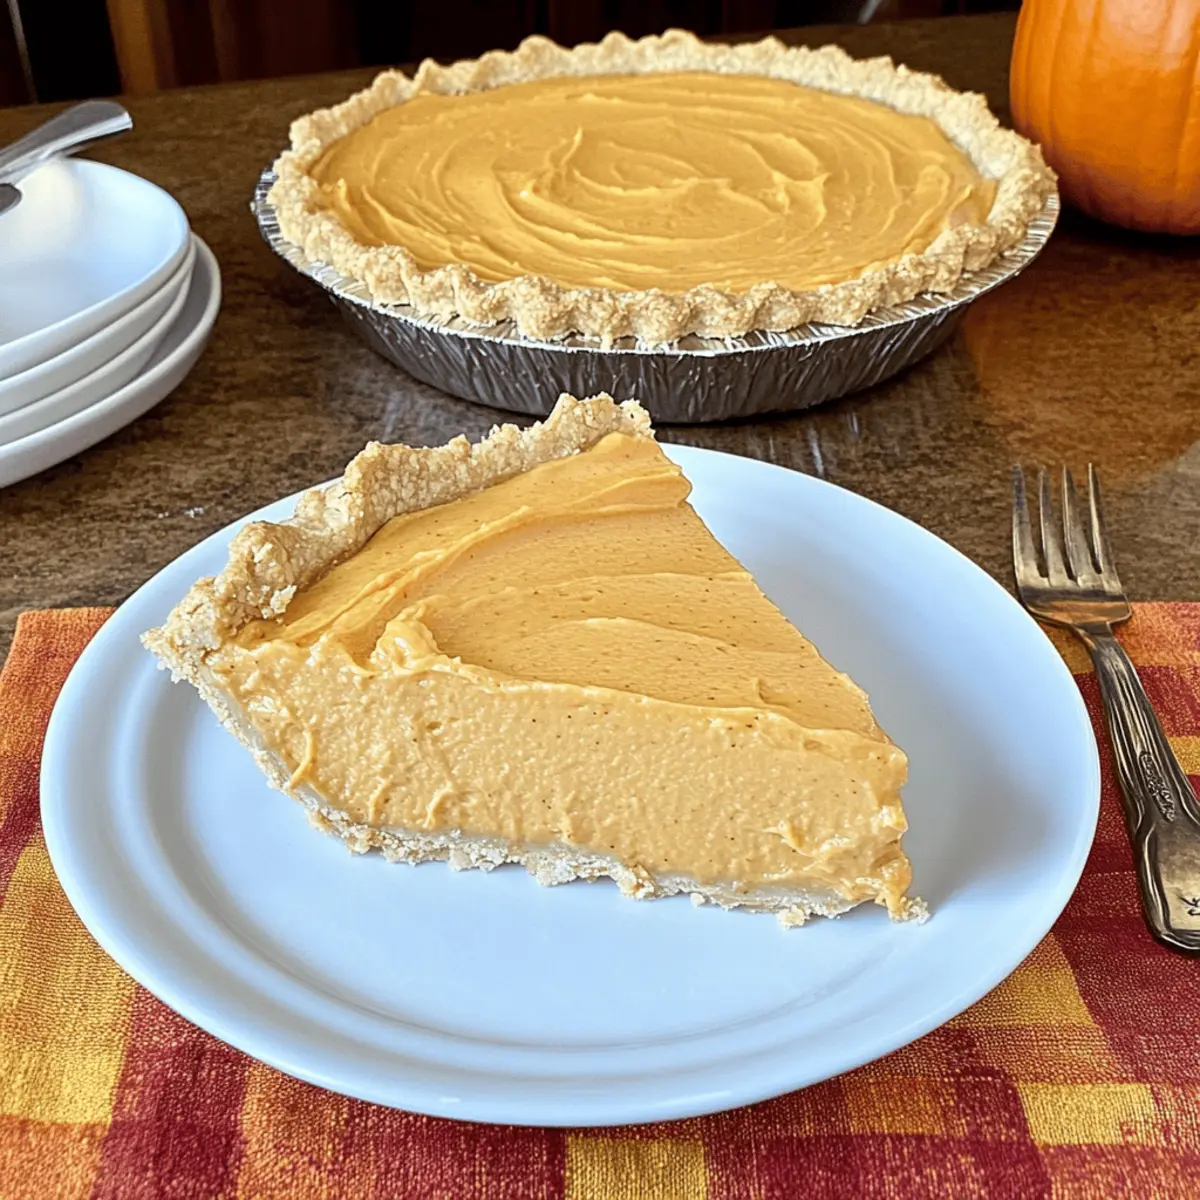
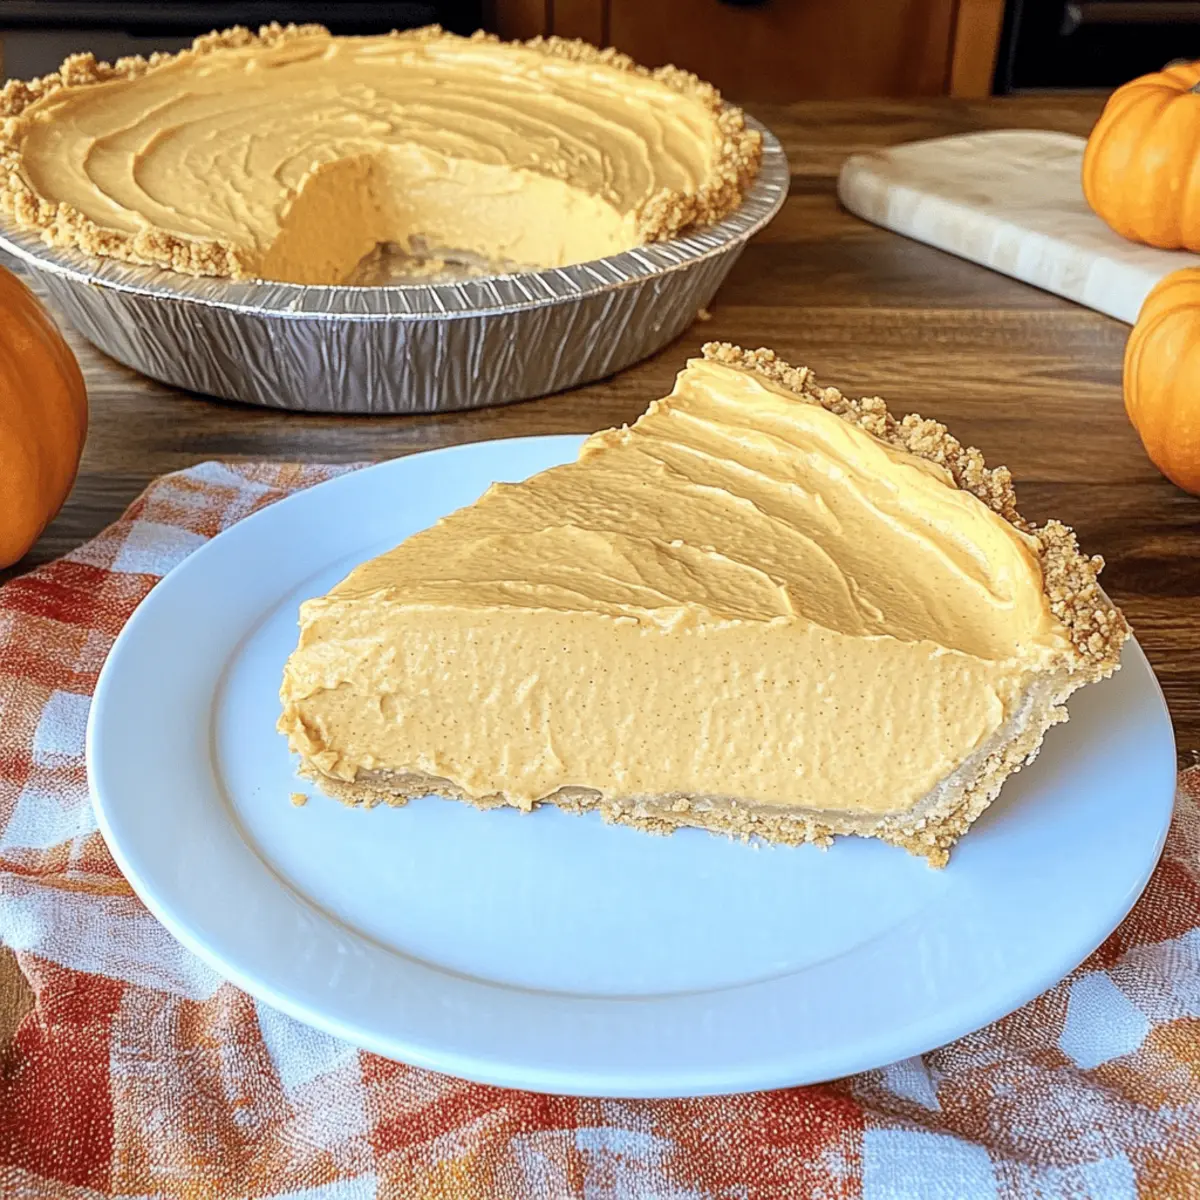
Take a pre-made graham cracker crust and set it on a flat surface or pie dish. If you prefer, you can use a gingersnap or pecan crust for a unique twist. Carefully pour the pumpkin filling into the crust, using a spatula to smooth the top for an even surface. Ensure the filling fills the crust completely, creating a beautiful presentation for your dessert.
Step 4: Chill the Pie
Cover the No-Bake Pumpkin Pie with plastic wrap or a lid and place it in the refrigerator. Let it chill for at least 2 hours to allow the flavors to meld and the filling to set properly. You’ll know it’s ready when the pie feels firm to the touch and the top has a lovely, creamy finish, waiting to impress your guests with its festive vibes.
Step 5: Serve and Enjoy
Once chilled, remove the No-Bake Pumpkin Pie from the refrigerator. For an extra touch, garnish with dollops of additional Cool Whip or a sprinkle of ground cinnamon on top. Slice into generous pieces and serve this delightful autumn dessert; be prepared for a chorus of “wow” from delighted friends and family, eager to savor every bite of your handiwork!
Expert Tips for No-Bake Pumpkin Pie
Perfect Mixing Technique: Avoid Over-Mixing: Use a spatula to gently fold in the Cool Whip to maintain that light, airy texture essential for a No-Bake Pumpkin Pie.
Ideal Chilling Time: Don’t Rush It: Chill the pie for at least 2 hours; this allows the flavors to meld and ensures a firm filling that’s easy to slice.
Crust Variations: Get Creative: Try alternative crusts like gingersnap or chocolate to complement or enhance the pumpkin flavor for a delightful twist!
Storage Secrets: Maximize Freshness: Store any leftovers in an airtight container in the refrigerator for up to 3 days to keep it creamy and delicious.
Presentation Matters: Garnish for Appeal: A sprinkle of ground cinnamon or a dollop of extra Cool Whip on top can add a beautiful finishing touch, making your pie look as good as it tastes!
What to Serve with No-Bake Pumpkin Pie
A festive dessert deserves equally delightful companions to craft the perfect autumn meal experience.
-
Cinnamon-Sugar Donuts: These warm, comforting bites add a sweet crunch and a memorable flavor contrast that pairs beautifully with pumpkin.
-
Apple Cider: Enjoy a chilled glass of spiced apple cider alongside your pie for a nostalgic taste of fall that perfectly complements pumpkin.
-
Spiced Pecans: Crunchy and sweet, spiced pecans provide a fantastic texture contrast while enhancing the flavors of the pumpkin pie with every bite.
-
Homemade Whipped Cream: A dollop of freshly whipped cream on top creates an indulgent, creamy finish, making each slice feel even more luxurious.
-
Roasted Brussels Sprouts: Their savory, earthy flavor offers a refreshing sharpness against the sweetness of the pie, balancing your holiday spread beautifully.
-
Gingersnap Cookies: Crunchy and spicy, these cookies make for a fantastic nibble when served alongside your pie, echoing its seasonal flavors.
-
Pumpkin Spice Latte: Embrace the spirit of the season with this warm, comforting drink that enhances the pumpkin flavors and wraps up your meal in cozy style.
-
Chocolate Mousse: For those looking to add a decadent twist, the rich creaminess of chocolate mousse is a delightful contrast that impresses as a side dessert.
How to Store and Freeze No-Bake Pumpkin Pie
Fridge: Keep your No-Bake Pumpkin Pie refrigerated in an airtight container for up to 3 days. This ensures it stays creamy and fresh for your next serving.
Freezer: If you need to store it longer, wrap the pie tightly in plastic wrap and aluminum foil, then freeze for up to 2 months. Thaw overnight in the fridge before serving.
Reheating: While this pie is best served chilled, if desired, you can let it sit at room temperature for about 15 minutes before serving for a softened texture.
Leftover Storage: For any leftover slices, place them in an airtight container to retain the lightness and flavor, enjoying them within the recommended fridge time.
Make Ahead Options
These No-Bake Pumpkin Pies are ideal for meal prep and can save you time during those bustling holiday gatherings! You can prepare the filling up to 24 hours in advance; simply mix together the pumpkin puree, instant vanilla pudding mix, and pumpkin pie spice, then store it in an airtight container in the refrigerator to maintain its freshness. The Cool Whip should be added right before pouring the filling into your crust, ensuring it stays light and fluffy. When you’re ready to serve, gently fold in the thawed Cool Whip, pour the mixture into your crust, and chill for at least 2 hours before serving. This way, you’ll have a show-stopping dessert ready with minimal effort and just as delicious as if you’d made it fresh!
No-Bake Pumpkin Pie Variations & Substitutions
Feel free to get creative with your No-Bake Pumpkin Pie, elevating it to match your taste preferences!
-
Dairy-Free: Substitute Cool Whip with a dairy-free whipped topping, like coconut whipped cream, for a lighter alternative.
-
Gluten-Free: Use gluten-free graham cracker crust or almond flour crust to accommodate gluten-sensitive guests. The results are just as delightful!
-
Spicy Twist: Swap pumpkin pie spice with chai spice for a warm, exotic flavor that’ll have your taste buds dancing with joy. This variation adds a whole new dimension of warmth!
-
Chocolate Lover’s Dream: Drizzle melted chocolate over the top before chilling for an indulgent touch. Pair with a scoop of vanilla ice cream for a fabulous dessert duo!
-
Sugar-Free: Use sugar-free instant vanilla pudding and a low-calorie whipped topping for a guilt-free but satisfying option that everyone can enjoy.
-
Nutty Flavor: Experiment with a pecan crust instead of graham cracker for added crunch and a nutty twist that complements the pie’s sweetness beautifully.
-
Cinnamon Roll Twist: Crumble bits of cinnamon rolls on top of the pie before chilling for a delightful finish that adds unique texture and flavor. It’s an unexpected treat for cinnamon lovers!
-
No-Crust Variation: For a lower-carb option, serve the pumpkin filling in individual cups, garnished with nuts or whipped topping to keep it easy and creamy!
Discover the joy of customization! For even more pumpkin inspiration, you might enjoy making Pumpkin Cheesecake Muffins or delightful Soft Chewy Pumpkin Cookies with Maple Frosting. Happy cooking!

No-Bake Pumpkin Pie Recipe FAQs
What type of pumpkin puree should I use for this recipe?
Absolutely! Use canned pumpkin puree that contains only pure pumpkin and not pumpkin pie filling. The latter contains added sugars and spices that could alter the intended flavor of your No-Bake Pumpkin Pie.
How should I store leftovers of the No-Bake Pumpkin Pie?
Keep any leftovers in an airtight container in the refrigerator. They’ll remain fresh for up to 3 days. Covering it properly ensures it doesn’t absorb any odors from the fridge, keeping every slice tasty.
Can I freeze No-Bake Pumpkin Pie?
Very! To freeze your pie, wrap it tightly in plastic wrap, then cover with aluminum foil to protect it from freezer burn. It can be frozen for up to 2 months. When you’re ready to enjoy it, simply thaw it in the refrigerator overnight.
What should I do if my filling is too thick?
A thick mixture can happen sometimes, especially if the pumpkin puree is denser. An excellent troubleshooting step is to mix in a tablespoon of milk or additional Cool Whip gradually while stirring. This will help achieve a lighter, fluffier consistency.
Is this recipe safe for people with allergies?
Always check your ingredient labels! This No-Bake Pumpkin Pie contains dairy due to the Cool Whip and instant pudding, which can be allergens. If you have anyone with allergies, consider using dairy-free whipped cream and pudding alternatives to create a suitable version that everyone can enjoy.
How can I tell when my pie is ready to serve after chilling?
After chilling for at least 2 hours, check your pie by gently pressing the top. It should feel firm yet creamy, and a knife inserted in the center should come out clean. If it holds its shape but has a little give, you’re perfectly set to slice and serve this delightful No-Bake Pumpkin Pie!
No-Bake Pumpkin Pie: Effortless Fall Flavor in 4 Ingredients
Ingredients
Equipment
Method
- In a mixing bowl, pour in 15 ounces of pumpkin puree, sprinkle 5 ounces of instant vanilla pudding mix and 1 teaspoon of pumpkin pie spice. Blend for about 2-3 minutes until smooth.
- Gently fold in 16 ounces of thawed Cool Whip into the pumpkin mixture. Aim for a uniform blend.
- Take a pre-made graham cracker crust, pour the pumpkin filling into it, and smooth the top.
- Cover with plastic wrap and chill for at least 2 hours.
- Remove from refrigerator, garnish as desired, slice, and serve.
Leave a Reply