
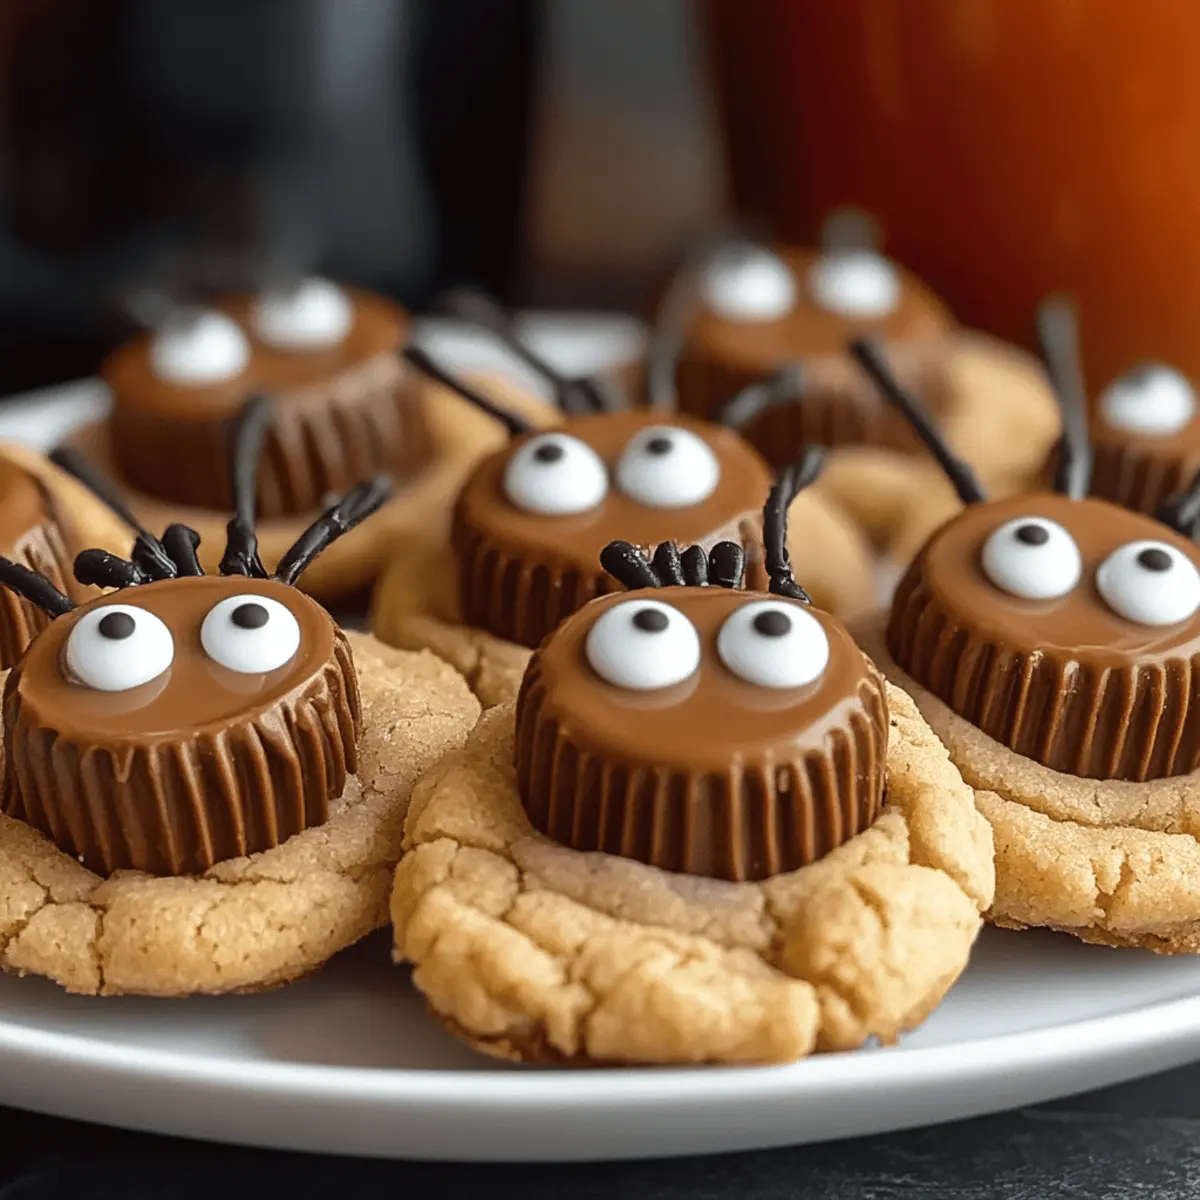
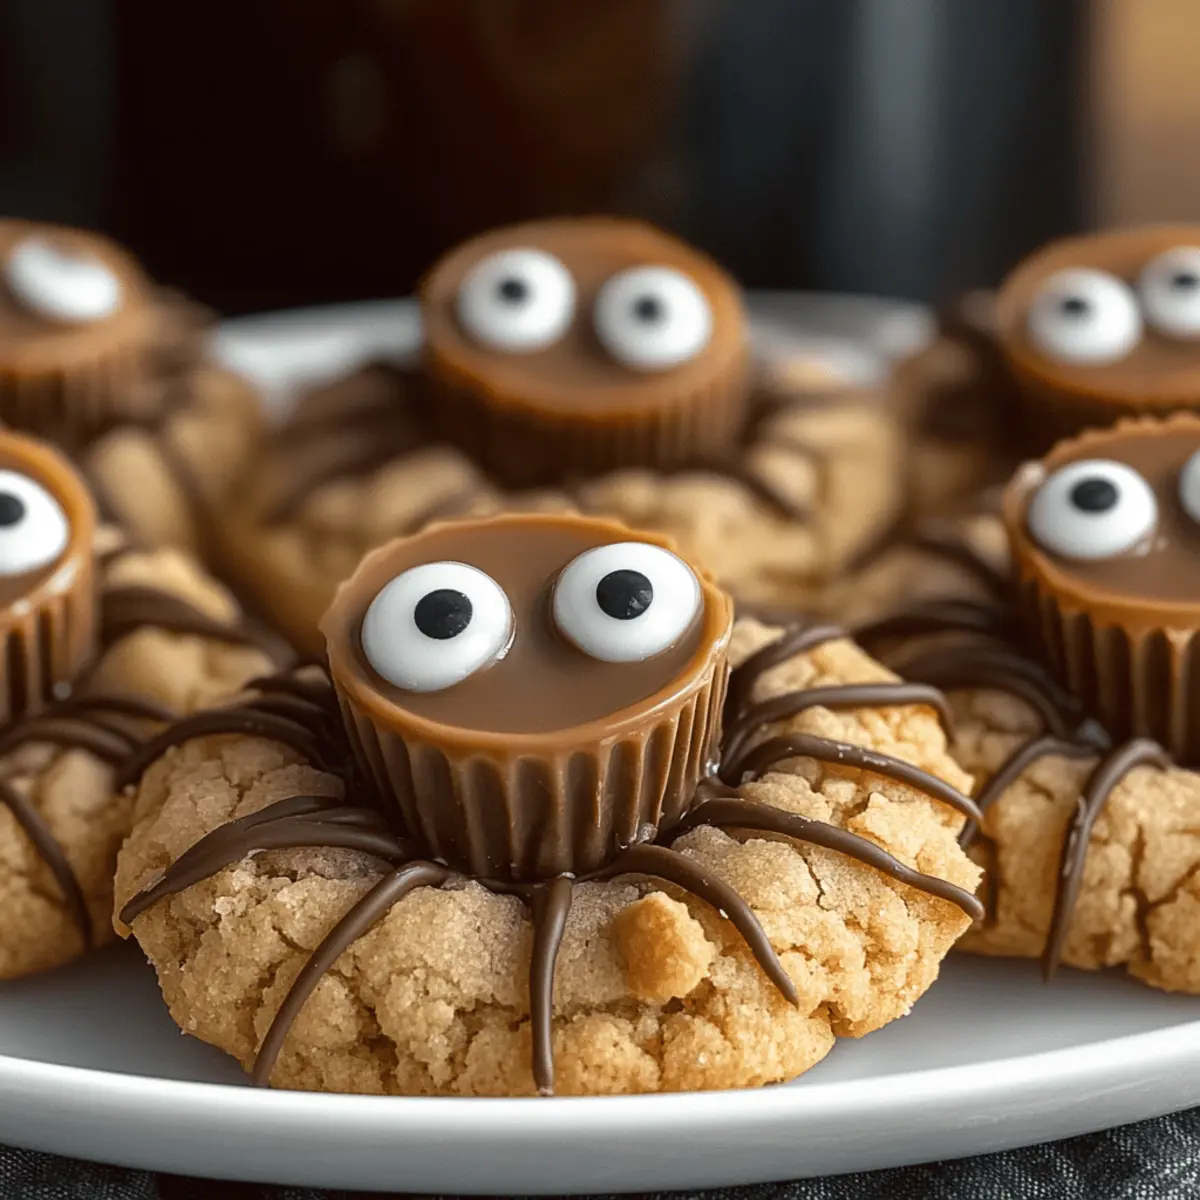
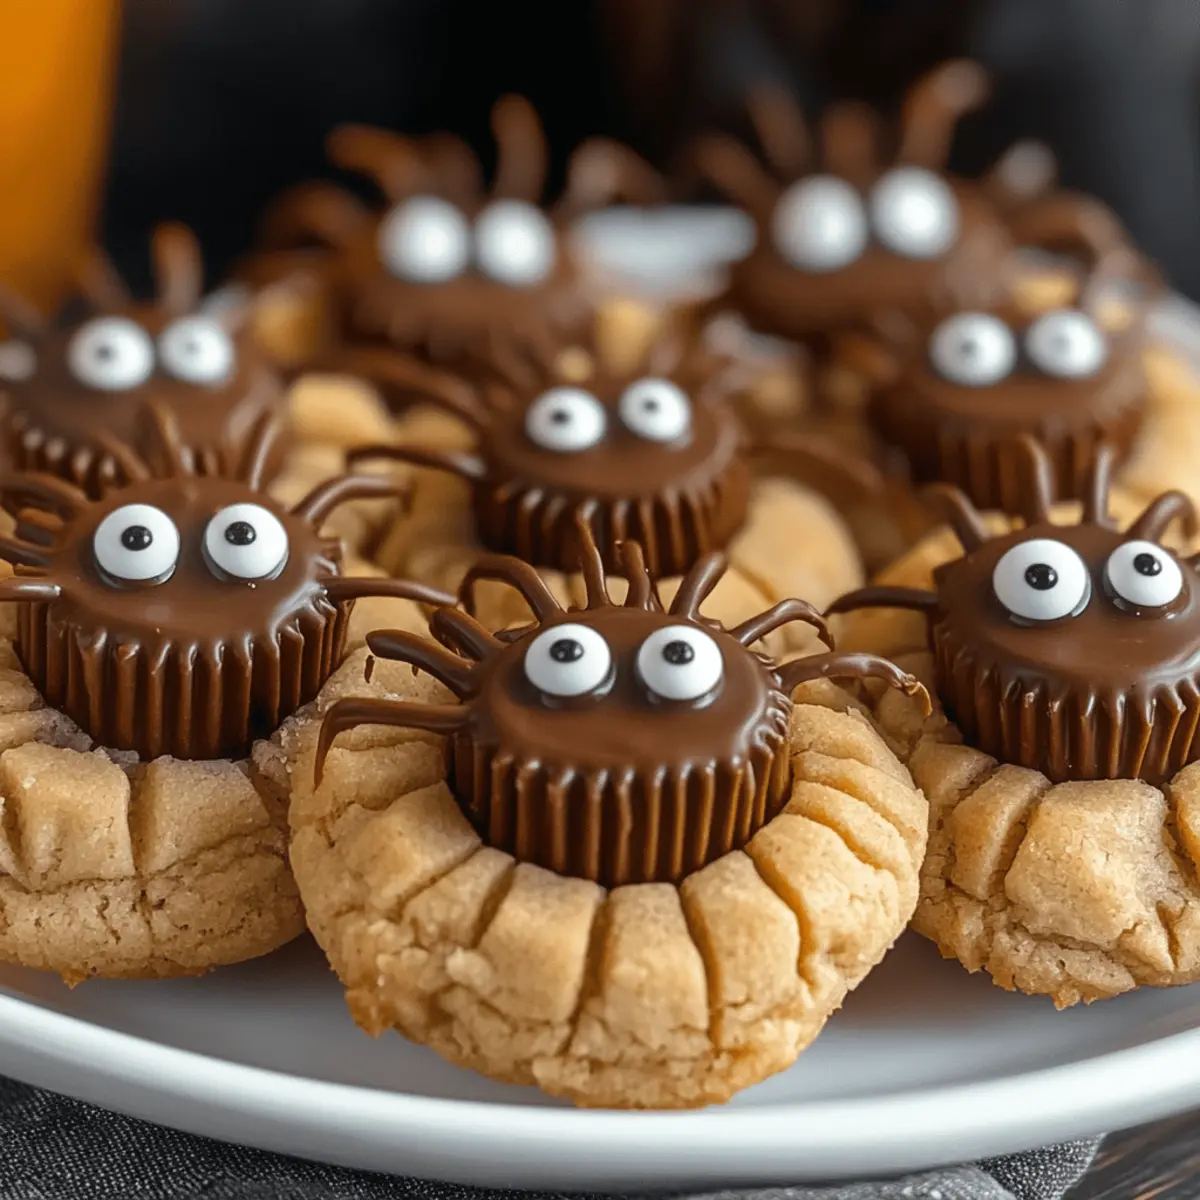
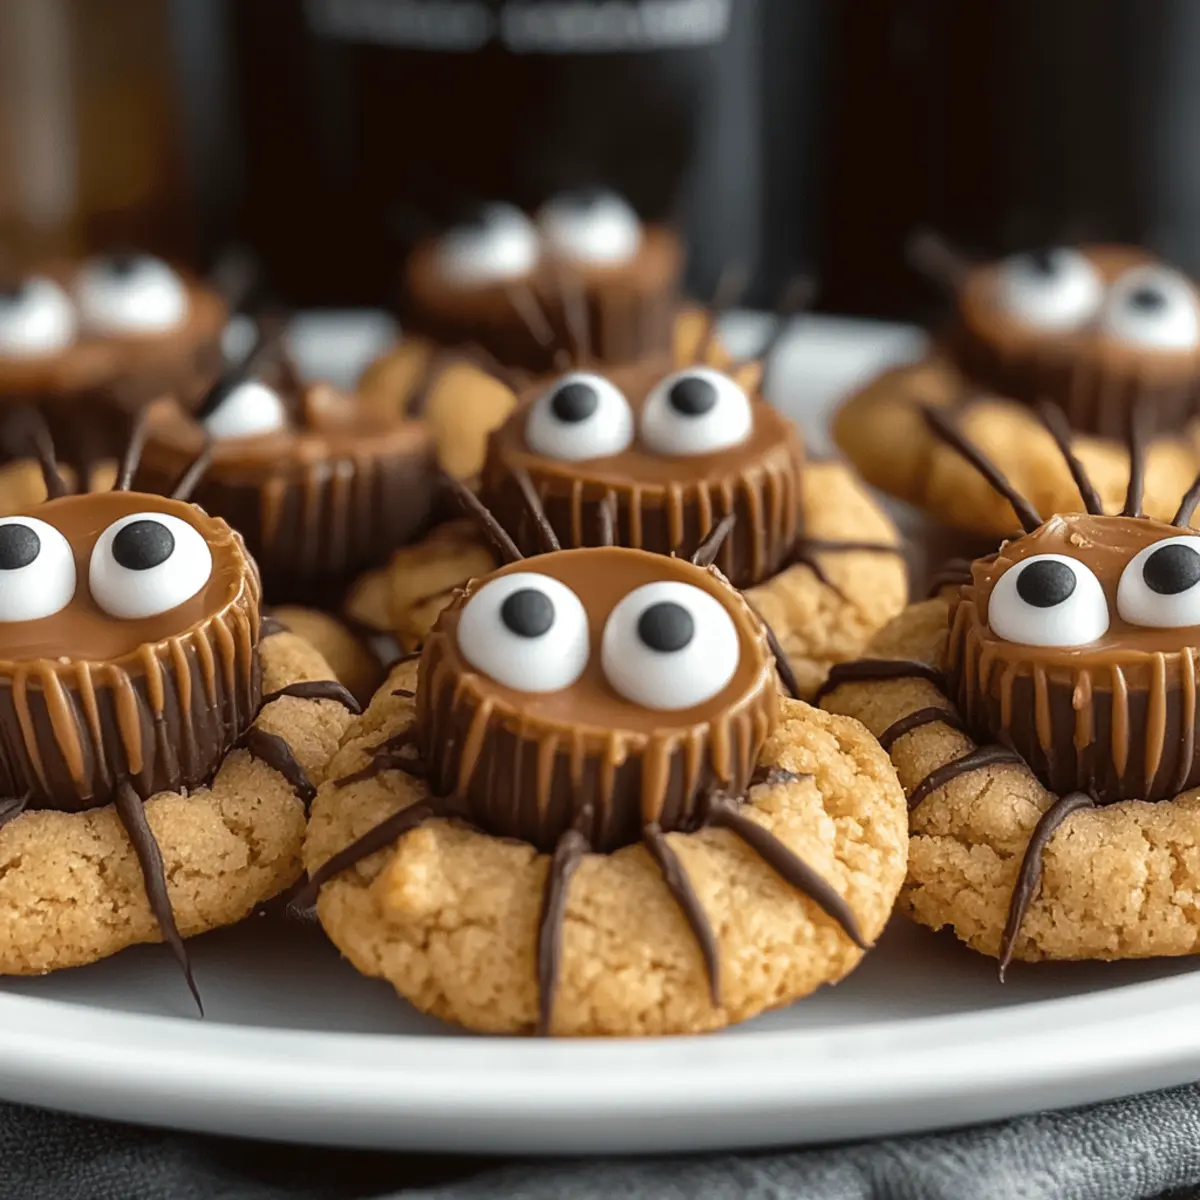
As I stood in the kitchen, the fragrance of warm peanut butter enveloping me like a cozy hug, I couldn’t help but smile at the fun about to unfold. These Peanut Butter Spider Cookies are the ultimate Halloween treat—no chilling required, and they come together in just 26 minutes! With soft, chewy cookie bases topped with Reese’s cups, melted chocolate spider legs, and whimsical candy eyes, they’re sure to be the star of your festive gatherings. Plus, they’re easy to make with just 12 simple ingredients, many of which you probably already have on hand. Whether you’re baking with kiddos or crafting a spooky surprise for your friends, these cookies make for a delightful addition to any Halloween celebration. So, are you ready to whip up some spider-themed magic in your kitchen?
Why Are These Cookies So Fun?
Unforgettable Fun: These Peanut Butter Spider Cookies are more than just treats; they’re a festive activity that you can enjoy making with your kids!
Ghoulishly Simple: With no chilling required, these cookies can be whipped up in just 26 minutes—perfect for last-minute parties!
Decadent Delight: The combination of creamy Reese’s and rich chocolate gives these cookies a flavor that will keep everyone coming back for more.
Kid-Approved: Kids love helping out in the kitchen, and decorating these cookies with candy eyes adds an extra layer of fun to baking!
Perfect for Sharing: Whether you’re hosting a Halloween gathering or just looking for a sweet snack, these cookies are sure to impress. Need more Halloween inspiration? Check out our delicious Honey Butter Skillet for a savory side!
Peanut Butter Spider Cookies Ingredients
For the Cookie Base
• Unsalted Butter – Adds richness and moisture; make sure it’s at room temperature for easy mixing.
• Brown Sugar – Provides moisture and a caramel-like sweetness; feel free to substitute with coconut sugar for a twist.
• Granulated Sugar – Sweetens the cookies and boosts texture; cane sugar can be used as an alternative.
• Creamy Peanut Butter – The main flavor component; avoid natural versions to maintain the right texture.
• Large Egg – Binds ingredients and adds moisture; a flax egg works well for a vegan option.
• Vanilla Extract – Elevates flavor; use pure vanilla for the best results.
• All-Purpose Flour – Offers structure; a gluten-free blend can be substituted in a 1:1 ratio.
• Baking Soda – Acts as a leavening agent to give the cookies a light rise.
• Baking Powder & Salt – Enhances flavor and balances sweetness.
For Rolling & Topping
• Granulated Sugar (for rolling) – Adds a sweet crust; consider colored sugar for a festive look.
• Mini Reese’s Peanut Butter Cups – Serves as the cookie decoration and offers a chocolatey surprise inside; a Halloween favorite!
• Semi-sweet Chocolate Chips – Used for crafting the spooky spider legs; dark or white chocolate can be substituted if preferred.
• Candy Eyeballs – Essential for that playful Halloween touch; they make the cookies come to life!
Whip up these Peanut Butter Spider Cookies to delight both kids and adults at your next gathering!
Step‑by‑Step Instructions for Peanut Butter Spider Cookies
Step 1: Prepare the Reese’s
Begin by unwrapping 24 mini Reese’s Peanut Butter Cups and placing them in the freezer for at least 15 minutes. This step is crucial to keep them firm when baking, ensuring they hold their shape in the cookie. While they chill, you can prepare the cookie dough, maximizing efficiency.
Step 2: Mix Wet Ingredients
In a large mixing bowl, beat together ½ cup of room temperature unsalted butter, ½ cup of brown sugar, and ½ cup of granulated sugar until the mixture is light and fluffy, about 2-3 minutes. Next, stir in 1 cup of creamy peanut butter, 1 large egg, and 1 teaspoon of vanilla extract, mixing until everything is smooth and well blended.
Step 3: Combine Dry Ingredients
In another bowl, whisk together 1 ½ cups of all-purpose flour, 1 teaspoon of baking soda, 1 teaspoon of baking powder, and ½ teaspoon of salt. Gradually add this dry mixture to the wet ingredients, stirring just until everything is combined to avoid overmixing. Your peanut butter cookie dough should be thick and ready for shaping.
Step 4: Shape Cookies
Preheat your oven to 350°F (175°C). Roll tablespoon-sized balls of the dough in granulated sugar for a sweet crust and place them on a baking sheet lined with parchment paper, spaced about 2 inches apart. This spacing is important to allow room for the cookies to spread slightly during baking.
Step 5: Bake
Place the baking sheet in the preheated oven and bake the cookies for 8 to 11 minutes until they’re lightly golden around the edges but still soft in the center. As soon as you take them out of the oven, press a frozen Reese’s into the center of each cookie while they are still warm, allowing the chocolate to melt slightly.
Step 6: Cool
Allow the cookies to cool on the baking sheet for about 15-20 minutes. This resting time helps the cookies set properly and makes them easier to transfer without breaking. After cooling, move the cookies onto a wire rack to cool completely before decorating.
Step 7: Decorate
Melt ½ cup of semi-sweet chocolate chips in a microwave-safe bowl in 20-second intervals, stirring until smooth. Use a squeeze bottle or a piping bag to draw spider legs on each cookie. Finally, attach candy eyeballs onto the melted chocolate before it sets, giving your Peanut Butter Spider Cookies their spooky, whimsical look!
Make Ahead Options
These Peanut Butter Spider Cookies are fantastic for meal prep, saving you precious time on busy days! You can prepare the cookie dough up to 24 hours in advance by mixing all the ingredients and storing the dough in an airtight container in the refrigerator. Additionally, you can unwrap the mini Reese’s and freeze them up to 3 days ahead to keep them firm during baking. When you’re ready to bake, just scoop the chilled dough onto a baking sheet, press in the frozen Reese’s, and follow the baking instructions as normal. This way, you’ll enjoy fresh cookies with minimal effort on the day you need them!
Peanut Butter Spider Cookies Variations
Customize your Peanut Butter Spider Cookies for a delightful twist that will impress and surprise your taste buds!
- Nutty Alternative: Substitute almond butter for peanut butter for a unique nutty flavor. This variation is perfect for anyone craving something a bit different!
- White Chocolate Wonder: Use white chocolate chips instead of semi-sweet for a sweeter finish. The creamy sweetness beautifully complements the peanut butter.
- Festive Sprinkles: Decorate with colored sprinkles instead of candy eyes for a pop of color! Kids will love this fun twist during the decorating process.
- Spicy Kick: Add a dash of cayenne pepper or cinnamon to the dough for a fun spicy note. This unexpected twist will intrigue adventurous eaters!
- Flourless Option: Use a flour substitute, like almond flour, to create gluten-free cookies. They may have a slightly different texture but will still taste delicious!
- Double Chocolate Delight: Mix in chocolate chips for an extra chocolatey treat. This variation is perfect for chocolate enthusiasts.
- Peanut Butter Swirl: Swirl in some additional peanut butter before baking for an extra burst of flavor. This will give your cookies an irresistible gooey center.
- Mix and Match Toppings: Try using different toppings such as mini marshmallows or crushed graham crackers instead of candy eyes. Get creative and let the kids choose their favorites!
For more great pairing ideas, check out our delicious Chewy Pumpkin Oatmeal cookies or enhance your culinary flair with our Honey Butter Skillet corn. Enjoy making these Peanut Butter Spider Cookies your own!
Expert Tips for Peanut Butter Spider Cookies
-
Chill the Reese’s: Ensure that the mini Reese’s Peanut Butter Cups are frozen before baking to maintain their shape and prevent melting into the dough.
-
Mix with Care: Avoid overmixing the dough after adding flour. This can lead to tough cookies instead of the soft, chewy texture we’re aiming for in these Peanut Butter Spider Cookies.
-
Correct Cooling Time: Let the cookies cool on the baking sheet for 15-20 minutes before moving them. This helps them set properly and prevents crumbling.
-
Use Fun Decorations: For best presentation, opt for colorful candy eyeballs as they add a festive touch and are sure to delight the kids!
-
Adjust Baking Time: Keep an eye on the cookies while baking; every oven is different. Remove them when they are just lightly golden for that perfect chewy bite.
What to Serve with Peanut Butter Spider Cookies
Embrace the spooky spirit with these delightful pairing ideas that elevate your Halloween cookie feast!
- Creamy Pumpkin Soup: A warm bowl of pumpkin soup adds a comforting fall essence, balancing the sweetness of the cookies.
- Spicy Apple Cider: Serve with a glass of hot apple cider infused with cinnamon and cloves for a cozy fall beverage.
- Chocolaty Milkshake: A rich chocolate milkshake provides a creamy contrast to the peanut butter cookies, making it a kid-favorite.
- Ghostly Marshmallow Treats: Pair with chewy marshmallow treats shaped like ghosts for a sweet and festive touch that kids will adore.
- Cheese Platter: Create a colorful cheese platter; the savory elements will contrast beautifully with the sweet cookies.
- Fruit Salad: A fresh fruit salad adds a burst of color and sweetness, cutting through the richness of the cookies.
- Gingerbread Cookies: Continue the Halloween theme with gingerbread cookies for a spiced, festive pairing that complements the peanut butter flavor.
- Vanilla Ice Cream: Top the cookies with a scoop of vanilla ice cream for an indulgent treat that brings together warmth and creaminess.
- Milk or Non-Dairy Alternative: Nothing beats a classic glass of milk! Alternate with almond or oat milk for a lighter option.
How to Store and Freeze Peanut Butter Spider Cookies
Room Temperature: Store cookies in an airtight container to keep them fresh for up to 3 days at room temperature, maintaining their soft and chewy texture.
Fridge: If you prefer, you can refrigerate the cookies to extend freshness for up to 1 week. Just ensure they are wrapped or in an airtight container to prevent them from drying out.
Freezer: For longer storage, freeze the cookies in an airtight container or freezer bag for up to 3 months. You can freeze them before or after baking; simply thaw in the fridge before consuming.
Reheating: To enjoy warm cookies, reheat in the microwave for 10-15 seconds, bringing back that fresh-baked gooeyness perfect for cozy fall nights with your Peanut Butter Spider Cookies.
Peanut Butter Spider Cookies Recipe FAQs
What type of peanut butter should I use for these cookies?
Absolutely! For these Peanut Butter Spider Cookies, I recommend using creamy peanut butter. It’s essential to avoid natural peanut butter, as it can affect the texture and consistency of your cookies. The creamy kind gives you that perfect soft and chewy base that everyone loves!
How should I store leftover cookies?
You can keep these monsters fresh by storing them in an airtight container at room temperature for up to 3 days. If you want them to last longer, feel free to refrigerate them for about 1 week, ensuring they’re wrapped up tight to prevent drying out.
Can I freeze Peanut Butter Spider Cookies?
Yes, indeed! To freeze these cookies, you have two options: you can freeze them before or after baking. For freezing before baking, shape the dough into balls, then place them on a baking sheet. Freeze until solid, then transfer them to a freezer-safe container for up to 3 months. When you’re ready to bake, add a couple of minutes to the baking time. If frozen after baking, let them cool completely first and then store them in an airtight container or freezer bag.
What if my cookies spread too much while baking?
Very! If your cookies spread too much, there are a couple of things to check. First, ensure your butter is at the right temperature; it should be softened but not melted. Overmixing the dough can also cause them to spread, so mix just until combined after adding the flour. Lastly, ensure you are chilling your mini Reese’s cups before pressing them in. If all else fails, consider baking a bit colder by turning down your oven by 25°F and keeping an eye on them!
Are these cookies safe for kids with allergies?
Absolutely! However, keep in mind that these cookies contain peanut butter and may not be suitable for kids with nut allergies. If you’re looking for alternatives, you could try almond butter for a nut-free option or even use sunbutter to cater to those with allergies. Always double-check ingredient labels for any hidden allergens!
Can I make these cookies vegan?
Yes, you can! To make these Peanut Butter Spider Cookies vegan, simply substitute the large egg with a flax egg. To do this, mix 1 tablespoon of ground flaxseeds with 2.5 tablespoons of water, let it sit for 5 minutes until it becomes gel-like, then mix it in with your wet ingredients. This simple swap allows everyone to join in on the spooky fun!
Peanut Butter Spider Cookies: A Fun Halloween Delight
Ingredients
Equipment
Method
- Begin by unwrapping 24 mini Reese's Peanut Butter Cups and placing them in the freezer for at least 15 minutes.
- In a large mixing bowl, beat together ½ cup of room temperature unsalted butter, ½ cup of brown sugar, and ½ cup of granulated sugar until light and fluffy, about 2-3 minutes.
- Stir in 1 cup of creamy peanut butter, 1 large egg, and 1 teaspoon of vanilla extract until smooth and well blended.
- In another bowl, whisk together 1 ½ cups of all-purpose flour, 1 teaspoon of baking soda, 1 teaspoon of baking powder, and ½ teaspoon of salt.
- Gradually add the dry mixture to the wet ingredients, stirring just until combined to avoid overmixing.
- Preheat your oven to 350°F (175°C). Roll tablespoon-sized balls of the dough in granulated sugar and place them on a baking sheet lined with parchment paper.
- Bake in the preheated oven for 8 to 11 minutes until lightly golden around the edges but still soft in the center.
- Press a frozen Reese's into the center of each cookie while still warm.
- Allow the cookies to cool on the baking sheet for about 15-20 minutes before transferring to a wire rack.
- Melt ½ cup of semi-sweet chocolate chips in a microwave-safe bowl, then use a squeeze bottle or piping bag to draw spider legs on each cookie.
- Attach candy eyeballs onto the melted chocolate before it sets.
Leave a Reply