
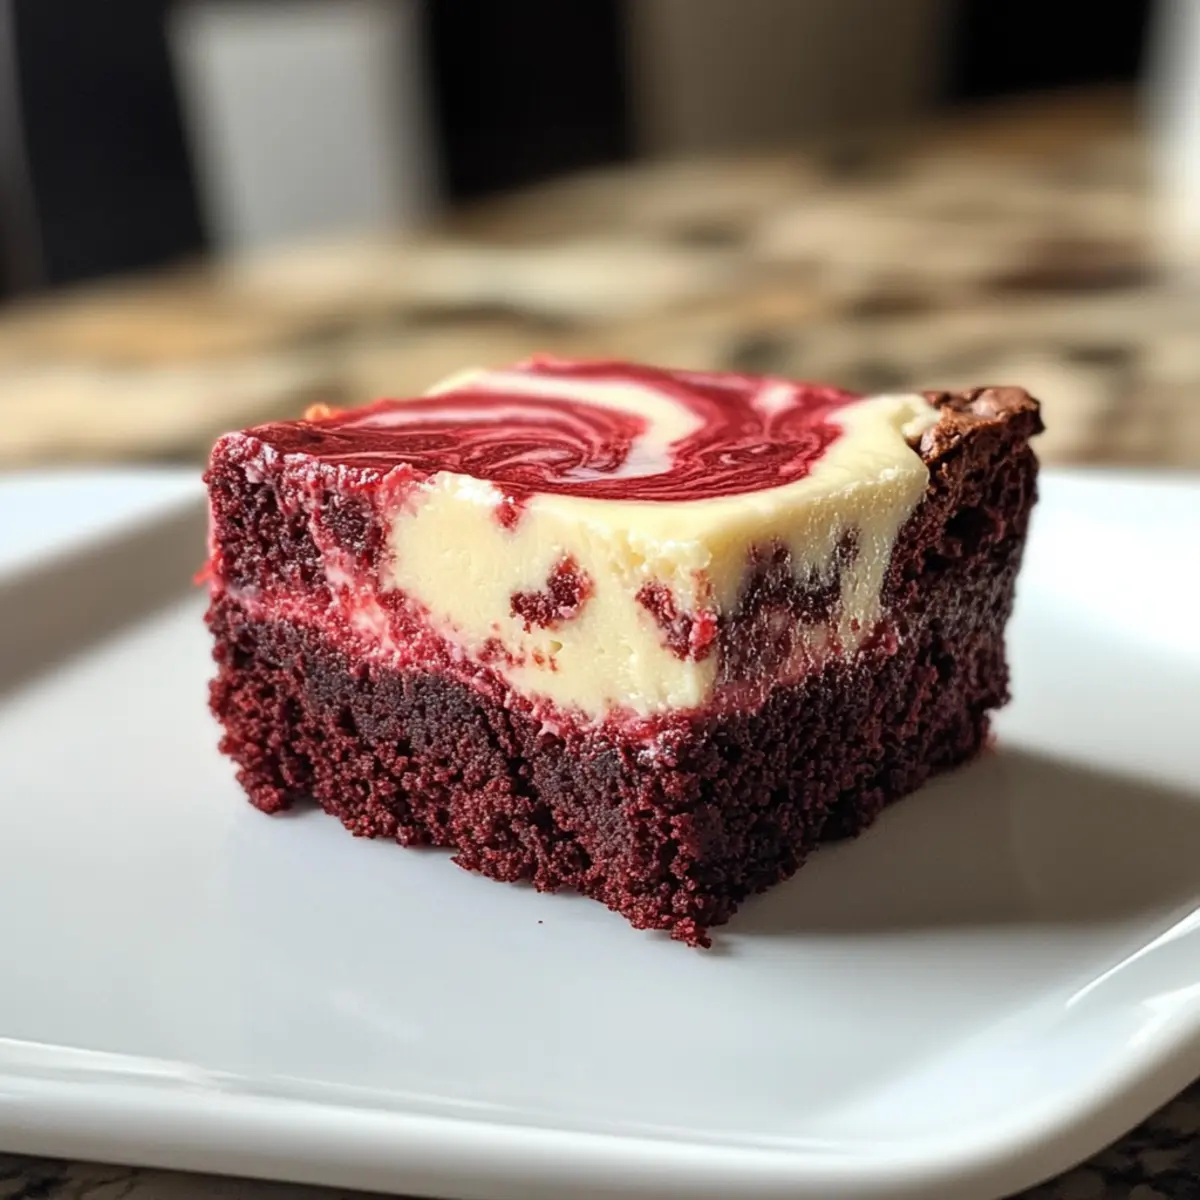
As I stood in my kitchen, the sweet scent of cocoa wafted through the air, igniting a craving for something special. That’s when the thought of Red Velvet Cheesecake Brownies struck me! These delightful treats seamlessly blend the classic richness of chocolatey red velvet with a luscious, creamy cheesecake swirl, creating a stunning dessert that’s hard to resist. Not only are they perfect for any gathering, but they’re also a fantastic way to elevate your dessert game without spending hours in the kitchen. Picture that vibrant red hue paired with a smooth white topping—these brownies are as pleasing to the eyes as they are to the taste buds. Ready to impress your friends and family with an indulgent masterpiece that’s surprisingly easy to make? Let’s dive into the recipe!
Why are Red Velvet Cheesecake Brownies irresistible?
Decadent Delight: These Red Velvet Cheesecake Brownies are creamy, fudgy, and rich, combining sweet chocolate with a tangy cheesecake twist that leaves everyone wanting more.
Visual Appeal: The striking red and white contrast not only makes them beautiful but also a standout at any gathering.
Easy Preparation: With straightforward steps, you’ll impress your guests without spending all day in the kitchen.
Versatile Options: Experiment with add-ins like white chocolate chips or serve them warm with a scoop of ice cream for extra indulgence.
Perfect for Any Occasion: Whether it’s a birthday, holiday gathering, or just because, these brownies fit any celebration perfectly.
For more delicious dessert ideas, you can also check out my Pumpkin Cheesecake Muffins or Peach Cobbler Cheesecake for more sweetness!
Red Velvet Cheesecake Brownies Ingredients
For the Brownie Batter
• Melted Butter – Adds moisture and richness; use unsalted for better control over salt levels.
• Sugar – Sweetens brownies and contributes to texture; can substitute with brown sugar for a deeper flavor.
• Eggs – Provides structure and moisture; make sure they’re at room temperature for better incorporation.
• Vanilla Extract – Enhances flavor; opt for pure vanilla extract for the best taste.
• Red Food Coloring – Gives the brownies their signature color; omit for a non-colored version but expect a different aesthetic.
• Cocoa Powder – Offers chocolate flavor; utilize unsweetened for optimal taste.
• All-Purpose Flour – Provides structure; can switch to gluten-free flour for a gluten-free variant.
• Salt – Balances sweetness and enhances overall flavor.
For the Cheesecake Layer
• Cream Cheese – Creates the cheesecake layer; ensure it’s softened for easier mixing.
• Sugar (for cheesecake) – Sweetens the cheesecake layer; adjust according to personal taste.
• Egg (for cheesecake) – Adds richness and helps set the cheesecake layer.
• Additional Flavoring (optional) – Vanilla extract for the cheesecake enhances flavor depth.
These Red Velvet Cheesecake Brownies are the perfect addition to your dessert repertoire, combining a rich, fudgy texture with a creamy, tangy cheesecake layer that’s sure to delight anyone who takes a bite!
Step‑by‑Step Instructions for Red Velvet Cheesecake Brownies
Step 1: Preheat the Oven
Begin by preheating your oven to 350°F (175°C). While the oven warms up, line an 8×8-inch baking pan with parchment paper, ensuring it hangs over the edges for easy removal later. This step is crucial for achieving the perfect texture in your Red Velvet Cheesecake Brownies.
Step 2: Prepare the Brownie Batter
In a medium bowl, whisk together the melted unsalted butter and sugar until well combined. Next, add in the eggs, pure vanilla extract, and red food coloring, mixing until smooth and creamy. This creates a vibrant base, essential for the characteristic flavor and color of your brownies.
Step 3: Combine Dry Ingredients
Sift the unsweetened cocoa powder, all-purpose flour, and salt directly into the wet mixture. Gently fold the dry ingredients into the wet mixture using a spatula until just combined; be cautious not to overmix. The batter should be thick and rich, ready to layer with the cheesecake filling.
Step 4: Make the Cheesecake Layer
In a separate bowl, beat the softened cream cheese and sugar together until creamy and smooth. Then, mix in the egg and vanilla extract, ensuring everything is fully incorporated. The cheesecake layer contributes a delightful tanginess that beautifully complements the sweetness of the brownie layer.
Step 5: Layer the Batter
Pour three-quarters of the brownie batter into the prepared baking pan, spreading it evenly. Next, carefully layer the cheesecake mixture on top, smoothing it out. Finally, drop spoonfuls of the remaining brownie batter randomly over the cheesecake layer, creating a tempting marble effect.
Step 6: Swirl the Layers
Using a knife or toothpick, gently swirl the brownie and cheesecake batters together. This technique helps to create beautiful marbling, making your Red Velvet Cheesecake Brownies visually stunning as they bake. Aim for a mixture of swirls without fully blending the layers.
Step 7: Bake the Brownies
Place the pan in the preheated oven and bake for 30-35 minutes. Keep an eye on the center; it should be set but still slightly soft, with a toothpick inserted coming out mostly clean. This ensures the brownies remain fudgy while the cheesecake layer remains creamy.
Step 8: Cool and Chill
Once baked, remove the brownies from the oven and allow them to cool completely in the pan on a wire rack. For cleaner slices, refrigerate the cooled brownies for at least 30 minutes. This chilling step enhances the flavors and makes cutting easier.
Step 9: Slice and Serve
After chilling, slice the Red Velvet Cheesecake Brownies into squares using a sharp knife. For an extra special treat, you can serve them with a dollop of whipped cream or a drizzle of chocolate sauce. Each bite promises a delightful combination of flavors and textures.
Expert Tips for Red Velvet Cheesecake Brownies
- No Overmixing: Be gentle when combining wet and dry ingredients; overmixing can lead to tough brownies.
- Accurate Flour Measurement: Spoon and level your flour rather than scooping to avoid too much flour, which can make brownies dry.
- Check for Doneness: The center should be set but slightly soft; remove them 1-2 minutes early to ensure the brownies remain fudgy and the cheesecake layer creamy.
- Cool Completely: Allow the brownies to cool completely before slicing. This helps set the cheesecake layer and makes for cleaner cuts.
- Chill for Perfection: For easier slicing, refrigerate the brownies for at least 30 minutes after cooling—it’s worth the wait!
How to Store and Freeze Red Velvet Cheesecake Brownies
Fridge: Store the brownies in an airtight container for up to 5 days to keep them fresh and delightful.
Freezer: For longer storage, wrap individual brownies tightly in plastic wrap and place them in a freezer-safe bag. They can be frozen for up to 3 months.
Reheating: When ready to enjoy, simply thaw in the fridge overnight and warm in the microwave for a few seconds for that fresh-baked taste.
Cutting: If you’ve frozen the brownies, let them sit at room temperature for about 10-15 minutes before slicing for perfectly clean edges.
Red Velvet Cheesecake Brownies Variations
Feel free to personalize these brownies with creative twists that’ll tantalize your taste buds!
- White Chocolate Chips: Stir in white chocolate chips for a sweet, creamy surprise in every bite.
- Nutty Addition: Fold in chopped walnuts or pecans for added crunch and a delightful texture contrast.
- Gluten-Free: Substitute all-purpose flour with a blend of gluten-free flour to make a fabulous gluten-free version.
- Crushed Oreos: Add crushed Oreo cookies to the brownie batter for an exciting flavor combination that your family will adore.
- Minty Fresh: Incorporate peppermint extract into the cheesecake layer for a festive hint of mint that brightens the dessert.
- Spicy Twist: Add a pinch of cayenne pepper or chili powder to the brownie batter for a surprising spicy kick.
- Chocolate Swirl: For extra decadence, mix in a swirl of cocoa fudge sauce before baking for richer chocolate flavor.
- Cheesecake Variation: Swap regular cream cheese with flavored cream cheese, like strawberry or pumpkin, for a seasonal treat.
These variations will make your brownies even more irresistible! And if you’re in the mood for more delightful desserts, don’t miss trying out my Pumpkin Cheesecake Cookies or indulge in delicious Peach Cobbler Cheesecake.
What to Serve with Red Velvet Cheesecake Brownies?
Imagine delighting in rich, fudgy brownies swirling with creamy cheesecake, then pairing them with delicious sides to create the ultimate dessert experience.
-
Vanilla Ice Cream: The smooth creaminess of vanilla ice cream is the perfect cool contrast to the warm brownies, enhancing the indulgent experience.
-
Raspberry Sauce: A drizzle of tangy raspberry sauce cuts through the richness, adding a delightful fruity note that elevates each bite.
-
Whipped Cream: Light and fluffy whipped cream provides a soothing element, balancing the sweetness and adding a cloud-like texture.
-
Chocolate Ganache: For the true chocolate lover, a glossy chocolate ganache poured over the brownies deepens the flavor and adds a sophisticated touch.
Pairing your brownies with a glass of milk or a cup of coffee offers an inviting way to complete the dessert experience; they play well with classic flavors, bringing warmth and comfort to your indulgence.
-
Chilled Coffee: The subtle bitterness of chilled coffee perfectly complements the sweetness and fudge of the brownies, creating a delightful balance.
-
Nutty Brownies: For added texture, try serving them alongside nutty brownie bites to enhance the experience with contrasting crunch and richness.
These pairing suggestions will transform your Red Velvet Cheesecake Brownies from a simple treat into an unforgettable dessert adventure!
Make Ahead Options
These Red Velvet Cheesecake Brownies are a fantastic option for meal prep, saving you time during busy weeknights or special occasions! You can prepare the brownie batter and the cheesecake layer up to 24 hours in advance. Just refrigerate the components separately in airtight containers. When you’re ready to bake, simply follow the baking instructions: layer the brownie batter and cheesecake mixture in the prepared pan, swirl them together, and bake as directed. This makes for a stress-free dessert experience while ensuring your brownies taste just as delicious! Remember, chilling the layers before mixing helps maintain their quality and texture.
Red Velvet Cheesecake Brownies Recipe FAQs
How do I know if my red food coloring is the right type?
Absolutely! When choosing red food coloring, opt for a gel or paste variety for deeper, more vibrant results. Liquid food coloring will work, but you may need to reduce the amount due to its higher water content. The goal is to have a bold red hue without overpowering the flavor; typically, about 1-2 tablespoons of gel coloring will do the trick for this recipe.
How should I store Red Velvet Cheesecake Brownies?
To keep these brownies fresh, store them in an airtight container in the refrigerator for up to 5 days. If you want to enjoy them later, they freeze beautifully! Wrap individual brownies tightly in plastic wrap, then place them in a freezer-safe bag. They can be frozen for up to 3 months. When you’re ready to indulge, let them thaw in the fridge overnight, and warm them in the microwave for that freshly baked taste.
Can I freeze Red Velvet Cheesecake Brownies?
Very much so! To freeze these decadent treats, follow these steps: Allow the brownies to cool completely. Next, wrap each brownie tightly in plastic wrap to prevent freezer burn. Place them in a labeled freezer-safe bag, being sure to remove as much air as possible. They can be stored for up to 3 months. To enjoy, thaw in the refrigerator overnight and heat in the microwave for a few seconds if desired.
What if my cheesecake layer cracks while baking?
Don’t worry, this can happen! To help prevent cracks, ensure you don’t overmix the cheesecake layer. Bake until the edges are set but the center is still slightly jiggly—this will keep the cheesecake creamy. If you do end up with a crack, a drizzle of warm chocolate sauce or a sprinkle of powdered sugar can easily cover it up when serving!
Are these brownies safe for pets?
While it may be tempting to share, it’s crucial to note that chocolate is toxic to pets, especially dogs. Keep these Red Velvet Cheesecake Brownies out of their reach, as all chocolate products can cause serious health issues for pets.
Can I modify the recipe for dietary restrictions?
Absolutely! For a gluten-free version, simply substitute all-purpose flour with a gluten-free flour blend. If you’re looking to reduce sugar, consider using a sugar substitute like erythritol or monk fruit sweetener in the brownie and cheesecake layers. Just be sure to check that it’s safe for your dietary needs!
Irresistible Red Velvet Cheesecake Brownies to Delight Your Senses
Ingredients
Equipment
Method
- Preheat your oven to 350°F (175°C) and line an 8x8-inch baking pan with parchment paper.
- In a medium bowl, whisk together melted unsalted butter and sugar until combined.
- Add eggs, pure vanilla extract, and red food coloring, mixing until smooth.
- Sift cocoa powder, all-purpose flour, and salt into the wet mixture, folding gently until combined.
- In a separate bowl, beat softened cream cheese and sugar until creamy; mix in the egg and vanilla.
- Pour three-quarters of the brownie batter into the baking pan, layer cheesecake mixture on top, and add remaining brownie batter in spoonfuls.
- Gently swirl the batters together using a knife or toothpick for marbling.
- Bake for 30-35 minutes, checking for doneness with a toothpick.
- Allow the brownies to cool completely in the pan on a wire rack before refrigerating for at least 30 minutes.
- Slice and serve with optional whipped cream or chocolate sauce.
Leave a Reply