
As I sifted through my pantry, a sudden inspiration struck: why not whip up a batch of 4-Ingredient Chocolate Oat Cookies? In just under 30 minutes, you can indulge in these gluten-free delights that not only satisfy your sweet tooth but also transform your snacking experience. With their chewy texture and the rich taste of chocolate, these cookies make for a perfect quick treat any time of the day. Best of all, they require no baking, making cleanup a breeze while keeping your kitchen cool. Are you ready to elevate your dessert game with these simple yet delectable cookies?
Why Are These Cookies a Game-Changer?
Simplicity is at the heart of this recipe, requiring just four ingredients to create blissful cookies in no time. Gluten-Free Delight: Perfect for those with dietary restrictions, everyone can enjoy these tasty treats. No-Bake Convenience means less time in the kitchen and more time savoring your creations. Pair them with a scoop of ice cream for an indulgent dessert or enjoy them alongside a cozy cup of coffee as an afternoon pick-me-up. For more quick and satisfying meals, check out these Garlic Butter Beef bites or the Beef Pepper Rice.
Chocolate Oat Cookie Ingredients
• Simple and delicious essentials await!
For the Cookies
- Rolled Oats – Provides structure and chewiness; substitute with quick oats for a finer texture.
- Nut Butter (e.g., almond, peanut) – Adds creaminess and healthy fats; sunflower seed butter is a great nut-free alternative.
- Honey or Maple Syrup – Acts as a natural sweetener; use agave syrup for a vegan option.
- Cocoa Powder – Adds rich chocolate flavor; swap with carob powder for a caffeine-free variant.
Optional Add-ins
- Dark Chocolate Chips – For an extra chocolatey bite, fold in a handful for more indulgence!
- Dried Fruits or Nuts – Toss in cranberries or chopped nuts for added texture and flavor.
Crafting these 4-ingredient chocolate oat cookies is not just a culinary joy but a way to transform your well-deserved snack moments! Enjoy the bliss.
Step-by-Step Instructions for 4-Ingredient Chocolate Oat Cookies
Step 1: Preheat the Oven
Begin by preheating your oven to 350°F (175°C). This ensures that the temperature is just right for baking your 4-ingredient chocolate oat cookies, creating a beautifully crispy edge while keeping the center chewy. While the oven heats, gather all your ingredients and prepare a baking sheet lined with parchment paper, making cleanup a breeze.
Step 2: Mix the Ingredients
In a large mixing bowl, combine the rolled oats, nut butter, honey or maple syrup, and cocoa powder. Use a sturdy spatula or spoon to mix everything together until well combined and smooth, allowing the nut butter to coat the oats thoroughly. The mixture should be sticky and hold together slightly, which is essential for forming cookie mounds later.
Step 3: Form the Cookies
Using a tablespoon or a cookie scoop, scoop the mixture onto the prepared baking sheet, creating small mounds spaced about 2 inches apart. This allows each cookie to spread slightly during baking. Aim for uniform-sized mounds for even baking, making sure they are all roughly the same size for consistent texture throughout your batch of chocolate oat cookies.
Step 4: Bake the Cookies
Carefully place the baking sheet in the preheated oven and bake the cookies for 10-12 minutes. Keep an eye on them and look for the edges to become firm while the center remains soft but set. The cookies should appear slightly puffed and darkened, giving off a delightful chocolate aroma that fills your kitchen.
Step 5: Cool and Enjoy
Once baked, remove the cookies from the oven and allow them to cool on the baking sheet for about 5 minutes. This resting time lets them firm up before transferring them to a wire rack. After a few minutes, move the cookies to the rack to cool completely, enjoying the irresistible scent of homemade 4-ingredient chocolate oat cookies wafting through the air.
Storage Tips for Chocolate Oat Cookies
Room Temperature: Store cookies in an airtight container at room temperature for up to 5 days to maintain their chewy texture and delicious taste.
Fridge: For longer freshness, keep them in the fridge in an airtight container for up to 1 week; just let them come to room temperature before enjoying.
Freezer: For extended preservation, freeze the cookies for up to 3 months. Layer between parchment paper in a freezer-safe bag to prevent sticking.
Reheating: If desired, reheat in the microwave for a few seconds to revive their freshness or eat them straight from the freezer for a delightful treat! Enjoy your chocolate oat cookies anytime.
Make Ahead Options
These 4-Ingredient Chocolate Oat Cookies are perfect for meal prep enthusiasts looking to save time during those busy weeknights! You can mix the dough up to 24 hours in advance, storing it in an airtight container in the refrigerator. This ensures that your cookies retain their freshness and texture. For longer storage, after baking, let the cookies cool completely and then freeze them for up to 3 months in a freezer-safe bag. When you’re ready to enjoy, simply thaw at room temperature for a couple of hours or pop them in the microwave for a few seconds for that fresh-from-the-oven taste. By prepping ahead, you’ll have delicious, wholesome treats ready to go whenever the craving strikes!
What to Serve with 4-Ingredient Chocolate Oat Cookies?
Indulge in delightful pairings that enhance the chocolatey goodness of your homemade cookies, turning sweet moments into special memories.
-
Creamy Vanilla Ice Cream: The coolness of ice cream beautifully contrasts the warm cookies’ texture, creating a blissful treat.
-
Fresh Berries: Juicy strawberries or blueberries add a refreshing tartness that perfectly complements the rich chocolate flavor.
-
Nutty Granola: A sprinkle of granola adds a satisfying crunch, enhancing the chewiness of the cookies while providing extra fiber and flavor.
-
Whipped Cream Topping: Fluffy whipped cream drizzled with chocolate sauce transforms your cookies into an elegant dessert that feels indulgent yet simple.
-
Iced Chocolate Coffee: Enjoy a cold coffee with a hint of chocolate to accentuate the rich cocoa notes of your cookies—perfect for any time of day.
-
Chilled Almond Milk: The subtle nuttiness of almond milk pairs beautifully, offering a light and refreshing sip alongside your treat.
-
Homemade Raspberry Sauce: Drizzle warm cookies with tart raspberry sauce for a beautiful color contrast and a zesty flavor punch that elevates your dessert experience.
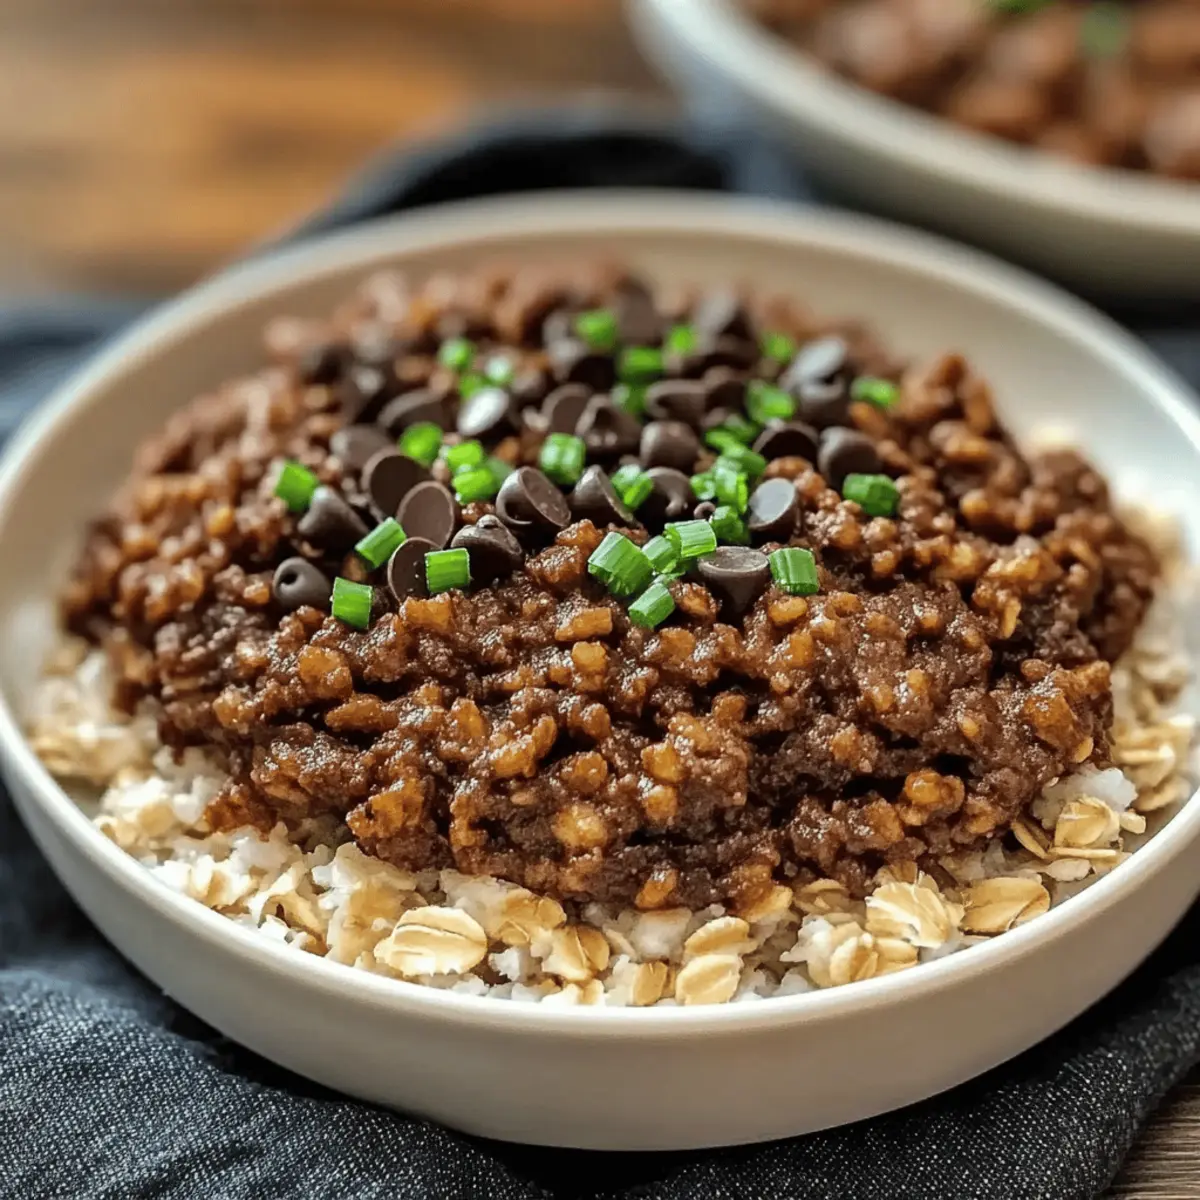
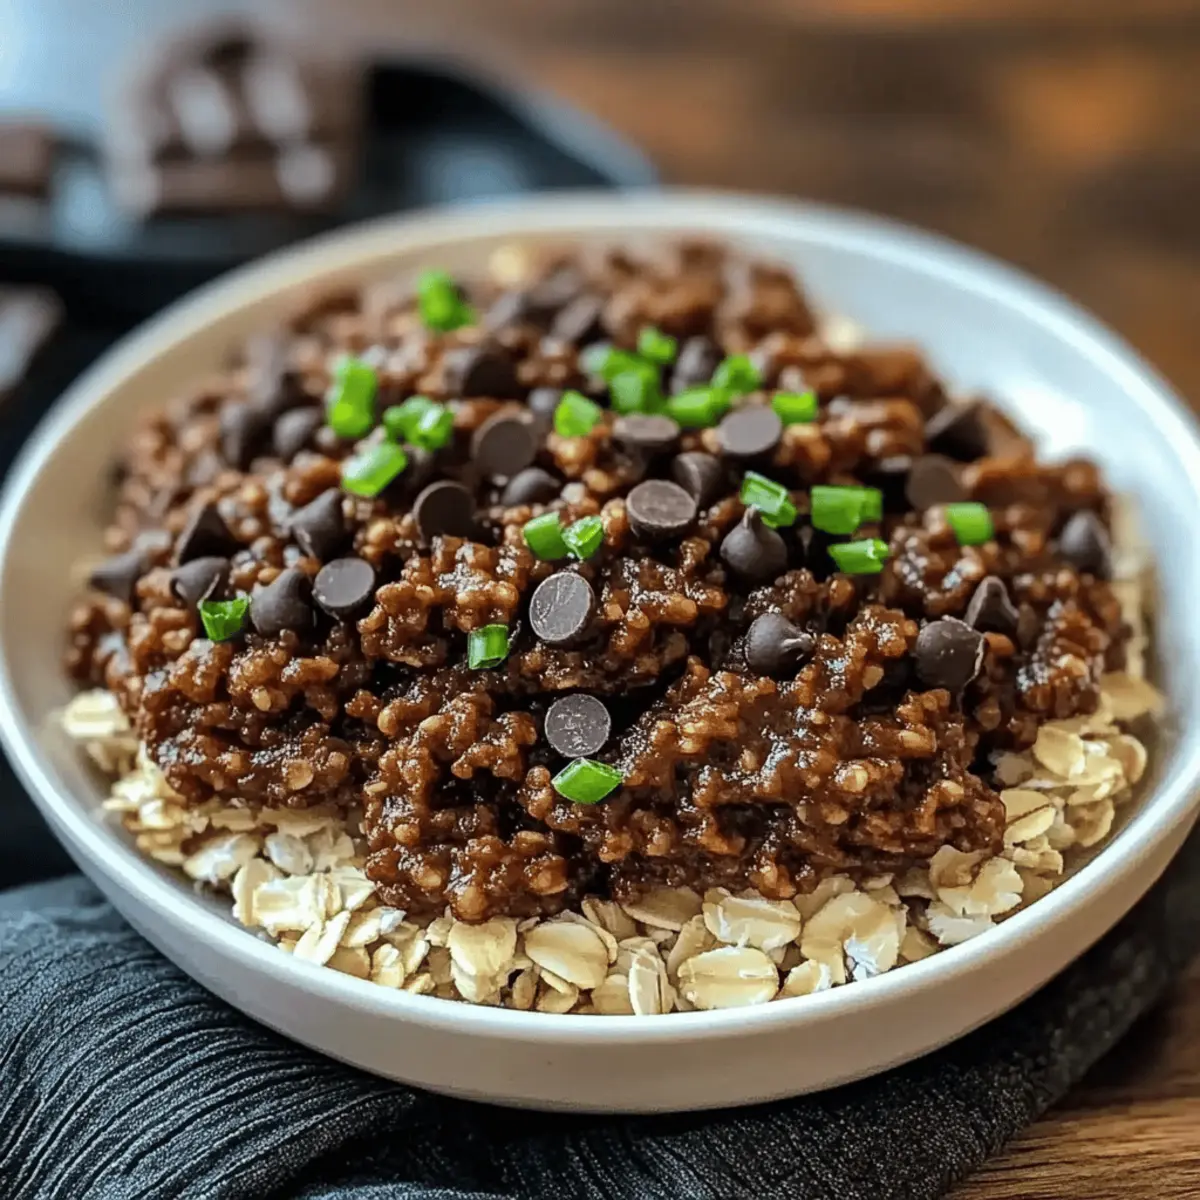
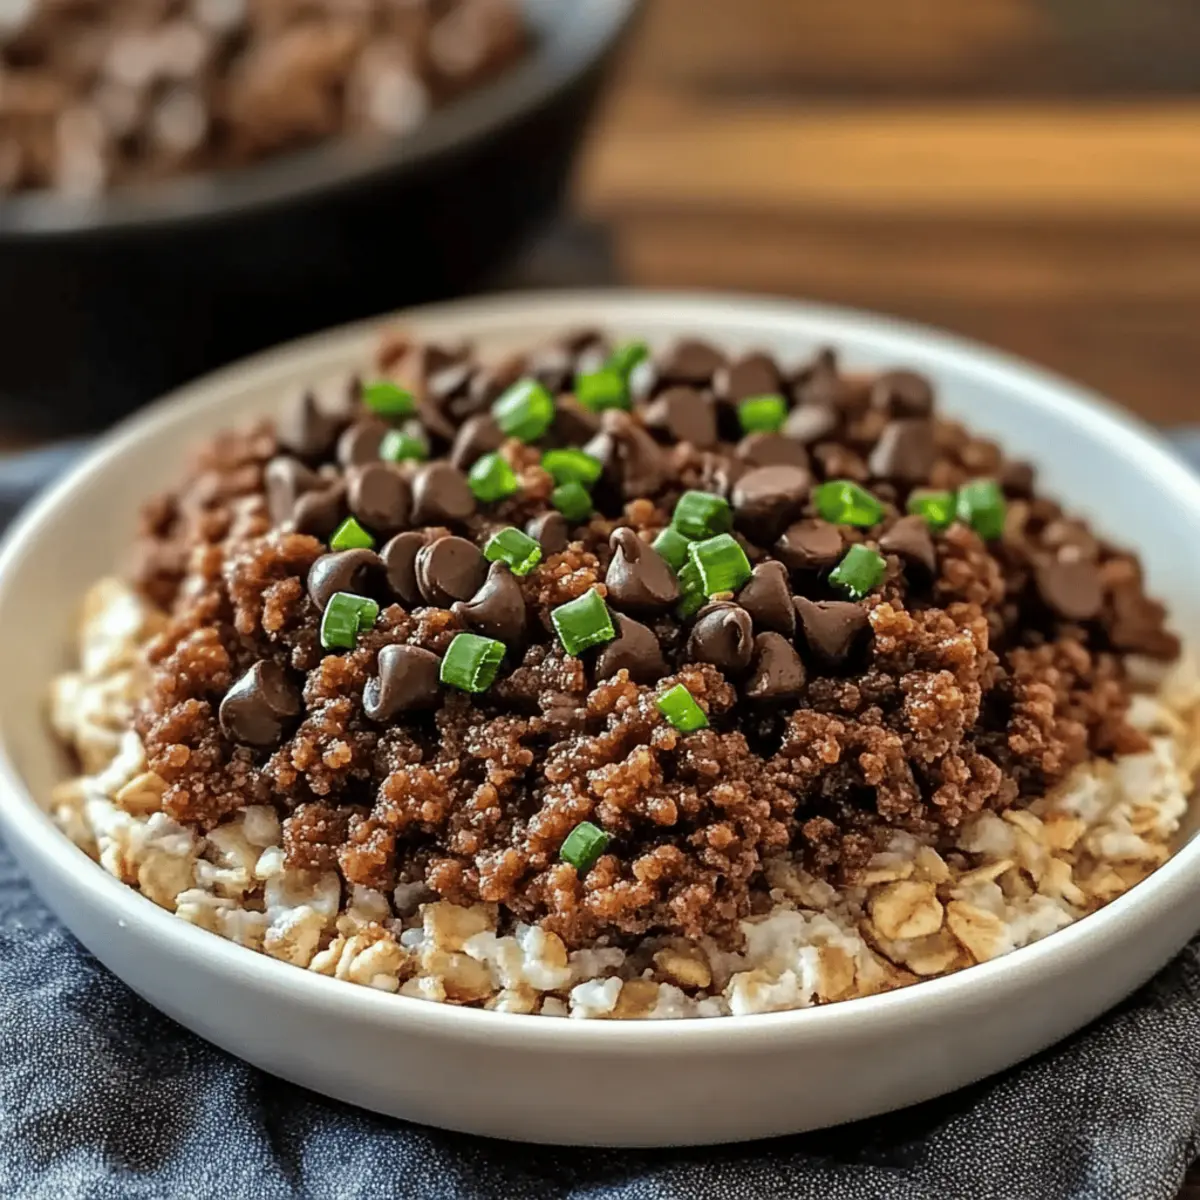
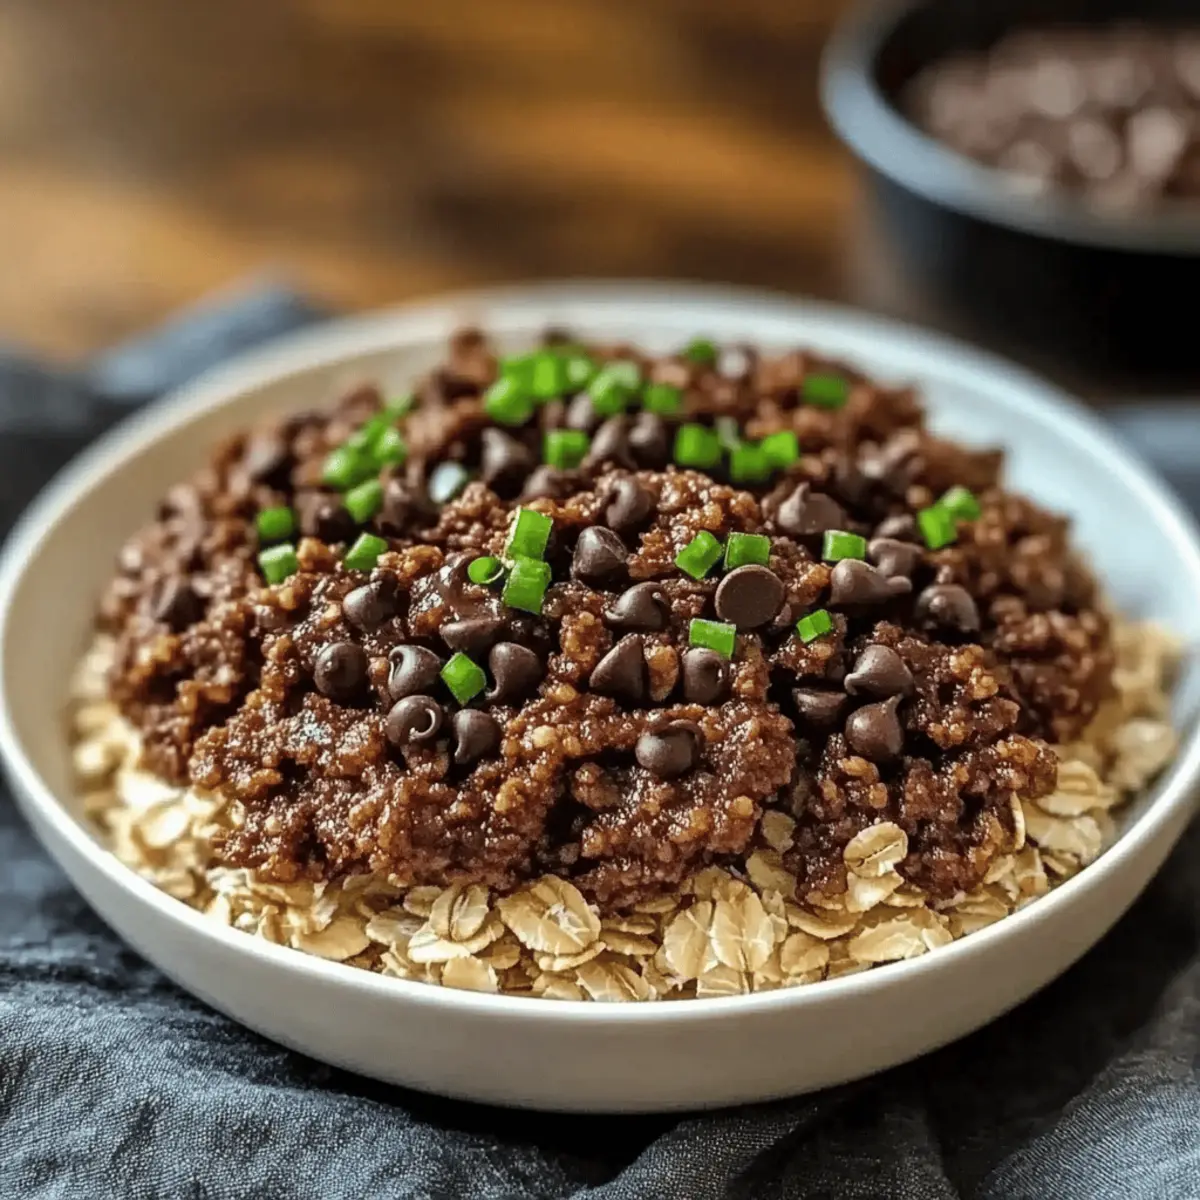
Korean Ground Beef Bowl Variations
Feel free to have fun and make this recipe your own with some tasty twists and substitutions!
-
Spicy Kick: Add red pepper flakes or diced jalapeños for a zesty, spicy flavor that enhances each bite.
-
Protein Swap: Use ground turkey or chicken instead of beef for a lighter, leaner option that pairs beautifully with the sauce.
-
Veggie Boost: Incorporate chopped bell peppers or broccoli for added nutrients and crunch. These colorful additions not only please the eye but also elevate the texture.
-
Soy-Free: Substitute coconut aminos for soy sauce to enjoy the same umami flavor without the soy. It’s a wonderful way to keep the dish accessible for those avoiding soy products.
-
Rice Alternatives: Serve the beef over quinoa or cauliflower rice to switch up the base. Quinoa adds a nutty flavor, while cauliflower rice keeps it low-carb.
-
Herb Infusion: Toss in fresh cilantro or green onions just before serving for a fresh burst of flavor. These herbs not only brighten the dish but also add a fragrant aroma.
-
Sweet & Savory: Mix in a tablespoon of brown sugar to the sauce for a hint of sweetness that balances the savory notes.
Don’t forget to check out the delightful Garlic Butter Beef for more hearty meal inspiration! Enjoy experimenting with flavors while creating your perfect Korean Ground Beef Bowl.
Expert Tips for 4-Ingredient Chocolate Oat Cookies
• Nut Butter Consistency: Ensure your nut butter is smooth and well-stirred. This helps create a consistent dough, preventing clumps that might not bake evenly.
• Cooling Time: Allow cookies to cool completely before handling. This is crucial to prevent them from breaking apart, ensuring they maintain a delightful chewy texture.
• Use Parchment Paper: Line your baking sheet with parchment paper for easy removal and cleanup. This also helps keep cookies from sticking, making for a more pleasant baking experience.
• Evenly Sized Mounds: Scoop uniform sizes of the dough onto the sheet to ensure even baking. This minimizes the risk of over-baked edges while keeping the centers perfectly chewy.
• Experiment with Add-Ins: Don’t hesitate to play with flavors! Adding dark chocolate chips or nuts can personalize your 4-ingredient chocolate oat cookies to match your taste preferences.
4-Ingredient Chocolate Oat Cookies Recipe FAQs
How do I choose the right rolled oats?
Absolutely! When selecting rolled oats, look for whole grain varieties that are marked gluten-free if that’s a dietary consideration. They should have a nice, even shape without dark spots or any signs of moisture. If you want a finer texture for your cookies, you might consider using quick oats, but keep in mind that they may yield a slightly different chewiness.
What’s the best way to store leftover cookies?
Very! Storing your chocolate oat cookies properly is key to maintaining their deliciousness. Keep them in an airtight container at room temperature for up to 5 days to enjoy that delightful chewiness. If you’d like to extend their life, refrigerating them can keep them fresh for about a week. Just make sure to let them come to room temperature before indulging again.
Can I freeze these cookies?
Absolutely! To freeze your chocolate oat cookies, layer them between parchment paper in a freezer-safe bag, ensuring they’re not sticking together. This will protect their texture and flavor. You can freeze them for up to 3 months. When you’re ready to enjoy, you can either eat them straight from the freezer or pop them in the microwave for a few seconds to bring back their delightful melt-in-your-mouth goodness!
What if my cookie dough is too dry or crumbly?
No worries! If you find that your cookie dough is too dry or crumbly, it may be that your nut butter wasn’t smooth enough or there wasn’t enough sweetener. Start by adding a touch more nut butter, a tablespoon at a time, mixing thoroughly to achieve the desired consistency. You can also add a bit of warm water if the dough still seems too dry, just mix until smooth without overdoing it!
Are these cookies safe for anyone with nut allergies?
Definitely! For those with nut allergies, you can easily swap the nut butter for sunflower seed butter, which provides a similar creamy texture without the nuts. Furthermore, always check that your sweeteners and cocoa powder are processed in nut-free facilities to ensure safety. This way, everyone can enjoy these delicious treats without worry!
Can pets safely have these cookies?
Be cautious! While these cookies are made with wholesome ingredients, avoid sharing them with pets. The peanut butter can be fine in moderation for dogs, as long as it doesn’t contain xylitol, which is toxic. However, it’s always best to stick to treats specifically made for our furry friends to ensure their safety and well-being!
Korean Ground Beef Bowl: Quick, Flavorful Comfort Food
Ingredients
Equipment
Method
- Preheat your oven to 350°F (175°C). Prepare a baking sheet lined with parchment paper.
- In a large mixing bowl, combine the rolled oats, nut butter, honey or maple syrup, and cocoa powder. Mix until well combined.
- Using a tablespoon or cookie scoop, create small mounds of the mixture on the prepared baking sheet, spaced about 2 inches apart.
- Bake in the preheated oven for 10-12 minutes until edges are firm but centers remain soft.
- Remove from the oven and allow to cool on the baking sheet for about 5 minutes before transferring to a wire rack.
Leave a Reply