
While flipping through an old Italian cookbook, I stumbled upon a dish that instantly transported me back to sun-drenched summers—Zucchini Scarpaccia. This delightful pan-fried treat combines the natural sweetness of zucchini with a crispy, golden crust that beckons from the skillet. As an effortlessly versatile recipe, Zucchini Scarpaccia not only caters to gluten-free and vegan diets but also showcases the beauty of homemade cooking, making it a fantastic addition to any meal. With a prep time that fits perfectly into a busy lifestyle, you can whip up this crowd-pleaser for family dinners or serve it alongside a fresh salad at your next brunch gathering. Ready to bring a taste of Italy to your kitchen? Let’s dive into this simple recipe that’s sure to become a new favorite!
Why is Zucchini Scarpaccia So Irresistible?
Simplicity at Its Best: This recipe requires minimal ingredients and skills—perfect for those busy weeknights.
Rich, Herb-Infused Flavor: Fresh zucchini and aromatic herbs create a delightful taste explosion.
Versatile Options: Easily adapt it to be gluten-free or vegan without losing the charm.
Perfect for Any Meal: Whether it’s a cozy family dinner or a summer brunch, Scarpaccia fits the occasion beautifully. Pair it with an arugula salad drizzled with lemon olive oil for a refreshing touch!
Zucchini Scarpaccia Ingredients
For the Batter
• Zucchini – Provides moisture and a light, slightly sweet flavor; can substitute with grated carrots or a mix of zucchini and yellow squash for color.
• All-Purpose Flour – Forms the batter base, contributing texture; for gluten-free, use a blend of rice flour and chickpea flour.
• Eggs – Bind the ingredients and add richness; for a vegan option, use a flax-seed “egg” (1 tbsp ground flax + 3 tbsp water).
• Ricotta Cheese – Adds creaminess and richness; swap with Greek yogurt for tanginess or silken tofu for a vegan alternative.
• Parmesan Cheese – Offers a nutty depth of flavor; replace with Pecorino Romano for a sharper taste.
• Garlic – Enhances the overall flavor profile; use fresh garlic for the best results.
• Fresh Mint – Introduces a refreshing herbal note; basil can be used as an alternative.
• Sea Salt and Black Pepper – Essential for seasoning the batter.
• Extra-Virgin Olive Oil – Used for pan-frying, creating a delightful golden crust; pre-heat oil for optimal crispiness.
Step‑by‑Step Instructions for Zucchini Scarpaccia
Step 1: Prepare the Zucchini
Start by washing and trimming two medium zucchinis, then grate them into a large mixing bowl using a box grater. This method brings out their natural moisture. Let the grated zucchini sit for about 10 minutes to allow excess water to pool at the bottom of the bowl, which will enhance the flavor of your Zucchini Scarpaccia.
Step 2: Drain Excess Moisture
After resting, gently squeeze the grated zucchini in a clean kitchen towel or cheesecloth to extract extra moisture. This step is crucial in preventing a soggy texture in your Zucchini Scarpaccia. Once well-drained, set the zucchini aside in a bowl, ensuring it remains ready for the batter mix.
Step 3: Mix the Batter
In a separate mixing bowl, whisk together one cup of all-purpose flour, three large eggs, one cup of ricotta cheese, and half a cup of grated Parmesan cheese. Add two minced garlic cloves, a handful of chopped fresh mint, sea salt, and black pepper. Blend until just combined, creating a creamy batter that will envelop the zucchini.
Step 4: Incorporate the Zucchini
Gently fold the squeezed zucchini into the prepared batter until just combined. Be careful not to over-mix, as this could result in a dense texture. The zucchini should be evenly coated in the creamy batter, ready to be transformed into delicious Zucchini Scarpaccia.
Step 5: Heat the Oil
In a large skillet, heat about a quarter cup of extra-virgin olive oil over medium-high heat. Allow the oil to shimmer, which indicates it’s hot enough for frying. A well-heated skillet is key to achieving that beautiful golden crust on your Zucchini Scarpaccia.
Step 6: Cook the Scarpaccia
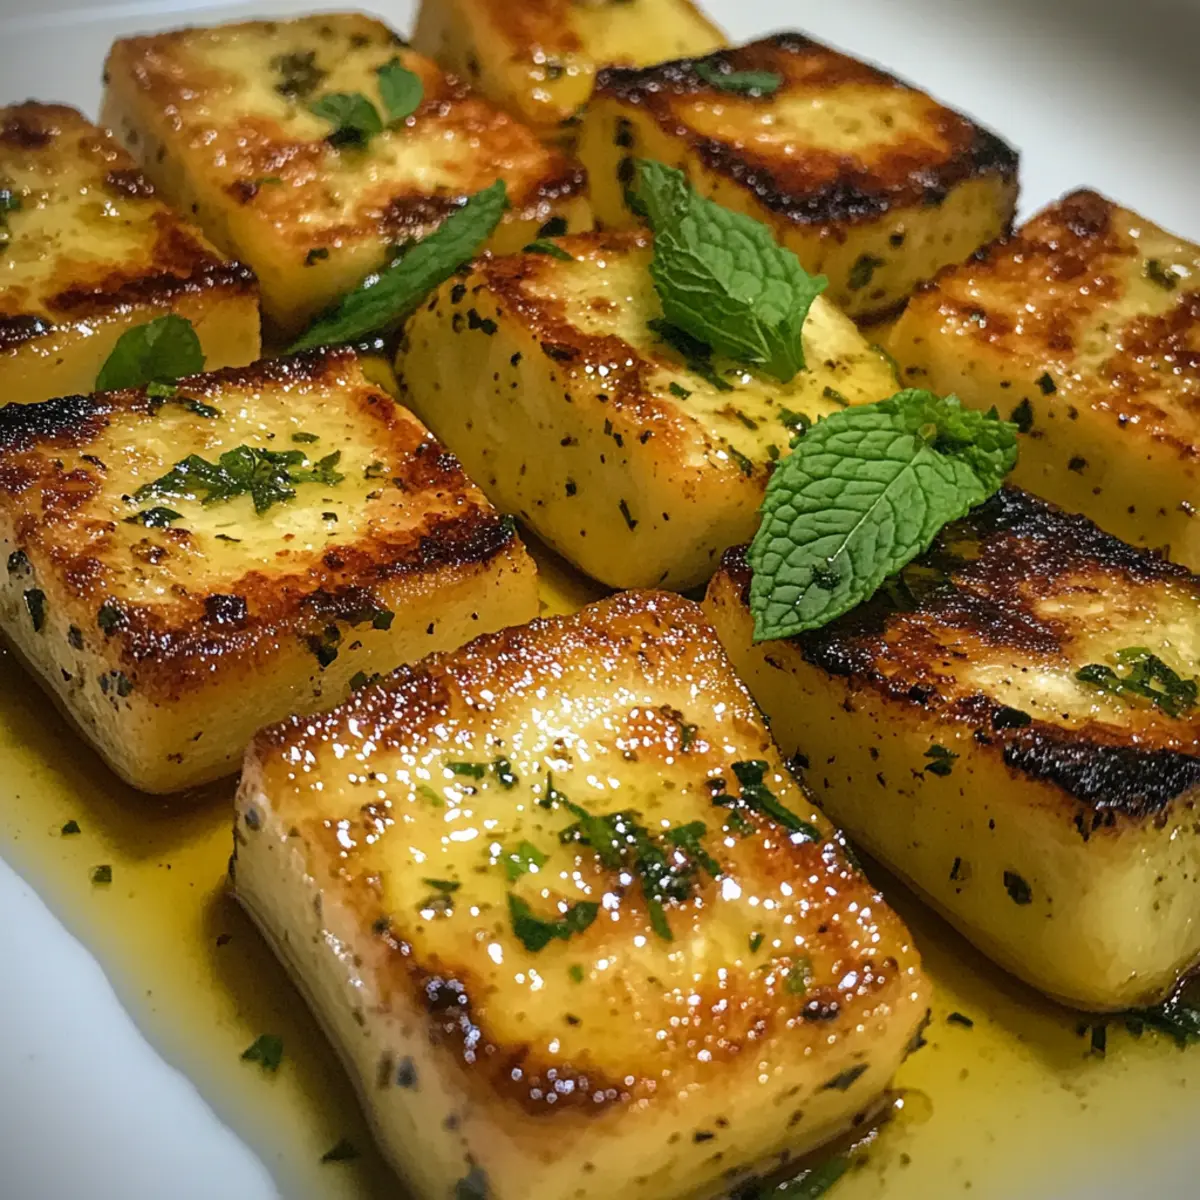
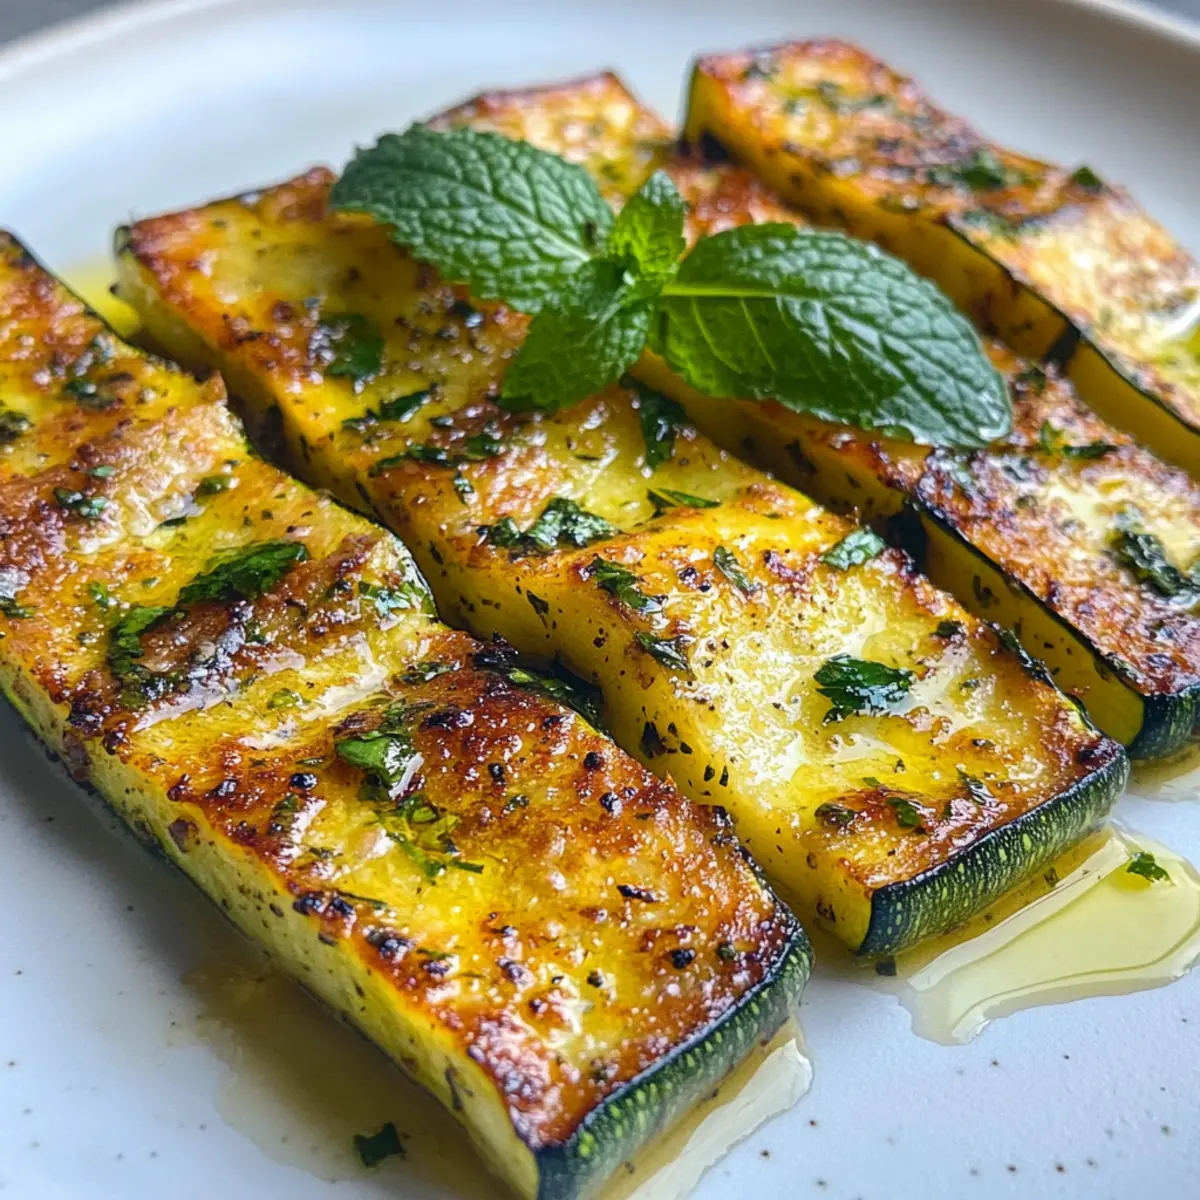
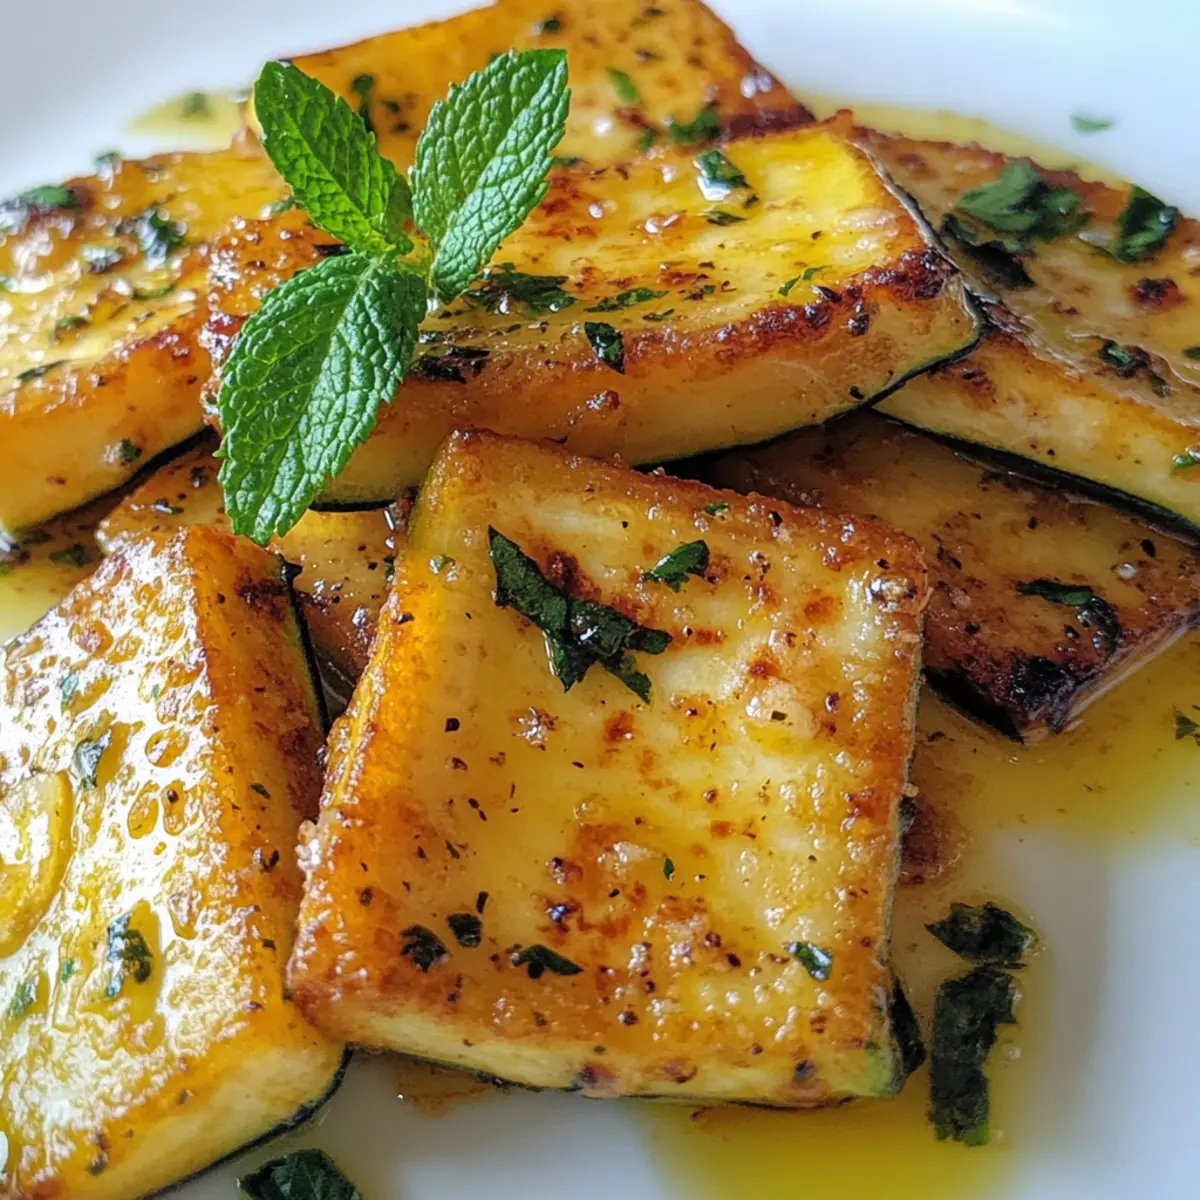
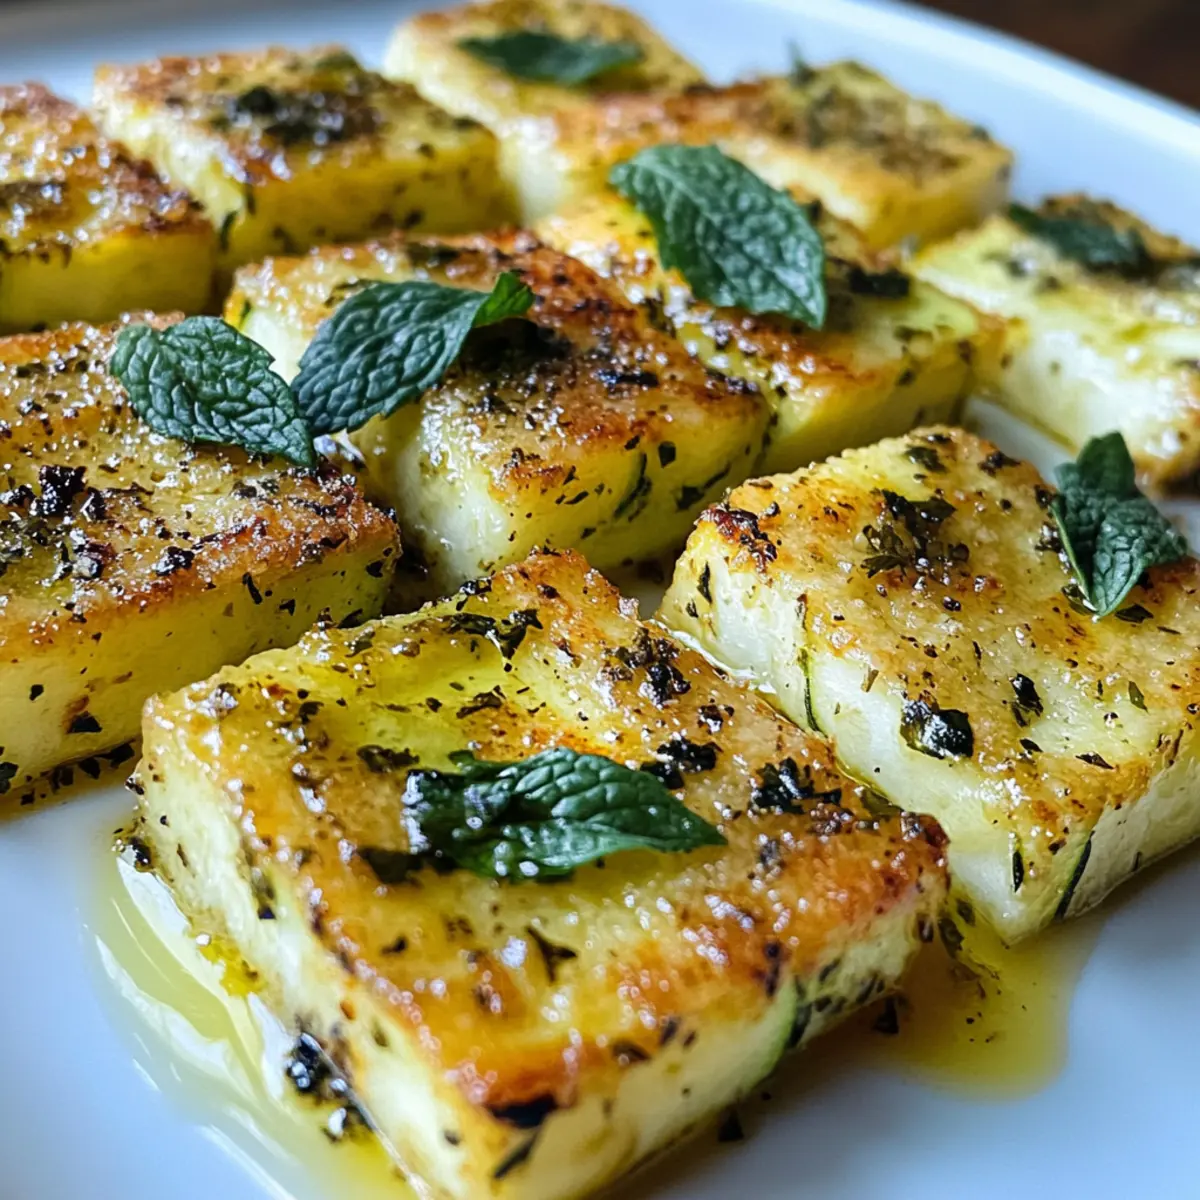
Pour small batches of the batter into the hot skillet, forming pancakes roughly 3-4 inches wide. Cook for 3-4 minutes until golden brown on one side, then carefully flip to cook the other side until similarly golden. The sizzling sound is a sign of the crispy texture developing—a hallmark of perfect Zucchini Scarpaccia.
Step 7: Drain and Serve
Once cooked, transfer the scarpaccia to a paper towel-lined plate to drain any excess oil. Allow the pieces to cool for a minute or two, then serve warm or at room temperature. Drizzle with additional olive oil and garnish with fresh mint for a refreshing touch. Enjoy this delightful dish on its own or alongside a vibrant salad!
Zucchini Scarpaccia Variations
Feel free to get creative with Zucchini Scarpaccia; let your taste buds explore new avenues!
- Gluten-Free: Use a mix of rice flour and chickpea flour to create a gluten-free batter without sacrificing flavor or texture.
- Vegan Delight: Replace eggs with a flax-seed mix and use silken tofu instead of ricotta for a plant-based twist. You won’t miss the creaminess!
- Herb-Infused: Experiment with different herbs like basil or oregano for a refreshing flavor boost. Fresh herbs can elevate your scarpaccia to new heights!
- Cheese Swap: Try Pecorino Romano instead of Parmesan for a sharper taste. The distinct flavor can add an exciting new layer to your dish.
- Add-Ons: Incorporate chopped sun-dried tomatoes or olives for a Mediterranean touch. These ingredients introduce a burst of flavor and enhance the dish’s visual appeal.
- Heat It Up: Spice things up with a pinch of red chili flakes or jalapeños for a bit of heat. The added kick pairs wonderfully with the zucchini’s natural sweetness.
- Mixed Veggies: Blend in shredded carrots or yellow squash for added color and nutrition, making your scarpaccia even more visually stunning.
- Sweet Twist: Indulge your sweet tooth by adding a sprinkle of cinnamon and a touch of maple syrup to the batter for a unique dessert version. Pair with fresh berries for a delightful treat!
Feel inspired? For more zucchini goodness, check out my recipes for Garlic Herb Zucchini or take a sweet turn with Apple Zucchini Bread.
Expert Tips for Zucchini Scarpaccia
-
Dry the Zucchini Well: Always squeeze out the excess moisture after grating the zucchini; this ensures your Zucchini Scarpaccia won’t be soggy.
-
Use a Hot Skillet: Preheat your skillet until it’s shimmering with oil to achieve that perfect crispy crust; a cool pan leads to sogginess.
-
Avoid Over-Mixing: Mix the batter and zucchini just until combined; over-mixing can result in a tough texture rather than the desired lightness.
-
Cook in Small Batches: Fry small portions of batter at a time; overcrowding the pan can lower the temperature, resulting in uneven cooking.
-
Rest Before Serving: Allow the cooked scarpaccia to rest for a couple of minutes; this helps the flavors meld and gives a better texture.
How to Store and Freeze Zucchini Scarpaccia
Room Temperature: Allow Zucchini Scarpaccia to cool completely before leaving it at room temperature for up to 2 hours for serving.
Fridge: Store in an airtight container after cooling. It can last for up to 3 days in the refrigerator, maintaining its flavor and texture.
Freezer: For longer storage, freeze individual pieces wrapped in plastic wrap, then in a freezer-safe bag. They can be frozen for up to 2 months.
Reheating: To restore crispiness, reheat Zucchini Scarpaccia in a preheated oven at 350°F (175°C) for about 10-15 minutes, or until warmed through.
What to Serve with Italian Zucchini Scarpaccia
Elevate your dining experience with delightful accompaniments that perfectly complement this crispy, herb-infused Italian dish.
-
Arugula Salad: A peppery arugula salad drizzled with lemon olive oil adds a refreshing crunch, balancing the richness of the scarpaccia.
-
Rustic Tomato-Basil Sauce: Serve with a homemade tomato-basil sauce for added moisture and vibrant flavor, intertwining the dishes beautifully.
-
Creamy Mashed Potatoes: Fluffy mashed potatoes provide a comforting creaminess that pairs well with the crispy texture of zucchini.
-
Grilled Asparagus: The smoky notes from grilled asparagus enhances the dish’s earthy flavors while contributing a satisfying crunch.
-
Roasted Bell Peppers: Sweet roasted bell peppers add a burst of color, sweetness, and a charred depth, making each bite a celebration of flavors.
-
Garlic Bread: Don’t forget slices of warm garlic bread! The buttery, toasty goodness complements the scarpaccia while inviting finger-licking joy.
-
Light White Wine: A chilled glass of Pinot Grigio or Sauvignon Blanc brings a refreshing acidity that cuts through the richness, enhancing every bite.
-
Fresh Fruit Salad: A simple fruit salad made of summer berries and melons offers a sweet contrast that lifts the palate, making the meal brighter.
Each of these pairings enriches your dining experience and showcases the inviting, rustic charm of your Zucchini Scarpaccia. Enjoy!
Make Ahead Options
Zucchini Scarpaccia is a fantastic dish to prepare ahead of time, making meal planning a breeze for busy families! You can grate the zucchini and mix it with salt, allowing it to release excess moisture up to 24 hours in advance. Store the grated zucchini in a sealed container in the refrigerator. Additionally, you can combine the batter ingredients (flour, eggs, ricotta, Parmesan, garlic, mint, salt, and pepper) up to 3 days prior and refrigerate until you’re ready to cook. When you’re set to enjoy your Zucchini Scarpaccia, simply fold in the prepared zucchini and cook as directed, ensuring your dish comes out just as delicious! This approach saves you valuable time without sacrificing taste.
Zucchini Scarpaccia Recipe FAQs
What type of zucchini should I use for the best flavor?
Absolutely! When selecting zucchini for your Zucchini Scarpaccia, aim for firm, medium-sized zucchinis without dark spots or bruises. Smaller zucchinis are often sweeter and more tender, while larger ones can be watery. If you’d like to add a colorful twist, feel free to mix in yellow squash or grated carrots for variety!
How should I store leftover Zucchini Scarpaccia?
Very important! Allow your Zucchini Scarpaccia to cool completely, then store it in an airtight container in the refrigerator. It will stay fresh for up to 3 days. If you want to keep it for longer, consider freezing individual pieces wrapped in plastic wrap and placed in a freezer-safe bag, where they can last for up to 2 months.
Can I freeze Zucchini Scarpaccia?
Absolutely, freezing is a great option! To freeze, allow the cooked scarpaccia to cool completely, then wrap each piece in plastic wrap before placing in a freezer-safe bag. When you’re ready to enjoy them again, simply reheat in a preheated oven at 350°F (175°C) for about 10-15 minutes until crispy and warm!
What if my Zucchini Scarpaccia is too soggy?
Not to worry! If your Zucchini Scarpaccia ends up soggy, ensure you thoroughly squeeze out excess moisture from the grated zucchini before mixing it into the batter. If you’ve already cooked it and it’s too moist, you can try reheating it in a hot skillet to crisp it up again. Always remember, a well-heated skillet is key to achieving that perfect golden crust.
Is Zucchini Scarpaccia suitable for dietary restrictions?
Very much so! This recipe can easily accommodate various dietary needs by making substitutions. For a gluten-free option, swap out the all-purpose flour for a rice and chickpea flour blend. If you’re following a vegan diet, you can replace the eggs with a flax-seed mix (1 tbsp ground flax mixed with 3 tbsp water) and use silken tofu in place of ricotta for a creamy texture without the dairy. The versatility truly shines here!
Savory Zucchini Scarpaccia: Your New Favorite Comfort Food
Ingredients
Equipment
Method
- Wash and trim the zucchini, then grate them into a bowl. Let sit for 10 minutes.
- Gently squeeze the grated zucchini in a towel to remove excess moisture. Set aside.
- Mix flour, eggs, ricotta, Parmesan, garlic, mint, salt, and pepper until just combined.
- Fold the squeezed zucchini into the batter until just combined.
- Heat olive oil in a skillet until shimmering.
- Drop small batches of batter into the skillet, cooking for 3-4 minutes until golden brown.
- Transfer cooked scarpaccia to a paper towel-lined plate and allow to cool slightly before serving.
Leave a Reply