
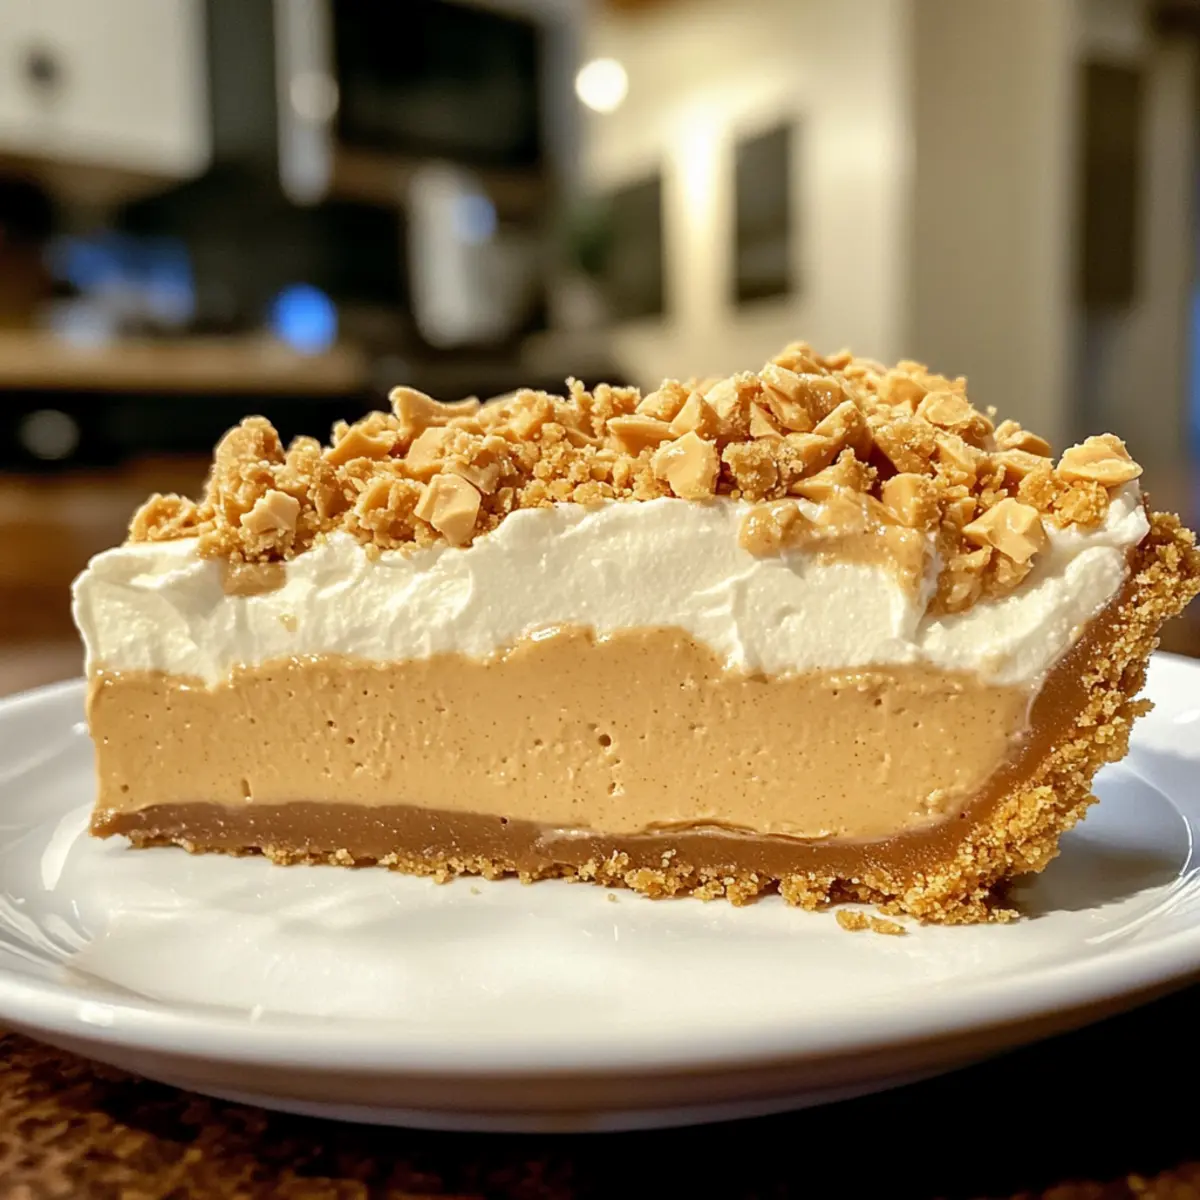
As summer heat sets in, I often find myself in a battle against the oven’s relentless warmth. That’s when my No-Bake Peanut Butter Pie swoops in to save the day! This classic dessert is a heavenly blend of creamy peanut butter and light, fluffy filling embraced by a buttery graham cracker crust, all made in just 15 minutes. It’s a delightful, hassle-free way to impress guests or treat yourself without turning the kitchen into a sauna. Plus, you have the freedom to customize it with your favorite toppings—think chocolate sauce, mini chocolate chips, or even chunks of Reese’s Peanut Butter Cups. Ready to transform your summer dessert routine into something truly special? Let’s get started!
Why Is No-Bake Pie a Must-Try?
Effortless Preparation: This No-Bake Peanut Butter Pie requires just 15 minutes of your time, making it a breeze to whip up even on the busiest days.
Decadent Flavor: The rich, nutty goodness of creamy peanut butter shines through every bite, satisfying your sweet tooth effortlessly.
Customizable Options: With toppings from chocolate sauce to crushed Reese’s Peanut Butter Cups, you can tailor this pie to suit your cravings.
Perfect for Any Occasion: Whether it’s a summer gathering or a cozy family dinner, this dessert is guaranteed to impress guests of all ages.
Crowd-Pleasing Delight: Everyone loves peanut butter! Pair it with a refreshing side like the Honey Butter Skillet Corn to round out the meal.
- Ingredients
• No-Bake Peanut Butter Pie Ingredients
For the Crust
• Graham Cracker Crust – The sweet and crunchy foundation of the pie. Substitution Note: An Oreo crust adds a delightful chocolate twist.
For the Filling
• Cream Cheese – Provides smoothness and stability; ensure it’s softened for easy mixing.
• Creamy Peanut Butter – The star of this dessert, bringing rich flavor; creamy works best for texture, but feel free to use crunchy for extra bites.
• Powdered Sugar – Sweetens the filling while maintaining its silky smoothness; substitutes can be used, but may alter the texture.
• Cool Whip – This ingredient lightens the filling and adds a whipped texture; remember to use a thawed, full 8-ounce container for optimal results.
Optional Toppings
• Chocolate Sauce – Drizzling adds a touch of sweetness and elegance.
• Mini Chocolate Chips – Great for adding texture and chocolatey goodness.
• Chopped Reese’s Peanut Butter Cups – For peanut butter lovers craving that extra layer of flavor.
Step‑by‑Step Instructions for No-Bake Peanut Butter Pie
Step 1: Prepare the Filling
In a large mixing bowl, use an electric mixer to beat 8 ounces of softened cream cheese and 1 cup of creamy peanut butter together until the mixture is smooth and well blended, about 2 minutes on medium speed. Look for a fluffy consistency free of lumps; this will ensure a creamy filling for your No-Bake Peanut Butter Pie.
Step 2: Sweeten the Mixture
Gradually add in 1 cup of powdered sugar while continuing to mix on low speed to avoid a sugar cloud. Mix for approximately 1–2 minutes until fully incorporated, resulting in a sweet yet velvety texture. Carefully scrape down the sides of the bowl with a spatula to ensure that all ingredients are thoroughly combined.
Step 3: Fold in the Cool Whip
Gently fold an entire 8-ounce container of thawed Cool Whip into the peanut butter mixture using a spatula. This process should take about 2 minutes; you want to incorporate the Cool Whip without deflating it, creating a light and airy filling perfect for your pie. Continue folding until no streaks of Cool Whip remain visible.
Step 4: Fill the Crust
Once your filling is ready, carefully transfer it into the premade graham cracker crust. Use a spatula to smooth the top, making sure to create an even layer that’s roughly 1–2 inches tall. This will give your No-Bake Peanut Butter Pie a beautiful presentation once chilled.
Step 5: Chill the Pie
Cover the pie with its crust lid or wrap it securely in plastic wrap, then place it in the refrigerator. Chill for at least 3 hours to allow the filling to set properly; overnight is even better for a firmer texture. You’ll know it’s ready when it feels firm to the touch and holds its shape.
Step 6: Prepare for Serving
If you chose to freeze your No-Bake Peanut Butter Pie, let it thaw in the refrigerator for about 10 minutes before serving. This gentle thawing will enhance the creamy texture, ensuring it’s easier to slice. Grab a sharp knife for clean cuts that showcase that delightful filling.
Step 7: Add Toppings
Finally, before serving, you can indulge your guests by drizzling chocolate sauce, adding mini chocolate chips, or sprinkling chopped Reese’s Peanut Butter Cups on top of the pie. This adds layers of flavor and a touch of elegance to your No-Bake Peanut Butter Pie, creating a spectacular presentation that everyone will appreciate.
Expert Tips for No-Bake Peanut Butter Pie
-
Soften Cream Cheese: To avoid lumps in your filling, be sure to let your cream cheese come to room temperature before mixing. This ensures a smooth texture for your no-bake peanut butter pie.
-
Chill Properly: Allow the pie to chill for at least three hours—overnight is best. This helps the filling set properly, resulting in a creamy yet firm pie.
-
Use Quality Ingredients: Opt for high-quality creamy peanut butter and Cool Whip for the best flavor and texture. Store brands may alter the overall taste of your pie.
-
Customize Wisely: Feel free to make substitutions, like using an Oreo crust or incorporating almond butter, but keep in mind that these may slightly change the pie’s texture.
-
Serving Tip: For easy slicing, dip your knife in hot water before cutting the pie. This helps create clean, neat slices, showcasing that delicious filling beautifully!
How to Store and Freeze No-Bake Peanut Butter Pie
Refrigerator: Store leftover pie in the fridge, covered, for up to 4 days. Keeping it airtight prevents any absorption of other flavors, ensuring your pie remains rich and creamy.
Freezer: If you want to keep it longer, wrap the pie tightly in plastic wrap and aluminum foil. It can be frozen for up to 2 months, but note that freezing may slightly alter the texture.
Thawing: When ready to enjoy, allow the No-Bake Peanut Butter Pie to thaw in the refrigerator for about 10 minutes before serving. This helps regain its creamy consistency.
Reheating: There’s no need to reheat this pie! Just slice and serve chilled, adding any desired toppings for an irresistible finish.
What to Serve with No Bake Peanut Butter Pie
Let the sweet, creamy decadence of this dessert inspire an entire meal that’s just as delightful.
-
Fresh Berries: The tartness of fresh strawberries, raspberries, or blueberries provides a refreshing contrast to the rich peanut butter filling.
Serve them on the side for a colorful and tasty addition that balances sweetness and tang. -
Classic Vanilla Ice Cream: A scoop of creamy vanilla ice cream pairs wonderfully, adding a coolness that enhances each luscious bite.
This nostalgic combination brings together textures, creating a delightful summer treat that evokes childhood memories. -
Chocolate Drizzled Pretzels: The salty crunch of pretzels drizzled with chocolate creates a satisfying texture contrast.
They make for a fun, finger-food snack that’s great alongside the silky pie, perfect for sharing at gatherings. -
Homemade Whipped Cream: A dollop of fresh, homemade whipped cream adds an airy, creamy layer that enhances the pie’s overall richness.
Just a hint of vanilla can elevate the flavor, making every slice even more indulgent. -
Chilled Lemonade: A refreshing glass of homemade lemonade cuts through the richness of the pie with its bright citrus notes.
The tartness of the lemonade invigorates the palate, making it a revitalizing companion on hot days. -
Coffee or Iced Coffee: A warm cup of coffee or a chilled iced coffee can enhance the dessert experience, especially with a hint of caramel.
The slightly bitter notes of coffee beautifully balance the sweetness of the pie, making each bite more enjoyable.
Make Ahead Options
These No-Bake Peanut Butter Pies are a lifesaver for busy home cooks! You can prepare the filling up to 24 hours in advance by mixing the softened cream cheese, creamy peanut butter, and powdered sugar, then folding in the Cool Whip. Store the filling in an airtight container in the refrigerator until you’re ready to assemble. The crust can also be made ahead and kept in the pantry. When you’re ready to serve, simply spread the filling into the crust, chill for at least 3 hours to set properly, and add your favorite toppings just before serving to ensure they stay fresh and delicious. Enjoy effortless entertaining with this dreamy dessert!
No-Bake Peanut Butter Pie Variations
Feeling adventurous in the kitchen? Let’s make this delightful pie even more uniquely yours!
-
Almond Butter: Swap out peanut butter for almond butter for a nutty twist that’s equally delicious.
Imagine a pie with a subtly sweet almond flavor, making it a lovely alternative for almond lovers. -
Nut-Free Option: Use sunflower seed butter instead of peanut butter for a nut-free dessert that everyone can enjoy.
This swap retains the creamy texture while offering a delightful sunflower flavor that pairs wonderfully with the graham cracker crust. -
Cookie Butter: Substitute peanut butter with your favorite cookie butter for a sweet and spiced twist.
The warm, spiced notes of cookie butter create a unique dessert that adds a new layer of flavor to your pie. -
Chocolate Crust: Try using a chocolate cookie crust instead of a graham cracker crust for a decadent chocolate base.
This combination gives a rich, indulgent experience—think of it as a dessert fit for a special occasion! -
Add Some Crunch: Mix in some crushed cookies or nuts into the filling for an added crunch.
The contrast in texture creates a delightful surprise in every bite, making it an exciting dessert option. -
Fruity Layer: Top your pie with a layer of fresh banana slices or sliced strawberries before serving.
The bright freshness of the fruits adds a refreshing contrast to the rich peanut butter flavor, making each bite irresistible. -
Extra Sweetness: For a sweeter twist, drizzle caramel sauce over the top before serving.
The addition of caramel enhances the dessert’s sweetness, creating a perfect harmony with the peanut butter’s nuttiness.
Now, if you’re seeking a peanut butter dessert with a delightful twist, don’t forget to check out my Pumpkin Pie Protein Balls for a healthy snack, or treat yourself to the delightful texture of Honey Butter Skillet Corn to pair alongside your pie!
No Bake Peanut Butter Pie Recipe FAQs
What type of peanut butter should I use for the best flavor?
Absolutely! For this No Bake Peanut Butter Pie, I recommend using creamy peanut butter for the smoothest texture. If you prefer a bit of crunch, feel free to swap in crunchy peanut butter; just keep in mind it will alter the overall consistency.
How should I store leftover No Bake Peanut Butter Pie?
There’s nothing better than a slice of pie waiting for you! Store any leftovers in the refrigerator, covered with plastic wrap or in an airtight container, for up to 4 days. This ensures it remains fresh and creamy without taking on any unwanted flavors.
Can I freeze the No Bake Peanut Butter Pie?
Very! To freeze your pie, wrap it tightly in plastic wrap and then in aluminum foil, preventing freezer burn. It can be frozen for up to 2 months. When you’re ready to enjoy, simply transfer it to the refrigerator to thaw for about 10 minutes before serving, ensuring the texture stays as creamy as ever.
What should I do if the filling is lumpy?
The key to a smooth pie is softened cream cheese! If you find lumps in your filling, it’s best to continue mixing on medium speed until the mixture becomes smooth. If you’re struggling, add a splash of milk to loosen it up slightly, allowing for easier blending and a creamier result.
Can I use a sugar substitute for the filling?
Yes, but be cautious! If you’re considering using a sugar alternative in your No Bake Peanut Butter Pie, note that it might slightly impact texture and flavor. I recommend using a powdered version suitable for baking to achieve the best results; erythritol or monk fruit blends could work well if you’re looking to cut back on sugar.
Are there any common allergens in this recipe?
Absolutely! This pie contains common allergens such as peanuts and dairy. If you’re preparing it for someone with allergies, consider using almond butter instead of peanut butter and a dairy-free cream cheese alternative. Always check labels to ensure safety for those with food sensitivities!

Indulge in Easy No-Bake Peanut Butter Pie Bliss
Ingredients
Equipment
Method
- In a large mixing bowl, use an electric mixer to beat 8 ounces of softened cream cheese and 1 cup of creamy peanut butter together until smooth, about 2 minutes.
- Gradually add in 1 cup of powdered sugar while mixing on low speed for about 1–2 minutes until fully incorporated.
- Gently fold in an 8-ounce container of thawed Cool Whip into the peanut butter mixture using a spatula.
- Transfer the filling into the premade graham cracker crust and smooth the top.
- Cover the pie and chill in the refrigerator for at least 3 hours, ideally overnight.
- If frozen, let the pie thaw in the refrigerator for about 10 minutes before serving.
- Before serving, add toppings like chocolate sauce, mini chocolate chips, or chopped Reese's Peanut Butter Cups.
Leave a Reply