
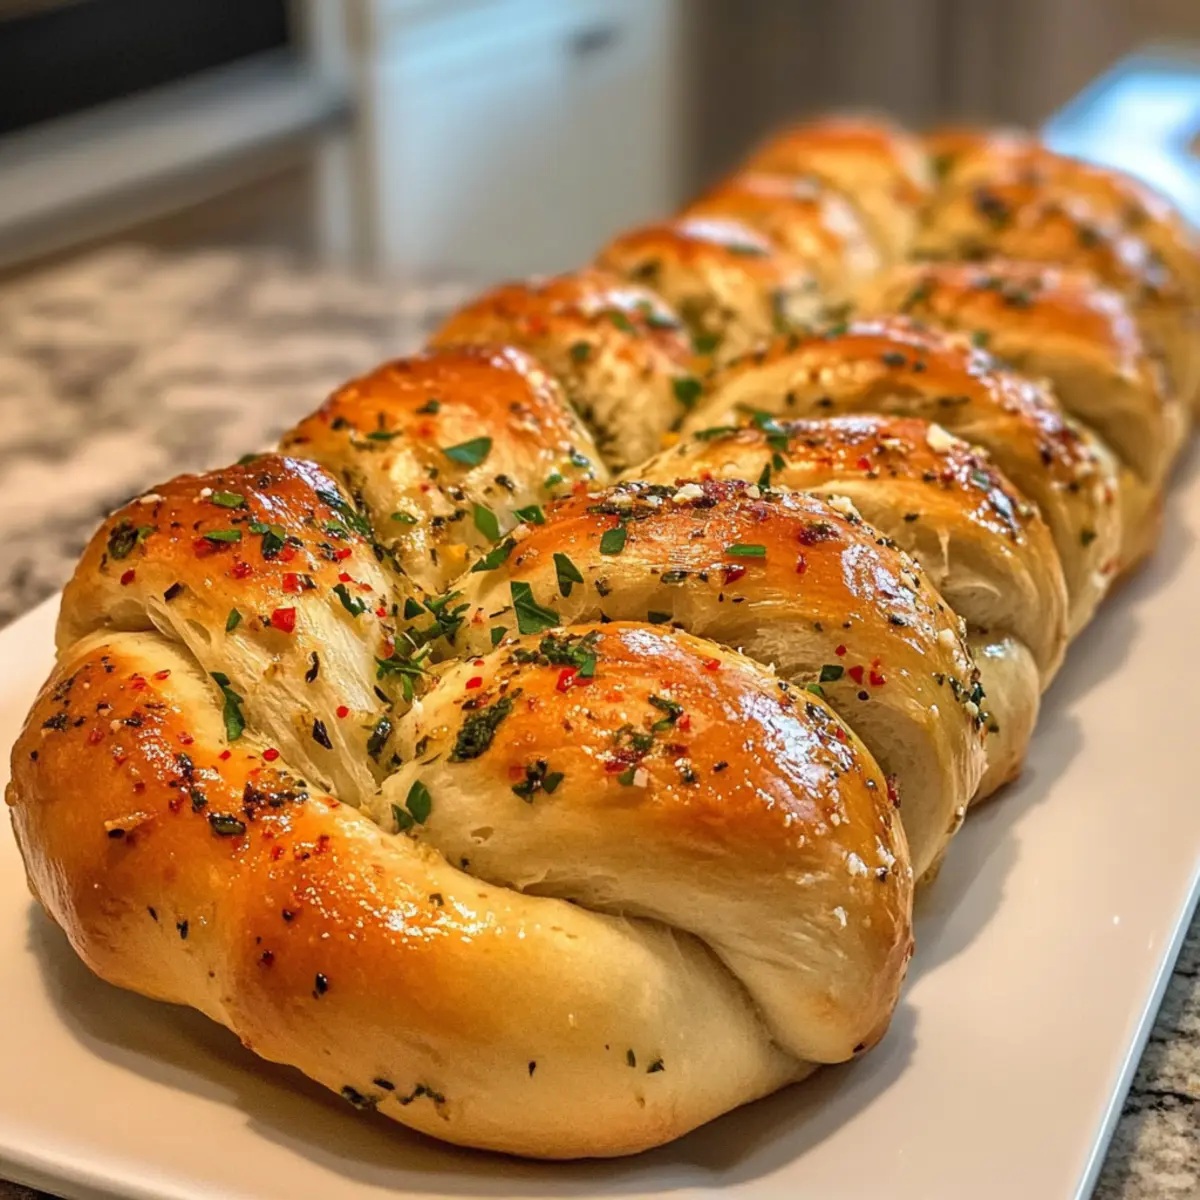
The warm, inviting scent of freshly baked bread can transform any kitchen into a cozy haven, and there’s something particularly special about making your own. My Garlic Herb Braided Bread captures that homemade charm with its golden crust, fluffy interior, and a savory blend of garlic and aromatic herbs. Not only is this loaf a feast for the senses, but it’s also surprisingly easy to prepare, making it a delectable addition to your family meals or holiday celebrations. Plus, its versatility allows you to pair it with soups, pasta dishes, or enjoy it on its own. Are you ready to master this delightful artisan loaf and impress everyone at your dinner table?
Why is Garlic Herb Braided Bread special?
Irresistible Aroma: The moment you pull this bread from the oven, your kitchen will be filled with the mouthwatering scent of garlic and herbs, tempting everyone to gather around.
Artisan Quality: With just a few simple ingredients, you’ll create a stunning bread that rivals your favorite bakery, showcasing your culinary skills effortlessly.
Versatile Delight: Great for any meal, this loaf pairs well with hearty soups, creamy pastas like Garlic Parmesan Chicken Pasta or simply slathered with butter for a snack.
Easy to Master: Don’t worry if you’re new to bread-making; this recipe is designed for success, making it perfect for beginner bakers looking to impress.
Texture Bliss: Each slice reveals a soft, fluffy interior encased in a beautifully crispy crust, providing a delightful contrast that will keep everyone coming back for more.
Garlic Herb Braided Bread Ingredients
For the Bread
- All-Purpose or Bread Flour – Provides structure for the bread; may substitute with a gluten-free blend for dietary needs.
- Active Dry Yeast – Activates the dough, helping it to rise and enhancing the flavor profile.
- Warm Water (110°F) – Hydrates the dough and ensures proper yeast activation; precision in temperature is key.
- Olive Oil – Adds richness to the dough; substitute with garlic butter for a flavor boost.
- Salt – Enhances flavor and regulates the yeast activity for optimal dough performance.
- Sugar – Feeds the yeast while adding a touch of sweetness to balance flavors.
- Garlic – Provides the signature flavor; you can use either minced or roasted garlic for depth.
- Dried Mixed Herbs (Oregano, Thyme, Basil) or Fresh – Infuses aromatic complexity; fresh herbs add vibrant flavor.
- Grated Parmesan Cheese – Introduces savory depth and enhances overall flavor.
- Melted Butter (for brushing) – Gives the crust a beautiful golden finish that makes it irresistible.
Optional Add-ins
- Red Pepper Flakes – Add a touch of heat to elevate the flavor profile.
- Shredded Mozzarella – For those who love extra cheesiness in their bread.
- Fresh Parsley – A perfect garnish that adds a pop of color and freshness.
This Garlic Herb Braided Bread is sure to be a crowd-pleaser, inviting warmth and comfort into your home with its delicious aroma and delightful flavor. Enjoy each moment as you bake!
Step‑by‑Step Instructions for Garlic Herb Braided Bread
Step 1: Activate the Yeast
In a large mixing bowl, combine 1 cup of warm water (at 110°F) with 1 tablespoon of sugar. Sprinkle 2 teaspoons of active dry yeast on top and let it sit for 5–10 minutes, or until it becomes frothy. This step is essential for ensuring your Garlic Herb Braided Bread rises beautifully, creating that fluffy texture everyone loves.
Step 2: Mix the Dough
Once the yeast is activated, stir in 2 tablespoons of olive oil, 2 cloves of minced garlic, 1 tablespoon of dried mixed herbs, and 1 teaspoon of salt. Gradually add 2½ cups of all-purpose flour, mixing until a shaggy dough begins to form. As the dough comes together, continue adding flour as needed until it pulls away from the sides of the bowl.
Step 3: Knead the Dough
Turn the dough out onto a lightly floured surface and knead for about 6–8 minutes. As you knead, incorporate ½ cup of grated parmesan cheese halfway through for added flavor. The dough should become smooth and elastic, giving a slight spring when pressed. This kneading process will develop the gluten structure essential for your Garlic Herb Braided Bread.
Step 4: First Rise
Place the kneaded dough in a greased bowl, turning it to coat all sides lightly. Cover the bowl with a clean kitchen towel or plastic wrap and let it rise in a warm area for about 1 hour, or until it has doubled in size. This resting period is crucial for achieving that airy texture in the final loaf.
Step 5: Shape the Dough
After the dough has risen, gently punch it down to release any air bubbles. Divide it into three equal parts and roll each piece into a rope, about 12 inches long. Braid the three ropes together, tucking the ends under the loaf to create a neat finish. Place the braided dough on a parchment-lined baking sheet, ready for its second rise.
Step 6: Second Rise
Allow the braiding to rise again for 30–40 minutes, covered with a damp cloth. During this time, the dough will puff up, creating a light and airy structure that’s ideal for your Garlic Herb Braided Bread. Be sure to keep it in a warm environment, which aids in the rising process.
Step 7: Preheat and Prepare
Preheat your oven to 375°F (190°C). Once the second rise is complete, brush the top of the braided loaf with melted butter for a golden finish. If desired, sprinkle with additional grated parmesan or red pepper flakes to enhance the flavor and visual appeal of your Garlic Herb Braided Bread.
Step 8: Bake the Bread
Place the baking sheet in the preheated oven and bake for 25–30 minutes. The bread should turn a beautiful golden brown and emit an irresistible aroma. To check for doneness, tap the bottom of the loaf; it should sound hollow and have a firm crust.
Step 9: Cool and Serve
Remove the bread from the oven and allow it to cool slightly on a wire rack. This will help maintain its crispy crust. Once it’s somewhat cooled, slice into the Garlic Herb Braided Bread and serve, or enjoy it warm on its own—either way, it’s sure to impress!
Expert Tips for Garlic Herb Braided Bread
-
Choose the Right Flour: Use all-purpose or bread flour for optimal structure; if using gluten-free flour, be aware the texture may differ slightly.
-
Perfect Yeast Activation: Ensure the water temperature is exactly 110°F to activate the yeast. Too hot or too cold can hinder the rise.
-
Knead Well: Knead the dough until smooth and elastic, which is crucial for achieving the fluffy texture in your Garlic Herb Braided Bread.
-
Ensure Rising Conditions: For the best results, let the dough rise in a warm, draft-free area; a cool environment can lead to dense bread.
-
Mind Your Timing: Don’t skip the second rise; it develops flavor and texture, making your bread light and airy. Patience is key!
-
Add Personal Touches: Feel free to incorporate different herbs or cheeses to tailor the flavor to your liking, keeping the bread fresh and exciting.
Garlic Herb Braided Bread Variations
Invite your creativity to shine through with these delightful twists on the traditional recipe!
- Gluten-Free: Substitute all-purpose flour with a gluten-free blend for a delicious alternative that everyone can enjoy.
- Cheesy Delight: Add shredded mozzarella into the dough for an extra cheesy surprise that elevates every bite.
- Herb Infusion: Experiment with fresh herbs like rosemary or dill to create unique flavor profiles that suit your palate.
- Spicy Kick: Incorporate red pepper flakes into the dough or sprinkle them on top before baking for a zesty punch.
- Seasoned Topping: Brush the top with garlic butter instead of plain butter for an even richer flavor that enhances the crust.
Feel free to get creative! Baking is all about experimenting, so why not try making it into rolls instead of a braid? You can also explore pairing this bread with dishes like Garlic Butter Beef Bites for a heartier meal or even a comforting bowl of soup. Whatever you decide, you’ll find that each variation brings its own charm to this luscious loaf!
Storage Tips for Garlic Herb Braided Bread
Room Temperature: Keep the braided bread in an airtight container at room temperature for up to 3 days to maintain its softness and flavor.
Freezer: For longer storage, wrap the cooled loaf tightly in plastic wrap and then in aluminum foil, freezing for up to 3 months. Thaw at room temperature before reheating.
Reheating: To enjoy the Garlic Herb Braided Bread warm, preheat your oven to 350°F (175°C) and bake for about 10-15 minutes, or until heated through.
Avoid Moisture: Never store bread in the fridge, as it can dry out quickly due to moisture loss; room temperature or freezer storage is best for preserving its delightful texture.
What to Serve with Garlic Herb Braided Bread
This delightful artisan loaf can elevate any meal, bringing warmth and comfort to your dining experience.
-
Rich Tomato Soup: The classic pairing of this velvety soup with garlic herb bread creates a comforting, unforgettable meal perfect for cozy evenings. Dipping the bread into the soup lets the flavors meld beautifully.
-
Creamy Risotto: Serve alongside a bowl of creamy risotto to balance the soft texture of the bread with the risotto’s rich, creamy consistency—a match made in heaven.
-
Fresh Green Salad: A vibrant salad filled with mixed greens and a zesty vinaigrette adds freshness and crunch, complementing the savory aroma of the garlic herb bread perfectly.
-
Cheese and Olive Platter: Arrange an assortment of cheeses, olives, and spreads on a board for sharing. The bread serves as the perfect vehicle to enjoy the delightful flavors of your favorite cheese.
-
Herbed Butter: Whip up some herbed butter to serve on the side. The richness melds beautifully with the garlic and parmesan notes of the bread, making each bite unforgettable.
-
Sparkling Lemonade: This refreshing drink offers a bright contrast to the savory flavors of the garlic herb braided bread, enhancing every bite with its citrusy brightness.
-
Dark Chocolate Brownies: For dessert, indulge in fudgy dark chocolate brownies. The combination of sweet and savory will create a delightful end to your meal.
Make Ahead Options
These Garlic Herb Braided Bread are perfect for busy home cooks looking to save time! You can prepare the dough up to 24 hours in advance by mixing and kneading it, then refrigerate it in a well-sealed container. This not only develops deeper flavors but also means you can braid your bread fresh the next day. Just let it sit at room temperature for about 30 minutes to regain warmth before shaping and allowing it to rise a second time. Remember to recover it while rising to prevent a crust from forming. Bake as directed, and you’ll have a beautifully risen loaf that’s just as delightful as if you’d made it the same day!
Garlic Herb Braided Bread Recipe FAQs
How do I choose the best garlic for Garlic Herb Braided Bread?
Absolutely! For the best flavor, look for garlic bulbs that are firm and plump without any dark spots or soft sections. Fresh garlic will give you the best taste, whether you choose to mince it or roast it for a sweeter, milder flavor.
What’s the best way to store Garlic Herb Braided Bread?
I recommend keeping your braided bread wrapped in an airtight container at room temperature for up to 3 days. This method ensures it remains soft and retains its delicious flavor. If you want to store it for longer, wrap it tightly in plastic wrap and then aluminum foil. This way, you can freeze it for up to 3 months, perfect for any future cravings!
Can I freeze Garlic Herb Braided Bread?
Certainly! To freeze, allow the bread to cool completely after baking. Then, wrap it tightly in plastic wrap followed by aluminum foil to protect it from freezer burn. When you’re ready to enjoy it, simply thaw it at room temperature and reheat in a 350°F (175°C) oven for about 10-15 minutes for that fresh-baked aroma and texture.
What if my dough doesn’t rise properly?
No worries! If your dough doesn’t rise, it might be due to inactive yeast or improper temperature during the activation step. Ensure your water is precisely 110°F and that the yeast has a chance to foam for 5-10 minutes. If it’s still not rising, try placing the dough in a warmer environment or giving it more time; sometimes, it just needs a little extra love and warmth!
Is Garlic Herb Braided Bread safe for anyone with food allergies?
Of course! This recipe contains gluten and dairy, so if you’re baking for someone with allergies, consider using a gluten-free flour blend and dairy-free cheese alternatives. Always check ingredients like yeast or any add-ins for allergens. You can easily adapt this delicious bread to fit your dietary needs.
Garlic Herb Braided Bread
Ingredients
Equipment
Method
- In a large mixing bowl, combine 1 cup of warm water with 1 tablespoon of sugar, and sprinkle 2 teaspoons of active dry yeast on top. Let it sit for 5-10 minutes until frothy.
- Once the yeast is activated, stir in 2 tablespoons of olive oil, 2 cloves of minced garlic, 1 tablespoon of dried mixed herbs, and 1 teaspoon of salt. Gradually add 2½ cups of flour.
- Turn the dough onto a floured surface and knead for 6-8 minutes, adding ½ cup of grated parmesan cheese halfway through.
- Place the kneaded dough in a greased bowl, cover, and let it rise for 1 hour until doubled in size.
- Punch down the dough, divide it into three equal parts, and braid them together. Place on a parchment-lined baking sheet.
- Allow the braid to rise for 30-40 minutes, covered with a damp cloth.
- Preheat the oven to 375°F (190°C). Brush the top with melted butter and sprinkle with additional parmesan or red pepper flakes.
- Bake for 25-30 minutes until golden brown. Tap the bottom to check for doneness.
- Allow cooling slightly on a wire rack before slicing and serving.
Leave a Reply