
As I stood in my kitchen with flour dusting the countertops, the aroma of garlic began to fill the air, pulling me into a comforting moment of creativity. This Garlic Herb Braided Bread is more than just a recipe; it’s an artisan loaf that transforms simple meals into memorable experiences. With its golden crust and fluffy interior, this bread boasts the delightful flexibility of being customizable — think gluten-free flour or herby variations to suit any taste! Not only is it perfect for family dinners, but it also makes an eye-catching centerpiece for gatherings. Plus, with a quick prep time and the delectable satisfaction of homemade freshness, it’s hard to resist. Are you ready to embark on a baking adventure that will leave your loved ones asking for seconds? Let’s get started!
Why Is Garlic Herb Braided Bread So Special?
Artisan Quality: This bread showcases baking skills that impress, resulting in a gorgeous artisan loaf that tastes as good as it looks.
Customizable: Feel free to experiment with different herbs or even substitute for gluten-free flour, making it suitable for everyone’s dietary needs.
Delectable Aroma: The moment you mix garlic and herbs, your kitchen will be filled with a mouthwatering scent that entices everyone around.
Quick Prep Time: With a straightforward process, your stunning bread will be ready in just a couple of hours, perfect for those busy days.
Perfect Pairing: Whether you serve it warm with butter or alongside a bowl of soup, the Garlic Herb Braided Bread elevates any meal. For more delicious sides, don’t forget to try Garlic Herb Roasted potatoes or even Sticky Garlic Chicken for a complete dining experience.
Crowd-Pleasing Appeal: This stunning loaf is sure to be a hit at family gatherings or dinner parties, leaving your guests impressed and asking for the recipe!
Garlic Herb Braided Bread Ingredients
For the Dough
• All-purpose or Bread Flour – Provides the necessary structure and texture; you can use a gluten-free flour blend for a wonderful alternative.
• Active Dry Yeast – Acts as the leavening agent to make your bread rise; instant yeast can save you time with quicker rise times.
• Warm Water (110°F) – Essential for hydrating and activating the yeast for the perfect dough rise.
• Olive Oil – Adds moisture and a rich flavor; feel free to swap it with garlic butter for an even more indulgent taste.
• Salt – Key for enhancing flavor and controlling yeast activity to ensure proper fermentation.
• Sugar – Aiding fermentation by feeding the yeast and giving a slight sweetness to balance flavors.
• Garlic (minced or roasted) – Imparts a robust, savory flavor; adjust the amount based on your personal preference for garlic.
• Dried Mixed Herbs or Fresh – Complements the garlic superbly; you can substitute with your favorite herbs to customize.
• Grated Parmesan Cheese – Infuses the bread with a savory depth; consider adding other cheeses for a twist.
• Melted Butter (for brushing) – Gives your loaf a beautiful shine and additional flavor upon baking.
Optional Add-ins
• Red Pepper Flakes – For a hint of heat that elevates the dish.
• Shredded Mozzarella – Perfect for those cheese lovers looking to take their bread to the next level.
• Fresh Parsley – A vibrant garnish that adds color and freshness just before serving.
This Garlic Herb Braided Bread is not only a treat for your taste buds but also a delightful way to bring the family together around the dinner table!
Step‑by‑Step Instructions for Garlic Herb Braided Bread
Step 1: Prepare the Yeast Mixture
In a large mixing bowl, combine warm water (110°F) and sugar, stirring gently to dissolve. Sprinkle the active dry yeast on top of the water and allow it to sit undisturbed for 5 to 10 minutes until it becomes foamy, signaling that the yeast is active and ready to work its magic in your Garlic Herb Braided Bread.
Step 2: Mix the Dough
Once the yeast mixture is foamy, add in the olive oil, minced garlic, dried herbs, salt, and 2½ cups of flour. With a wooden spoon or dough hook attachment, mix until a soft dough forms, gradually incorporating remaining flour as necessary. The dough should be slightly sticky but manageable, preparing it for the kneading process.
Step 3: Knead the Dough
Turn the dough onto a floured surface and knead for 6 to 8 minutes. As you knead, add half the grated parmesan cheese to the dough, allowing it to blend in completely. You’ll know the dough is ready when it feels smooth and elastic, a key texture for your Garlic Herb Braided Bread that will result in a delightful rise.
Step 4: Let It Rise
Transfer the kneaded dough into a greased bowl, covering it with a clean kitchen towel or plastic wrap. Place the bowl in a warm area and let it rise until doubled in size, approximately 1 hour. Keep an eye on it; you should see the dough expand into a fluffy, airy mass, ready for braiding.
Step 5: Shape the Dough
After the dough has doubled, punch it down gently to release any excess air. Divide the dough into three equal pieces and roll each piece into long ropes, about 12 inches in length. Braid the three ropes together, ensuring a tight and even braid. This step is key to creating your stunning Garlic Herb Braided Bread.
Step 6: Second Rise
Tuck the ends of the braided dough underneath to create a neat shape, then place it on a parchment-lined baking sheet. Cover loosely with a towel and let it rise again for 30 to 40 minutes until puffy. During this time, preheat your oven to 375°F (190°C), ensuring it’s perfectly hot for a great bake.
Step 7: Prepare for Baking
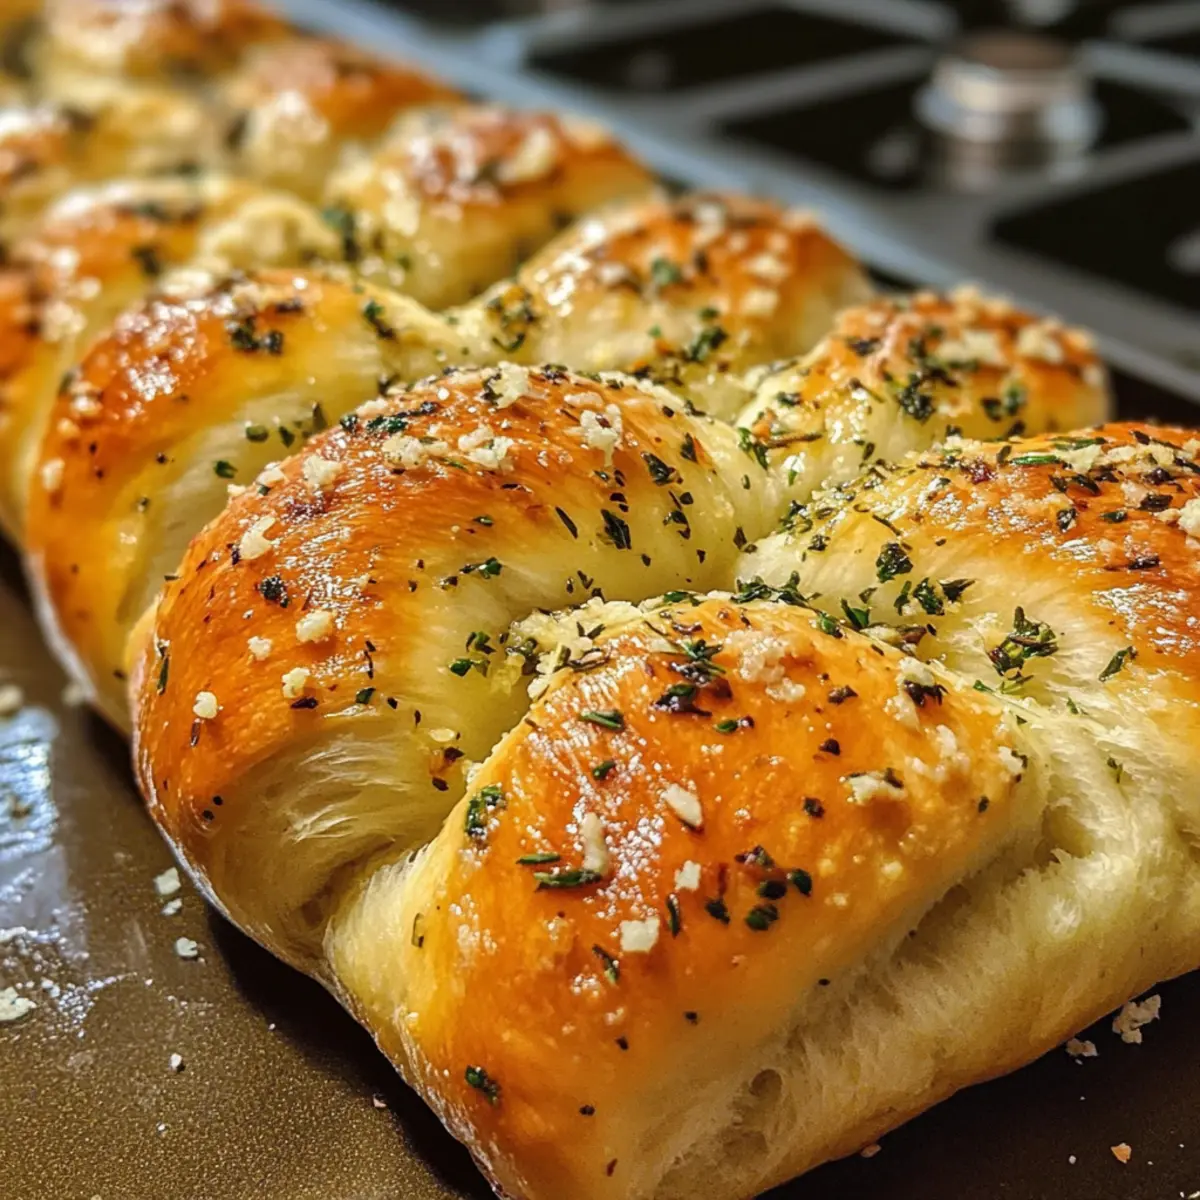
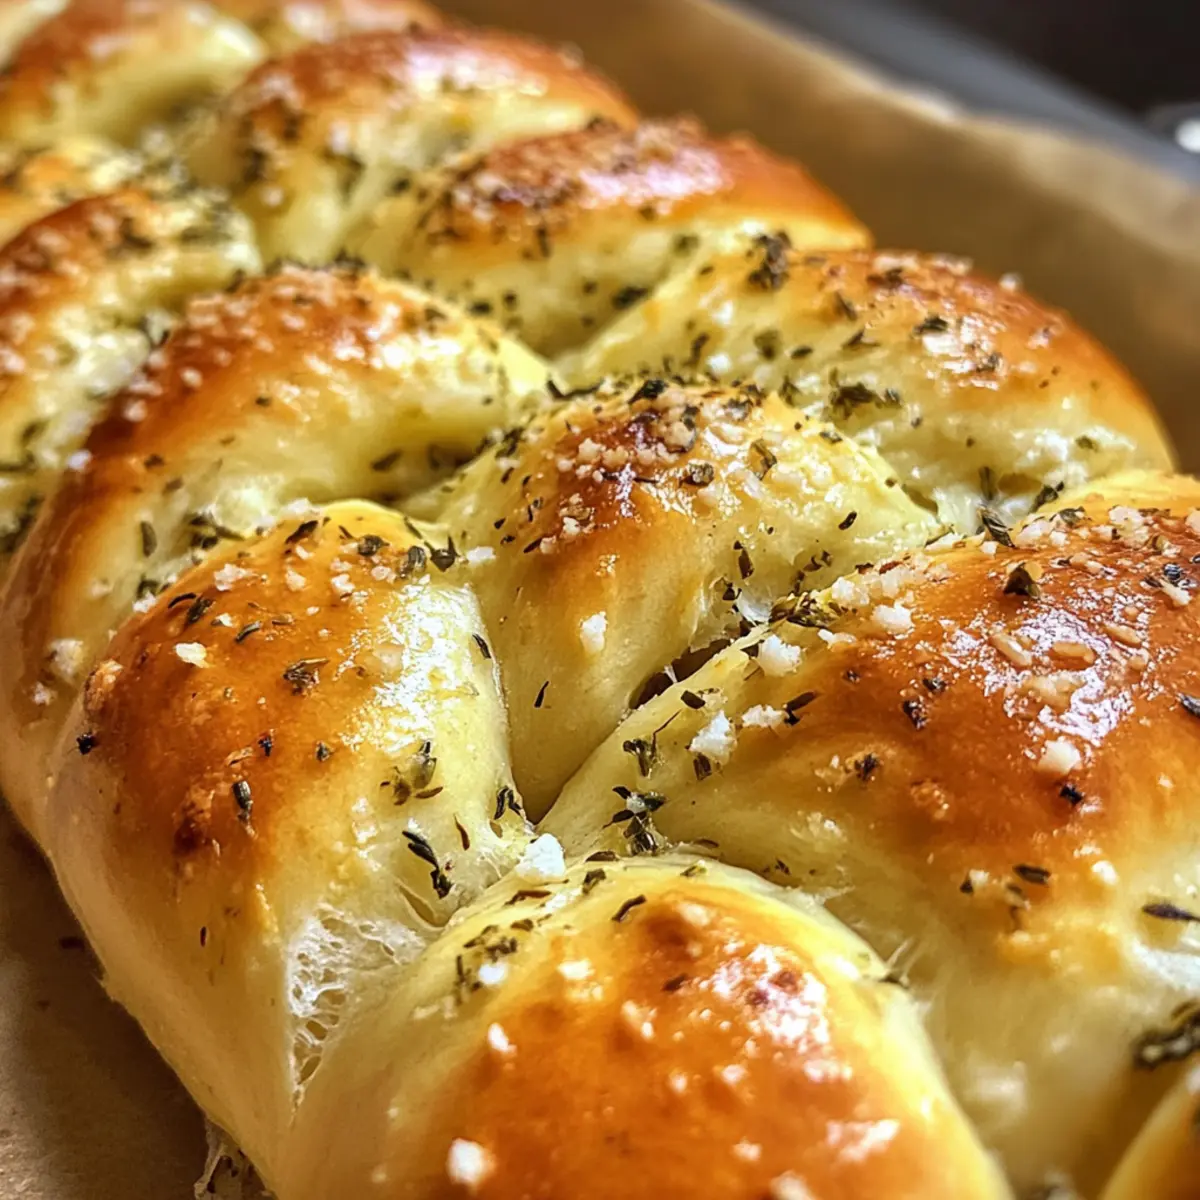
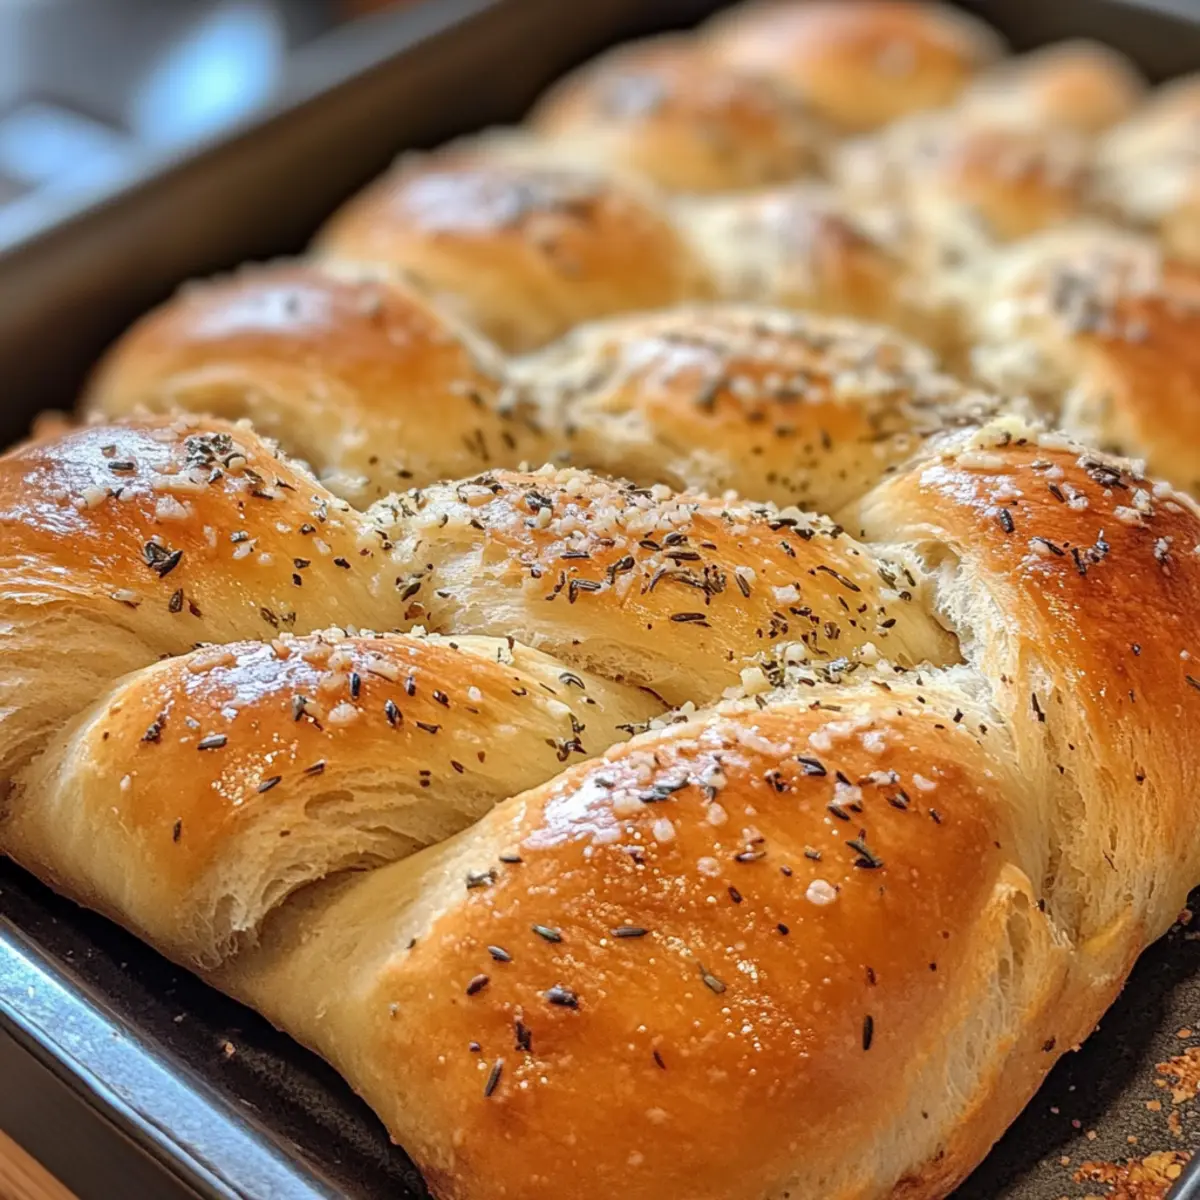
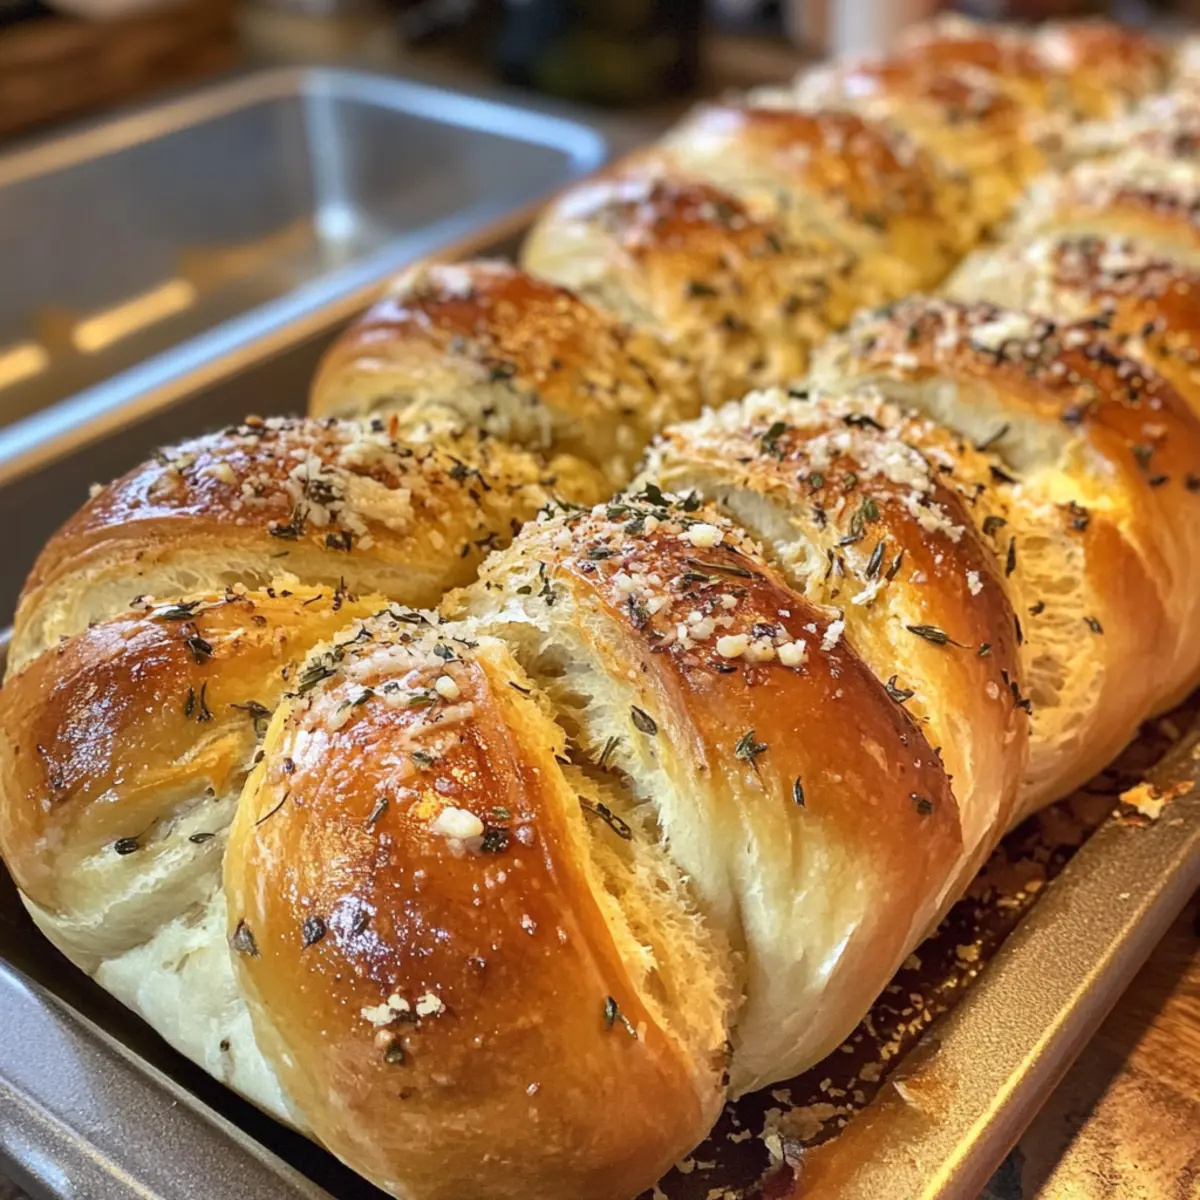
Once the second rise is complete, brush the top of your braided loaf with melted butter for a golden sheen. If desired, sprinkle with additional grated parmesan or your favorite toppings for extra flavor. This final touch enhances both the appearance and taste of your Garlic Herb Braided Bread.
Step 8: Bake the Bread
Bake the bread in the preheated oven for 25 to 30 minutes, until it turns golden brown and you can smell its lovely aroma filling your kitchen. To check for doneness, tap the bottom of the loaf; it should sound hollow when fully baked. Once done, remove the bread from the oven and let it cool slightly before slicing.
Storage Tips for Garlic Herb Braided Bread
Room Temperature: Store your Garlic Herb Braided Bread in an airtight container at room temperature for up to 3 days. This keeps the crust crispy while keeping the inside soft.
Fridge: If you need to extend storage, wrap the bread in plastic wrap and refrigerate for up to a week. However, be aware that refrigeration may alter the texture slightly.
Freezer: Freeze the bread for longer storage by wrapping it tightly in plastic wrap, then placing it in a freezer bag. It can be frozen for up to 3 months without losing flavor.
Reheating: To reheat, simply thaw overnight in the fridge and warm in a 350°F (175°C) oven for about 10 minutes to revive that fresh-baked texture.
What to Serve with Garlic Herb Braided Bread?
Creating a memorable meal is easy when you have delightful options to pair with this aromatic loaf.
- Creamy Tomato Soup: The rich, tangy flavors beautifully complement the savory garlic herbs of the bread, making every dip delightful.
- Garlic Butter Shrimp: This dish brings a juicy, buttery sweetness that elevates the garlicky flavors in the bread, creating a taste sensation that lingers.
- Roasted Vegetable Medley: Colorful and full of texture, these veggies offer a delicious contrast to the soft fluffiness of your Garlic Herb Braided Bread.
- Classic Caesar Salad: The crisp greens and creamy dressing provide a refreshing contrast while the croutons pair perfectly with the bread’s texture.
- Cheesy Gratin Potatoes: Rich, creamy, and topped with a golden layer of cheese, these potatoes enhance the comforting nature of your meal while adding depth.
- Sparkling White Wine: A refreshing drink choice that cuts through the richness of the bread, enhancing its savory flavors and making your dining experience feel special.
- Lemon Sorbet: A light and zesty dessert that cleanses the palate after enjoying your bread and main dishes, leaving everyone feeling refreshed and satisfied.
- Fresh Fruit Platter: A bright assortment of fruits adds a burst of sweetness to balance the savory bread and lends a fresh finish to your meal.
- Olive Tapenade: This savory spread brings a delightful burst of flavor that pairs wonderfully with the soft texture of the bread.
Expert Tips for Garlic Herb Braided Bread
Temperature Matters: Ensure your warm water is at 110°F. Too hot can kill the yeast, preventing your Garlic Herb Braided Bread from rising successfully.
Don’t Skimp on Kneading: Knead for a full 6-8 minutes until the dough is smooth and elastic. This creates the right texture for a fluffy loaf.
Proper Rising Time: Give your dough enough time to rise in a warm spot. Rushing this step can lead to dense bread rather than the wonderfully airy delight you desire.
Braid with Care: Try different braiding techniques to create a beautiful finished loaf. A tighter braid ensures it holds together and looks stunning.
Topping Choices: Brush melted butter on before baking for a golden sheen. Don’t hesitate to sprinkle on more parmesan or herbs for added flavor that captivates every bite.
Make Ahead Options
These Garlic Herb Braided Bread make-ahead options are perfect for busy cooks looking to save time without sacrificing flavor! You can prepare the dough up to 24 hours in advance and refrigerate it; just remember to cover it tightly to maintain its quality and prevent drying out. After refrigerating, allow the dough to come to room temperature for about 30 minutes before shaping and braiding. Additionally, you can braid the loaf ahead of time, let it rise for the second time, then cover with plastic wrap and refrigerate for up to 3 days. When you’re ready to enjoy this stunning bread, simply preheat the oven and bake as instructed for fresh, warm Garlic Herb Braided Bread that’s just as delicious!
Garlic Herb Braided Bread Variations
Feel free to explore delicious twists and turns for your Garlic Herb Braided Bread that match your tastes and dietary preferences!
-
Gluten-Free: Use a gluten-free flour blend to make this bread accessible for those with gluten sensitivities. The same soft texture can be achieved with a quality blend!
-
Cheesy Delight: Add shredded mozzarella or extra parmesan into the dough for a richer flavor and creamy texture. This makes every slice ooze delightful cheesiness!
-
Herb Swap: Use fresh basil or rosemary for a fragrant twist that transforms the taste profile completely. Each bite will sing with vivacious green notes!
-
Roasted Garlic: Swap out minced garlic for roasted garlic instead. It mellows the flavor, giving your bread a rich sweetness and a buttery feel.
-
Add Some Heat: Incorporate red pepper flakes into the dough or sprinkle on top before baking. This will elevate the flavor and add a delightful kick that your family and friends will love.
-
Sweet Twist: Mix in a handful of dried cranberries or raisins for a touch of sweetness. This unexpected sweetness can create a beautiful balance with savory toppings.
-
Fancy Braids: Explore new braiding techniques, like a four-braid or a twisted ring, for a stunning presentation. The art of the braid can make your bread the star of the meal!
-
Variation in Shape: Transform the braided bread into individual rolls by dividing the dough before braiding. This makes for perfect single-serving pieces to enjoy alongside dinner or as snacks!
By adjusting these elements, you’re not just creating a loaf; you’re crafting a new family tradition. If you’re seeking other delicious pairings for your meals, consider trying out Garlic Butter Beef for a satisfying protein that complements your bread perfectly!
Garlic Herb Braided Bread Recipe FAQs
What type of flour is best for Garlic Herb Braided Bread?
I recommend using all-purpose or bread flour for the best structure and texture. If you’re looking for a gluten-free option, you can use a gluten-free flour blend. Just make sure to adjust any additional ingredients accordingly, as gluten-free flours can have different absorbency.
How should I store leftover Garlic Herb Braided Bread?
To keep your bread fresh, store it in an airtight container at room temperature for up to 3 days. If you need to store it for a longer period, wrapping it in plastic wrap and refrigerating it can extend its life up to a week, but it may slightly alter the texture.
Can I freeze Garlic Herb Braided Bread? How?
Absolutely! To freeze, wrap the cooled bread tightly in plastic wrap, then place it inside a freezer bag. It can be frozen for up to 3 months. When you’re ready to enjoy, thaw in the refrigerator overnight and reheat in a 350°F (175°C) oven for about 10 minutes to restore its delightful texture.
What can I do if my dough doesn’t rise?
If your dough doesn’t rise, it may be due to inactive yeast. Make sure your water is at the correct temperature (around 110°F). If you used old yeast or didn’t let it bloom properly, your bread won’t rise. Alternatively, find a warm spot in your kitchen to help encourage the rising process. You can also try kneading a bit of extra flour in to help stabilize it.
Is Garlic Herb Braided Bread safe for pets?
While the bread itself is typically safe for pets in small amounts, avoid giving them any that contains garlic, as it can be harmful to dogs and cats. Always check on the ingredients or consult your vet before sharing homemade goodies with your furry friends.
Can I add other ingredients to this bread?
The possibilities are endless! Feel free to incorporate different herbs for flavor, or even additional ingredients like cheese or red pepper flakes. Adjust the garlic and seasoning amounts to suit your family’s tastes — the more, the merrier! Enjoy experimenting!
Garlic Herb Braided Bread: Artisan Flavor for Your Table
Ingredients
Equipment
Method
- Prepare the yeast mixture by combining warm water and sugar; sprinkle yeast on top and let sit for 5 to 10 minutes until foamy.
- Mix the dough by adding olive oil, minced garlic, dried herbs, salt, and 2½ cups of flour; mix until a soft dough forms.
- Knead the dough on a floured surface for 6 to 8 minutes, incorporating half the grated parmesan.
- Let the dough rise in a greased bowl, covered, until doubled in size, about 1 hour.
- Shape the dough by dividing it into three pieces, rolling into ropes, and braiding them.
- For the second rise, let the braided dough rise on a parchment-lined baking sheet for 30 to 40 minutes.
- Prepare for baking by brushing with melted butter and adding toppings if desired.
- Bake in a preheated oven at 375°F for 25 to 30 minutes until golden brown.
Leave a Reply