
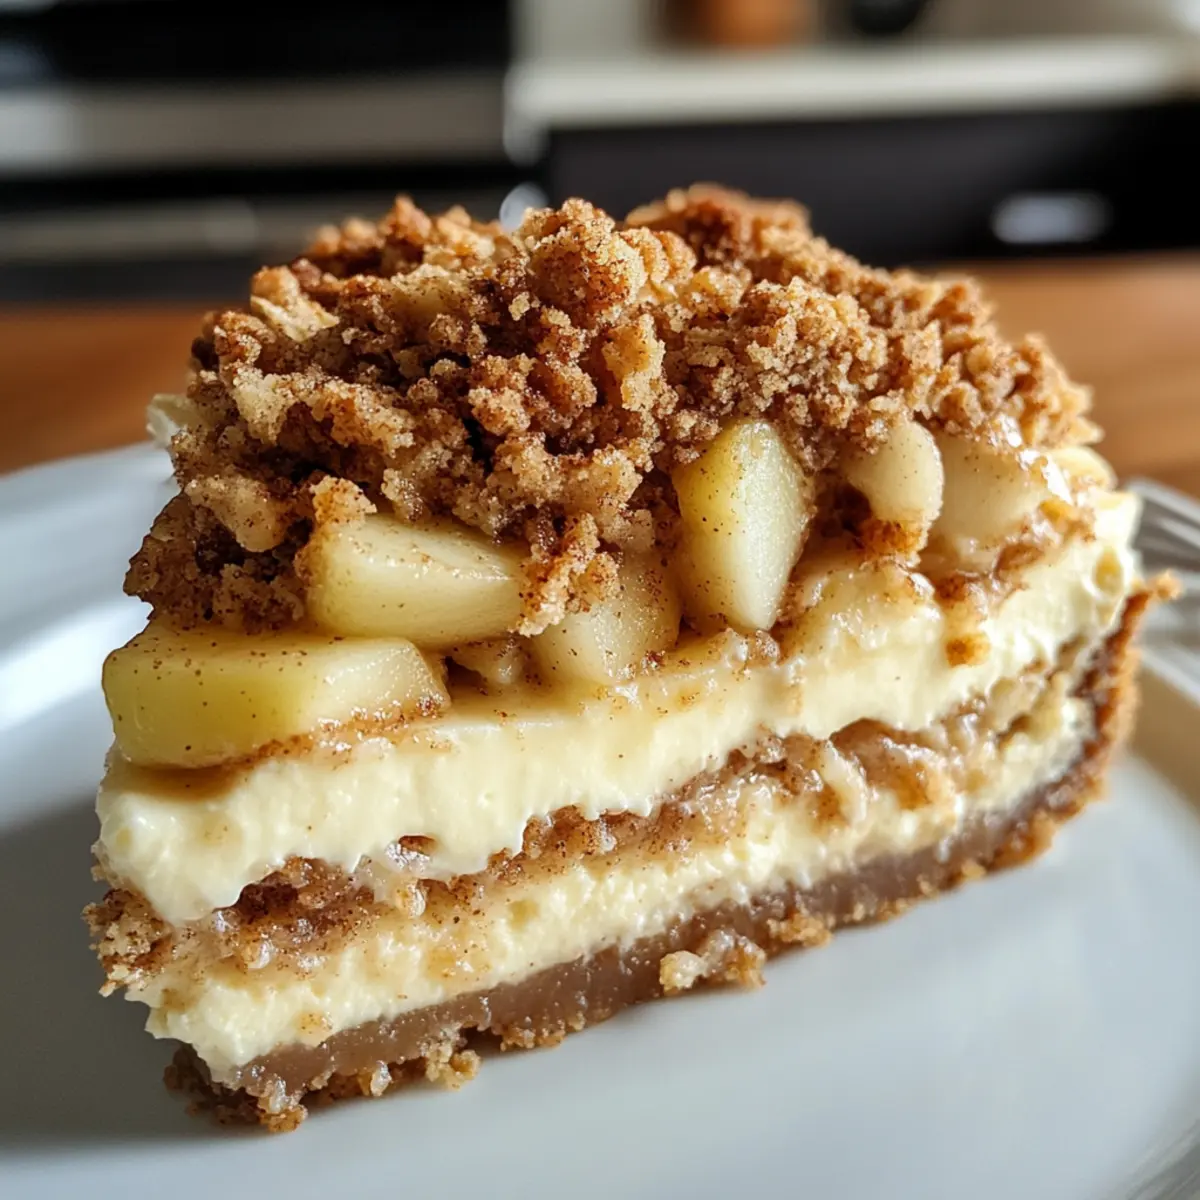
As I stood by the oven, the inviting aroma of cinnamon and caramel danced through the air, instantly transporting me to cozy autumn days. This is the magic of Apple Crisp Cheesecake, a delightful hybrid that marries the creamy satisfaction of cheesecake with the warm, spiced allure of baked apples and a crunchy crumb topping. Not only is this dessert a true crowd-pleaser, it’s also incredibly simple to prepare, making it a perfect choice for hosting friends or treating yourself. With an easy-to-follow recipe that delivers on both flavor and presentation, you’re sure to impress even the pickiest of eaters. Are you ready to uncover this delightful dessert that promises to elevate your next gathering? Let’s dive in!
Why is Apple Crisp Cheesecake a Must-Try?
Irresistible Flavor: The blend of rich cream cheese and spiced apples creates a deliciously decadent experience that everyone will love.
Effortless Preparation: With simple steps, even novice bakers can whip up this delightful dessert in no time.
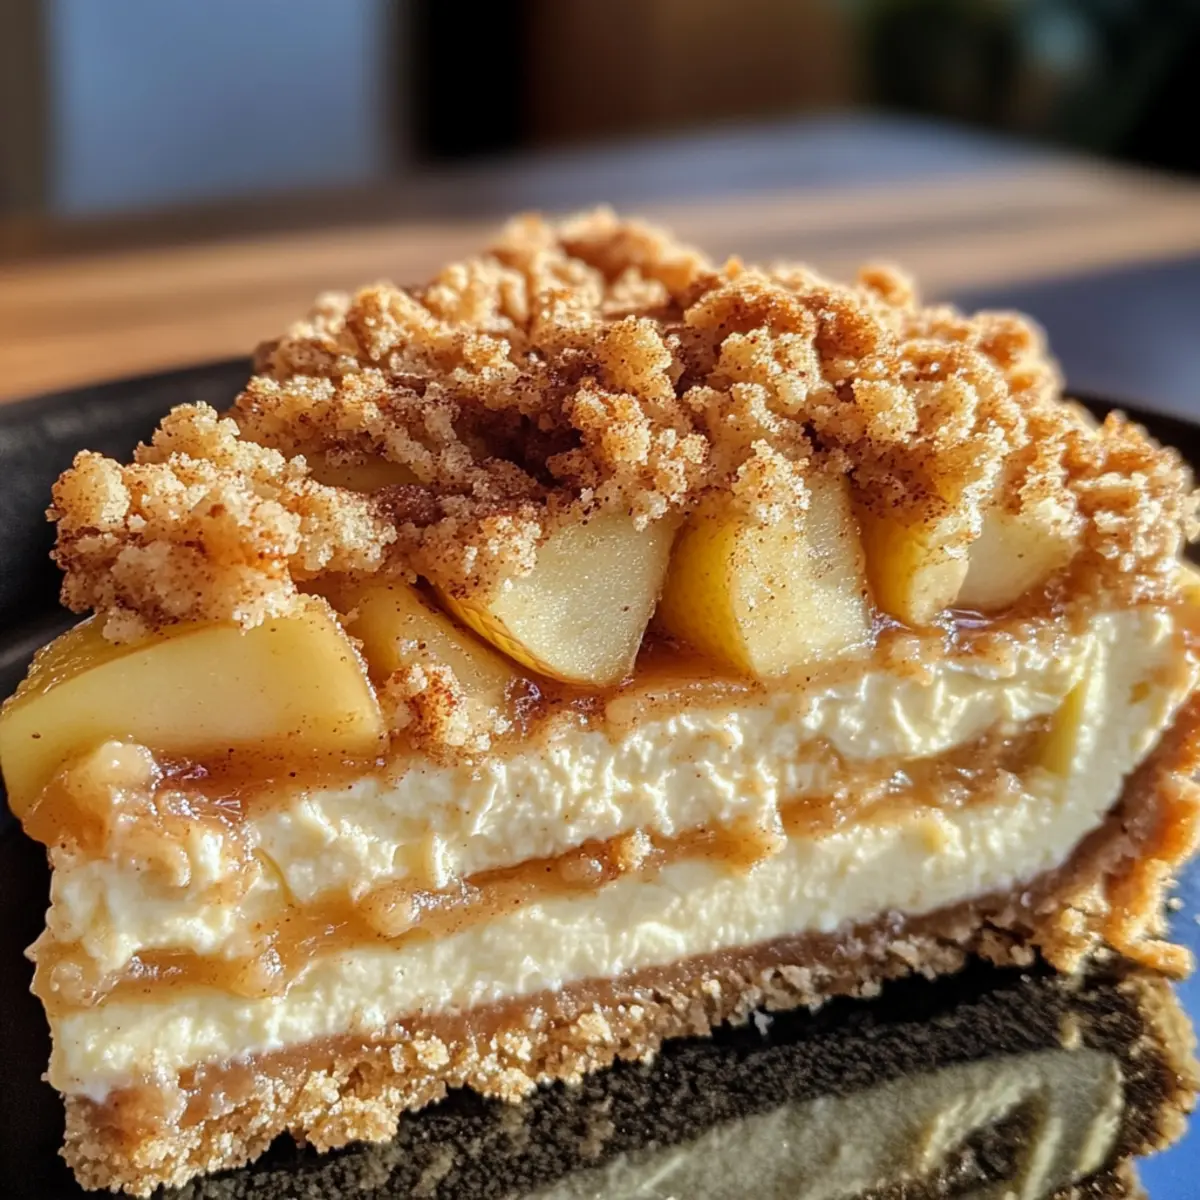
Showstopper Presentation: Garnished with caramel sauce, it not only tastes amazing but looks beautiful on any table.
Versatile Dessert: This recipe is easily customizable; swap out apples for pears or berries for a unique twist!
Perfect for Gatherings: Whether it’s a holiday feast or a casual get-together, this cheesecake will impress all your guests.
Try pairing it with a scoop of ice cream or check out our Pumpkin Cheesecake Muffins for another crowd-pleasing dessert!
Apple Crisp Cheesecake Ingredients
Get ready to create a dessert masterpiece!
For the Crust
- Graham Cracker Crumbs – Provides the base crust; substitute with digestive biscuits for a different flavor.
- Granulated Sugar (1¼ cups total) – Sweetens both the cheesecake and the topping; use brown sugar for a richer flavor in the topping.
- Melted Butter – Binds the crust ingredients together; can be replaced with coconut oil for a dairy-free version.
For the Cheesecake Filling
- Cream Cheese (3 packages, 24 oz total) – The star of the show; use full-fat for best results.
- Plain Greek Yogurt (or sour cream, 2 cups) – Adds creaminess and tang; substitute with light sour cream or a non-dairy alternative if needed.
- Vanilla Extract – Enhances the flavor; for a more aromatic twist, consider using vanilla bean paste.
- Eggs (4 large) – Provides structure; can be replaced with flax eggs for a vegan variant (1 flax egg = 1 tablespoon flaxseed meal + 2.5 tablespoons water).
For the Apple Topping
- Apples (3 cups, peeled and sliced) – The delightful base for the topping; choose varieties like Granny Smith or Honeycrisp for the best results.
- Cinnamon (1 tsp + 1 tsp for topping) – Adds warmth and sweetness; adjust to taste.
For the Crumble Topping
- All-Purpose Flour (¼ cup) – Used to bind the crumble topping; can be replaced with almond flour for a gluten-free option.
- Rolled Oats (½ cup) – Adds texture to the topping; substitute with crushed nuts for a different crunch.
- Brown Sugar (¼ cup) – Provides flavor in the crumble topping; use coconut sugar as an alternative.
Optional for Serving
- Salted Caramel Sauce – Drizzle before serving; use homemade or store-bought as desired.
Step‑by‑Step Instructions for Apple Crisp Cheesecake
Step 1: Preheat the Oven
Begin by preheating your oven to 325°F (163°C). This temperature is ideal for creating a perfectly baked crust. While the oven heats up, gather a springform pan and line it if desired. Greasing the pan will ensure the cheesecake comes out smoothly after baking.
Step 2: Prepare the Crust
In a bowl, combine the graham cracker crumbs and sugar. Pour in the melted butter and mix until the crumbs are well-coated. Press this mixture firmly into the bottom of the springform pan, creating an even layer. Bake the crust for 10 to 12 minutes until it’s golden and appears dry. Allow it to cool completely.
Step 3: Lower the Oven Temperature
Once the crust has cooled, reduce the oven temperature to 275°F (135°C). It’s crucial to bake the cheesecake at this lower temperature to prevent cracking. While the oven adjusts, prepare your ingredients for the cheesecake filling, ensuring they are measured and ready.
Step 4: Mix the Cheesecake Filling
In a large mixing bowl, beat the cream cheese until it’s smooth and creamy, avoiding any lumps. Gradually add the Greek yogurt, sugar, and vanilla extract, mixing thoroughly. Then, incorporate the eggs one at a time, ensuring each is well combined before adding the next. This mixture creates the luscious filling for your Apple Crisp Cheesecake.
Step 5: Pour and Smooth the Filling
Gently pour the cheesecake batter into the cooled crust, using a spatula to smooth the top for an even finish. This layer will provide a beautiful base for your apple topping. Now, set your prepared cheesecake aside while you work on the apple filling.
Step 6: Prepare the Apple Topping
In another bowl, mix the peeled and sliced apples with additional sugar and cinnamon. This step infuses the apples with a delightful sweetness and spice. Layer this mixture evenly over the cheesecake batter, creating a colorful and inviting presentation.
Step 7: Create the Crumble Topping
In a separate bowl, combine flour, oats, brown sugar, and cinnamon. Stir in melted butter until the mixture has a crumbly texture. Sprinkle this crumble evenly over the apple layer, ensuring every slice will have that delicious crunch when baked.
Step 8: Bake the Cheesecake
With everything layered, place the cheesecake in the oven and bake for 1.5 to 2 hours. Check for doneness when the center of the cheesecake reaches 150°F (65°C) on an instant-read thermometer. The edges should be set while the center remains slightly jiggly for perfect creaminess.
Step 9: Cool in the Oven
After baking, turn off the oven and leave the cheesecake inside with the door ajar for about 1 hour. This gradual cooling helps prevent cracking. Once cooled, remove it from the oven and let it rest at room temperature before chilling further.
Step 10: Refrigerate Before Serving
Cool the cheesecake completely, then refrigerate it for at least 8 hours, or overnight, to set. This chilling time allows the filling to firm up beautifully. Right before serving, drizzle with salted caramel sauce for an extra touch of indulgence. Enjoy your homemade Apple Crisp Cheesecake!
Apple Crisp Cheesecake Variations & Substitutions
Feel free to get creative and personalize your Apple Crisp Cheesecake with these delightful twists that will heighten the flavor and texture!
-
Fruit Swap: Use pears or berries instead of apples for a different fruity flavor profile. Each fruit brings its unique tartness to the dessert.
-
Grain-Free Option: Substitute almond flour for all-purpose flour in the crumble topping for gluten-free goodness that still has a satisfying crunch.
-
Dairy-Free Delight: Opt for coconut cream in place of cream cheese and Greek yogurt for a dairy-free cheesecake experience that’s still creamy and flavorful.
-
Sweetener Adjustment: Swap brown sugar for coconut sugar or maple syrup for a natural sweetener that adds depth and richness to the dessert.
-
Spice It Up: Incorporate pumpkin pie spice or add nutmeg along with cinnamon for a warm, cozy flavor that evokes a sense of fall.
-
Chocolate Twist: For chocolate lovers, add cocoa powder to the cheesecake mixture or layer chocolate ganache between the cheesecake and the apple filling for a divine chocolatey contrast.
-
Oat-Free Alternative: Replace rolled oats with crushed nuts like pecans or walnuts for an extra crunch that adds depth of flavor to your crumble topping.
-
Serving Suggestions: Consider serving slices alongside a scoop of vanilla ice cream or whipped cream for an extra treat. You might also like to drizzle with homemade salted caramel sauce for a perfect finish!
For more cozy desserts, check out our delectable Pumpkin Cheesecake Muffins or the sweet and spiced Apple Cinnamon Blondies that will keep your cravings satisfied!
How to Store and Freeze Apple Crisp Cheesecake
Fridge: Store covered in the refrigerator for up to 5 days to maintain freshness and flavor.
Freezer: Wrap the cheesecake tightly in plastic wrap and then in aluminum foil for freezing; it can last up to 2 months.
Thawing: When ready to enjoy, thaw in the fridge overnight to preserve texture. Note that the crumble topping may lose its crunch upon thawing.
Reheating: For a warm slice, briefly heat in the microwave for 15-20 seconds, making sure not to overheat to keep the cheesecake creamy.
Make Ahead Options
This Apple Crisp Cheesecake is an excellent choice for meal prep enthusiasts, allowing you to enjoy its deliciousness while saving time on busy days! You can prepare the crust and filling up to 24 hours in advance—just store them separately in the refrigerator. For the apple topping, mix the sliced apples with sugar and cinnamon ahead of time and refrigerate for up to 3 days, ensuring they’re well-sealed to prevent browning. When you’re ready to finish, simply layer the apple mixture and crumble topping over the cheesecake batter, then bake as directed. With these make-ahead tips, your cheesecake will be just as delicious while freeing up precious time!
Expert Tips for Apple Crisp Cheesecake
-
Room Temperature Cream Cheese: Always use cream cheese at room temperature to ensure a smooth texture without lumps. This is crucial for your cheesecake’s success.
-
Mixing Technique: Avoid over-mixing the filling, as this can introduce too much air, leading to cracks on the surface. Just mix until combined.
-
Monitor Baking Time: Keep an eye on the cheesecake towards the end of baking. Overbaking can result in a dry texture, so it’s better to check for doneness early.
-
Cooling Method: After baking, let the cheesecake cool in the oven with the door slightly open. This gradual cooling prevents cracking and helps maintain moisture.
-
Crust Tips: If your crust feels too crumbly, add a touch more melted butter. This will help it hold together nicely for a perfect base for your Apple Crisp Cheesecake.
-
Flavor Variations: Don’t hesitate to experiment with different spices or fruits. Adding nutmeg or swapping apples for pears can create exciting new flavors!
What to Serve with Apple Crisp Cheesecake
Indulging in a slice of this magnificent dessert is just the beginning—let’s create a full, comforting meal experience!
- Vanilla Ice Cream: A scoop of creamy vanilla perfectly balances the richness of the cheesecake, adding a delightful chill to every bite.
- Fresh Whipped Cream: Light and airy, this topping enhances the dessert’s flavors while bringing an elegant touch to your plate.
- Cinnamon Spiced Apples: A warm side of sautéed spiced apples harmonizes beautifully with the cheesecake’s apple topping, intensifying the comforting flavors.
- Toasted Pecans: Adding a handful of toasted pecans can enhance the crunchiness while introducing a rich, nutty flavor that partners well with the dessert.
- Coffee or Espresso: A bold cup of coffee or espresso complements the sweetness of the cheesecake, providing a perfect contrast that delights the senses.
- Maple-Glazed Carrots: These earthy, sweet vegetables create a lovely balance with the dessert while adding a vibrant pop of color to your meal.
- Apple Cider: Refreshing apple cider, whether hot or cold, brings out the apple notes in your cheesecake, enhancing the overall flavor profile.
- Chocolate Ganache: Drizzling some rich chocolate ganache over the dessert adds a luxurious touch, creating a combination that chocolate lovers will adore.
Apple Crisp Cheesecake Recipe FAQs
What type of apples work best for this cheesecake?
The best apples for your Apple Crisp Cheesecake are Granny Smith or Honeycrisp. These varieties provide a nice tartness that pairs beautifully with the sweet filling while maintaining their shape during baking.
How should I store leftover cheesecake?
Store your Apple Crisp Cheesecake covered in the refrigerator for up to 5 days. Make sure to wrap it well to avoid absorbing odors from the fridge, maintaining its delicious flavor and texture.
Can I freeze Apple Crisp Cheesecake, and if so, how?
Absolutely! To freeze your Apple Crisp Cheesecake, wrap it tightly in plastic wrap, followed by aluminum foil. This double-layering will protect it in the freezer. It can be kept for up to 2 months. When you’re ready to enjoy it, thaw overnight in the fridge to maintain its creamy texture.
Why does my cheesecake have cracks on top?
Cracks in your cheesecake can occur if it’s over-mixed or baked at too high a temperature. To avoid this, make sure all of your ingredients, especially the cream cheese, are at room temperature before mixing. Also, keeping an eye on the baking time is crucial; aim for the center to remain slightly jiggly.
Can I modify this recipe for dietary restrictions?
Definitely! To make this cheesecake dairy-free, replace the cream cheese with a vegan cream cheese alternative and use coconut oil instead of butter. For a gluten-free option, simply substitute the graham cracker crumbs with gluten-free crackers or almond flour for the crust, and ensure the oats are certified gluten-free.
What’s the best way to serve this cheesecake?
Serve your Apple Crisp Cheesecake chilled, and consider drizzling it with warm salted caramel sauce for that extra touch of decadence! For an added treat, a scoop of vanilla ice cream or a dollop of whipped cream pairs wonderfully with the rich flavors of the cheesecake.
Delicious Apple Crisp Cheesecake to Brighten Your Day
Ingredients
Equipment
Method
- Preheat your oven to 325°F (163°C). Prepare a springform pan by greasing it.
- In a bowl, combine graham cracker crumbs and sugar. Mix in melted butter until well-coated. Press into the pan and bake for 10 to 12 minutes until golden.
- After cooling, reduce oven temperature to 275°F (135°C) and prepare cheesecake filling ingredients.
- Beat cream cheese until smooth, then add Greek yogurt, sugar, vanilla, and eggs one at a time, mixing until combined.
- Pour the cheesecake batter into the cooled crust, smoothing the top with a spatula.
- In a bowl, mix apples with sugar and cinnamon, then layer them over the cheesecake batter.
- Combine flour, oats, brown sugar, and cinnamon. Stir in melted butter until crumbly, then sprinkle over the apples.
- Bake for 1.5 to 2 hours until the center reaches 150°F (65°C). The edges should be set, but the center can be jiggly.
- Turn off the oven and leave the cheesecake inside with the door ajar for 1 hour.
- Cool completely at room temperature, then refrigerate for at least 8 hours before serving. Drizzle with caramel sauce before serving.
Leave a Reply