
As I walked into the kitchen, the tantalizing aroma of sizzling bacon filled the air and wrapped me in a warm embrace. That’s when I knew it was time to whip up my favorite snack: Bacon Cheeseburger Bombs. These delightful treats transform a classic cheeseburger into a fun, shareable experience, perfect for gatherings or cozy movie nights. With quick prep and a world of customization options—like swapping in your favorite cheeses or adding a spicy kick with jalapeños—there’s something to please everyone. Imagine serving these crispy, cheesy bites straight from the oven, their golden exterior beckoning, while the gooey filling melts in your mouth. So, are you ready to take your snacking game to the next level? Let’s dive into this irresistible recipe!
What Makes Bacon Cheeseburger Bombs Special?
Unforgettable Flavor: These bombshell bites pack a punch, combining smoky bacon with melty cheese and seasoned beef for an explosion of deliciousness.
Customizable Delights: Want to add a twist? Mix and match cheeses or throw in jalapeños for heat, ensuring everyone can enjoy their perfect bomb!
Time-Saving Treats: Ready in just 20 minutes, these tasty morsels make for a quick appetizer for your next gathering or even a weeknight dinner option.
Crowd-Pleasing Appetizer: Perfect for parties, game days, or cozy nights in. Your friends and family won’t be able to resist these mouthwatering delights!
Satisfying Crisp: With a crunchy exterior and juicy filling, every bite is a balance of textures that keeps you coming back for more. Don’t forget to serve them with your favorite dipping sauces for that extra zing!
Bacon Cheeseburger Bombs Ingredients
For the Filling
• Ground Beef – Adds protein and rich flavor; swap for lean turkey for a healthier option.
• Shredded Cheese – Provides creaminess and flavor variety; try cheddar, mozzarella, or pepper jack to personalize your bites.
• Parmesan Cheese – Elevates the flavor; optional but recommended for that extra cheesy richness.
• Onion – Infuses depth; use finely chopped yellow or white onions for sweetness, or sauté for caramelization.
• Garlic – Enhances the aroma; garlic powder can be used as a quick substitute.
• Egg – Binds the mixture together; no substitutes needed to maintain consistency.
• Breadcrumbs – Holds the mixture together and adds crunch; opt for panko for an extra crispy finish.
• Salt and Pepper – Essential seasonings that elevate overall flavor; adjust according to personal taste preference.
For Wrapping
• Bacon – Provides a crispy, flavorful outer layer; raw bacon is critical for proper cooking and crispiness.
Optional Add-ins
• Jalapeños – Adds a spicy kick; finely dice and mix into the filling for those who enjoy heat.
• Other Cheeses – Consider swapping out cheddar for mozzarella or feta to explore different flavor profiles.
• Additional Vegetables – Add sautéed mushrooms or caramelized onions for an extra layer of flavor and texture.
Gather these ingredients to create your own delectable Bacon Cheeseburger Bombs, perfect for any occasion!
Step‑by‑Step Instructions for Bacon Cheeseburger Bombs
Step 1: Prepare the Mixture
In a large bowl, combine 1 pound of ground beef, 1 cup of shredded cheese, ¼ cup of Parmesan, ½ finely chopped onion, 2 minced garlic cloves, 1 beaten egg, ½ cup of breadcrumbs, and a pinch of salt and pepper. Mix gently until just combined to maintain a tender texture. This hearty mixture will become the savory filling for your Bacon Cheeseburger Bombs.
Step 2: Shape the Bombs
Once your mixture is prepared, divide it into 12 equal portions. With clean hands, shape each portion into a ball, roughly the size of a golf ball. Ensure that the balls are sturdy but not overly compacted, as this will help them cook evenly and stay juicy when transformed into your mouthwatering Bacon Cheeseburger Bombs.
Step 3: Wrap in Bacon
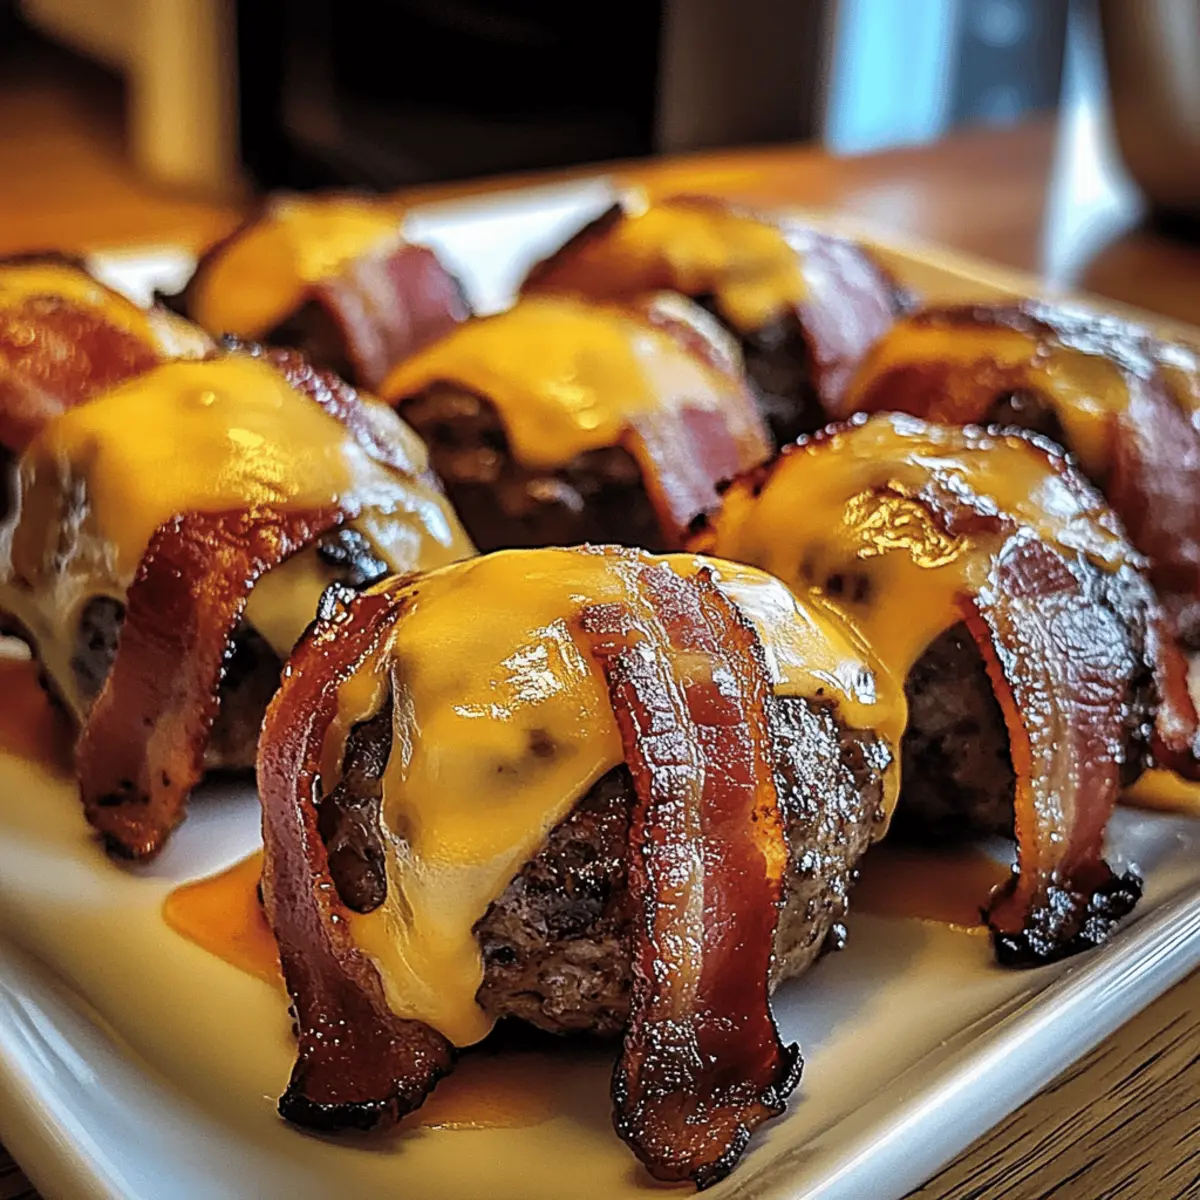
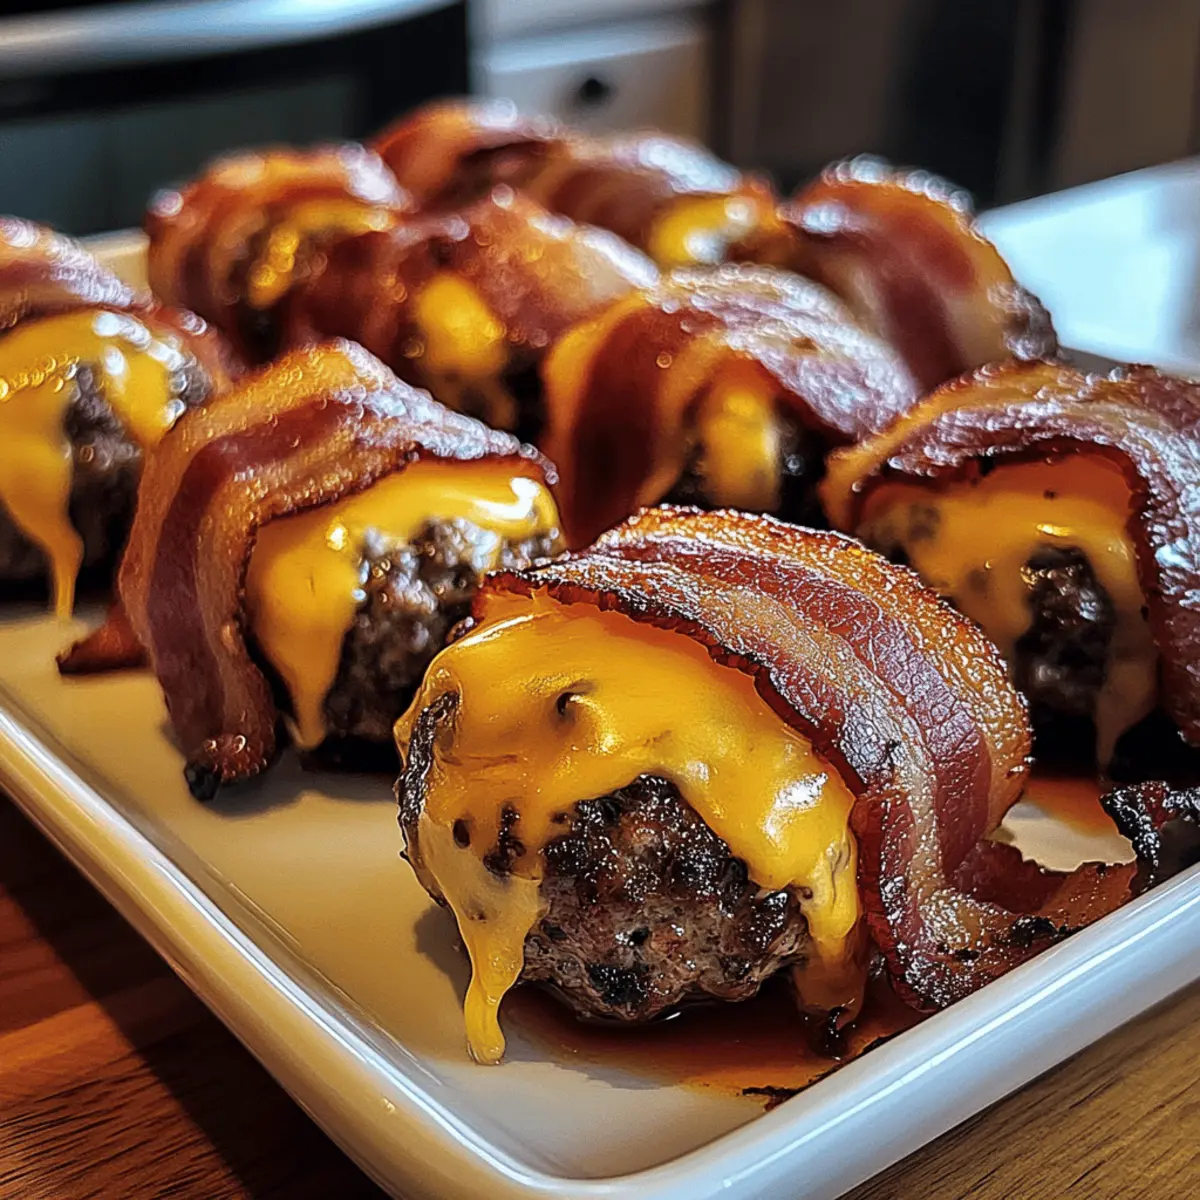
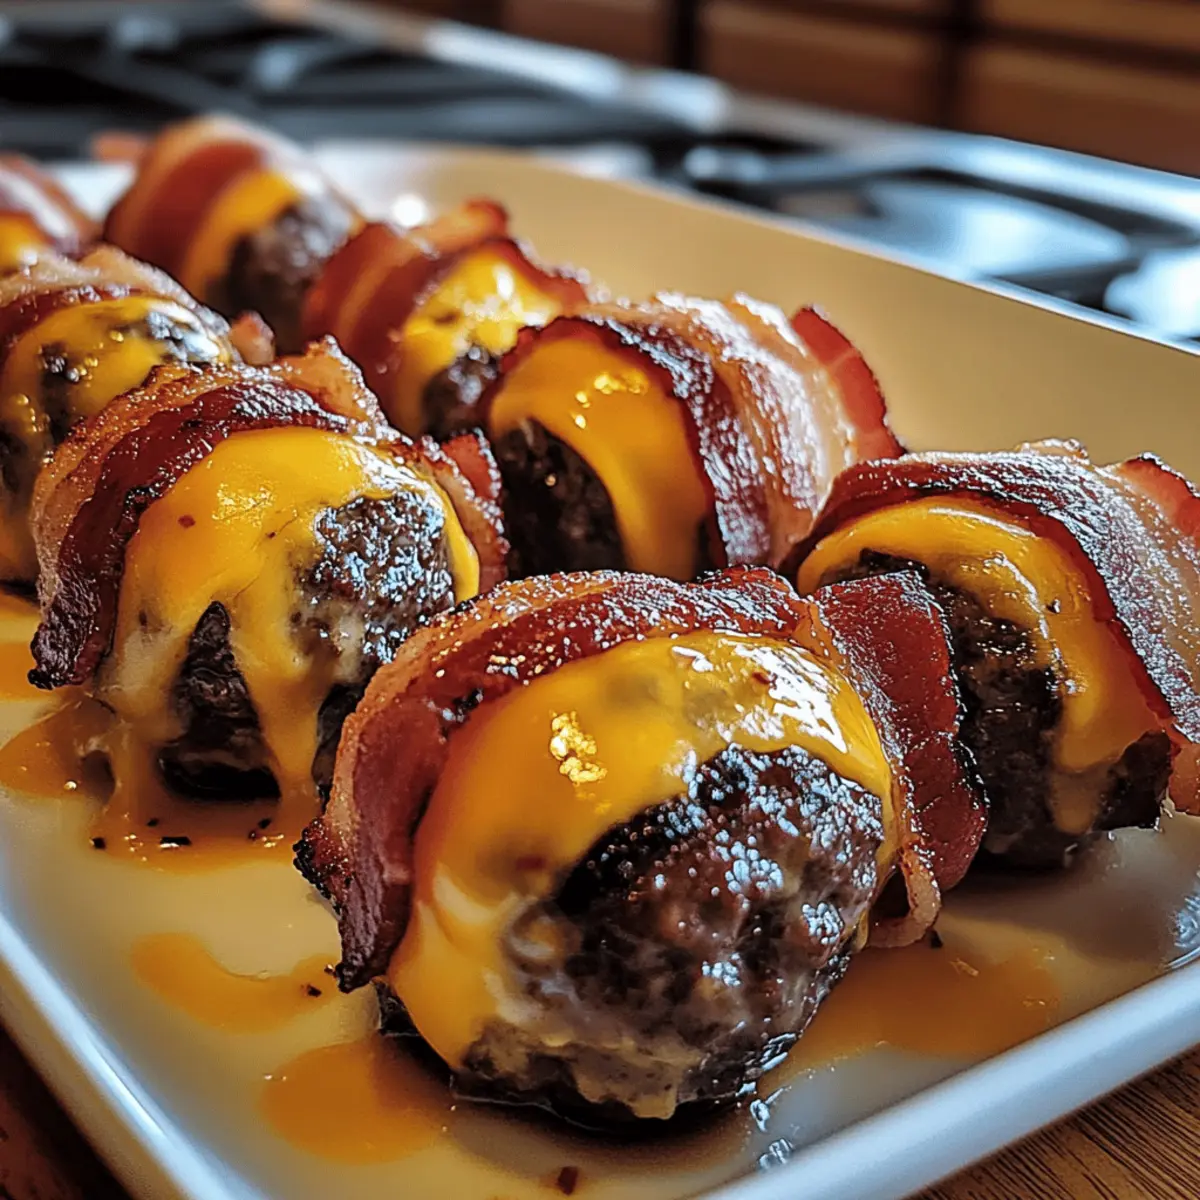
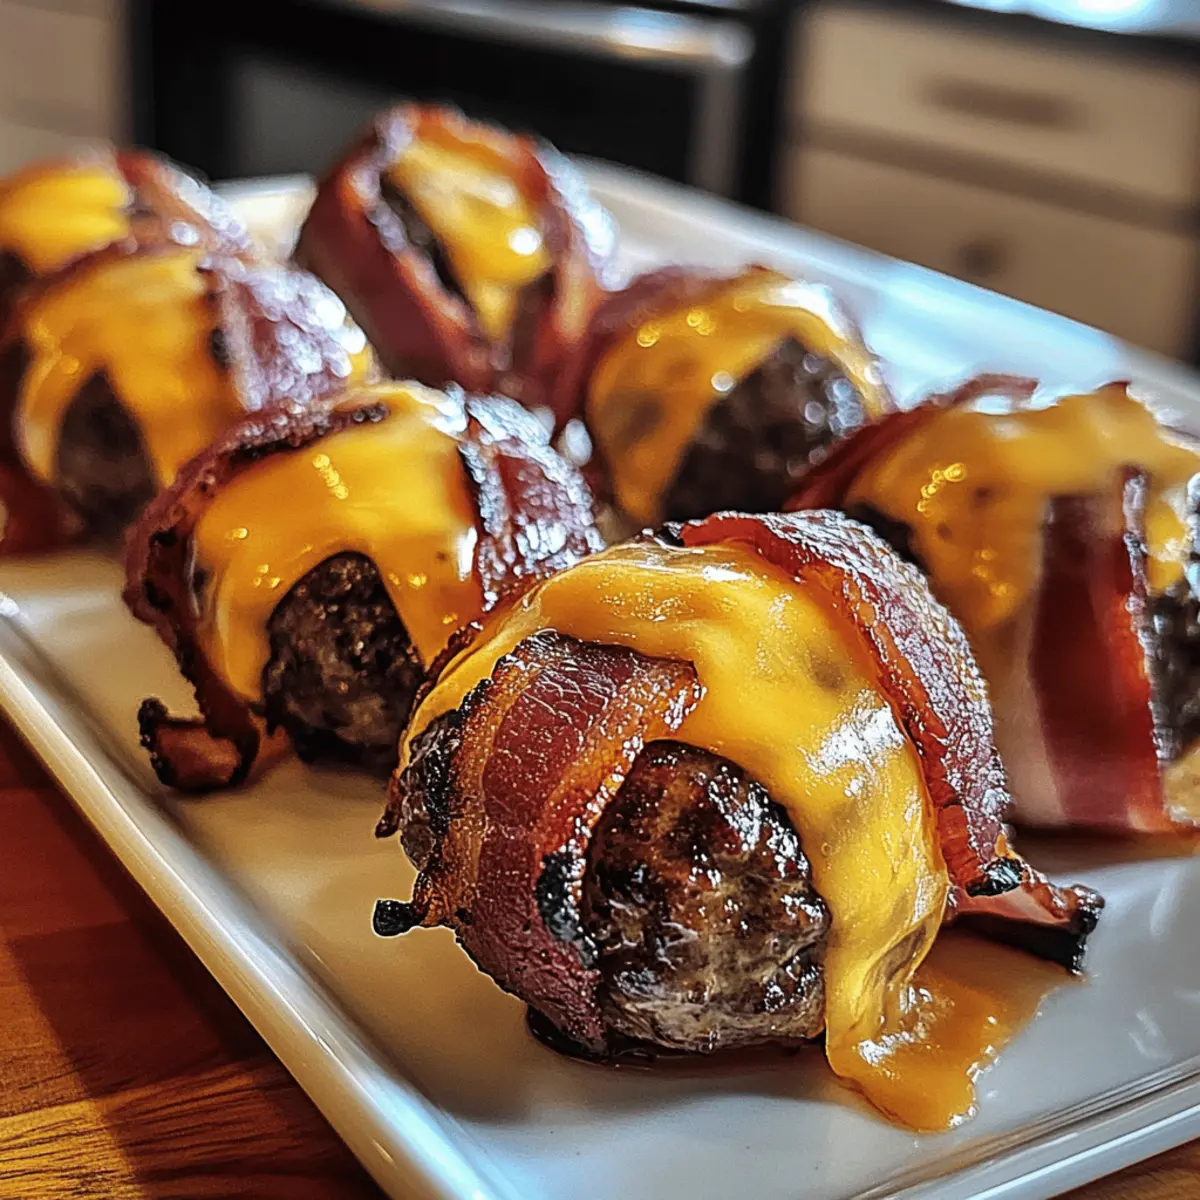
Take one raw slice of bacon and wrap it around each meatball, ensuring the entire surface is covered. If needed, secure the bacon with a toothpick to hold it in place during baking. This crispy outer layer will add a delightful crunch to your Bacon Cheeseburger Bombs, balancing the juicy filling perfectly.
Step 4: Bake the Bombs
Preheat your oven to 400°F (200°C) while you arrange the bacon-wrapped bombs on a parchment-lined baking sheet. Place them spaced apart to allow for even cooking. Bake for 15-20 minutes, or until the bacon is golden brown and crispy, sending a savory aroma wafting through your kitchen—an indication they’re nearly ready to enjoy!
Step 5: Serve Hot
Once baked, remove the Bacon Cheeseburger Bombs from the oven and let them cool for a few minutes. Serve them hot, paired with your favorite dipping sauces like ketchup, mustard, or spicy aioli. These irresistible bites are perfect for parties or a cozy night in, making every gathering a bit more special.
Storage Tips for Bacon Cheeseburger Bombs
Fridge: Keep leftover Bacon Cheeseburger Bombs in an airtight container for up to 3 days. This helps maintain their moisture while keeping them safe to enjoy later.
Freezer: For longer storage, freeze the uncooked bacon bombs individually on a baking sheet, then transfer to a freezer bag. They can be stored for up to 3 months—perfect for quick snacks!
Reheating: To reheat, place frozen bombs in a preheated oven at 400°F (200°C) for about 20-25 minutes, or until heated through and bacon is crispy.
Make Ahead: Feel free to assemble the Bacon Cheeseburger Bombs in advance. Just wrap and refrigerate until you’re ready to bake, making entertaining a breeze!
What to Serve with Bacon Cheeseburger Bombs
There’s nothing quite like a casual gathering where everyone delights in tasty bites, and these bombs are the star of the show.
- Classic French Fries: Golden, crispy fries are the ultimate companion, providing a satisfying crunch that pairs perfectly with the savory cheeseburger bombs.
- Fresh Coleslaw: The tangy crunch of coleslaw cuts through the richness, offering a refreshing balance that brightens each bite.
- Spicy Aioli: This creamy, zesty sauce adds a kick, elevating the flavor experience with every delicious dip into the bomb’s cheesy goodness.
- Baked Potato Wedges: Crisp on the outside and soft inside, these wedges complement the bombs beautifully, while allowing for your favorite seasoning choices.
- Veggie Platter: Offer an assortment of colorful, crisp veggies served with ranch dressing for a healthful contrast to the meaty bombs on your snack table.
- Ice-cold Beer: A chilled lager or amber ale enhances the flavors of the bacon cheeseburger bombs, creating a delightful pairing perfect for game day.
- Lemonade or Iced Tea: Refreshing beverages like tangy lemonade or sweet iced tea offer a cool respite, perfectly countering the hearty bites.
- Chocolate Chip Cookies: Sweeten up the gathering by ending on a high note with warm, gooey cookies, balancing the savory richness of the bacon bombs.
- Seasoned Popcorn: Lightly seasoned popcorn brings a fun, airy crunch, perfect for those who want a snack that’s easy to grab between bites.
Bacon Cheeseburger Bombs Variations
Calling all flavor adventurers! Dive into a world of delicious possibilities by customizing your Bacon Cheeseburger Bombs to suit every taste.
- Cheese Variety: Switch up the shredded cheese for mozzarella, provolone, or feta for a unique taste experience.
- Spicy Kick: Add finely diced jalapeños or serrano peppers to the filling for those who love a bold heat. It’ll elevate that savory explosion!
- Vegetarian Option: Use plant-based ground beef alternatives and skip the bacon for a delightful meatless version without sacrificing flavor.
- Extra Crunch: Incorporate chopped nuts or crispy fried onions into your mixture to introduce a delightful texture twist.
- Gourmet Twist: Elevate your bombs by adding sautéed mushrooms or caramelized onions for a gourmet flavor boost.
- Herb-Infused: Mix in fresh herbs like chopped parsley or cilantro to add a refreshing lift and aromatic flair.
- BBQ Flavor: Drizzle some barbecue sauce into the meat mixture before shaping for a smoky, tangy surprise in every bite.
- Breakfast Bombs: Blend in scrambled eggs and a touch of cheese for a brunch-worthy version that’s perfect for lazy weekends.
As you explore these variations, consider pairing your Bacon Cheeseburger Bombs with easy sides like Green Beans and Potatoes with Bacon for a well-rounded meal or serve alongside your favorite dipping sauces for added excitement! Enjoy the culinary journey!
Expert Tips for Bacon Cheeseburger Bombs
• Choose the Right Bacon: Opt for thicker cuts of bacon for a crunchier texture and more flavor. Thin bacon may not hold up during baking.
• Mix Gently: Avoid overmixing your filling. Lightly combine ingredients to maintain tenderness in the filling of your Bacon Cheeseburger Bombs.
• Customize Wisely: Feel free to add extras like jalapeños or mushrooms, but ensure that additional ingredients don’t push the mixture to be too wet, which can affect texture.
• Watch Baking Time: Ovens can vary! Keep an eye on your bombs and pull them out when the bacon is crispy and golden to prevent overcooking.
• Serve with Dipping Sauces: Enhance the experience by serving your Bacon Cheeseburger Bombs with a variety of sauces like BBQ or ranch; this adds an extra layer of flavor.
Make Ahead Options
These Bacon Cheeseburger Bombs are perfect for meal prep enthusiasts! You can prepare the filling mixture (1 pound of ground beef, 1 cup of shredded cheese, etc.) and shape the bombs up to 24 hours in advance. Simply cover them tightly with plastic wrap or store in an airtight container in the refrigerator to maintain freshness. When you’re ready to bake, simply unwrap and follow the baking steps. If you want even more flexibility, consider freezing shaped bombs for up to 3 months; just bake straight from frozen, adding a few extra minutes to the cooking time. This way, you can enjoy delicious homemade snacks with minimal last-minute effort!
Bacon Cheeseburger Bombs Recipe FAQs
What type of ground beef should I use?
Absolutely! For the best flavor and texture, I recommend using 80/20 ground beef, which offers a nice balance of fat and lean meat. If you’re looking for a healthier twist, lean turkey or a plant-based alternative works well too!
How should I store leftover Bacon Cheeseburger Bombs?
After enjoying these delightful snacks, keep any leftover Bacon Cheeseburger Bombs in an airtight container in the fridge for up to 3 days. This will help maintain their moisture and flavor, so they’re still delicious when you’re ready to heat them up!
Can I freeze Bacon Cheeseburger Bombs?
Yes! To freeze, place the uncooked bacon bombs individually on a baking sheet lined with parchment paper. Freeze them for about 1-2 hours until solid, then transfer them to a freezer bag. They can be stored for up to 3 months. When ready to cook, bake directly from frozen, adding an extra 5-10 minutes to the baking time.
What can I do if my bombs are falling apart?
No worries, it happens! If your bombs are crumbling, ensure you’re mixing your filling gently and not overworking it. Also, make sure the mixture has enough binding agents, such as breadcrumbs and egg. If they still break apart, try adding a few more breadcrumbs to absorb moisture and help hold the bombs together.
Are there any dietary considerations for pets or allergies?
Definitely! If you have pets, be mindful that the bacon and cheese are unsuitable for common household pets like dogs and cats. Always keep leftover Bacon Cheeseburger Bombs out of reach. For allergies, ensure to check the ingredients of your breadcrumbs and any cheese used; opt for gluten-free breadcrumbs or dairy-free cheese if necessary.
Savor Irresistible Bacon Cheeseburger Bombs for Any Occasion
Ingredients
Equipment
Method
- Prepare the Mixture: In a large bowl, combine ground beef, shredded cheese, Parmesan, finely chopped onion, minced garlic, beaten egg, breadcrumbs, and a pinch of salt and pepper. Mix gently until just combined.
- Shape the Bombs: Divide the mixture into 12 equal portions and shape each into a sturdy ball.
- Wrap in Bacon: Wrap one slice of bacon around each meatball, securing with a toothpick if needed.
- Bake the Bombs: Preheat the oven to 400°F, arrange the bombs on a baking sheet, and bake for 15-20 minutes until bacon is golden brown.
- Serve Hot: Allow to cool slightly before serving with your favorite dipping sauces.
Leave a Reply