
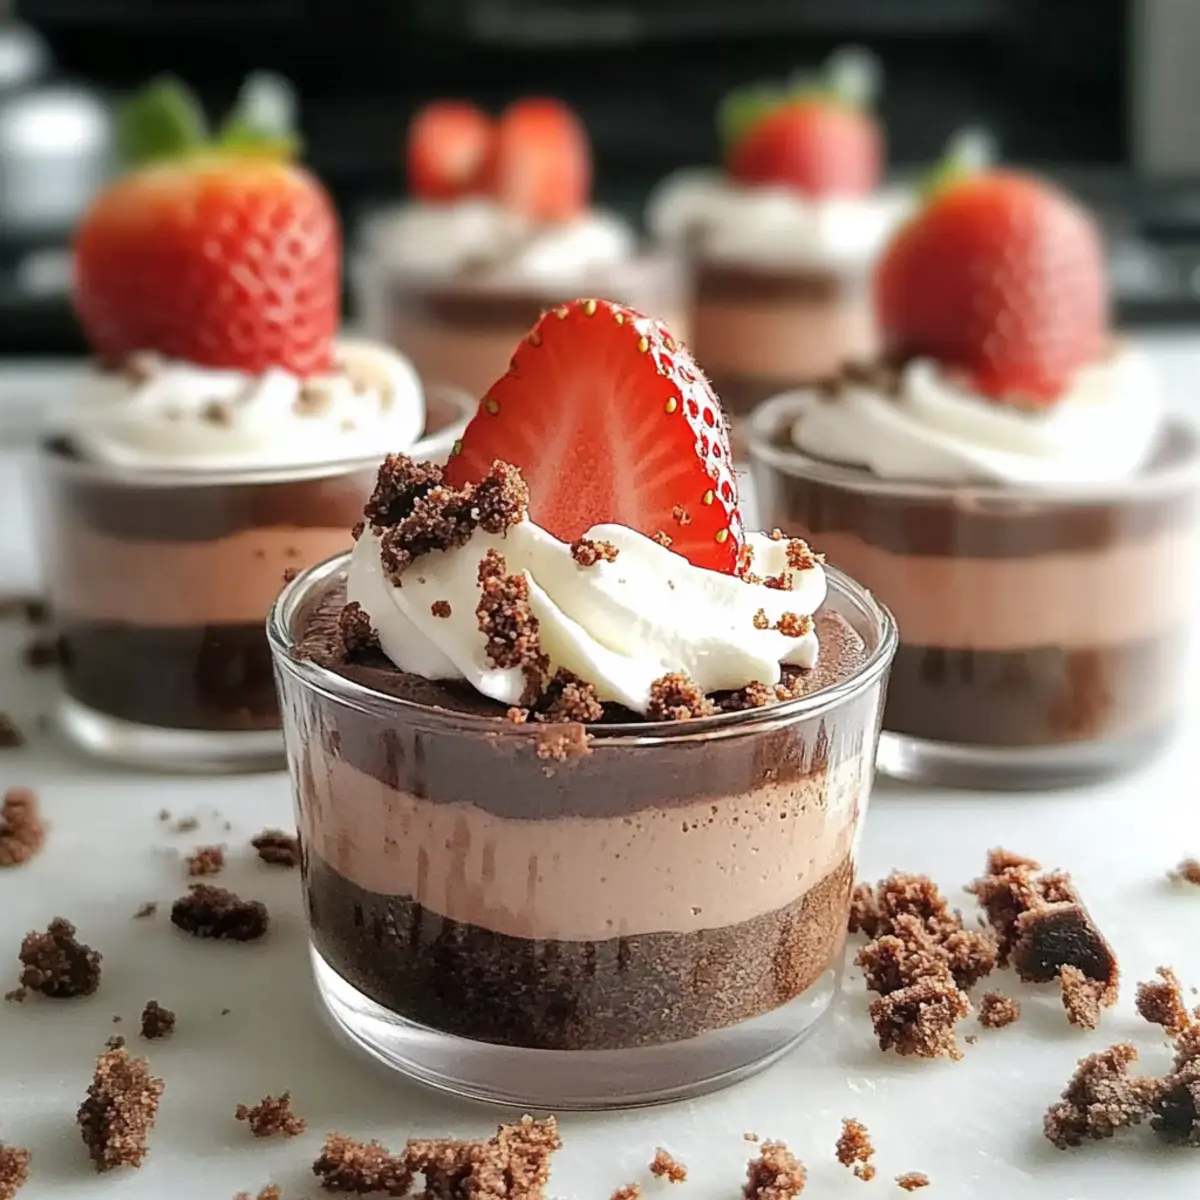
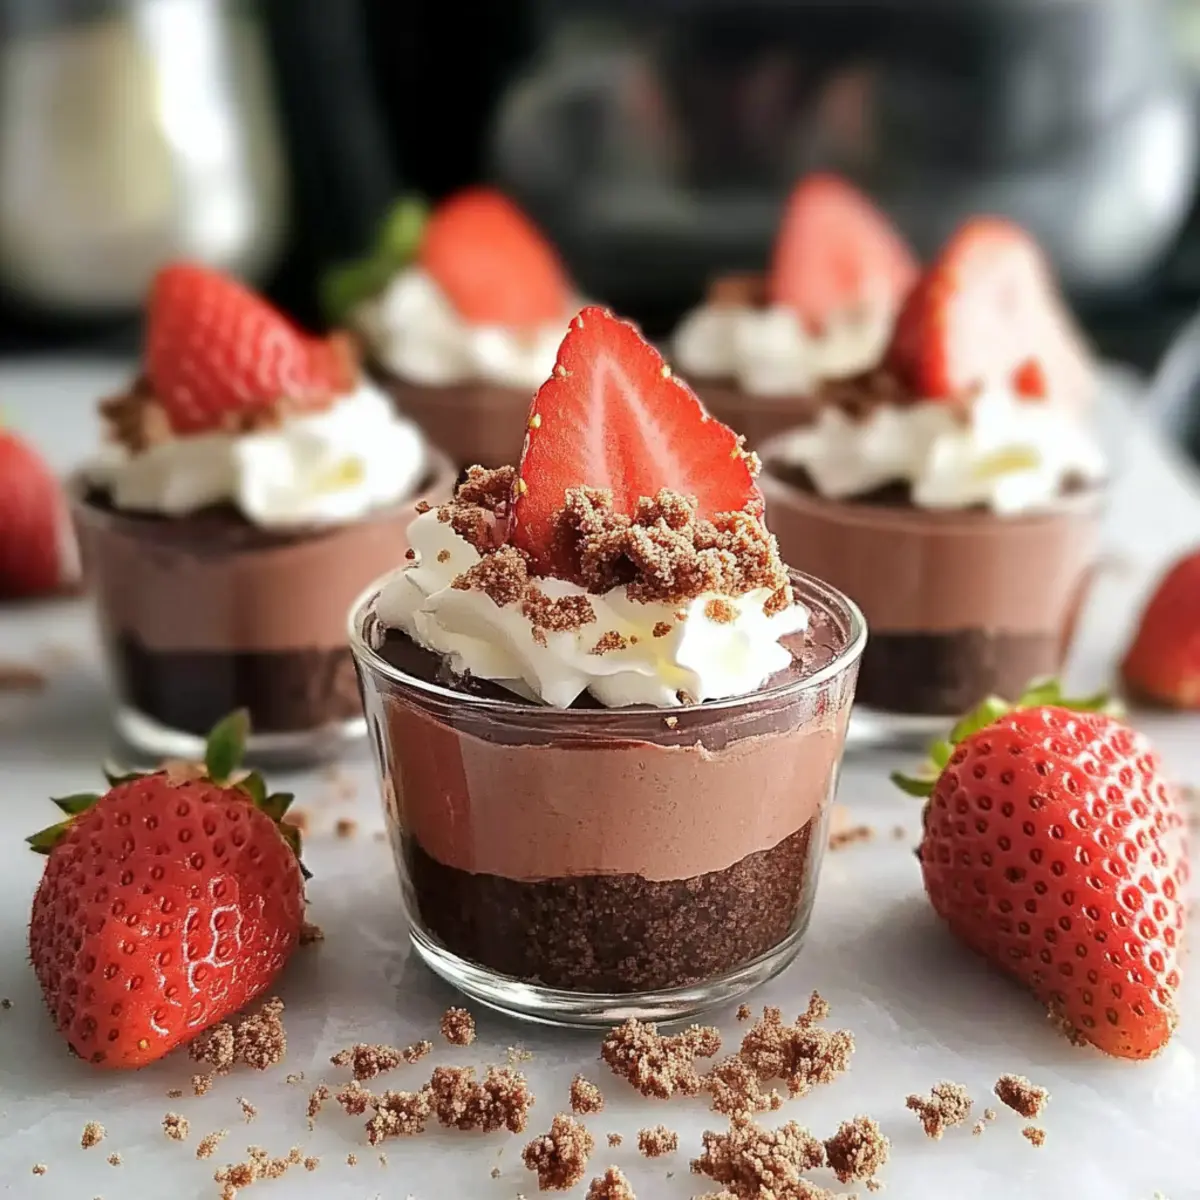
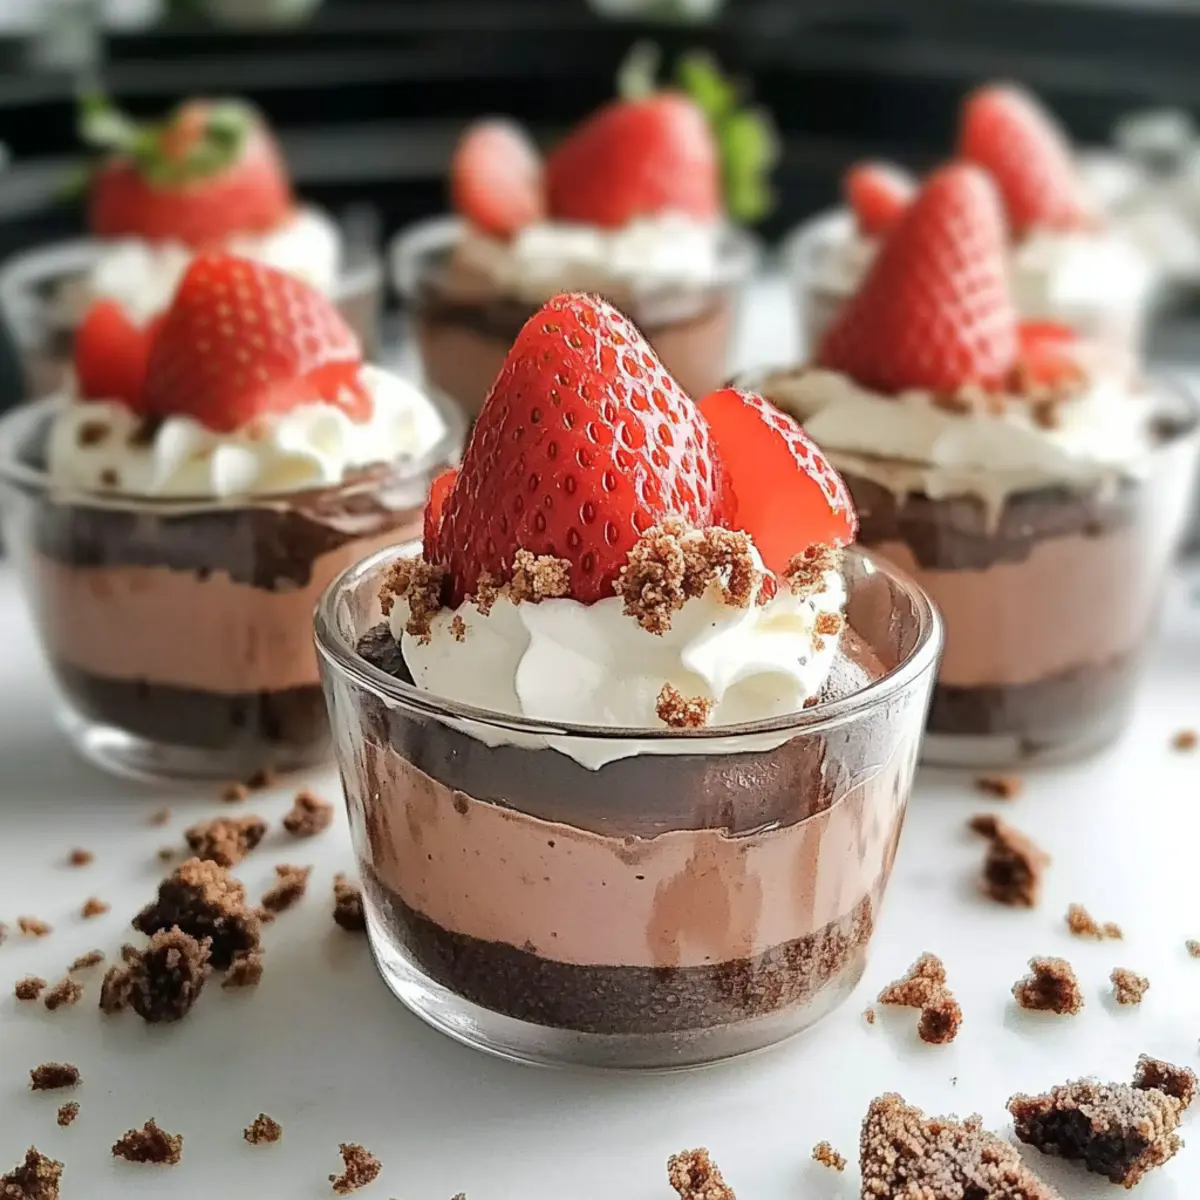
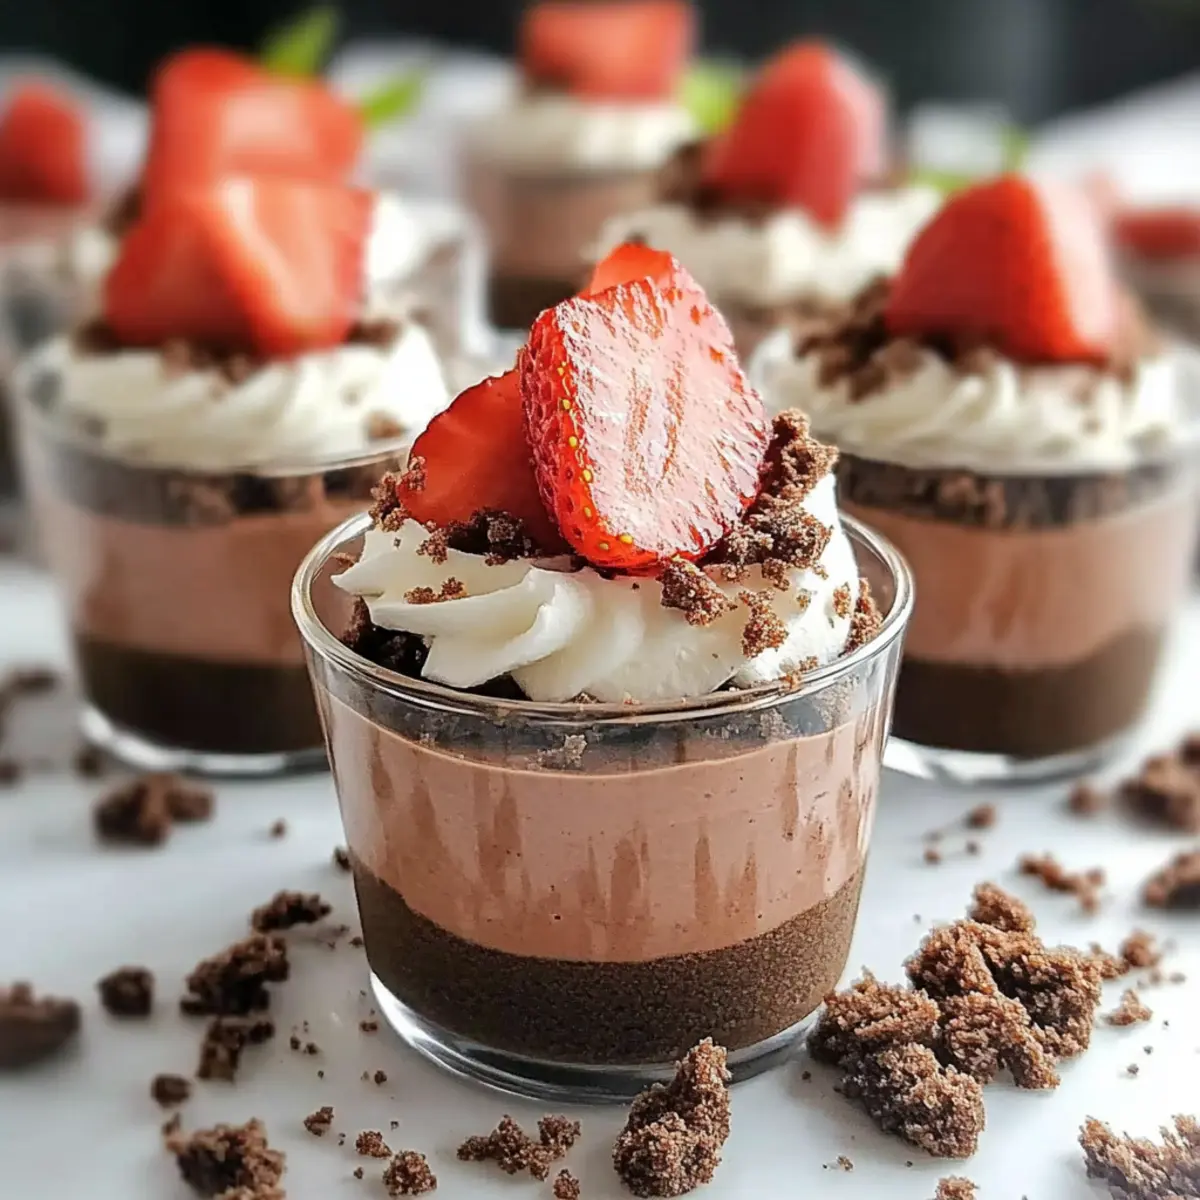
On a warm afternoon, I found myself craving something sweet that didn’t involve a baking marathon. That’s when the idea of Creamy No-Bake Chocolate Cheesecake Cups came to life. These delightful little creations combine rich chocolate flavor with a luxuriously creamy texture, making them the perfect indulgence without the fuss. In a matter of minutes, you can whip up a dessert that’s not only quick but also easily customizable to suit your taste. Whether you’re a chocolate lover wanting a classic version or feel adventurous with peanut butter and fresh fruits, this recipe has you covered! Plus, they make for a stunning presentation at any gathering. Ready to dive into this delightful treat? Let’s get started!
Why Are These Cheesecake Cups a Must-Try?
Decadent Flavor: Indulge in the rich chocolate taste, combined with a smooth and creamy texture that simply melts in your mouth.
No-Bake Convenience: Skip the oven! With just a few mixing steps, you’ll create an impressive dessert that saves time and energy.
Customizable Delight: Personalize your treats by adding peanut butter, seasonal fruits, or even flavored extracts, ensuring everyone finds their perfect match.
Eye-Catching Presentation: Serve in elegant cups or jars to impress your guests, turning simple ingredients into a stunning showstopper.
Perfect for Gatherings: Enjoy these cheesecake cups at parties or cozy evenings in; they’re sure to be a crowd favorite that satisfies every sweet tooth!
If you’re also in the mood for more delightful treats, check out my Pumpkin Cheesecake Muffins for a seasonal twist!
Creamy No-Bake Chocolate Cheesecake Cups Ingredients
To create these luscious creamy no-bake chocolate cheesecake cups, gather the following ingredients:
For the Cheesecake Filling
- Cream Cheese – Provides a creamy base and richness; make sure it’s softened for smooth blending.
- Sugar – Sweetens the cheesecake cups; consider using maple syrup or agave nectar for a natural alternative.
- Whipped Topping – Adds lightness and texture; for a homemade touch, use heavy cream whipped into peaks.
- Chocolate (Dark/Semi-Sweet) – Infuses the cups with deep chocolate flavor; choose higher quality chocolate for the best results.
For the Crust
- Graham Crackers – Forms the crust for a perfect crunchy contrast; gluten-free options can be made with digestive biscuits or gluten-free crackers.
Optional Add-ins
- Peanut Butter – Adds creaminess and a nutty flavor; almond butter works great for a different twist.
- Fresh Fruits – Enhances both presentation and flavor; top with berries like strawberries or raspberries for extra deliciousness.
With these ingredients ready, you’re just a step away from creating these delightful creamy no-bake chocolate cheesecake cups that everyone will love!
Step‑by‑Step Instructions for Creamy No-Bake Chocolate Cheesecake Cups
Step 1: Prepare the Crust
Start by crushing graham crackers into fine crumbs using a food processor or a rolling pin. In a medium bowl, combine the cracker crumbs with melted butter until well mixed. Press this mixture firmly into the bottom of your serving cups, creating an even layer. Set aside while you prepare the decadent filling.
Step 2: Make the Filling
In a large mixing bowl, beat the softened cream cheese with an electric mixer on medium speed until smooth and creamy. Gradually add in the sugar and melted chocolate, mixing until well combined and free of lumps. The filling should be thick and luscious, ready to be transformed into the star of your creamy no-bake chocolate cheesecake cups.
Step 3: Incorporate Whipped Topping
Once the filling is smooth, gently fold in the whipped topping using a spatula. Be careful to maintain the airiness of the mixture; this will contribute to the light texture of your cheesecake cups. Mix until fully combined, ensuring that no white streaks remain. The filling should now have a rich and fluffy consistency.
Step 4: Layer the Cups
Spoon the chocolate cheesecake filling over the prepared crusts in each cup, filling them generously. Use an offset spatula or the back of a spoon to smooth the tops for a polished look. Make sure each cup is filled evenly, allowing about half an inch at the top to leave room for toppings if desired.
Step 5: Chill the Cups
Cover the filled cups with plastic wrap or a lid, and place them in the refrigerator. Chill for at least 4 hours, or overnight if possible, to allow the flavors to meld and the filling to set properly. When ready, the cheesecake should be firm yet creamy, perfect for indulging.
Step 6: Serve and Garnish
Before serving your delicious creamy no-bake chocolate cheesecake cups, add your favorite toppings. Consider fresh berries, a dollop of whipped cream, or chocolate shavings for that extra special touch. Arrange the cups on a serving tray for an elegant presentation, and prepare to delight your guests with this irresistible treat!
What to Serve with Creamy No-Bake Chocolate Cheesecake Cups
Indulging in these dreamy little cups makes it easy to craft an unforgettable dessert experience that’s both delightful and satisfying.
-
Fresh Berries: Their tartness balances the rich chocolate sweetness, adding a burst of flavor and color atop your dessert. Pairing strawberries or raspberries really elevates the overall presentation.
-
Coffee or Espresso: The bold notes of coffee harmonize beautifully with chocolate, creating an irresistibly comforting combination. A warm cup alongside your cheesecake cups will make for a delightful after-dinner treat.
-
Whipped Cream Topping: For an extra layer of decadence, serve with a dollop of homemade whipped cream. It adds a light, airy texture that perfectly complements the creamy cheesecake.
-
Mint Leaves: Fresh mint serves as a beautiful garnish and adds a refreshing contrast. Just a few leaves on top of the cups provide an aromatic flair that will enhance each bite.
-
Chocolate Shavings: A sprinkle of high-quality chocolate shavings can intensify the chocolate flavor while adding a charming visual appeal. This simple touch makes your dessert feel ultra-indulgent.
-
Ice Cream: Enrich your dessert experience with a scoop of vanilla or coffee ice cream. The creamy cold treats will create a delightful contrast with the rich, velvety cheesecake cups, making every bite a blissful delight!
-
Herbal Tea: Offering a cup of soothing herbal tea such as chamomile or peppermint alongside can provide a refreshing finish. The warmth and aroma of tea enhance the entire dining experience following the chocolate indulgence.
Indulging in a combination of these pairings will surely make your creamy no-bake chocolate cheesecake cups a hit for any occasion!
Creamy No-Bake Chocolate Cheesecake Cups Variations
Let your creativity flow and customize these delightful cupcake-style cheesecakes with your personal touches!
-
Peanut Butter Bliss: Fold in ½ cup of creamy peanut butter for a nutty, rich flavor twist. It’s the perfect indulgence for peanut butter lovers!
-
Fruity Refresh: Top the cheesecake cups with seasonal fruits such as strawberries, sliced bananas, or raspberries for a refreshing contrast. The bright flavors will pop against the smooth chocolate!
-
Minty Fresh: Add ½ teaspoon of peppermint extract to the filling for a cool minty sensation. It’s a game changer for mint chocolate fans.
-
Chocolate Hazelnut: Swirl in some Nutella or hazelnut spread for an extraordinary chocolate-hazelnut experience! Pieces of chopped hazelnuts on top can add an appealing crunch.
-
Vegan Delight: Use vegan cream cheese and coconut whipped cream for a delightful dairy-free option. Enjoy a rich and creamy treat that everyone can love!
-
Coffee Kick: Incorporate a tablespoon of espresso powder into the filling for a mocha-inspired flavor. This adds a delightful depth that chocolate lovers will appreciate!
-
S’mores Style: Replace the graham cracker crust with crushed chocolate cookies for a decadent s’mores variation. Top with miniature marshmallows for added flair!
If you’re looking to satisfy more sweet cravings, try whipping up my Pumpkin Cheesecake Muffins for a cozy treat or indulge in some Chocolate Pumpkin Cupcakes for a seasonal sensation!
Make Ahead Options
These Creamy No-Bake Chocolate Cheesecake Cups are fantastic for meal prep, saving you precious time during busy weeknights or gatherings! You can prepare the crust and filling up to 24 hours in advance, storing both elements separately. To maintain quality, make sure to tightly cover the crust to prevent it from getting soggy and refrigerate the filling in a sealed container. When you’re ready to serve, simply layer the chilled filling over the prepared crust, smoothing the tops for a clean finish. Before serving, add your favorite toppings, like fresh fruits or whipped cream, for a delicious and impressive dessert that feels fresh and indulgent!
Expert Tips for Creamy No-Bake Chocolate Cheesecake Cups
-
Room Temperature Cream Cheese: Ensure your cream cheese is at room temperature to avoid lumps in your filling, leading to a smoother texture in your creamy no-bake chocolate cheesecake cups.
-
Don’t Overmix: When incorporating the whipped topping, mix gently to maintain the airy texture. Overmixing can lead to a dense filling rather than a light and fluffy cheesecake.
-
Chill Time Matters: Allow the cups to chill for at least 4 hours, but overnight is best for enhancing flavor and setting the filling properly. This step is crucial for a delectable experience.
-
Elegant Presentation: Use a piping bag for whipped cream or toppings to add sophistication to your cheesecake cups. A well-presented dessert elevates the entire dining experience.
-
Substitution Savvy: If you prefer healthier options, substitute sugar with maple syrup or agave nectar for natural sweetness while still achieving delicious creamy no-bake chocolate cheesecake cups.
Storage Tips for Creamy No-Bake Chocolate Cheesecake Cups
Fridge: Store the cheesecake cups in an airtight container in the refrigerator for up to 2 days. This keeps them fresh and maintains their lovely creamy texture.
Freezer: You can freeze these cups for up to 2 months. Wrap each cup tightly in plastic wrap and then place them in a freezer-safe container. Thaw in the fridge before serving.
Reheating: Since these are no-bake cheesecake cups, there’s no need to reheat them—enjoy them chilled for the best flavor and texture!
Toppings: For optimal freshness, keep any toppings like fresh fruits or whipped cream separate until you’re ready to indulge in your creamy no-bake chocolate cheesecake cups.
Creamy No-Bake Chocolate Cheesecake Cups Recipe FAQs
How do I select the right cream cheese for the filling?
Absolutely! For the smoothest texture, use regular cream cheese that’s at room temperature. This allows for easy mixing without lumps, resulting in a velvety filling. If you’re looking for a lighter option, low-fat cream cheese works well too, maintaining the creaminess while cutting down calories.
What’s the best way to store these cheesecake cups?
Very! Store your creamy no-bake chocolate cheesecake cups in an airtight container in the refrigerator for up to 2 days. This ensures they stay fresh and maintain their luscious texture. If you plan to keep them for longer, consider freezing them for up to 2 months—just wrap them tightly in plastic wrap and place them in a freezer-safe container.
Can I freeze the cheesecake cups, and how?
Absolutely! To freeze your creamy no-bake chocolate cheesecake cups, wrap each cup in plastic wrap and then place them in a freezer-safe container. This prevents freezer burn and retains flavor. When you’re ready to enjoy them, thaw in the refrigerator overnight. This gradual thawing helps maintain their delightful texture.
What if my cheesecake filling is too runny?
Let’s troubleshoot! If your filling is too runny, it might be due to overmixing or not chilling long enough. Make sure to mix the whipped topping gently to preserve airiness, and chill the cups for a minimum of 4 hours, preferably overnight, to allow them to firm up. If the filling is still loose, you might consider adding a bit more cream cheese or even a little powdered sugar to help thicken it.
Are these cheesecake cups suitable for people with allergies?
Very! To make them more inclusive, consider any dietary restrictions your guests may have. For nut allergies, simply omit the peanut butter or use sunflower seed butter as an alternative. If gluten-free options are needed, swap out the graham crackers for gluten-free biscuits. Always check ingredient labels to ensure they align with any allergies.
How can I adjust the sweetness in the recipe?
Absolutely! If you’re looking to reduce sugar, you can swap regular sugar for natural sweeteners like maple syrup or agave nectar. Start with half the amount suggested, and adjust to taste. Remember, natural sweeteners can be a bit sweeter than regular sugar, so it may require some experimentation to find your perfect level of sweetness!
Creamy No-Bake Chocolate Cheesecake Cups for Instant Indulgence
Ingredients
Equipment
Method
- Start by crushing graham crackers into fine crumbs using a food processor or a rolling pin. In a medium bowl, combine the cracker crumbs with melted butter until well mixed. Press this mixture firmly into the bottom of your serving cups.
- In a large mixing bowl, beat the softened cream cheese with an electric mixer on medium speed until smooth and creamy. Gradually add in the sugar and melted chocolate, mixing until well combined and free of lumps.
- Once the filling is smooth, gently fold in the whipped topping using a spatula, ensuring no white streaks remain.
- Spoon the chocolate cheesecake filling over the prepared crusts in each cup, smoothing the tops for a polished look. Allowing about half an inch at the top for toppings if desired.
- Cover the filled cups with plastic wrap or a lid, and place them in the refrigerator. Chill for at least 4 hours, or overnight if possible.
- Before serving, add your favorite toppings like fresh berries or a dollop of whipped cream. Arrange on a serving tray for elegance.
Leave a Reply