
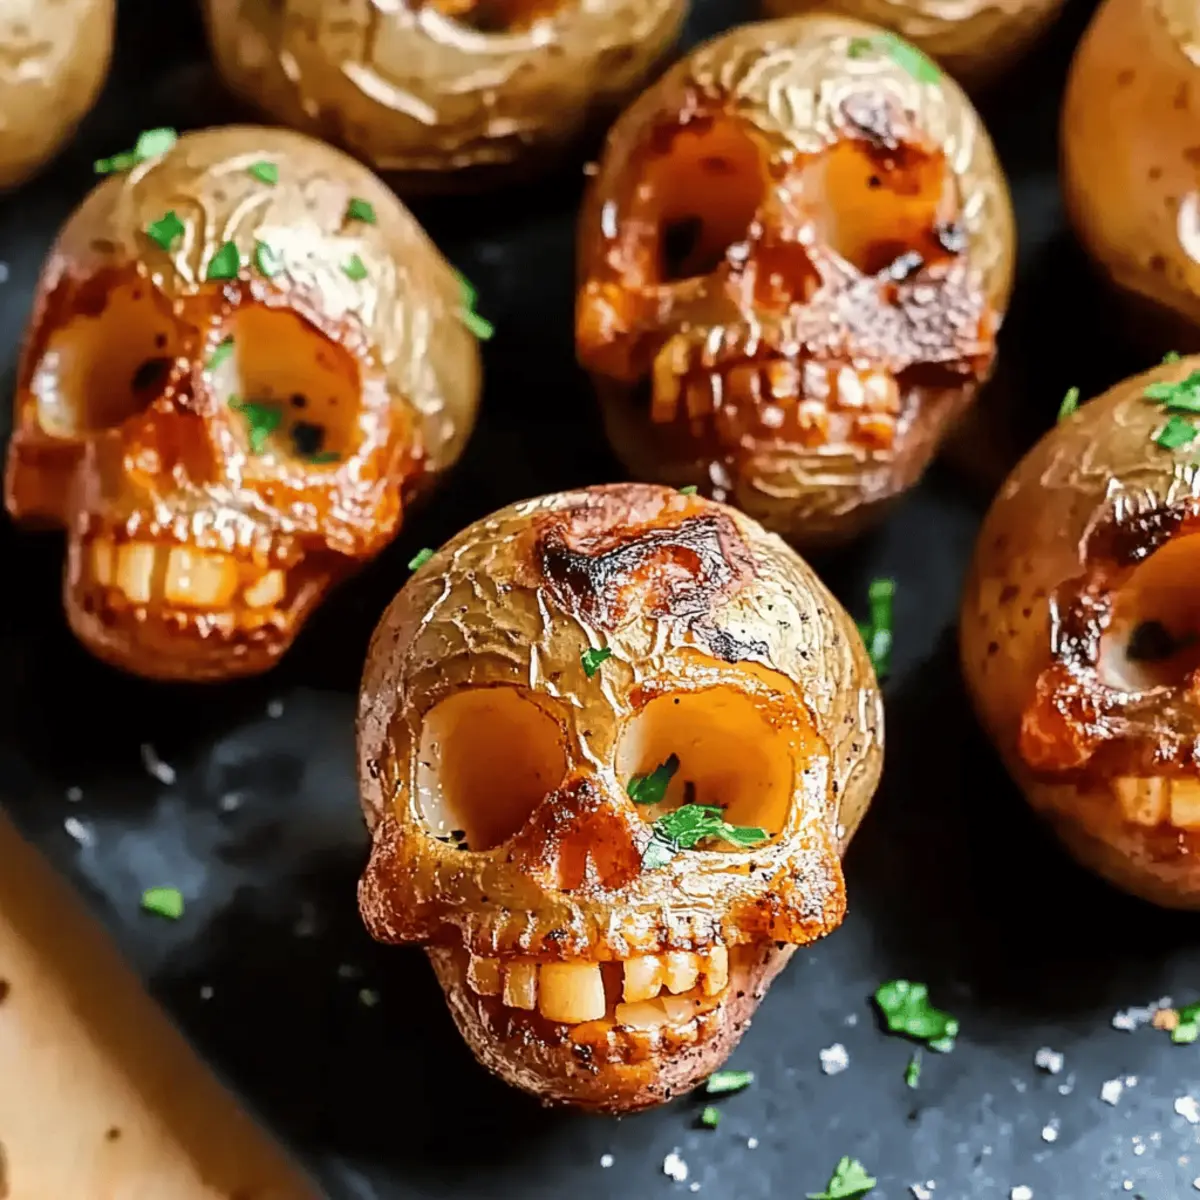
As I stood in the kitchen, the unmistakable scent of roasting potatoes wafted through the air, instantly sparking memories of cozy autumn nights. With Halloween right around the corner, there’s something magical about creating festive dishes like these Halloween Skull Potatoes. They’re not just a spooky side dish; they’re a fun culinary project that turns ordinary potatoes into delightful skull shapes, adding an artistic flair to your table. Plus, these crispy potatoes have a fluffy interior that will make everyone reach for seconds. Whether you’re hosting a Halloween party or just want to impress your family with a unique snack, these potatoes are sure to be a hit. Curious how to carve your way to a spook-tacular dinner? Let’s dive into the recipe!
Why are Halloween Skull Potatoes a must-try?
Crispiness that Delights: The golden-brown exterior offers an irresistible crunch, making every bite a party for your taste buds.
Creative Presentation: Artfully carved skull shapes add a playful touch to your Halloween celebrations, impressing guests of all ages.
Customizable Flavors: Tailor the recipe to your preferences by adding herbs or spices. Want a twist? Try them with melted cheese or chopped chives on top!
Quick and Easy: With simple ingredients and straightforward instructions, you’ll have these spooky snacks ready in no time—perfect for those who are bored of fast food!
Family Fun: Invite the kids to help carve the skulls, turning cooking into a memorable Halloween activity. For more Halloween flair, consider serving these alongside Halloween Witch Cookies or Halloween Oreo Stuffed. Let the spooky festivities begin!
Halloween Skull Potatoes Ingredients
For the Potatoes
• Mini Creamer Potatoes – Ideal size for carving; baby Yukon Golds can add a richer flavor.
• Olive Oil – Ensures a beautifully crispy texture; substitute with melted butter for extra richness.
• Salt – Boosts the overall flavor; try garlic salt for an aromatic twist.
• Pepper – Adds a gentle kick; opt for white pepper to maintain a subtle appearance.
For the Toppings
• Melted Cheese – Enhances the flavor and adds a gooey texture; consider cheddar or mozzarella for an extra treat.
• Fresh Herbs – Chopped chives or parsley can brighten the dish, adding freshness and color to your spooky creation.
These Halloween Skull Potatoes will be the star of your dinner table, making them a must-try during the spooky season!
Step‑by‑Step Instructions for Halloween Skull Potatoes
Step 1: Prep the Potatoes
Begin by preheating your oven to 400°F (200°C). While the oven warms up, give the mini creamer potatoes a good wash under cold water, scrubbing away any dirt. Once clean, dry them thoroughly with a kitchen towel. This will help achieve that fantastically crispy texture when making your Halloween Skull Potatoes.
Step 2: Carve Skulls
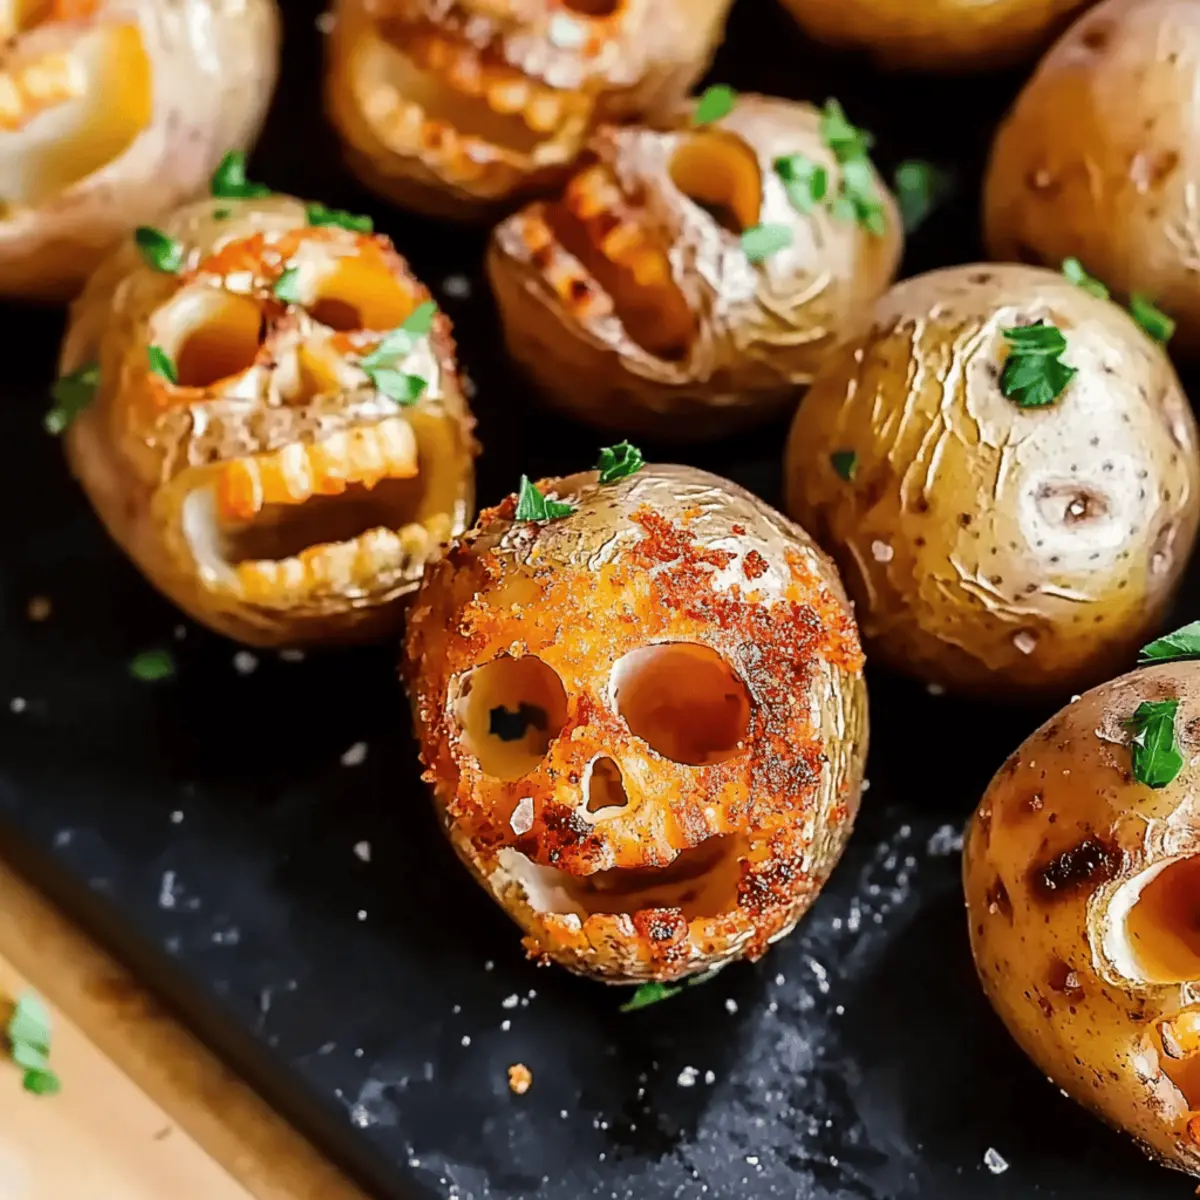
Using a sharp paring knife, carefully outline and carve the desired skull features on each potato. Take your time to ensure you cut deep enough to create distinct shapes, like eye sockets and a mouth. If you prefer, use a small melon baller to scoop out sections for more intricate designs. Place the carved potatoes on a cutting board to keep them steady as you work.
Step 3: Seasoning
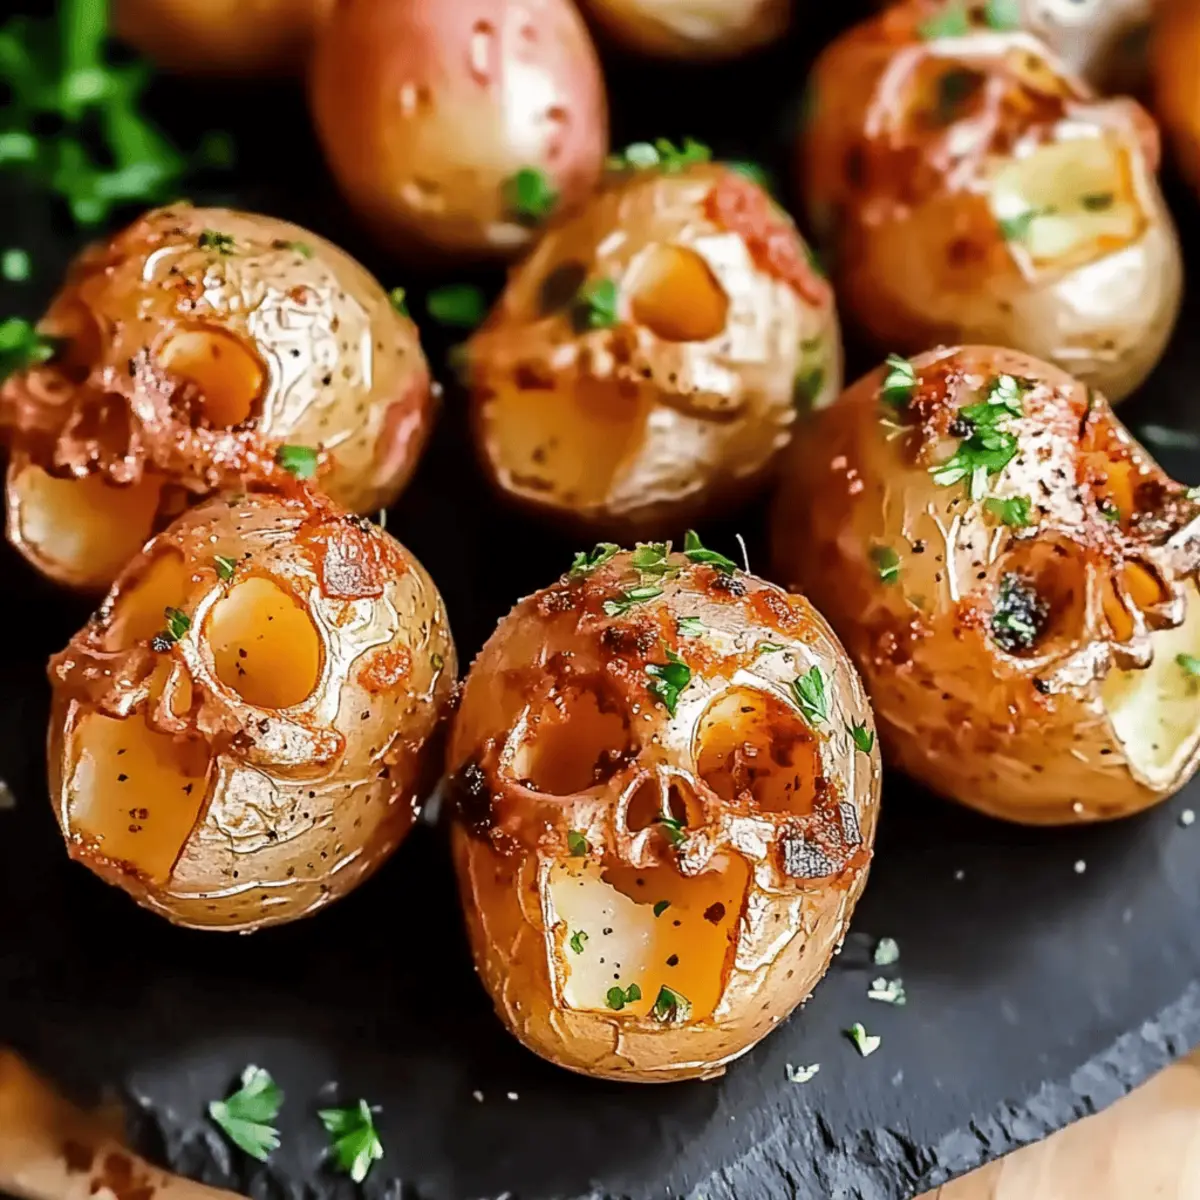
In a large bowl, toss the carved Halloween Skull Potatoes with a generous drizzle of olive oil, ensuring each potato is well-coated. Add salt and pepper to taste, mixing well to evenly distribute the seasoning. This step is key for achieving that flavorful punch and delightful crunch that will make your spooky snack irresistible.
Step 4: Roasting
Place the seasoned potatoes on a baking sheet lined with parchment paper, ensuring they’re spaced apart to promote even cooking. Roast in the preheated oven for 25-30 minutes, flipping halfway through for maximum crispiness. You’ll know they’re done when they are golden brown and crispy on the outside while remaining fluffy inside.
Step 5: Serving
Once your Halloween Skull Potatoes are perfectly roasted, remove them from the oven and let them cool for about 5 minutes. This brief cooling period enhances their crunchiness. If desired, top with melted cheese or fresh herbs before serving to elevate the festive flair. Present them on a platter and watch everyone enjoy these spooktacular treats!

Make Ahead Options
These spooky Halloween Skull Potatoes are perfect for meal prep, allowing you to save time on busy Halloween days! You can carve the skull features and season the potatoes up to 24 hours in advance. Simply store the prepared potatoes in an airtight container in the refrigerator to maintain their quality and prevent browning. When you’re ready to enjoy them, spread the carved potatoes on a baking sheet, roast in the oven as directed, and they’ll be just as delicious and crispy! This make-ahead option ensures your Halloween festivities are as stress-free as they are fun, giving you more time to enjoy the spooky celebrations!
Expert Tips for Halloween Skull Potatoes
• Carving Caution: Take your time when carving the skulls. Always cut away from your hands to prevent accidents and injuries during the fun!
• Even Coating: Ensure each carved potato is thoroughly coated in olive oil, salt, and pepper for uniform flavor and that delicious crispiness in your Halloween Skull Potatoes.
• Spacing is Key: When roasting, avoid overcrowding the baking sheet. Space the potatoes apart to allow for proper air circulation and maximum crispiness.
• Experiment with Designs: Play around with different skull expressions! Whether spooky or silly, the unique designs will add a personal touch and wow your guests.
• Store Properly: These potatoes are best enjoyed fresh right from the oven. However, if you have leftovers, store them in an airtight container for no more than 2 days to maintain flavor.
Halloween Skull Potatoes: Customizable Fun
Invite your inner chef to play with these Halloween Skull Potatoes as you explore exciting twists and variations that will elevate your spooky side dish!
- Dairy-Free: Substitute olive oil with coconut oil to achieve a similarly crispy texture without dairy, while giving a subtle, tropical flavor.
- Spice it Up: Add a teaspoon of cayenne pepper or chili powder to the seasoning mix for a delightful kick that warms the soul.
- Herb Infusion: Toss in fresh rosemary or thyme before roasting; the aroma will enhance the dish and provide a gourmet touch.
- Cheesy Goodness: After roasting, melt some gouda or pepper jack cheese on top for a rich, creamy layer that blends perfectly with the crispy texture.
- Veggie Delight: Mix in finely chopped zucchini or bell peppers in each skull cavity before roasting for added color, flavor, and nutrition.
- Texture Twist: For an even crunchier bite, coat the carved potatoes in panko breadcrumbs seasoned with garlic powder before baking.
- Halloween Flair: Serve the skull potatoes alongside a cauldron of spicy pumpkin soup or a themed salad for an engaging Halloween meal that enlivens the senses.
Whether you’re aiming for mouthwatering enhancements or curious spins on the original recipe, these variations keep the joy of cooking alive this spooky season. If you’re looking for more Halloween-themed delights, consider pairing these potatoes with Halloween Witch Cookies for a sweet finish or serve alongside Green Beans and Potatoes with Bacon for a complete meal that’s sure to impress!
What to Serve with Spooky Crispy Halloween Skull Potatoes
As you whip up these playful Halloween Skull Potatoes, consider rounding out your festive feast with delightful accompaniments that enhance both flavor and fun.
-
Pumpkin Soup: This creamy soup adds a warm, autumnal touch that complements the savory crunch of the potatoes. Its velvety texture contrasts beautifully with the crispy skulls.
-
Coleslaw: A refreshing, tangy coleslaw brings a bright crunch to your plate, balancing the rich flavors of the potatoes. The crisp veggies elevate the entire meal and are a colorful addition.
-
Roasted Brussels Sprouts: These caramelized little greens offer bold flavors that perfectly match the seasoned potatoes. Their slight bitterness enhances the overall taste experience.
-
Deviled Eggs: The creaminess and zest of classic deviled eggs provide a delightful bite that pairs wonderfully with the playful skull design of the potatoes. They’re a familiar favorite that won’t go unnoticed.
-
Sangria: A fruity and refreshing sangria makes for a festive drink that rounds out your Halloween gathering. The vibrant colors and sweet flavors are a perfect match for the spooky theme.
-
Candy Corn Cupcakes: For dessert, these whimsical treats will be a hit with both kids and adults alike. Their sweetness adds a playful end to your meal, making for a truly memorable Halloweek celebration.
-
Garlic Breadsticks: Soft, buttery breadsticks brushed with garlic herb oil are perfect for dipping into pumpkin soup or savoring alongside the potatoes. Their warmth brings comfort to the festive meal.
-
Cauldron Chili: A hearty chili simmering with spices and beans invites everyone to cozy up around the table. The bold flavors will perfectly accompany your Halloween Skull Potatoes for a satisfying meal.
-
Chocolate Mousse: End the spooky celebration with this rich, velvety delight. The bittersweet chocolate balances the savory flavors of the main dishes, making it a decadent way to conclude your feast.
How to Store and Freeze Halloween Skull Potatoes
Room Temperature: Store any leftovers at room temperature for no longer than 2 hours to prevent spoilage.
Fridge: Keep your Halloween Skull Potatoes in an airtight container in the fridge for up to 2 days. This helps maintain their flavor, although they may lose some crispiness.
Reheating: To bring back some of that delicious crunch, reheat in an oven at 375°F (190°C) for 10-15 minutes until warmed through. Enjoy your spooky snack!
Freezer: If you’re looking to store them longer, freeze unbaked, carved potatoes in a single layer on a baking sheet. Once frozen solid, transfer to a freezer bag and store for up to 3 months.
Halloween Skull Potatoes Recipe FAQs
How do I select the best potatoes for my skull potatoes?
Absolutely! For the best results, choose mini creamer potatoes or baby Yukon Golds. Look for firm potatoes without blemishes or dark spots. The right size is essential for carving detailed skull features.
What’s the best way to store leftover Halloween Skull Potatoes?
Very! After cooling, store your leftover Halloween Skull Potatoes in an airtight container in the fridge for up to 2 days. This helps preserve their flavor, though they may lose some crispiness. When ready to enjoy, simply reheat them in the oven for that crunchy texture!
Can I freeze Halloween Skull Potatoes?
Of course! If you want to prepare them ahead of time, you can freeze unbaked, carved potatoes. Simply place them in a single layer on a baking sheet until frozen solid, then transfer them to a freezer bag. They can be kept for up to 3 months. When you’re ready to cook, bake them directly from frozen—just be sure to add a few extra minutes to the cooking time.
What if my potatoes don’t come out crispy?
No worries at all! If your Halloween Skull Potatoes aren’t as crispy as you’d like, double-check that they weren’t overcrowded on the baking sheet, which can trap steam. Ensure they’re spaced apart for optimal airflow. Additionally, consider adding a touch more olive oil for an extra crunch!
Are there any dietary considerations for making Halloween Skull Potatoes?
Definitely! While this recipe is naturally gluten-free, always check your salt and cheese options for any hidden allergens. If you’re making them for guests, it’s a good idea to ask about any allergies beforehand. You can customize toppings or skip them entirely if needed, ensuring everyone can enjoy this festive treat safely.
Crispy Halloween Skull Potatoes: A Spooktacular Treat!
Ingredients
Equipment
Method
- Preheat your oven to 400°F (200°C). Wash mini creamer potatoes under cold water, scrub away any dirt, and dry thoroughly.
- Using a sharp paring knife, carve the desired skull features on each potato, ensuring distinct shapes.
- Toss the carved potatoes with olive oil, salt, and pepper in a bowl to evenly coat.
- Place the seasoned potatoes on a baking sheet and roast for 25-30 minutes, flipping halfway through.
- Cool for 5 minutes, then top with melted cheese or fresh herbs before serving.
Leave a Reply