
The moment the smell of sizzling chicken fills my kitchen, I can’t help but smile—it’s time for Japanese Katsu Bowls. Growing up, these crispy, savory wonders were a comforting staple, and now, I love sharing this joy with friends and family. This easy Chicken Katsu recipe pairs perfectly with fluffy, seasoned rice and a drizzle of tangy tonkatsu sauce, making it a standout in any dinner rotation. Beyond being a crowd-pleaser, this dish is incredibly versatile; you can swap in pork or even try a vegetarian version with tofu or eggplant. Whip this up on a busy weeknight or for a cozy weekend gathering, and watch how it transforms your dining experience. Ready to dive into the crunch? Let’s get cooking!
Why Are Katsu Bowls So Irresistible?
Comforting flavors make Katsu Bowls a family favorite; the crispy chicken paired with fluffy rice creates a satisfying meal that everyone loves. Versatile options allow you to swap chicken for pork or tofu, catering to different diets. Quick to Prepare: This recipe saves time on busy nights while bringing joy to your table. The crunchy coating of panko ensures a delightful texture in every bite, and the savory sauce elevates the dish to new heights. With just a few ingredients, you’re on your way to a delicious homemade treasure. For a deeper dive into how to elevate your meals, check out more comforting dishes.
Japanese Katsu Bowl Ingredients
• Create your perfect Katsu Bowls with these essential ingredients!
For the Chicken Katsu
- Boneless chicken breasts (2 pieces) – The main protein that can beautifully transform into crispy katsu or be swapped for pork loin for a traditional twist.
- Salt and pepper – Essential seasonings that enhance the natural flavors of the meat.
- All-purpose flour (1 cup) – This forms a base layer for the breading; substitute with gluten-free flour for a gluten-friendly option.
- Large eggs (2) – Acts as the binder for breadcrumbs, crucial for that irresistible crispy coating.
- Panko breadcrumbs (1 cup) – Creates a light, crunchy texture; use ground almonds for a low-carb alternative.
- Vegetable oil – Perfect for frying; ensure it’s hot enough by testing with a piece of bread.
For the Seasoned Rice
- Japanese short-grain rice (2 cups) – The star carbohydrate adds delightful chewiness; jasmine rice is a suitable substitute if needed.
- Water (2½ cups) – Needed for cooking the rice to perfection.
- Rice vinegar (1 tablespoon) – Adds a touch of acidity to season the rice; apple cider vinegar can work as a swap.
- Sugar (1 tablespoon) – Helps balance the dish’s flavors; honey makes a sweet alternative.
- Salt (½ teaspoon) – Enhances the flavor of the rice and is vital for balance.
For the Savory Sauce
- Tonkatsu sauce (¼ cup) – The rich sauce that adds umami; store-bought is perfectly fine for convenience.
- Soy sauce (1 tablespoon) – Brings depth and enhances the sauce’s flavor.
- Worcestershire sauce (1 teaspoon) – Contributes a unique complexity to the recipe.
- Ketchup (1 teaspoon) – Just the right sweetness to complement the savory notes.
For Toppings
- Shredded cabbage (1 cup) – A fresh topping that adds a crunchy texture; carrots can be substituted for a different flavor.
- Green onions (2, sliced) – Offers a burst of freshness; great for garnishing!
- Sesame seeds – Optional but highly encouraged for a nutty finish.
- Pickled ginger – A delightful, refreshing accompaniment to cleanse the palate.
Step‑by‑Step Instructions for Japanese Katsu Bowls
Step 1: Prepare the Rice
Rinse 2 cups of Japanese short-grain rice under cold water until the water runs clear, about 2-3 times. Soak it in 2½ cups of water for 30 minutes. Bring the rice to a boil over medium heat, then cover it, lower the heat, and let it simmer for 15 minutes without lifting the lid. Once the time is up, remove it from heat and let it sit, covered, for another 10 minutes before mixing in rice vinegar, sugar, and salt.
Step 2: Prepare the Katsu
While the rice is cooking, pound the boneless chicken breasts to an even thickness, about ½ inch thick, and season with salt and pepper. Set up a breading station with three shallow dishes: one for flour, one for beaten eggs, and one for panko breadcrumbs. Dredge each chicken breast first in flour, then dip in the egg, and finally coat with panko to create a crispy layer.
Step 3: Fry the Chicken
Heat a skillet over medium heat and pour in enough vegetable oil to cover the bottom, about ¼ inch deep. Once hot (test with a small piece of bread, it should sizzle), fry the chicken cutlets for 4-5 minutes on each side until they’re golden brown and the internal temperature reaches 165°F (75°C). Once cooked, transfer the chicken to a paper towel-lined plate to drain any excess oil and let it rest.
Step 4: Make the Sauce
In a small bowl, combine the tonkatsu sauce, soy sauce, Worcestershire sauce, and ketchup. Mix them together until smooth, creating a tangy and savory sauce that will complement the crispy chicken. Set aside while you finish preparing the dish, allowing the flavors to meld together.
Step 5: Assemble the Dish
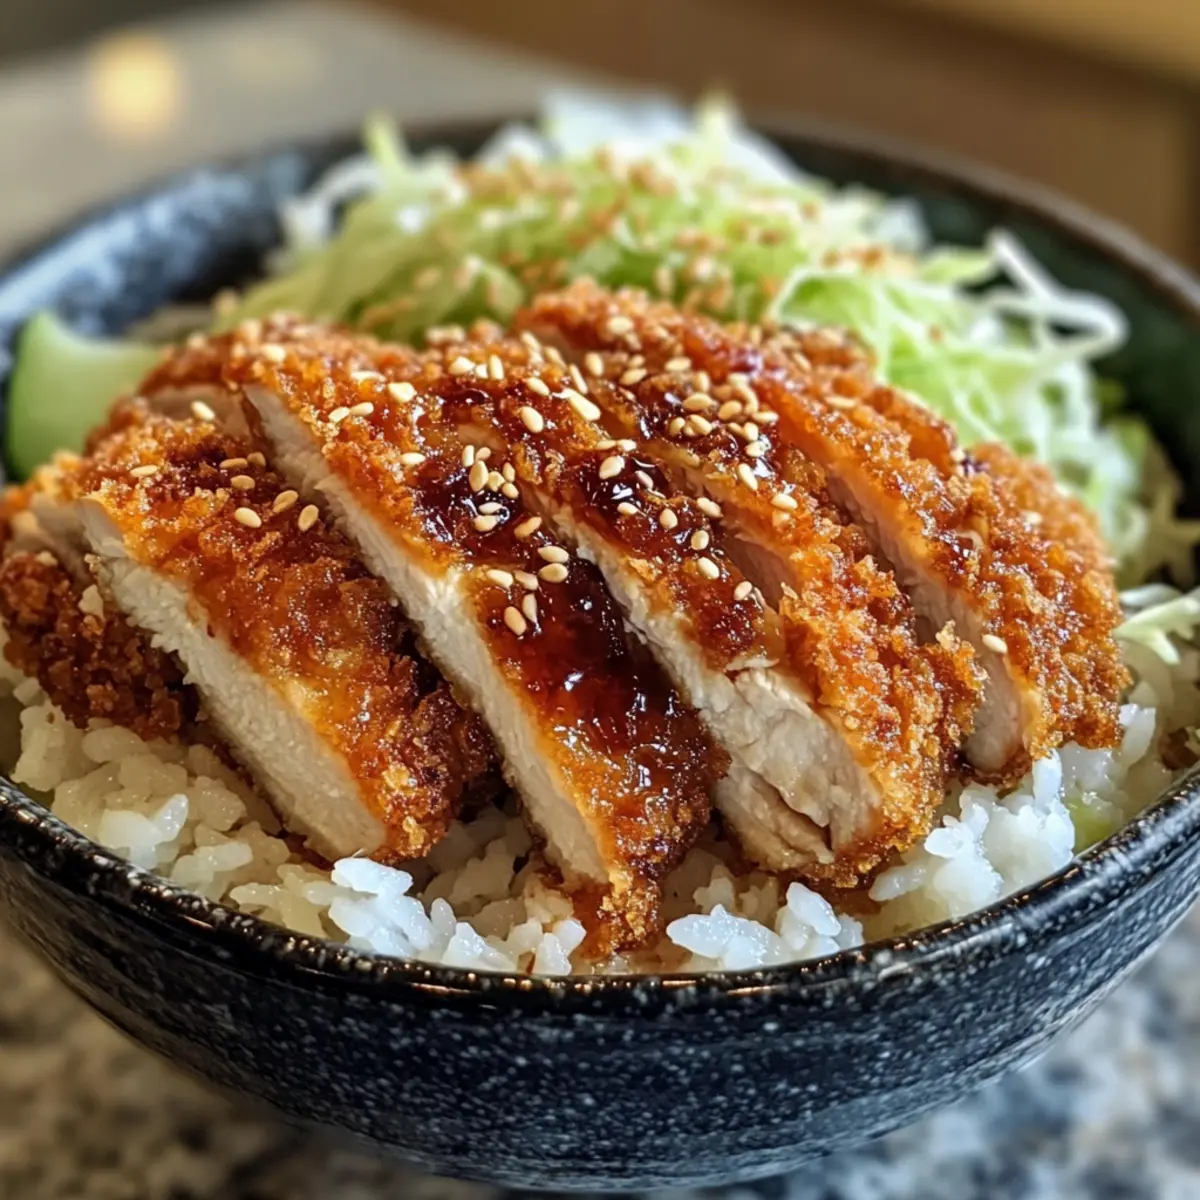
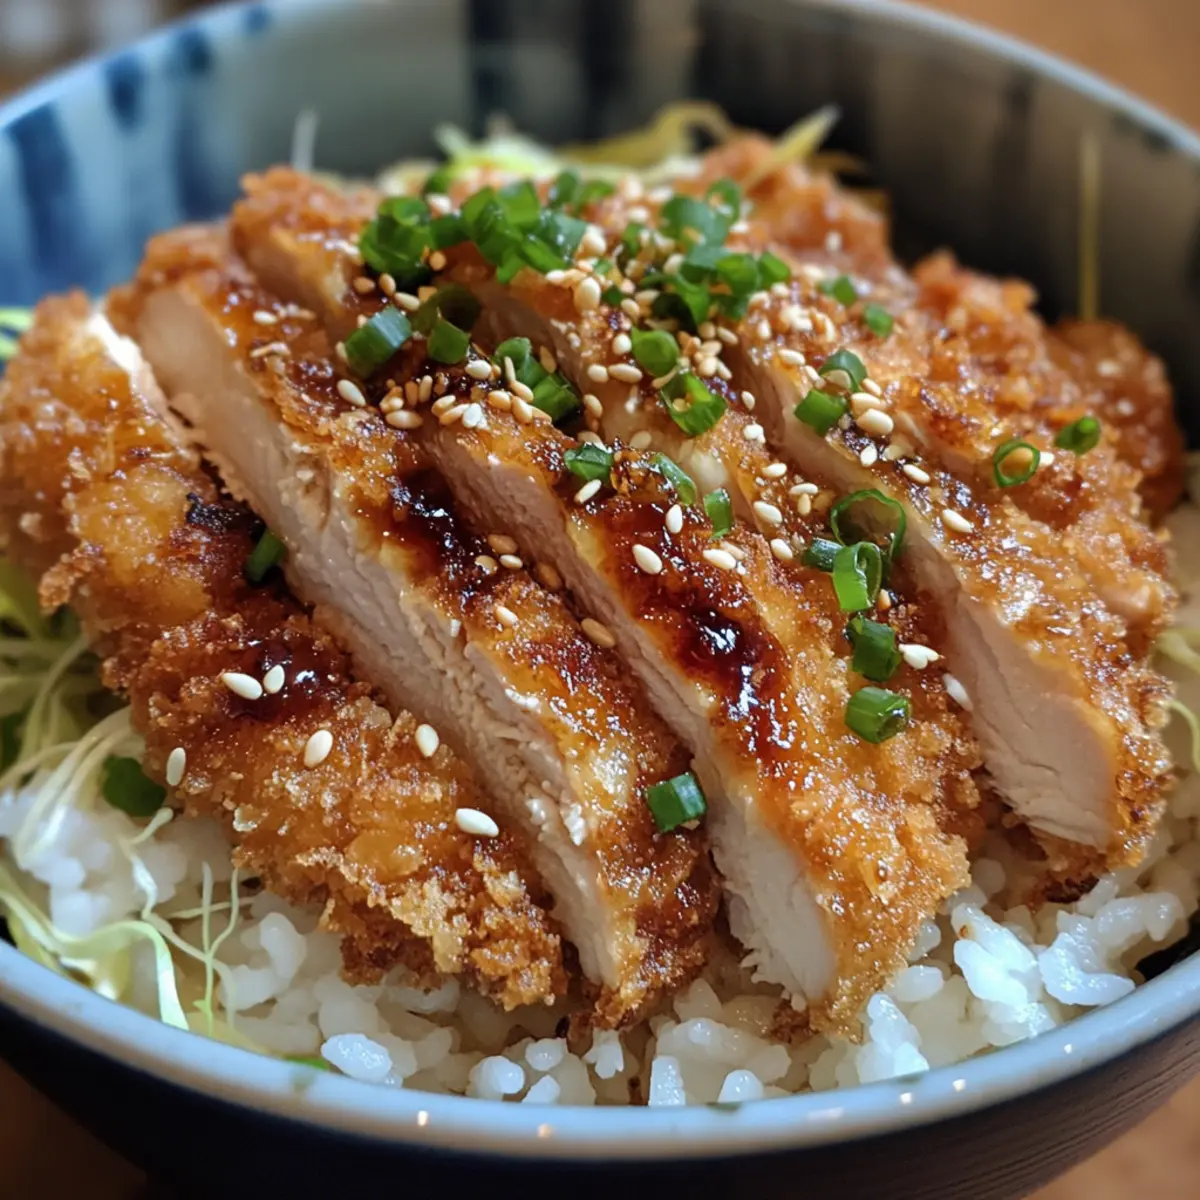
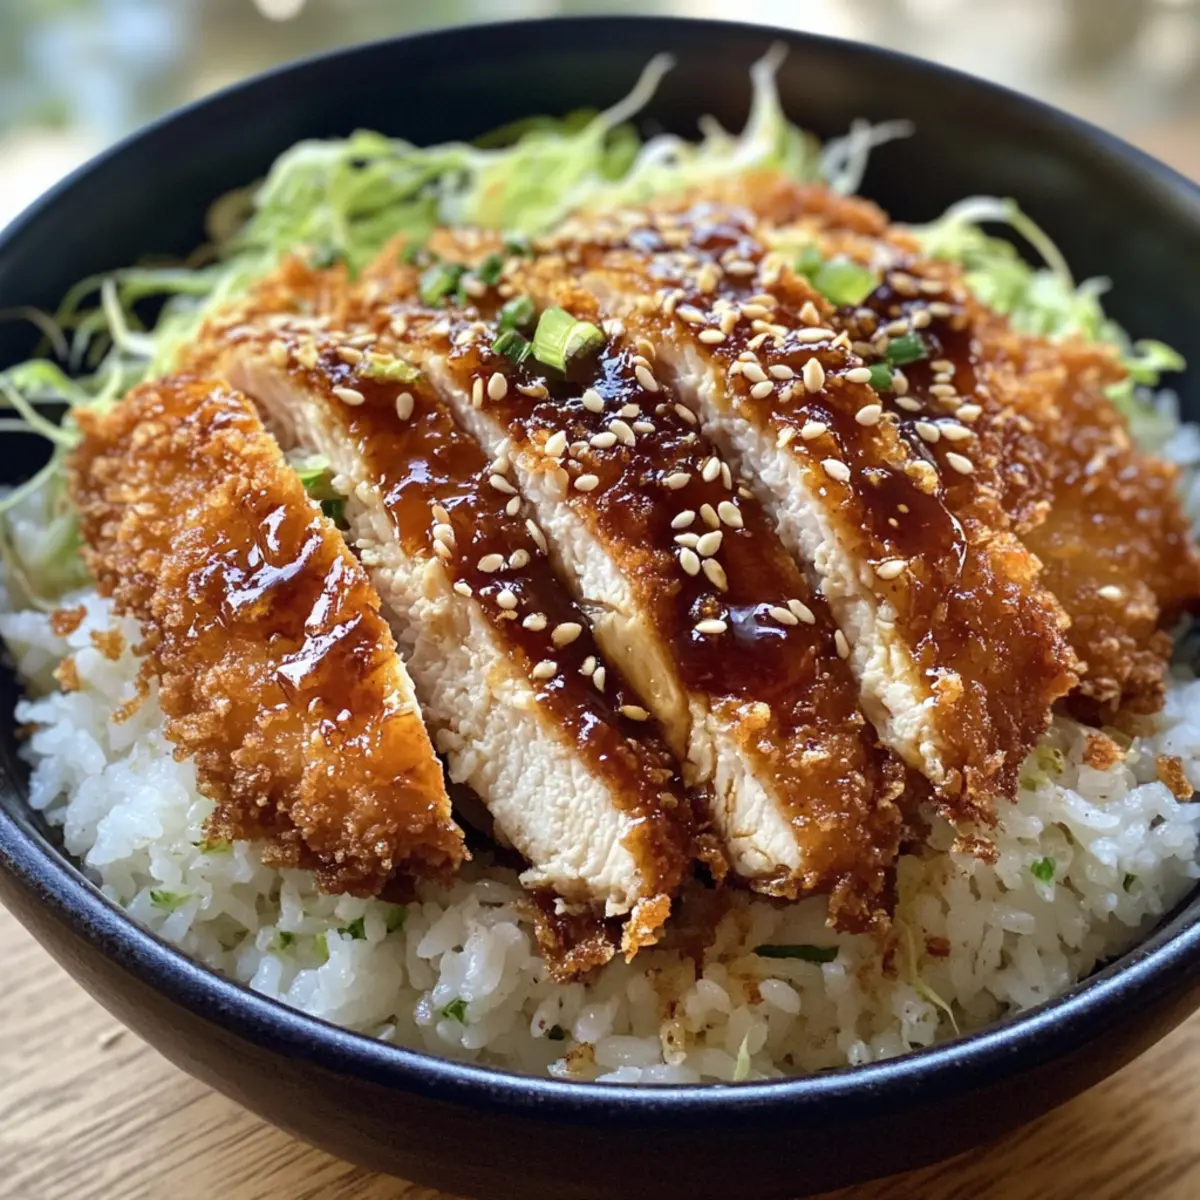
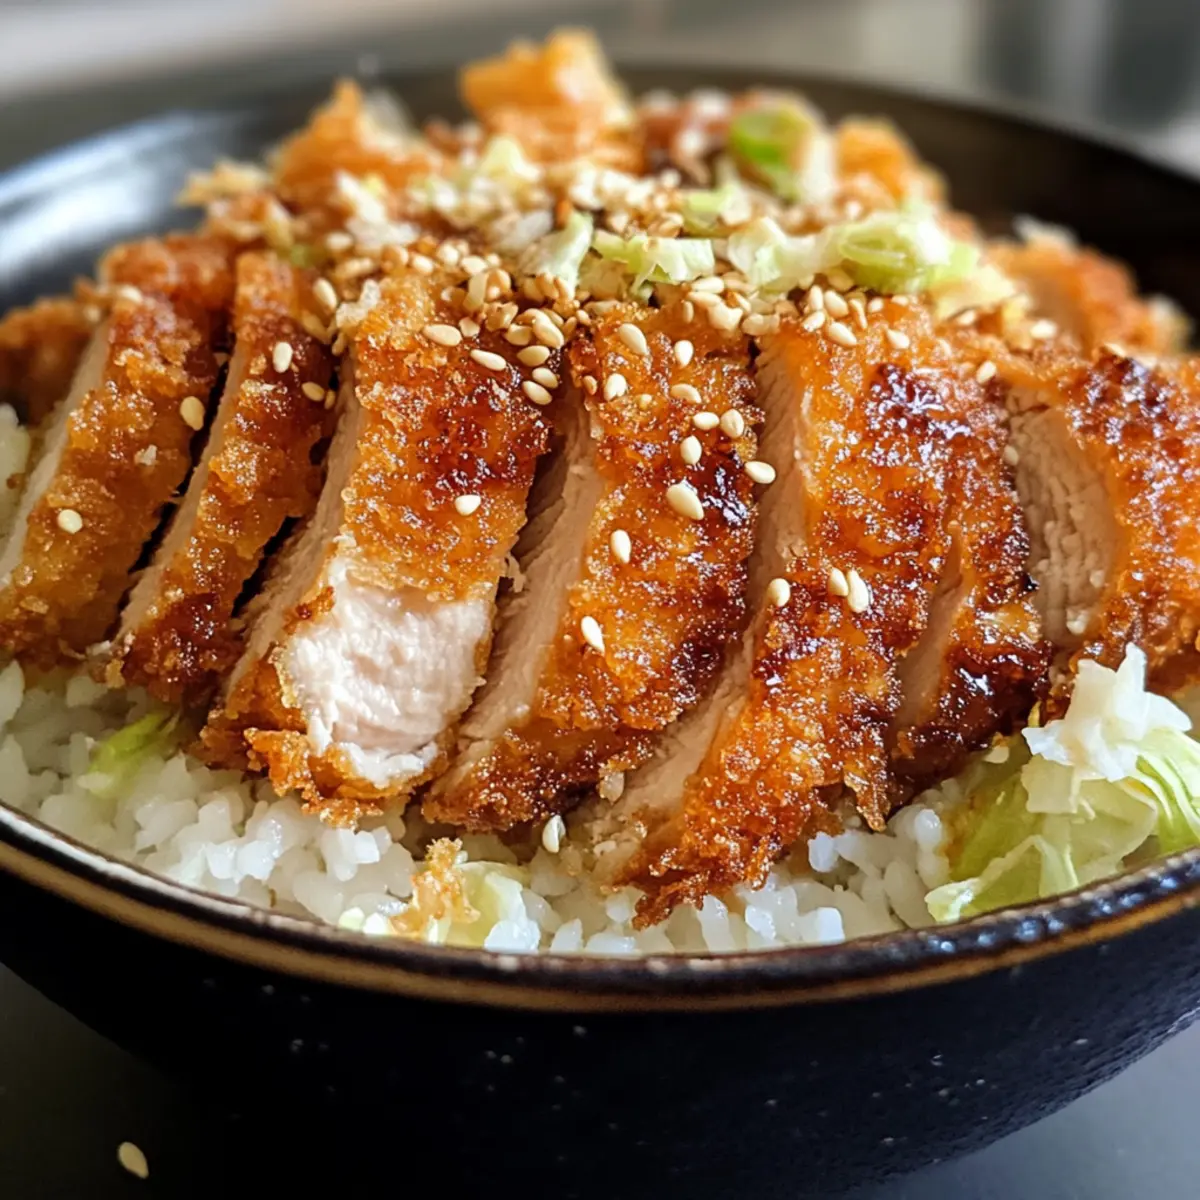
Now, it’s time to put your Japanese Katsu Bowls together! Serve the sliced chicken katsu over a generous helping of the seasoned rice. Drizzle the flavorful sauce over the katsu, and top it with shredded cabbage, sliced green onions, and a sprinkle of sesame seeds for added crunch. Add pickled ginger on the side for a refreshing note, if desired.
Expert Tips for Japanese Katsu Bowls
- Maintain Oil Temperature: Fry your katsu in small batches to keep the oil hot; overcrowding will lower temperature and result in soggy chicken.
- Perfect Coating Technique: Ensure each chicken breast is fully coated with flour, egg, and panko for that signature crunch. Thin layers yield the best results!
- Rest Chicken After Frying: Let the cooked katsu rest on paper towels for a few minutes to drain excess oil before slicing; this keeps it crispy.
- Flavorful Rice: Mix the vinegar, sugar, and salt gently into the rice—overmixing can lead to mushy rice, disrupting the texture of your Japanese Katsu Bowls.
- Experiment with Proteins: Don’t hesitate to swap chicken for pork or go vegetarian with eggplant or tofu to suit your taste buds and dietary needs.
Make Ahead Options
These Japanese Katsu Bowls are perfect for busy weeknights and meal prep enthusiasts! You can prep the chicken katsu up to 24 hours in advance by breading the chicken, then wrapping it tightly in plastic wrap and refrigerating it until ready to fry. The seasoned rice can be made up to 3 days ahead; simply cook it, let it cool, and store it in an airtight container in the refrigerator. To maintain quality, reheat the rice gently with a little water to keep it fluffy before serving. When you’re ready to enjoy your meal, simply fry the chicken, assemble your bowls with the reheated rice, and drizzle with the sauce for a deliciously satisfying dinner with minimal effort!
Storage Tips for Japanese Katsu Bowls
Fridge: Store leftover Katsu Bowls in an airtight container in the refrigerator for up to 3 days to keep the chicken crispy and the rice fresh.
Freezer: For longer storage, freeze the katsu separately from the rice in airtight containers or heavy-duty freezer bags for up to 2 months.
Reheating: Reheat the chicken in an oven at 375°F (190°C) for about 15-20 minutes to keep it crispy. Reheat the rice in the microwave with a splash of water to restore moisture.
Assembly Tip: When ready to serve, combine the reheated chicken with freshly cooked rice and sauce to enhance textures and flavor in your Japanese Katsu Bowls.
Japanese Katsu Bowls: Delicious Variations
Feel free to elevate your Katsu Bowls with these exciting twists that will mesmerize your taste buds.
- Pork Katsu: Substitute chicken with thinly sliced pork loin for a more traditional katsu experience. The rich flavor pairs beautifully with the sauce!
- Vegetarian Delight: Swap chicken for eggplant or tofu, breading them the same way for a delightful, meat-free meal. The result is perfectly crispy and satisfying!
- Gluten-Free: Use gluten-free panko and flour to make this dish friendly for those with dietary restrictions. You won’t lose that amazing crunch!
- Curry Twist: Add a touch of Japanese curry powder to your panko breadcrumbs for an aromatic flavor kick. This simple tweak can radically transform the dish!
- Spicy Katsu: Incorporate a pinch of cayenne pepper or some chili flakes into the breading for a bit of heat that beautifully contrasts with the crispy coating.
- Seasoned Rice Variations: Mix steamed veggies like peas or carrots into the rice just before serving for extra color and nutrition. The crunch of veggies enhances every bite.
- Lasagna Style: Layer your Katsu with lasagna noodles instead of rice for an unusual yet delicious twist that combines two beloved recipes into one.
- Creamy Sauce Swap: Try a creamy miso dressing instead of tonkatsu sauce for a tangy, luscious flavor. This will take your Katsu Bowls to a whole new level!
Feel free to explore these variations and let your creativity shine! To inspire more delicious meals, consider trying out more comforting dishes. Happy cooking!
What to Serve with Authentic Japanese Katsu Bowls
Elevate your dining experience with these delightful pairings that will perfectly complement the rich, crispy flavors of your katsu.
-
Creamy Coleslaw: This tangy dish adds a refreshing crunch, balancing the savory katsu with its bright flavors. The creamy dressing contrasts beautifully with the crispy texture of the chicken.
-
Steamed Edamame: Lightly salted edamame beans bring a subtly earthy taste that makes for a healthy side. They’re easy to prepare and enhance the Japanese theme of your meal.
-
Miso Soup: A warm bowl of miso soup offers umami richness, harmonizing with the katsu’s crispiness. It’s a soothing addition, perfect for savoring between bites.
-
Cucumber Salad: A simple salad with thinly sliced cucumbers and rice vinegar dressing adds a refreshing zest that cuts through the dish’s richness. This light side keeps your meal perfectly balanced.
-
Garlic Fried Rice: This aromatic and flavorful fried rice can serve as a heartier accompaniment that pairs well with the chicken katsu. The extra garlic notes bring depth and satisfaction to every bite.
-
Japanese Pickles: Serve assorted pickled vegetables to introduce acidity and enhance your platter’s colors. Their bright flavor will elevate your Katsu Bowls, adding a touch of whimsy.
-
Sake or Green Tea: A chilled glass of sake can elevate your meal, enhancing the experience with its unique flavors. If you prefer non-alcoholic, a warm cup of green tea adds a soothing note to your dining experience.
-
Matcha Ice Cream: End your meal with a scoop of creamy matcha ice cream for a sweet finish. Its earthy, slightly bitter flavor complements the savory elements of the katsu wonderfully.
Japanese Katsu Bowls Recipe FAQs
What type of chicken is best for katsu?
I recommend using boneless chicken breasts for the best result; they cook evenly and stay juicy. If you prefer a traditional twist, pork loin is also an excellent choice. For a vegetarian option, eggplant or tofu works beautifully—just follow the same breading method!
How long can I store leftover katsu bowls?
Store your Japanese Katsu Bowls in an airtight container in the refrigerator for up to 3 days. This keeps the flavors intact and the chicken relatively crispy.
Can I freeze katsu? If so, how?
Absolutely! To freeze, store the cooked katsu separately from the rice. Place the katsu in airtight containers or heavy-duty freezer bags and freeze for up to 2 months. When you’re ready to enjoy, thaw overnight in the fridge, then reheat in an oven at 375°F (190°C) for about 15-20 minutes to regain its crispy texture.
What if my katsu isn’t crispy enough?
If your katsu isn’t achieving that sought-after crunch, a couple of things might be at play. Ensure your oil is hot enough by testing it with a small piece of bread; it should sizzle upon contact. Additionally, avoid overcrowding the pan when frying; this will maintain oil temperature and yield a crispier coating. A good, even layer of panko is essential as well!
Can I omit any ingredients for dietary restrictions?
Definitely! You can easily adapt the recipe for gluten sensitivity by using gluten-free panko and flour. If you’re avoiding sugar, substitutes like honey or skip sweeteners entirely can work. Just be mindful of the taste; a little vinegar can help balance flavors when omitting sugar.
Is katsu safe for pets?
While katsu itself is safe for dogs in moderation, it is not recommended to feed them the fried version due to oil and seasoning. Always consult with your vet before introducing new foods to your pet’s diet to ensure they stay happy and healthy.
Crispy Japanese Katsu Bowls: A Comfort Food Delight
Ingredients
Equipment
Method
- Rinse 2 cups of Japanese short-grain rice under cold water until the water runs clear. Soak the rice in 2½ cups of water for 30 minutes. Bring it to a boil, cover, lower the heat, and let it simmer for 15 minutes. Let it sit for another 10 minutes before mixing in rice vinegar, sugar, and salt.
- Pound the boneless chicken breasts to about ½ inch thick and season with salt and pepper. Set up a breading station with flour, eggs, and panko breadcrumbs. Dredge the chicken in flour, dip in the egg, and coat with panko.
- Heat enough vegetable oil in a skillet to cover the bottom. Fry chicken cutlets for 4-5 minutes on each side until golden brown and cooked through. Transfer to a paper towel-lined plate to drain excess oil.
- Combine tonkatsu sauce, soy sauce, Worcestershire sauce, and ketchup in a bowl. Mix until smooth.
- Serve sliced chicken katsu over seasoned rice, drizzle with sauce, and top with cabbage, green onions, sesame seeds, and pickled ginger on the side.
Leave a Reply