
“You won’t believe how simple it is to create spine-chilling delights this Halloween! Enter the world of Meringue Ghost Cookies—fluffy, ethereal treats that glide into your heart. These whimsical ghostly shapes are not just a feast for the eyes; they’re also a hit with kids and grown-ups alike! With minimal ingredients, you can whip these up in no time, making them a fantastic choice for last-minute parties or cozy family gatherings. Plus, they’re naturally low in calories, so you can indulge without guilt. Imagine serving these delightful cookies at your Halloween bash, watching as they vanish amidst the laughter and joy. Ready to make your Halloween unforgettable? Let’s get started!”
Why Are Meringue Ghost Cookies So Appealing?
Irresistible Charm: These ghost-shaped cookies add a playful touch to your Halloween festivities, captivating both kids and adults alike.
Light as Air: Their airy texture allows them to melt effortlessly in your mouth, offering a delightful culinary experience.
Super Easy: With just a handful of ingredients and straightforward steps, there’s no baking experience required!
Customizable Fun: Feel free to experiment with flavor variations like peppermint or even use food coloring for a colorful twist.
Crowd Pleaser: Perfect for parties, school events, or even as a cozy family treat, these cookies are sure to be the star of the show!
Ready to elevate your Halloween with these Easy Meringue Ghost Cookies?
Meringue Ghost Cookies Ingredients
For the Meringue Base
• Egg Whites – These are essential for creating the light, fluffy structure of your meringue cookies; make sure there’s no yolk.
• Granulated Sugar – Sweetens and stabilizes the meringue; add it slowly to ensure proper incorporation.
• Vanilla Extract – This adds delightful flavor; substitute with almond extract for a unique twist.
• Vinegar or Lemon Juice – Helps stabilize the egg whites for a glossy finish; choose one based on your preference.
Get ready to create a spooky dessert that your loved ones won’t be able to resist—these Meringue Ghost Cookies are just a few ingredients away!
Step‑by‑Step Instructions for Meringue Ghost Cookies
Step 1: Preheat the oven
Begin by preheating your oven to 95°C (200°F), ensuring it’s at the right temperature for gentle baking. This low heat is crucial as it allows the meringue ghost cookies to dry out slowly, helping them develop a crisp exterior while remaining light and airy inside.
Step 2: Whip the egg whites
In a clean mixing bowl, use a stand mixer or hand mixer to beat the egg whites until firm peaks form, which should take about 3-5 minutes. It’s essential that no yolk is present, as this will hinder the whipping process. Watch for the mixture to become white and frothy, giving you that perfect consistency for your Meringue Ghost Cookies.
Step 3: Add sugar gradually
Once you have firm peaks, gradually incorporate the granulated sugar, about a tablespoon at a time. Continue to mix on high speed for an additional 5-7 minutes until the meringue becomes glossy and the sugar fully dissolves. You can rub a little between your fingers to check for graininess; the mixture should feel smooth.
Step 4: Flavors and stabilizers
Next, gently fold in the vanilla extract and your choice of vinegar or lemon juice. These ingredients not only add delightful flavor but also help stabilize the meringue for your Halloween treats. Continue mixing for another minute until everything is just combined and you achieve stiff peaks, which will hold their shape beautifully.
Step 5: Pipe the ghost shapes
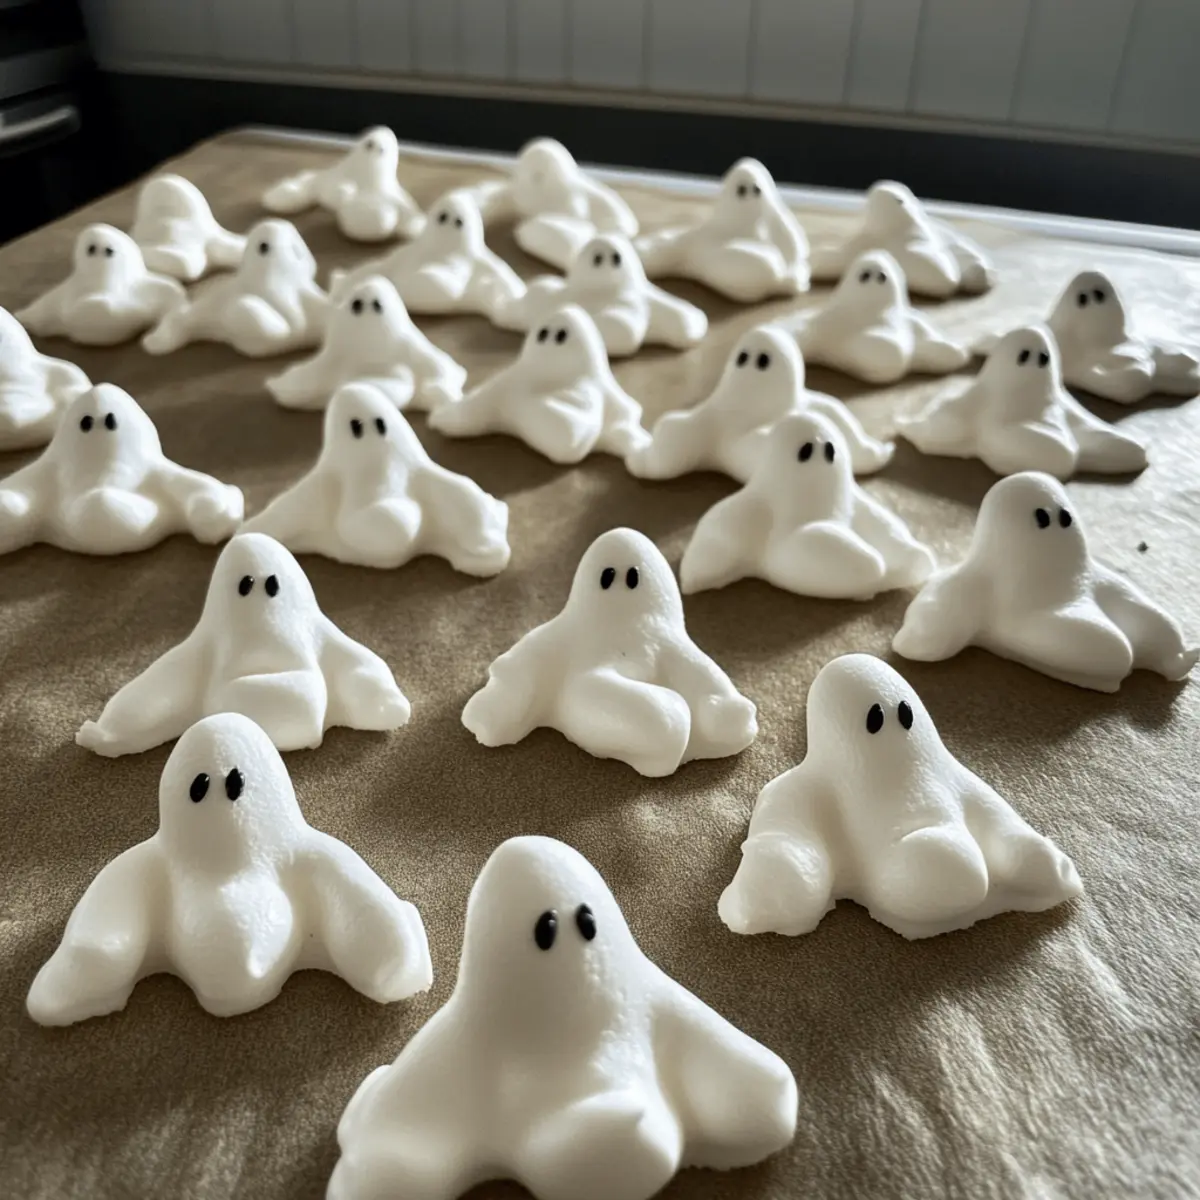
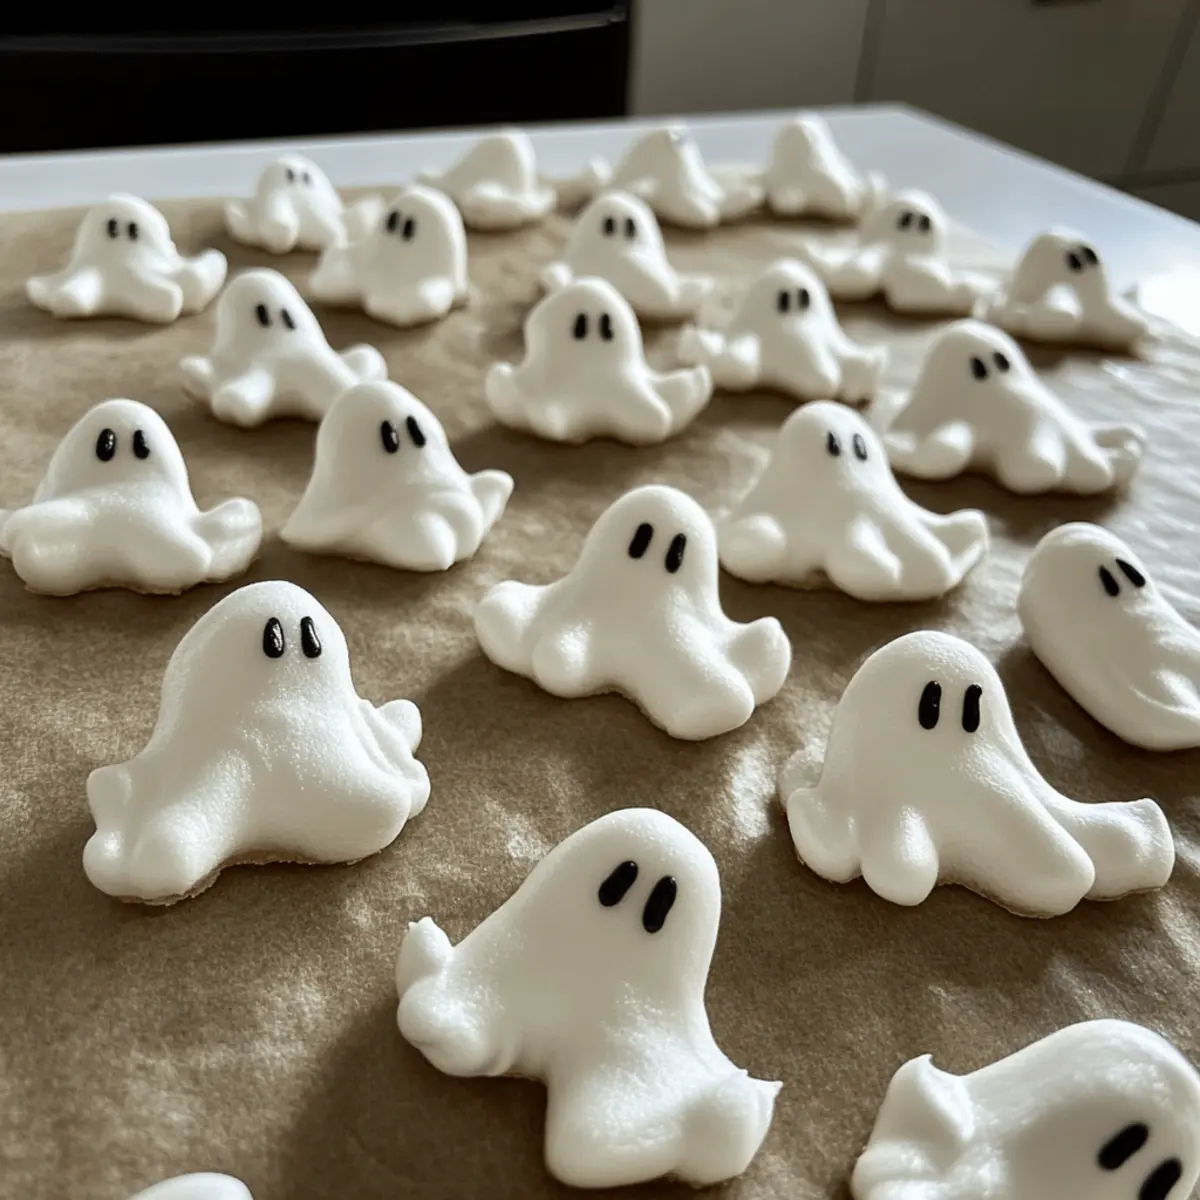
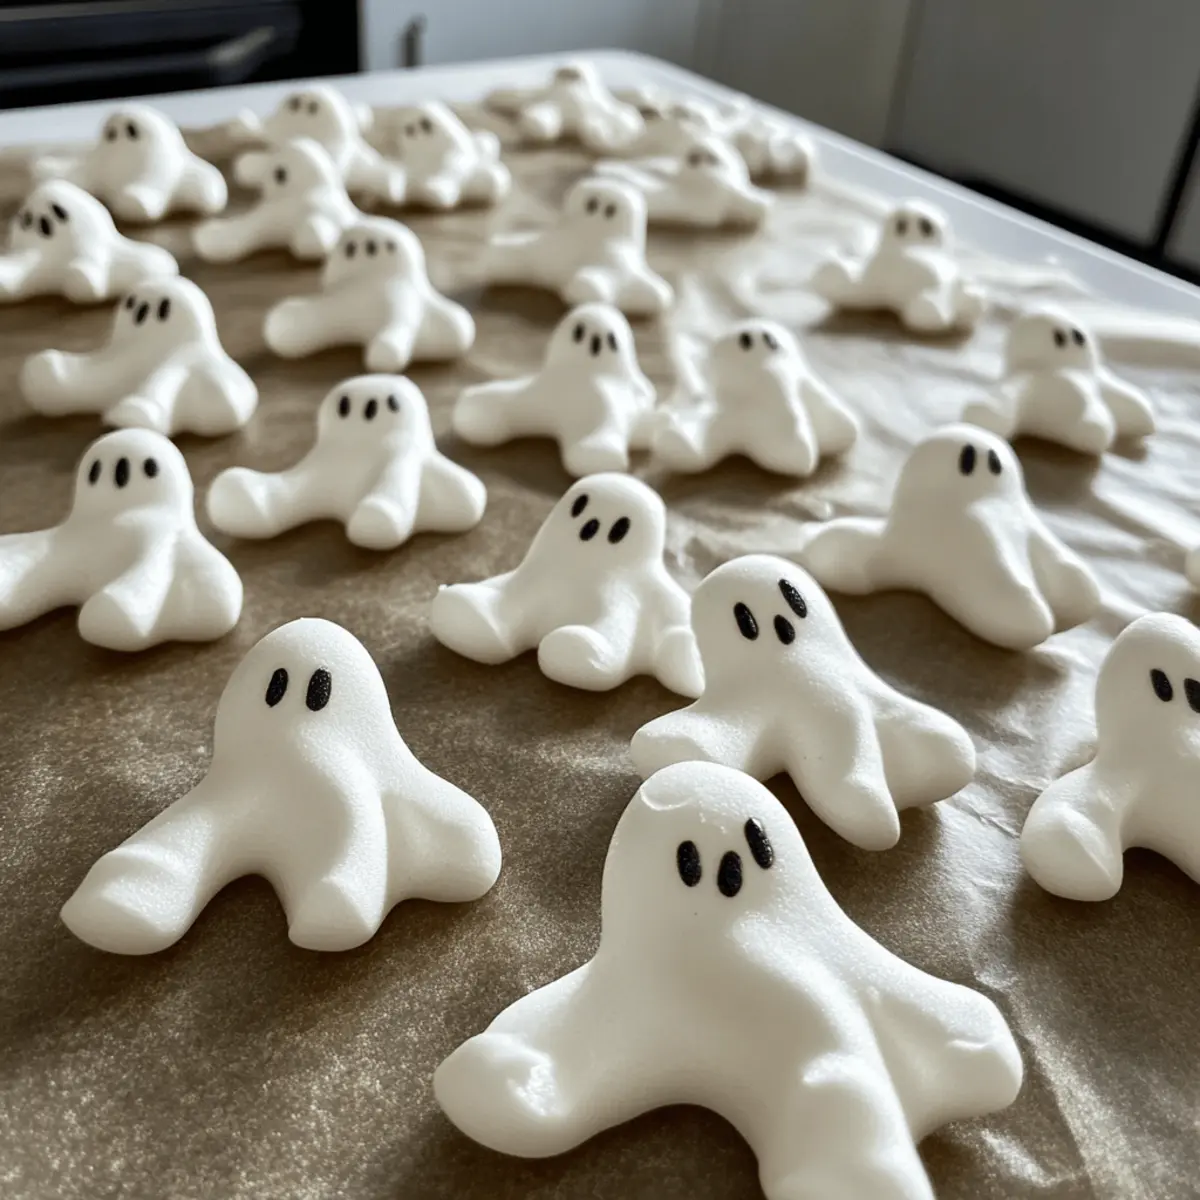
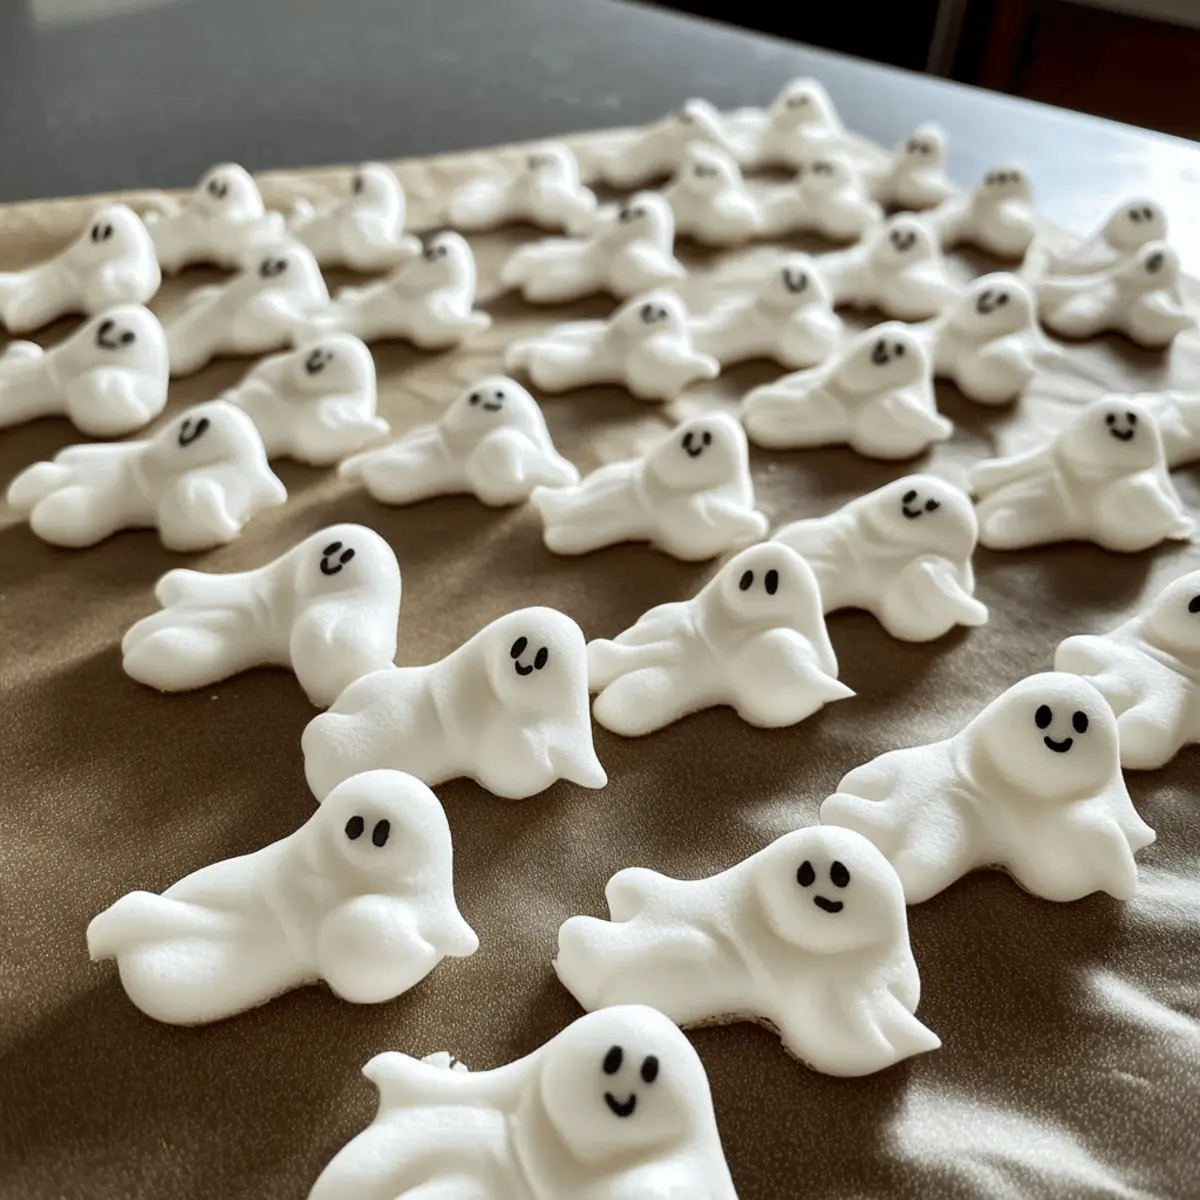
Transfer the meringue mixture to a piping bag fitted with a round tip. On parchment-lined baking sheets, pipe small ghost shapes, approximately 2 inches tall. Create a swirl at the top for the ghostly “head” and slightly wider “bottom” for added flair. Aim to make them all a similar size for even baking.
Step 6: Bake and dry
Place the baking sheets in the preheated oven and bake for 90 to 120 minutes. Check for doneness by ensuring the meringue ghost cookies easily peel off the parchment paper. If they start to take on color, reduce the oven temperature slightly to keep that stunning white appearance intact.
Step 7: Cool and decorate
Once baked, turn off the oven and open the door slightly to let them cool inside for at least an hour. After they are completely cool, take a moment to decorate your Meringue Ghost Cookies using an edible black marker to draw spooky eyes and mouths, bringing your whimsical treats to life!
What to Serve with Meringue Ghost Cookies
Indulge in a whimsical Halloween feast that delights both sight and palate while making your gathering extra special.
-
Pumpkin Spice Latte: This creamy, spiced drink pairs perfectly with the lightness of the cookies, ensuring a cozy vibe for your celebration.
-
Chocolate-Dipped Strawberries: The rich chocolate complements the airy sweetness of the meringue, creating a balance that guests will adore.
-
Spooky Fruit Platter: An assortment of seasonal fruits adds freshness and a splash of color to your table, enhancing ambiance while enticing little trick-or-treaters.
-
Creepy Cupcakes: Decorated with Halloween themes, these delightful confections provide a contrast in texture alongside your ghostly treats, making dessert time fun and festive.
-
Warm Apple Cider: This classic fall drink brings warmth to your gathering and pairs wonderfully with cookies, inviting guests to sip and savor.
-
Caramel Popcorn: The sweet crunch offers a delightful contrast to the soft meringues and adds a fun, playful element to your Halloween spread.
-
Ghostly Marshmallow Treats: These can echo the meringue’s shapes while adding a chewy texture, making for a cohesive dessert experience.
-
Miniature Cheesecakes: A creamy, rich option that contrasts beautifully with the lightness of meringue—perfect for those who enjoy a decadent touch!
Make Ahead Options
These Meringue Ghost Cookies are perfect for meal prep, saving you valuable time during the Halloween rush! You can whip up the meringue and pipe the ghost shapes up to 24 hours in advance. Simply store them in an airtight container at room temperature to maintain their crispness. If you prefer, you can also bake the meringues a day ahead; just let them cool completely before storing. To finish, decorate the cookies with edible markers right before serving, ensuring they remain just as delightful and eye-catching. By prepping ahead, you’ll enjoy stress-free entertaining with these charming treats!
Meringue Ghost Cookies Variations
Elevate your spooky baking experience with these delightful twists that will make your Meringue Ghost Cookies truly unique!
- Dairy-Free: Use coconut milk powder instead of any dairy-based flavoring to keep your treats light and plant-based.
- Flavor Adventure: Add peppermint or almond extract for a delicious twist, perfect for seasonal variations that delight the taste buds.
- Colorful Ghouls: Incorporate food coloring into your meringue before piping to create vibrantly spooky ghosts that will enchant everyone.
- Crispy Add-Ins: Fold in mini chocolate chips or crushed candy canes for an extra texture that’ll surprise your guests with delightful crunch.
- Spiced Up: Sprinkle in a dash of cinnamon or nutmeg for a warm, festive flavor that enhances the overall Halloween vibe.
- Citrus Zest: Add a teaspoon of lemon or orange zest for a bright, zesty flavor that will keep your ghosts refreshing and lively.
- Ghostly Variations: Instead of ghost shapes, pipe meringue into bats or witches hats for an added Halloween flair that can appeal to everyone at your party.
- Gluten-Free: These meringues are naturally gluten-free, making them a great option for guests with dietary restrictions; feel free to indulge without worry!
Looking for more delightful treats? These Butter Spider Cookies and Pumpkin Cheesecake Cookies also make fantastic fall additions to your Halloween celebrations!
How to Store and Freeze Meringue Ghost Cookies
Room Temperature: Store your Meringue Ghost Cookies in an airtight container at room temperature to keep them crisp for up to 3 days.
Fridge: It’s best not to refrigerate these cookies as moisture can make them chewy instead of light and airy, but they can last a day if needed.
Freezer: Meringue cookies can be frozen for up to 3 months! Place them in a single layer in an airtight container, separated by parchment paper to prevent sticking.
Reheating: If you want to refresh the texture, simply place them in a low oven (95°C or 200°F) for 10-15 minutes to help regain some crispness before serving.
Expert Tips for Meringue Ghost Cookies
-
Clean Equipment: Ensure all mixing bowls and utensils are spotless and grease-free. This helps egg whites achieve maximum volume for your meringue ghost cookies.
-
Size Matters: Opt for smaller ghost shapes to bake more reliably. Smaller meringues dry out better than larger ones, ensuring a perfect crisp texture.
-
Baking Vigilance: Keep an eye on your meringues while they bake. If they start to brown, reduce the oven temperature immediately to maintain their pristine white color.
-
Incorporate Gradually: Add sugar slowly to the egg whites to ensure it dissolves properly. This incorporation is key to achieving a glossy and stable meringue for your cookies.
-
Cool Slowly: Allow your baked meringue ghost cookies to cool in the oven with the door ajar. This gradual cooling helps prevent cracking and ensures their light, airy consistency.
Meringue Ghost Cookies Recipe FAQs
What should I look for when selecting egg whites?
Absolutely! When selecting egg whites, ensure that the eggs are fresh, and separated carefully, with no yolk contamination, as even a tiny bit of yolk can prevent the egg whites from whipping properly. For the best results, look for egg whites that are clean, frothy, and maintain their shape when whipped.
How should I store Meringue Ghost Cookies for freshness?
You can keep your Meringue Ghost Cookies in an airtight container at room temperature for about 3 days. Make sure the container is in a cool, dry place to prevent humidity from affecting their crisp texture. For optimal freshness, avoid refrigerating them since the moisture can lead to a chewy consistency, not the airy delight we aim for.
Can I freeze Meringue Ghost Cookies?
Yes, you can freeze these delightful treats! Place the meringue cookies in a single layer in an airtight container, using parchment paper between layers to prevent sticking. They can be frozen for up to 3 months. When you’re ready to enjoy them, simply thaw at room temperature, or for a refreshing crunch, pop them in a low oven at 95°C (200°F) for 10-15 minutes to regain their crispiness.
What if my meringue mixture doesn’t reach stiff peaks?
Don’t worry! If your meringue mixture isn’t reaching stiff peaks, it could be due to a couple of factors. First, ensure that your bowl and whisk are completely grease-free. If you’ve got any oil or grease residue, it will inhibit the egg whites from whipping up properly. Also, try adding a bit more granulated sugar gradually; this can help stabilize the meringue as it whips. If you’re still having trouble, consider starting over with fresh egg whites.
Are there any dietary considerations I should be aware of?
Very! Meringue Ghost Cookies are naturally gluten-free and low in calories, making them a great treat for many dietary needs. However, if you’re concerned about allergies, keep in mind that they do contain egg whites. For those with egg allergies, unfortunately, this recipe isn’t suitable. Always inform your guests about the ingredients used when serving.
Meringue Ghost Cookies That Haunt Your Halloween Dreams
Ingredients
Equipment
Method
- Preheat your oven to 95°C (200°F).
- In a clean mixing bowl, whip the egg whites until firm peaks form, about 3-5 minutes.
- Gradually add the granulated sugar, a tablespoon at a time, mixing for 5-7 minutes until glossy.
- Gently fold in the vanilla extract and vinegar or lemon juice until combined.
- Transfer the mixture to a piping bag and pipe ghost shapes onto parchment-lined baking sheets.
- Bake for 90 to 120 minutes, checking that they easily peel off the parchment paper.
- Turn off the oven, slightly open the door, and let the cookies cool inside for at least an hour.
- Decorate the cooled cookies with an edible black marker to create eyes and mouths.
Leave a Reply