
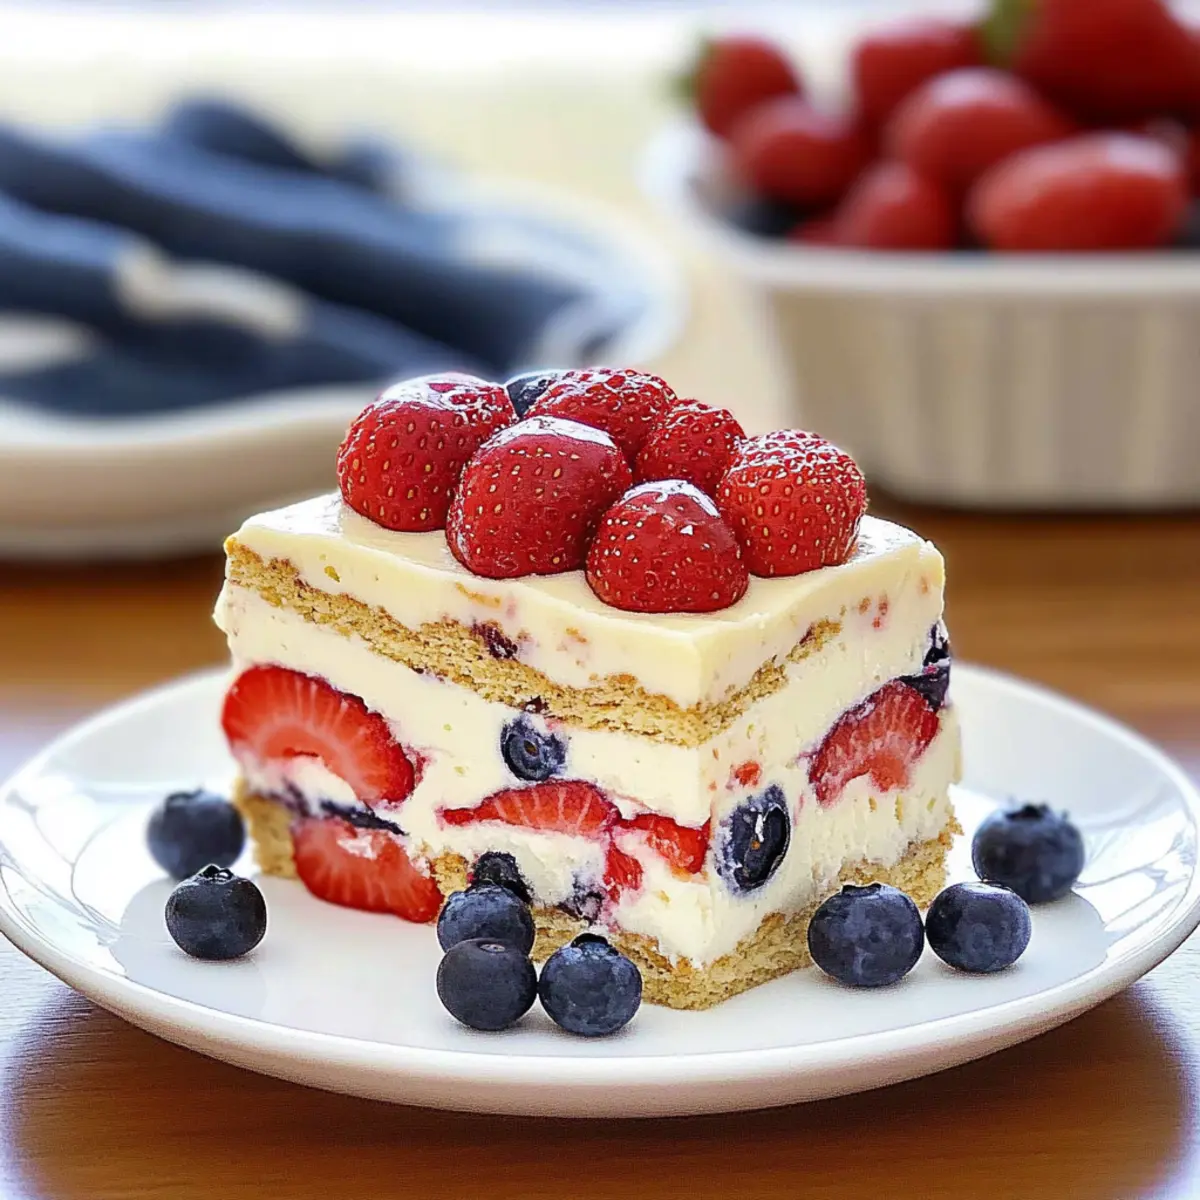
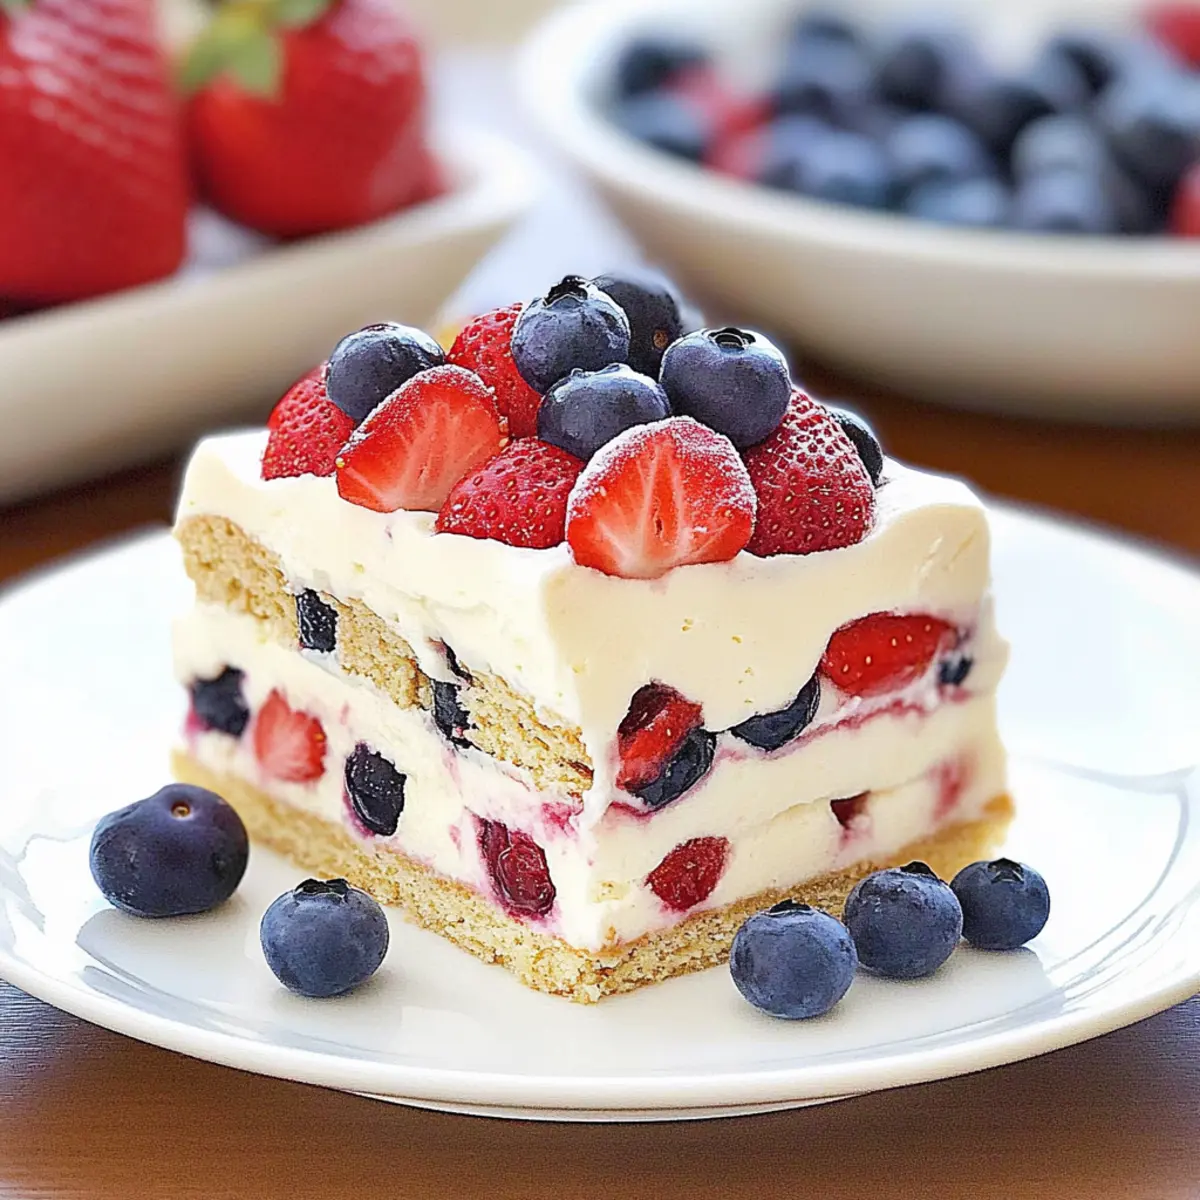
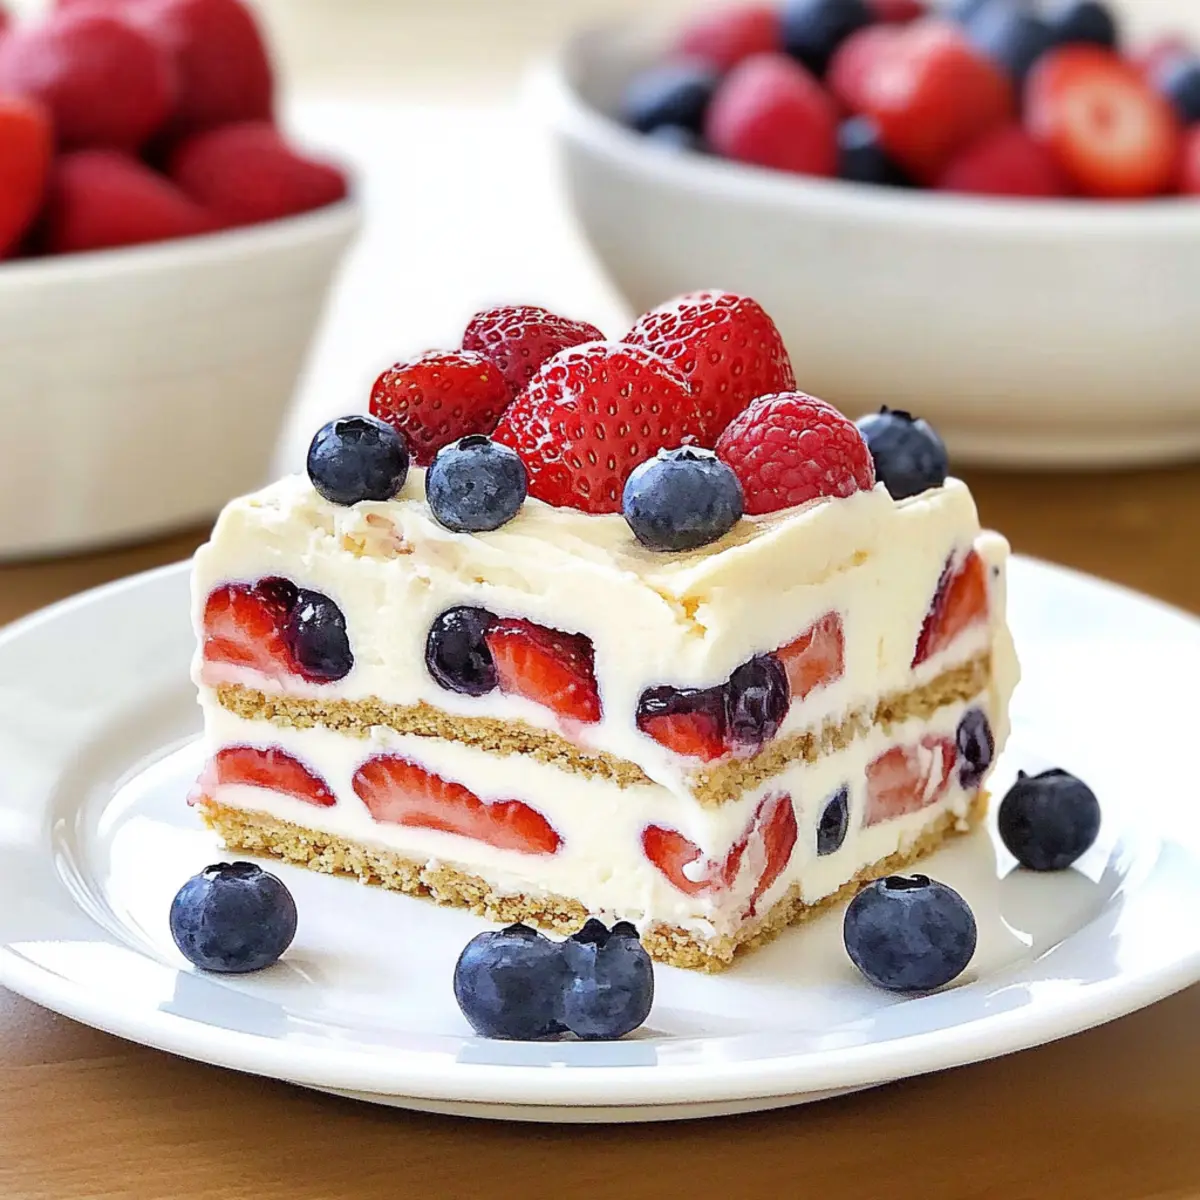
The incredible taste of summer is just a recipe away with this No Bake Summer Berry Icebox Cake. Imagine basking in the sun, a light, refreshing dessert that whips up in no time is exactly what you need! This delightful treat fuses layers of creamy vanilla pudding with crunchy graham crackers and juicy berries, offering a blissful escape from the sweltering heat. Not only is this easy summer dessert a crowd-pleaser, but it can also be prepared a day ahead, saving you precious time when entertaining guests. As the flavors meld in the fridge, you’ll be rewarded with an irresistible cake-like experience that’s sure to delight! What’s your favorite berry to include in a summer dessert?

What makes this dessert a summer must-try?
No Bake Convenience: This recipe is perfect for hot days when the last thing you want is to turn on the oven.
Effortless Preparation: With minimal ingredients and steps, you’ll find that assembling this dessert is a breeze!
Fresh Fruit Flavor: Each bite bursts with freshness from the vibrant strawberries and blueberries—truly the taste of summer!
Versatile Options: Feel free to mix and match with your favorite berries or even swap graham crackers for pound cake for a twist.
Crowd Favorite: Impress family and friends with this stunning dessert that looks as good as it tastes, making it ideal for gatherings.
Make-Ahead Magic: Prepare it the night before and let the flavors deepen while you relax, allowing you more time to enjoy your guests!
No Bake Summer Berry Icebox Cake Ingredients
• Here’s everything you need to whip up this refreshing treat!
For the Base
- Graham Crackers – The sturdy foundation of the cake; consider substituting with vanilla wafers if you desire a different flavor base.
- White Chocolate Chips – Drizzle on top for an extra touch of sweetness; you can omit them if you prefer a lighter dessert.
For the Creamy Filling
- Cream Cheese – Provides depth and creaminess; ensure it’s softened for smooth mixing.
- Vanilla Instant Pudding – Thickens the filling beautifully; a cheesecake-flavored pudding can elevate the creamy goodness of your no bake summer berry icebox cake.
- Cold Milk – Essential for mixing everything together; full-fat milk will yield a richer flavor.
- Cool Whip (or homemade whipped cream) – Adds an airy texture; don’t hesitate to use homemade for a fresh touch.
For the Fruit Layers
- Fresh Strawberries – Their sweetness and vibrant color make each slice pop; feel free to swap for raspberries for a tangy twist.
- Fresh Blueberries – Offer bursts of flavor with every bite; ensure they are fresh and plump for the best experience.
Now, gather these ingredients, and let’s create a dessert that truly captures the essence of summer!
Step‑by‑Step Instructions for No Bake Summer Berry Icebox Cake
Step 1: Prepare the Creamy Filling
In a large mixing bowl, beat the softened cream cheese and vanilla instant pudding together until well blended, about 2-3 minutes. Gradually pour in 2 cups of cold milk, mixing until smooth and creamy. This pudding mixture is the heart of your No Bake Summer Berry Icebox Cake, so ensure there are no lumps before moving on to the next step.
Step 2: Fold in the Cool Whip
Gently fold 2 cups of Cool Whip into the cream cheese and pudding mixture until fully combined, being careful not to deflate the light texture. Reserve ½ cup of the Cool Whip for topping later. This addition brings a delightful airiness to your filling, enhancing the overall creaminess of your cake.
Step 3: Create the Bottom Layer
Spread a thin layer of the reserved Cool Whip across the bottom of a 9×13 inch pan, creating a nice base for your dessert. This layer not only adds flavor but also helps the graham crackers adhere beautifully. As you prepare to layer your ingredients, gather your graham crackers and fresh berries for quick access.
Step 4: Layer the Graham Crackers
Lay 5 graham crackers horizontally in a single layer over the Cool Whip. Press them gently into the mixture to secure their place. This will serve as the first layer of your No Bake Summer Berry Icebox Cake, providing a delicious crunch that contrasts perfectly with the creamy filling.
Step 5: Add the Pudding and Berries
Spoon a generous layer of the creamy pudding filling over the graham crackers, spreading it evenly with a spatula. Next, sprinkle a mix of fresh strawberries and blueberries on top of the pudding, ensuring they’re evenly distributed for bursts of flavor in every bite. The vibrant colors will make your dessert visually appealing!
Step 6: Repeat the Layers
Repeat the layering process by adding another set of graham crackers, followed by more pudding and additional berries. Continue this pattern until you reach the top of the pan. Make sure to finish with a layer of pudding, as this will help lock in the freshness of the berries.
Step 7: Top with Cool Whip
Spread the reserved Cool Whip evenly over the final layer of pudding. This creates a beautiful, fluffy topping that complements the No Bake Summer Berry Icebox Cake. Use a spatula to smooth it out, and don’t worry about perfection—this dessert is all about fun and flavor!
Step 8: Chill the Cake
Cover the pan with plastic wrap and refrigerate for at least 4 hours, but ideally overnight. Chilling allows the graham crackers to soften, creating that delightful cake-like texture. As you wait, you can prepare the white chocolate drizzle for a finishing touch!
Step 9: Drizzle with White Chocolate
Before serving, melt ½ cup of white chocolate chips in the microwave in 30-second intervals until smooth. Drizzle the melted chocolate over the top of your chilled No Bake Summer Berry Icebox Cake for added sweetness and visual appeal. The warm chocolate will slightly melt into the Cool Whip, creating an indulgent topping.
Step 10: Serve and Enjoy
Slice into squares, serve chilled, and watch your guests delight in this refreshing summer dessert! The vibrant berries and creamy layers will bring smiles all around. Caution: it may disappear quickly, so be prepared with your favorite refreshments on hand!
Make Ahead Options
These No Bake Summer Berry Icebox Cake are perfect for busy home cooks looking to save time! You can assemble the entire cake up to 24 hours in advance, ensuring each layer melds beautifully while you tackle other tasks. Simply follow all the steps, cover the pan with plastic wrap, and refrigerate it overnight. This resting period not only allows the graham crackers to soften, creating that delightful cake-like texture, but also ensures the flavors deepen for a more delicious taste. Just remember to add the white chocolate drizzle right before serving to maintain its rich appearance and texture. Enjoy more time with your guests and let this carefree dessert do the talking!
No Bake Summer Berry Icebox Cake Variations
Feel free to get creative with this delicious dessert—let your imagination run wild with flavors and textures!
-
Gluten-Free: Use gluten-free graham crackers or almond flour cake to accommodate dietary needs while still enjoying the beauty of this cake.
-
Dairy-Free: Substitute cream cheese with a dairy-free alternative, and use coconut cream instead of Cool Whip for a tropical vibe.
-
Berry Medley: Mix in your favorite seasonal berries, such as blackberries or peaches, for delightful and unexpected bursts of flavor.
-
Chocolate Lovers: Replace vanilla pudding with chocolate pudding, and drizzle with dark chocolate for a rich and luscious dessert.
-
Nutty Crunch: Sprinkle chopped nuts like almonds or walnuts between layers for added texture and a wholesome crunch.
-
Citrus Zest: Add a bit of lemon or orange zest to the pudding mixture for a bright and refreshing twist that complements the berries beautifully.
-
Ice Cream Version: Layer scoops of your favorite ice cream in place of the pudding for a more indulgent, sundae-like experience.
-
Coffee Infusion: Stir in some instant coffee granules to the pudding for a delightful mocha flavor that pairs perfectly with the berries.
For even more tempting desserts, consider trying Almond Flour Cake or a bowl of Summer Corn and Zucchini Chowder alongside your icebox cake! Each variation adds its own touch, making your summer gatherings even more special.
Expert Tips for No Bake Summer Berry Icebox Cake
• Softened Cream Cheese: Ensure your cream cheese is fully softened at room temperature before mixing to prevent unsightly lumps in your filling.
• Perfect Pudding Consistency: If the pudding mixture appears too runny, reduce the milk slightly while mixing to achieve the right thickness for your no bake summer berry icebox cake.
• Berry Preparation: Wash and dry your fresh berries thoroughly before adding them to the layers to prevent excess moisture that can make the dessert soggy.
• Layering Technique: Aim for even layers of graham crackers, pudding, and berries for a beautiful presentation and balanced flavor in every slice.
• Chill Time Matters: Refrigerate overnight if possible—this enhances the flavors and allows the graham crackers to soften perfectly for that cake-like texture.
• Drizzle Wisely: Save your white chocolate drizzle for just before serving to keep it looking fresh and appealing, adding the perfect finishing touch to your dessert!
How to Store and Freeze No Bake Summer Berry Icebox Cake
Fridge: Store any leftovers in an airtight container for up to 3 days. The cool temperature helps maintain the cake’s creamy texture and fruity flavors.
Freezer: It’s best not to freeze this dessert, as the graham crackers can become soggy and the creamy filling may separate upon thawing.
Reheating: This cake is meant to be enjoyed chilled, so there’s no need to reheat—simply slice and serve straight from the fridge!
Make Ahead: Preparing the No Bake Summer Berry Icebox Cake the night before is ideal, as it allows the layers to meld together beautifully.
What to Serve with No Bake Summer Berry Icebox Cake
When it comes to creating the perfect summer meal, finding complementary dishes will have everyone asking for seconds!
-
Minty Fruit Salad: A refreshing mix of seasonal fruits tossed with a hint of mint elevates your berry dessert beautifully. The cool flavors balance the sweetness of the cake and add a splash of color to your table.
-
Grilled Chicken Skewers: These savory bites marinated in a light vinaigrette bring a satisfying twist to your meal. The smoky flavor pairs wonderfully with the lightness of the No Bake Summer Berry Icebox Cake, making for an ideal summer feast!
-
Lemonade or Iced Tea: Sip on chilled lemonade or iced tea infused with fresh mint for a burst of citrusy zing. Not only does it refresh, but the tartness complements the sweetness of your dessert, enhancing the overall experience.
-
Cheese Platter: A rustic cheese board featuring sharp cheddar and creamy brie provides a delightful contrast to your cake. Add some nuts and dried fruits for texture; this pairing keeps the meal balanced and sophisticated!
-
Chocolate-Dipped Strawberries: Elevate your dessert experience with these indulgent treats. Their rich chocolate encase fresh berries, seamlessly mirroring the essence of the icebox cake while enhancing the sweet-berry theme.
-
Vanilla Ice Cream: A scoop of creamy vanilla ice cream served alongside your no-bake cake is a classic choice. The velvety ice cream melts into the layers, creating a delightful balance of textures and flavors with each spoonful!
No Bake Summer Berry Icebox Cake Recipe FAQs
What type of berries should I use?
Absolutely, you can use a variety of fresh berries! Strawberries and blueberries are classic choices that embody summer’s sweetness. Raspberries or blackberries can add a delightful tang, and if you’re feeling adventurous, peaches can bring a juicy twist. Just make sure to choose berries that are ripe and firm, avoiding any with dark spots or signs of over-ripeness.
How should I store the No Bake Summer Berry Icebox Cake?
To keep your cake fresh, store any leftovers in an airtight container in the refrigerator for up to 3 days. This will help maintain its creamy texture and delightful flavors. If you’ve assembled the cake ahead of time, you can enjoy it up to 24 hours later, as the graham crackers will soften nicely in the fridge.
Can I freeze this dessert?
I recommend against freezing the No Bake Summer Berry Icebox Cake, as the creamy filling may separate, and the graham crackers can turn soggy upon thawing. Instead, enjoy it fresh and chilled! If you want to prepare components ahead of time, consider mixing the filling and layering it right before serving.
What to do if my pudding mixture is too thin?
If you find that your pudding mixture is runny, don’t fret! Just slightly reduce the amount of cold milk you add next time; aim for 1¾ cups instead of 2 cups. Another method is to allow the mixture to chill for a bit longer, which can help it thicken naturally before folding in the Cool Whip.
Can pets have any of these ingredients?
Be cautious! While fruits like strawberries and blueberries are generally safe for dogs, cream cheese and Cool Whip often contain sugars and additives that aren’t suitable for pets. It’s best to enjoy this yummy dessert yourself and keep it out of reach of your furry friends.
How can I add more flavor to this dessert?
The more, the merrier! You might consider adding a splash of vanilla extract to the pudding mixture for extra depth or even a sprinkle of lemon zest over the layers for a refreshing zing. If you want a chocolate version, switch the vanilla pudding for chocolate pudding and drizzle melted dark chocolate on top for a decadent twist!
Delightful No Bake Summer Berry Icebox Cake for Hot Days
Ingredients
Equipment
Method
- In a large mixing bowl, beat the softened cream cheese and vanilla instant pudding together until well blended, about 2-3 minutes. Gradually pour in 2 cups of cold milk, mixing until smooth and creamy.
- Gently fold 2 cups of Cool Whip into the cream cheese and pudding mixture until fully combined.
- Spread a thin layer of the reserved Cool Whip across the bottom of a 9x13 inch pan.
- Lay 5 graham crackers horizontally in a single layer over the Cool Whip.
- Spoon a generous layer of the creamy pudding filling over the graham crackers, then sprinkle a mix of fresh strawberries and blueberries on top.
- Repeat the layering process until you reach the top of the pan, finishing with a layer of pudding.
- Spread the reserved Cool Whip evenly over the final layer of pudding.
- Cover the pan with plastic wrap and refrigerate for at least 4 hours.
- Before serving, melt ½ cup of white chocolate chips in the microwave and drizzle over the top.
- Slice into squares, serve chilled, and enjoy!
Leave a Reply