
As I mixed the familiar ingredients together, the comforting aroma of vanilla and chocolate filled the air, instantly transporting me back to my childhood kitchen. There’s something magical about the combination of chewy chocolate chip cookies and the delightful crunch of Rice Krispies that makes these Crunchy Rice Krispie Chocolate Chip Cookies a true standout. What’s more, they come together in a flash with no chilling time required—perfect for those baking moments that hit spur-of-the-moment! Whether you’re a seasoned baker or just starting out, this recipe is uncomplicated and uses ingredients you likely have on hand. Not only will these cookies bring smiles to faces young and old, but their delightful texture and rich flavor will also make them a new favorite. Ready to whip up a batch and create some memorable moments?

Why are these cookies so special?
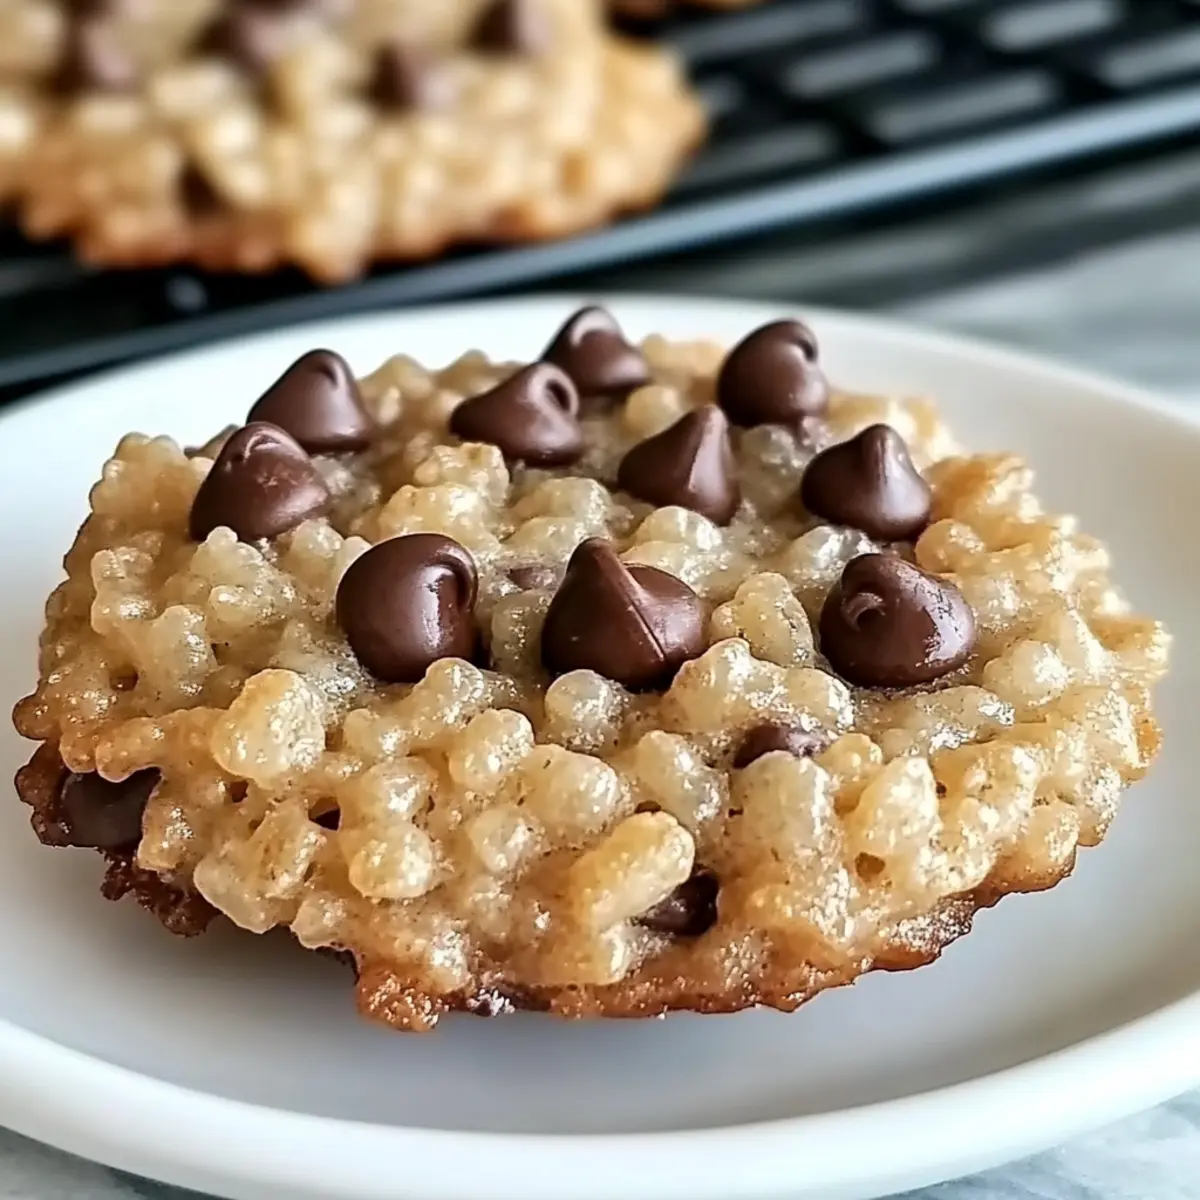
Unmatched Crunchiness: The addition of Rice Krispies creates an incredible texture, giving these cookies a delightful crunch that beautifully complements the soft chewiness of chocolate chips.
Quick and Easy: With no chilling time required, these cookies are a breeze to whip up, making them perfect for those last-minute cravings or spontaneous get-togethers.
Versatile Ingredients: Using everyday pantry staples, you can easily customize this recipe. Try adding nuts or substituting different chips for a unique twist, much like with your favorite Moist Chocolate Chip treats!
Family Fun: These cookies are not just delicious; they’re a fantastic activity to share with kids. Imagine them helping you mix in the Rice Krispies and scoop the dough!
Crowd-Pleasing Treat: Whether at a birthday party or a cozy family evening, these cookies will surely delight all ages—especially when paired with a glass of milk!
Rice Krispie Chocolate Chip Cookies Ingredients
Discover the simple yet delightful ingredients behind these irresistible treats!
For the Cookie Base
• Butter – Provides richness and moisture; use unsalted butter for better control over salt.
• Brown Sugar – Adds sweetness and a delicious chewy texture; can substitute with coconut sugar for a healthier twist.
• Granulated Sugar – Contributes extra sweetness and a crispiness; to reduce sweetness, cut by about 1/4.
• Eggs – Binds ingredients for a perfectly structured cookie; for a vegan option, a flax egg could do the trick.
• Vanilla Extract – Enhances the flavor; consider almond extract for a different taste profile.
• All-Purpose Flour – Provides the necessary structure; gluten-free flour can be used as a substitute.
• Baking Soda – Helps the cookies rise; if unavailable, baking powder works but adjust the amount accordingly.
• Salt – Balances sweetness; you can omit it if using salted butter.
For the Chocolate Goodness
• Chocolate Chips – The star of the show for a rich flavor; feel free to mix in white chocolate or even dark chocolate for a fun variation.
For the Crunch
• Rice Krispies – Adds that delightful crunch and light texture; feel free to swap with other puffed cereals for a twist.
Embrace the joy of baking these Rice Krispie Chocolate Chip Cookies today and experience the delicious balance of textures that will make your taste buds dance!
Step‑by‑Step Instructions for Rice Krispie Chocolate Chip Cookies
Step 1: Preheat the Oven
Begin by preheating your oven to 350°F (175°C). This ensures a perfectly baked batch of Rice Krispie Chocolate Chip Cookies. While the oven warms up, line a baking sheet with parchment paper to prevent the cookies from sticking, making cleanup a breeze.
Step 2: Cream the Butter and Sugars
In a large mixing bowl, combine softened unsalted butter, brown sugar, and granulated sugar. Using an electric mixer, beat the mixture on medium speed until it turns fluffy and light in color, about 2-3 minutes. This creaming process adds air to the dough for a tender cookie texture.
Step 3: Add Eggs and Vanilla Extract
Once your butter and sugars are fluffy, crack in two eggs and pour in the vanilla extract. Beat the mixture on medium speed until the eggs are fully incorporated, about 1-2 minutes. The batter should look smooth and cohesive, with a warm, inviting aroma filling your kitchen.
Step 4: Whisk the Dry Ingredients
In a separate bowl, whisk together all-purpose flour, baking soda, and salt. Mixing the dry ingredients first helps ensure even distribution throughout the Rice Krispie Chocolate Chip Cookies. Once well combined, gradually add the dry mixture to the wet ingredients, mixing until just combined.
Step 5: Combine the Wet and Dry Mixtures
Gently fold the dry ingredients into the wet mixture using a spatula or wooden spoon. Be careful not to overmix; aim for a slightly lumpy batter, which will ensure a tender cookie texture. You may notice some flour pockets, but that’s perfectly fine!
Step 6: Fold in Chocolate Chips and Rice Krispies
Now, it’s time to add the star ingredients! Fold in the chocolate chips and Rice Krispies gently until they are evenly distributed throughout the dough. The Rice Krispies will add delightful crunch, making these cookies truly special.
Step 7: Scoop the Cookie Dough
Using a cookie scoop or spoon, drop generous spoonfuls of dough onto your prepared baking sheet. Make sure to leave space between the cookies, as they will spread while baking. Your tray should be filled with happy little mounds of cookie dough, ready for the oven!
Step 8: Bake the Cookies
Place the baking sheet in your preheated oven and bake for 10-12 minutes. Keep an eye on them; the edges should turn golden brown while the center may appear slightly underbaked—this will ensure a chewy texture in your Rice Krispie Chocolate Chip Cookies.
Step 9: Cool on Baking Sheet
Once baked, let the cookies cool on the baking sheet for about 5 minutes. This cooling period allows them to set while still maintaining a delightful chew. Afterward, carefully transfer them to a wire rack to cool completely and enjoy the enticing aromas of freshly baked cookies.

Make Ahead Options
These Crunchy Rice Krispie Chocolate Chip Cookies are perfect for meal prep enthusiasts looking to save time during busy weeknights! You can prepare the cookie dough up to 24 hours in advance by mixing all the ingredients except for the Rice Krispies and chocolate chips, then refrigerating it in an airtight container. When you’re ready to bake, simply fold in the Rice Krispies and chocolate chips, scoop, and bake as directed. To maintain freshness, store the prepared dough tightly wrapped in the fridge or freeze it for up to 3 months. Your cookies will still come out just as delicious and ready to delight!
How to Store and Freeze Rice Krispie Chocolate Chip Cookies
Room Temperature: Store the cookies in an airtight container at room temperature for up to 1 week to maintain their chewy texture and delightful crunch.
Fridge: If you prefer a firmer cookie, place them in the fridge. They can last for up to 2 weeks, but may lose some of their original crispiness.
Freezer: For longer preservation, freeze the cookies in a single layer on a baking sheet. Once solid, transfer them to a freezer bag for up to 3 months—wrap tightly to prevent freezer burn.
Reheating: To enjoy that freshly baked taste, reheat cookies in the microwave for about 10-15 seconds, or in the oven at 350°F (175°C) for 5-7 minutes, making those Rice Krispie Chocolate Chip Cookies soft and gooey again!
What to Serve with Rice Krispie Chocolate Chip Cookies
There’s nothing quite like creating a delightful spread to enjoy alongside these satisfying cookies, truly captivating all your senses.
-
Cold Glass of Milk: This classic pairing enhances the cookie’s flavors, providing a refreshing contrast to the sweetness. Nothing beats dunking powerful chocolatey bites into ice-cold milk!
-
Vanilla Bean Ice Cream: A scoop of creamy vanilla bean ice cream is perfect for enhancing the chocolate notes while adding a luxurious chill. Warm cookies and cold ice cream create blissful bites!
-
Fresh Fruit Salad: An assortment of berries or citrus adds a bright, refreshing element. The tartness of fresh fruit beautifully balances the cookies’ sweetness.
-
Caramel Sauce Drizzle: Drizzling warm caramel over each cookie intensifies the flavors. It’s a sweet touch that adds an indulgent finish to each bite.
-
Candied Nuts: Roasted or candied nuts give an added crunchy texture and a hint of saltiness. Mix them in for an inviting snack mix alongside the cookies.
-
Coffee or Hot Cocoa: A warm beverage like coffee or hot cocoa enhances the cookies’ comforting nature. The rich flavors complement the chocolatey goodness of your cookies.
Indulge in these thoughtful pairings to create the ultimate cozy moment filled with warmth and joy!
Rice Krispie Chocolate Chip Cookie Variations
Feel free to get creative and customize these cookies to suit your taste buds!
-
Nutty Delight: Add chopped walnuts or pecans for a satisfying crunch that complements the soft chocolate chips.
-
Dried Fruit: Mix in 1/2 cup of dried cranberries or raisins for a sweet and tart contrast to the cookie’s rich chocolate flavor. These fruity additions bring a delightful chew!
-
Cocoa Twist: Substitute Rice Krispies with Cocoa Krispies for an extra chocolaty experience that both kids and adults will adore. It’s a fun way to amp up the chocolate!
-
Flavor Boost: Experiment by adding a teaspoon of cinnamon or instant coffee to enhance the overall flavor profile, giving your cookies a unique twist with each bite. Trust me; it takes them from great to gourmet!
-
Peanut Butter Chip: Swapping out some chocolate chips with peanut butter chips will create a classic combination that’s hard to resist, reminiscent of your favorite Corn White Chocolate.
-
Spicy Kick: For a hint of heat, add a pinch of cayenne pepper or chili powder to the batter. It’s a bold choice that adds an unexpected and delightful heat to these sweet treats.
-
Gluten-Free: Use a gluten-free all-purpose flour blend to make these cookies accessible for those with dietary restrictions without sacrificing any flavor!
No matter how you choose to customize, these cookies will surely be a hit at any gathering or cozy family night!
Expert Tips for Rice Krispie Chocolate Chip Cookies
-
Room Temperature Butter: Ensure butter is softened to room temperature for easy creaming, which is essential for a fluffy texture in your cookies.
-
Mixing Time: Avoid overmixing the dough once you add flour, which can lead to tough cookies instead of the desired chewy Rice Krispie Chocolate Chip Cookies.
-
Chilling Option: For deeper flavors, let the dough sit for about 30 minutes before baking, allowing the ingredients to meld beautifully.
-
Baking Sheet Tips: Use parchment paper on your baking sheet for easy removal of cookies and minimal mess during cleanup.
-
Watch the Oven: Keep an eye on your cookies as they bake; they should be golden on the edges and slightly underbaked in the center for the perfect chewy bite.
Rice Krispie Chocolate Chip Cookies Recipe FAQs
How do I choose the best butter for my cookies?
Absolutely! I recommend using unsalted butter for a more controlled flavor profile. Ensuring it’s softened to room temperature allows for easier creaming with the sugars, leading to a fluffier texture in your cookies. If you have salted butter on hand, just omit the added salt in the recipe for a balanced taste!
How should I store leftover cookies?
To keep your Rice Krispie Chocolate Chip Cookies fresh, store them in an airtight container at room temperature for up to 1 week. If you prefer to enjoy them for a longer period, consider placing them in the fridge for up to 2 weeks, but keep in mind they may lose some crunchiness.
Can I freeze these cookies?
Yes, indeed! To freeze your cookies, first place them in a single layer on a baking sheet and freeze until solid—about 1-2 hours. Once frozen, transfer them to a freezer bag or container where they can be kept for up to 3 months. Wrap them tightly to prevent freezer burn, and when you’re ready to indulge, just reheat in the microwave for 10-15 seconds!
What should I do if my cookie dough is too sticky?
If your cookie dough ends up being too sticky, it might be due to the butter being too soft or too much liquid in the dough. To fix this, simply add a little more flour—about a tablespoon at a time—until the dough reaches a manageable consistency. Just be careful not to overmix, as it can toughen the cookies. Make sure to allow the dough to rest for a bit, as this can help with the stickiness too!
Can these cookies be made gluten-free?
Absolutely! For a gluten-free version of these Rice Krispie Chocolate Chip Cookies, you can substitute all-purpose flour with a gluten-free flour blend. Just make sure your Rice Krispies are also gluten-free. Enjoy baking a batch that everyone can savor!

Rice Krispie Chocolate Chip Cookies: Crunchy, Chewy Bliss
Ingredients
Equipment
Method
- Preheat your oven to 350°F (175°C) and line a baking sheet with parchment paper.
- In a large mixing bowl, combine softened unsalted butter, brown sugar, and granulated sugar. Beat until fluffy and light in color, about 2-3 minutes.
- Add two eggs and vanilla extract. Beat until fully incorporated, about 1-2 minutes.
- In a separate bowl, whisk together all-purpose flour, baking soda, and salt. Gradually add to the wet ingredients, mixing until just combined.
- Gently fold the dry ingredients into the wet mixture using a spatula or wooden spoon.
- Fold in the chocolate chips and Rice Krispies until evenly distributed.
- Drop generous spoonfuls of dough onto your lined baking sheet, leaving space between.
- Bake for 10-12 minutes, until edges are golden brown and centers may appear slightly underbaked.
- Cool on the baking sheet for about 5 minutes, then transfer to a wire rack to cool completely.
Leave a Reply