
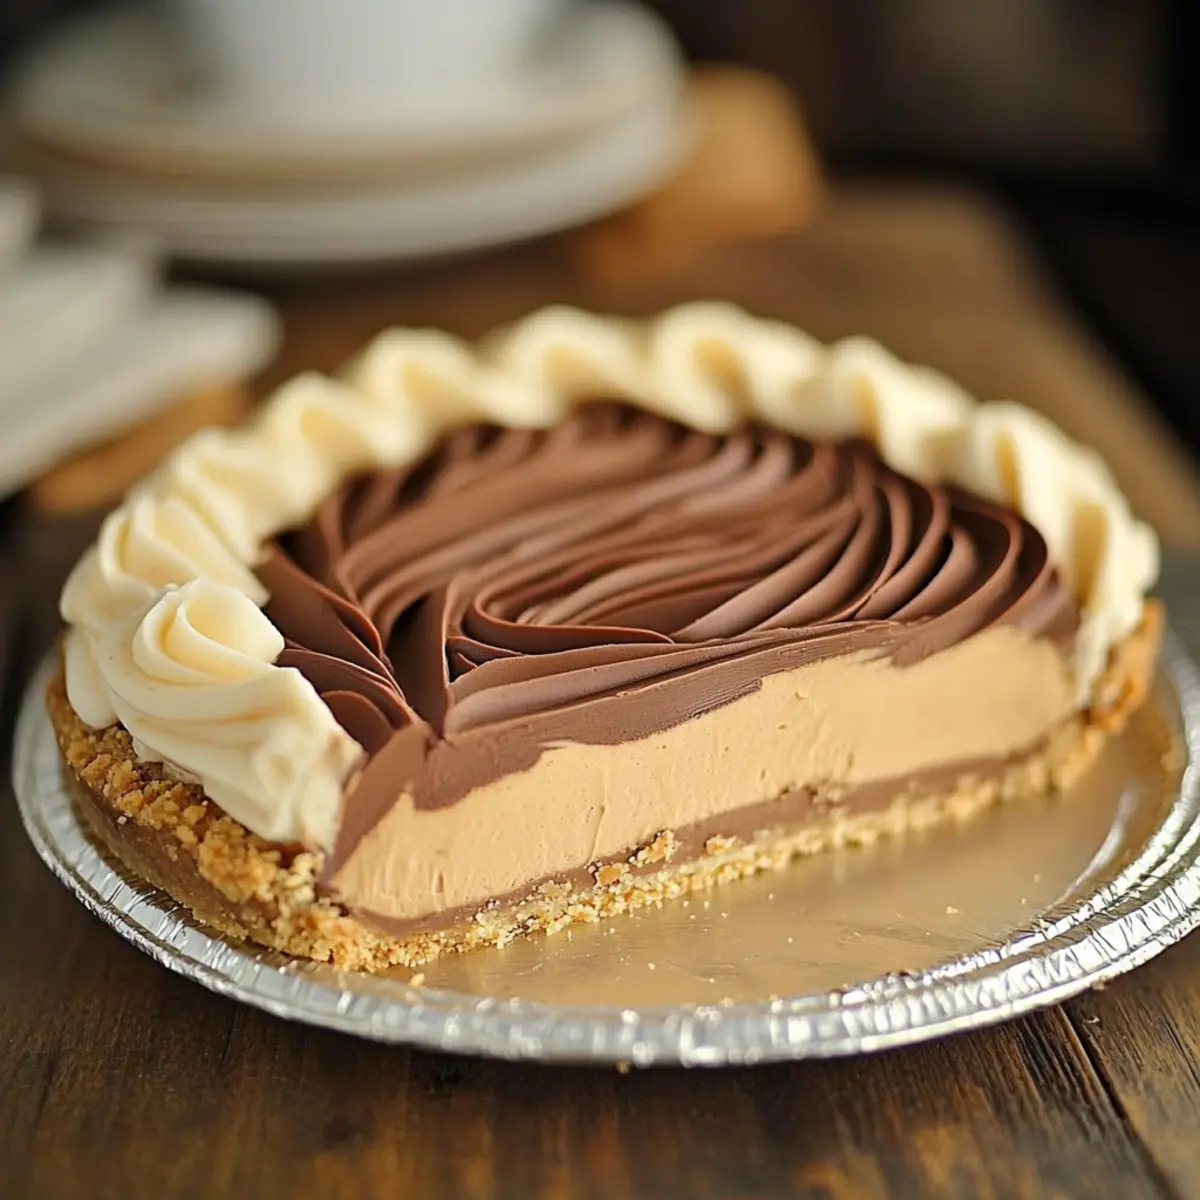
There’s nothing quite like the moment you open your fridge, and there it is—a stunning slice of Copycat Costco Peanut Butter Chocolate Cream Pie just waiting for you. This homemade version of the beloved dessert embodies that outrageous combination of creamy peanut butter and rich chocolate nestled in a crunchy graham cracker crust, and trust me, it’s pure indulgence! Not only is this no-bake recipe a breeze to whip up, but it also delivers a satisfying bite that will have your friends and family begging for seconds. Whether you’re celebrating a special occasion or simply craving something sweet, this pie transforms any gathering into a delightful memory. Ready to immerse yourself in layers of lusciousness? Let’s dive into this delicious adventure together!
What makes this pie so irresistible?
Decadent Layers: Each slice of this pie reveals a heavenly blend of creamy peanut butter and rich chocolate, making it truly scrumptious.
No-Bake Convenience: You won’t need to turn on the oven for this recipe, saving you time and energy while still delivering a homemade treat.
Crowd-Pleasing Delight: Perfect for both casual gatherings and special occasions, this pie is bound to impress friends and family alike.
Customizable Variations: Enjoy it as is or try adding sliced bananas or a chocolate cookie crust for a fun twist!
Quick Prep Time: In just a few simple steps, you can have this luxurious dessert ready for the fridge or freezer. You might also like to pair it with a warm slice of Moist Chocolate Chip banana bread for a sweet touch.
Costco Peanut Butter Chocolate Cream Pie Ingredients
Here’s everything you’ll need to recreate this dreamy dessert!
For the Crust
- Prepared Graham Cracker Crust – Provides a sweet, crunchy base; feel free to use store-bought for convenience or make your own for a personal touch.
For the Chocolate Layer
- Milk Chocolate Chips – Delivers sweetness and a rich chocolate flavor; opt for semi-sweet for added depth.
- Heavy Cream – Creates a smooth ganache for the chocolate layer; whipping cream can substitute, but texture will vary.
For the Peanut Butter Filling
- Cream Cheese – Adds creaminess to both fillings; full-fat cream cheese is preferred for a rich texture.
- Peanut Butter – The star ingredient that gives the filling its signature flavor; creamy peanut butter is best, though chunky adds fun texture.
- Powdered Sugar – Sweetens the filling and stabilizes the mixture; adjust to taste based on your sweetness preference.
For the Topping
- Frozen Whipped Topping (e.g., Cool Whip) – Offers lightness to the filling; homemade whipped cream can be used, but may need additional sweetening.
This homemade Costco Peanut Butter Chocolate Cream Pie is sure to indulge your cravings and impress at any gathering!
Step‑by‑Step Instructions for Costco Peanut Butter Chocolate Cream Pie
Step 1: Melt the Chocolate Ganache
In a medium heatproof bowl, combine the milk chocolate chips and heavy cream. Place the bowl over a pot of simmering water, stirring gently until the chocolate is fully melted and the mixture is smooth, about 5-7 minutes. Once melted, remove it from heat and let it cool to room temperature while you prepare the other layers.
Step 2: Create the Peanut Butter Filling
In a large mixing bowl, beat one block of cream cheese, peanut butter, and powdered sugar until the mixture is completely smooth and creamy, about 3-4 minutes. Then, gently fold in half of the frozen whipped topping until fully combined. This luscious peanut butter filling will be the first layer of your homemade Costco Peanut Butter Chocolate Cream Pie.
Step 3: Whip up the Chocolate Layer
In another mixing bowl, mix the second block of cream cheese with the cooled chocolate mixture and one more portion of powdered sugar. Beat this mixture until fully combined and silky, about 2-3 minutes. Carefully fold in the remaining frozen whipped topping, ensuring you maintain the light and airy texture for the chocolate layer of the pie.
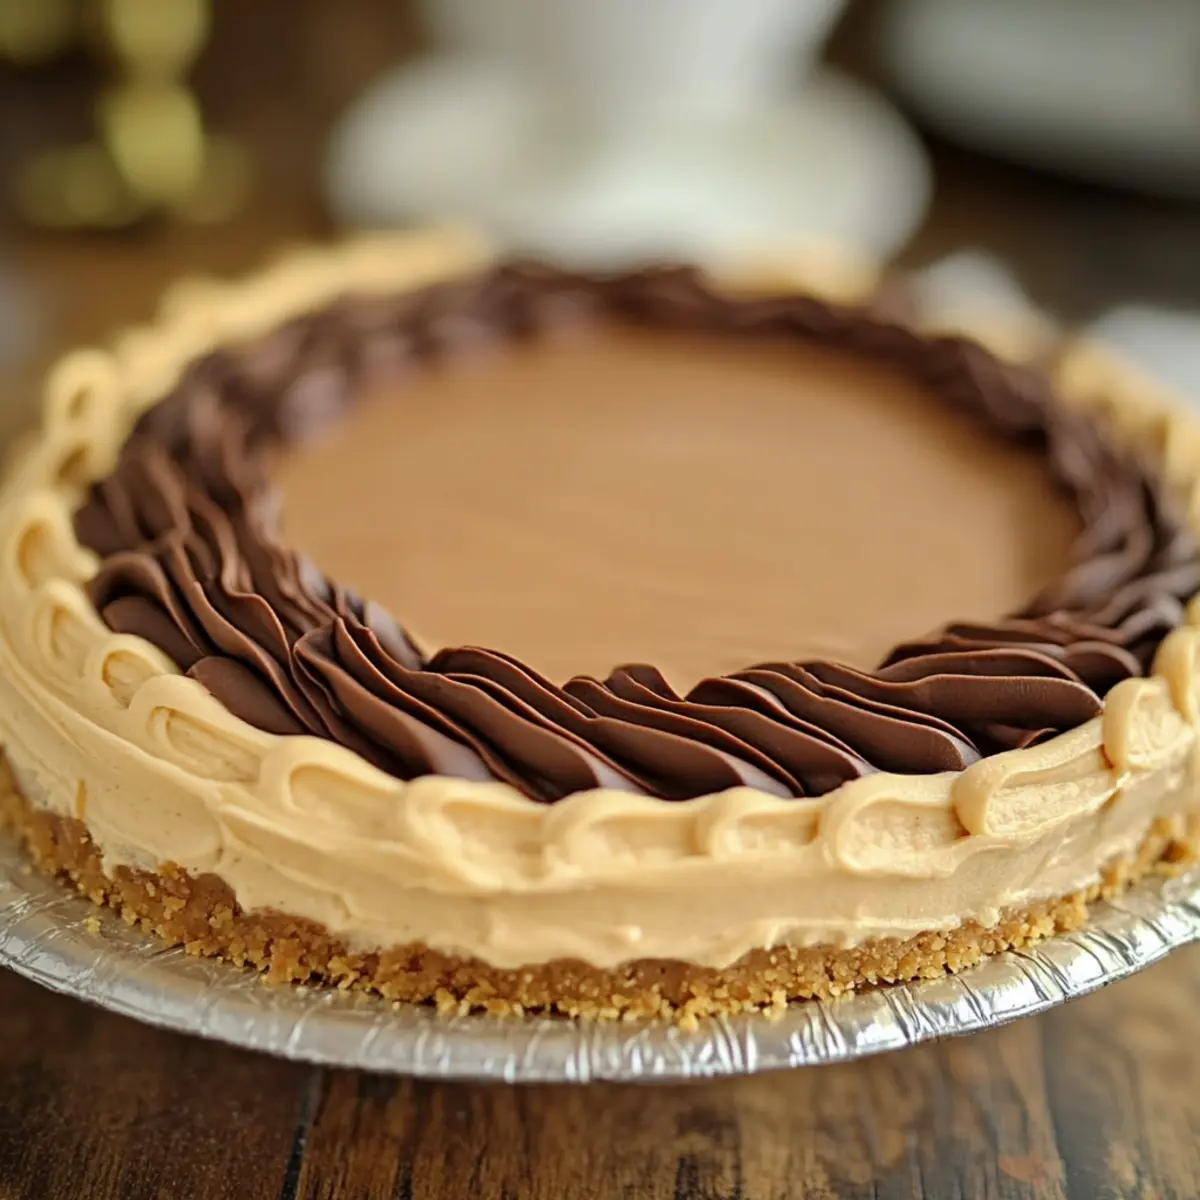
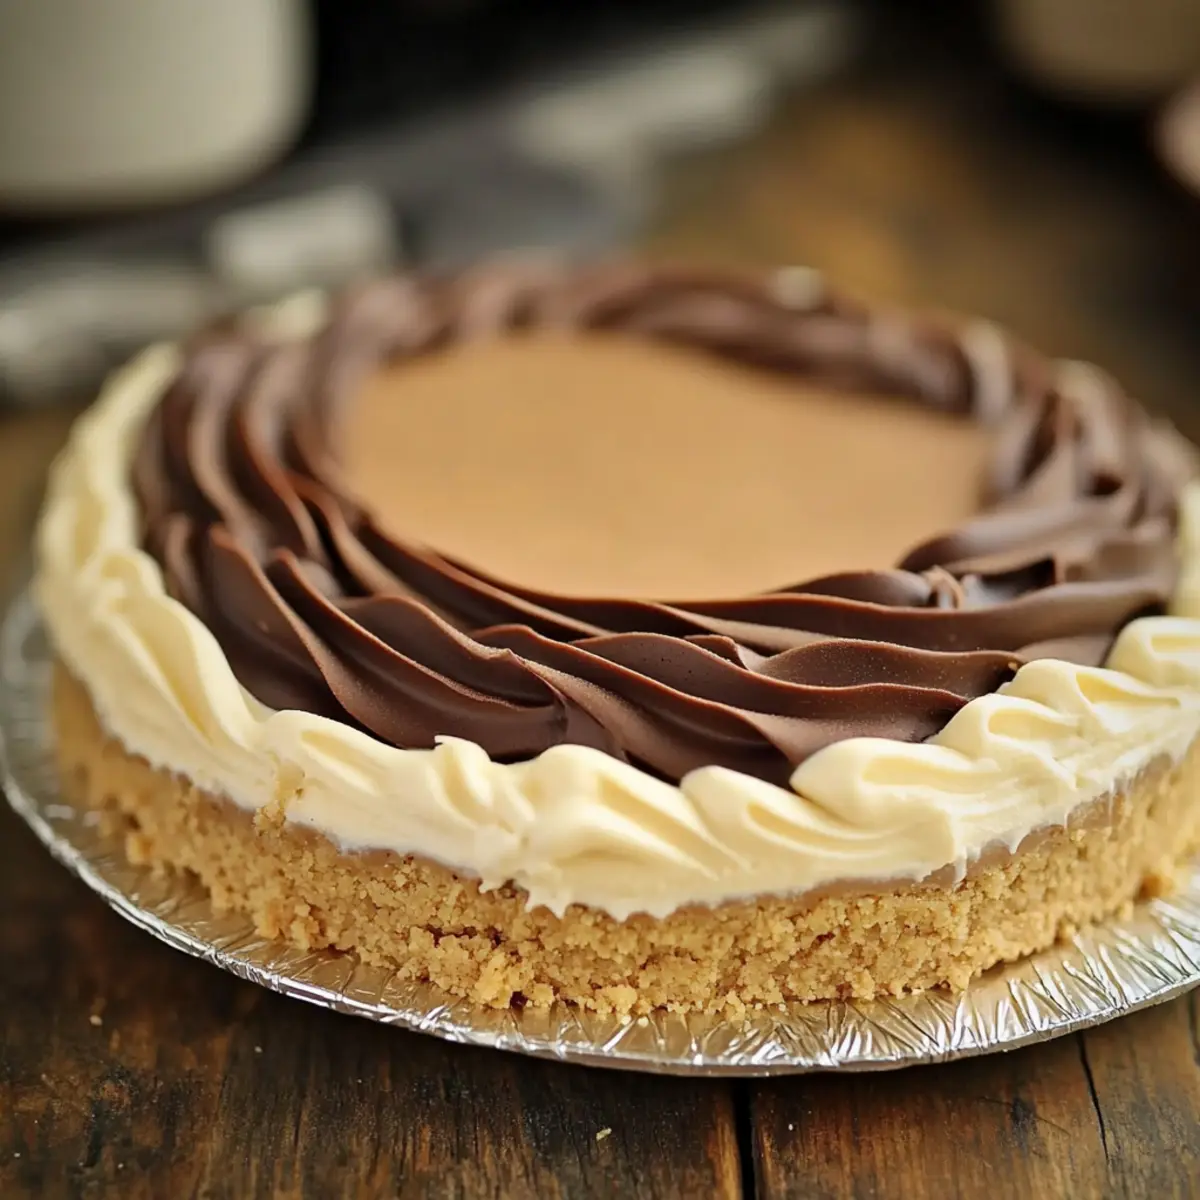
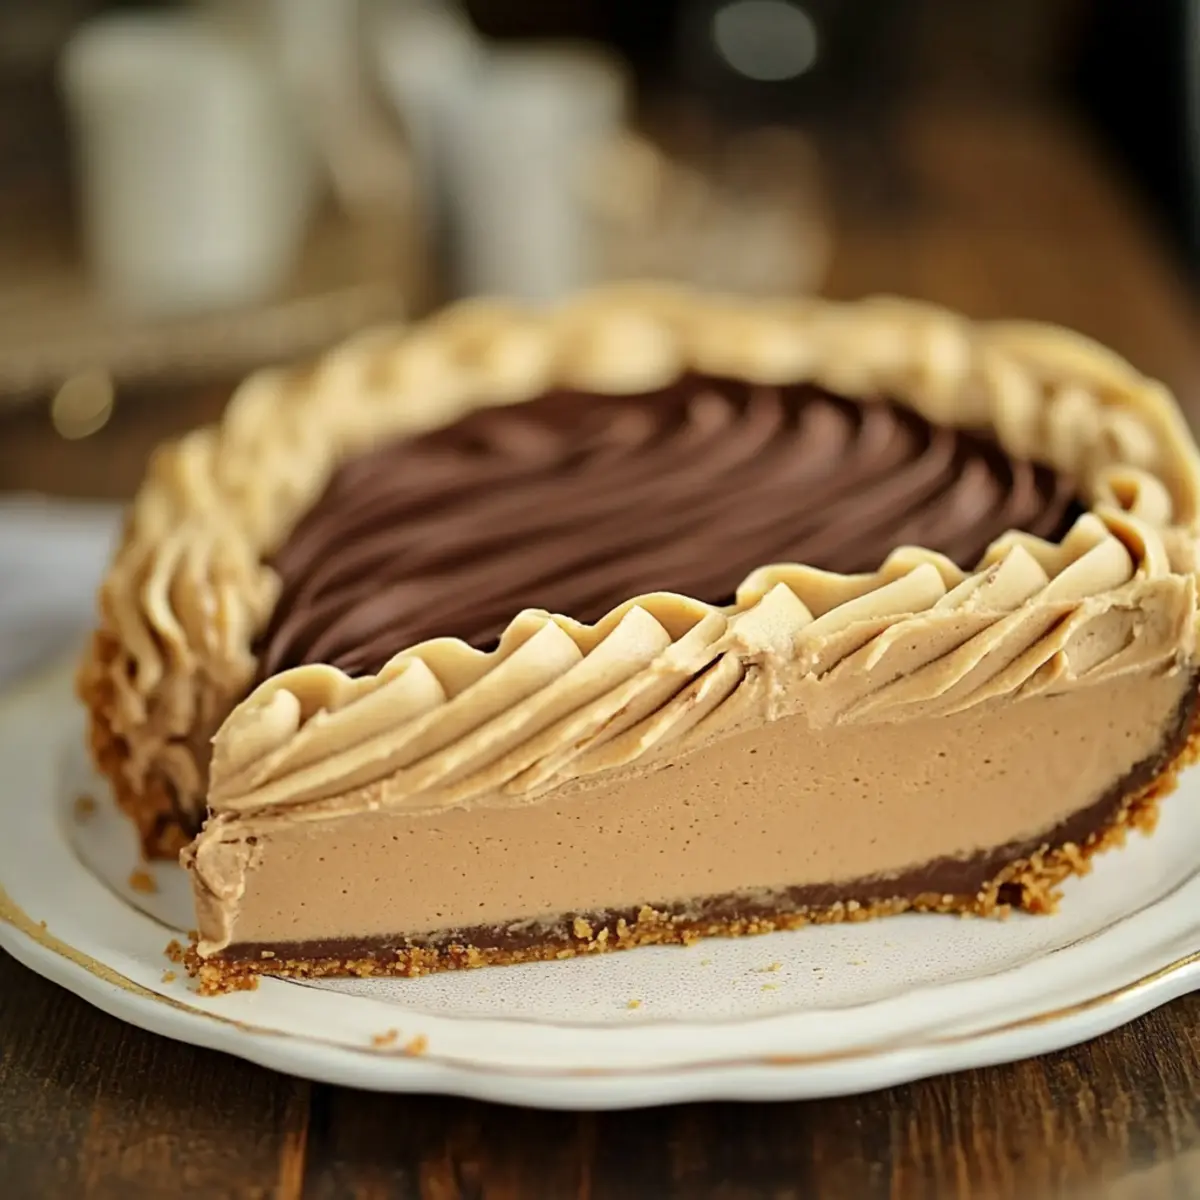
Step 4: Assemble the Layers
Begin layering your Costco Peanut Butter Chocolate Cream Pie by spreading half of the peanut butter mixture evenly in the prepared graham cracker crust. Next, add the chocolate layer on top, smoothing it out to create an even surface. Finally, spoon the remaining peanut butter filling over the top, creating a beautiful three-layer pie that is sure to impress.
Step 5: Decorate and Chill
If desired, use a piping bag with a star tip to decorate the top of the pie for an extra touch of elegance. Once decorated, cover the pie with plastic wrap and refrigerate for at least 4 hours, allowing the layers to set properly. This chilling step is essential for a firm yet creamy texture, ensuring a delightful slice every time.
Expert Tips for Costco Peanut Butter Chocolate Cream Pie
-
Temperature Matters: Ensure all ingredients are at room temperature for smoother mixing, making your filling fluffier and easier to work with.
-
Chill with Care: Don’t rush the refrigeration step! Letting the pie chill for at least 4 hours is crucial for the layers to set perfectly.
-
Mixing Technique: Use a hand mixer for smooth fillings, but be careful not to overmix, as that can incorporate excess air and make the texture too light.
-
Crust Cool Down: If you opt for a homemade crust, always let it cool completely before adding any fillings to avoid melting and causing a soggy base.
-
Avoid Over-Sweetening: Start with less powdered sugar in the fillings, tasting as you go, so you can adjust sweetness to your liking for the best Costco Peanut Butter Chocolate Cream Pie experience!
How to Store and Freeze Costco Peanut Butter Chocolate Cream Pie
Fridge: Store your leftover pie covered in the refrigerator for up to 5 days. This will help maintain its creamy texture and flavor.
Freezer: For longer storage, wrap slices tightly in plastic wrap and place in an airtight container. It can be frozen for up to 2 months without compromising taste.
Thawing: To enjoy a slice from the freezer, transfer it to the fridge the night before to thaw slowly. Avoid microwave thawing to preserve texture.
Serving Note: Before serving, let the pie sit at room temperature for about 15 minutes to soften slightly for the best tasting experience.
Costco Peanut Butter Chocolate Cream Pie Variations
Feel free to get creative with this delicious pie—there are so many ways to make it your own!
-
Oreo Crust: Swap the graham cracker crust for an Oreo crust for an extra chocolatey twist. The rich flavors meld beautifully with the fillings.
-
Dark Chocolate Upgrade: For a more intense flavor, use dark chocolate chips instead of milk chocolate. It gives the pie a luxurious depth that’s simply divine.
-
Nutty Crunch: Add chopped peanuts or pecans to the peanut butter mixture for a delightful crunch. This textural addition elevates each bite and enhances the nutty goodness.
-
Banana Layer: Add a layer of fresh, sliced bananas between the peanut butter and chocolate layers. It brings a refreshing sweetness that complements the creaminess.
-
Vegan Alternative: Use coconut cream and a dairy-free cream cheese for a vegan-friendly version. You can also try almond or cashew butter for a nutty change!
You might also love pairing this pie with an easy batch of Chocolate Pumpkin Cupcakes for a festive dessert table! Each addition creates a unique twist, ensuring it’s a treat that everyone can enjoy.
Make Ahead Options
Preparing your Copycat Costco Peanut Butter Chocolate Cream Pie in advance is a fantastic way to simplify your busy schedule! You can create the entire pie up to 24 hours ahead of time, just be sure to refrigerate it properly. To prep, make the crust and layers (the peanut butter filling and chocolate layer) separately, storing them in airtight containers in the fridge. This will maintain their delicious textures and flavors. When you’re ready to serve, simply layer the pie and refrigerate for at least 4 hours or overnight to let it set properly. This way, you’ll have a stunning dessert that’s just as delightful as when freshly made—all with minimal effort!
What to Serve with Copycat Costco Peanut Butter Chocolate Cream Pie
Indulging in this rich dessert is just the beginning—consider these delicious accompaniments to elevate your experience!
-
Vanilla Ice Cream: A scoop of creamy vanilla ice cream provides a delightful contrast to the rich flavors of the pie, creating a decadent dessert duo.
-
Fresh Berries: Juicy strawberries or raspberries add a refreshing burst of flavor, cutting through the sweetness while enhancing the overall presentation.
-
Chocolate Drizzle: A generous drizzle of warm chocolate sauce adds a luxurious touch, taking each slice to a whole new level of decadence.
-
Whipped Cream: A dollop of whipped cream not only looks beautiful but also adds a light and airy texture, balancing the pie’s richness.
-
Coffee: A robust cup of coffee enhances the flavor profile of this pie, making each bite more satisfying and warming—perfect for those after-dinner chats.
-
Nutty Granola: A sprinkle of crunchy nutty granola adds a contrasting texture, making each bite interesting and providing a healthful touch alongside the indulgence.
Enhance your pie experience with these delightful pairings, turning a simple dessert into a memorable feast!
Costco Peanut Butter Chocolate Cream Pie Recipe FAQs
What type of peanut butter should I use?
Using creamy peanut butter is recommended for the smooth texture and flavor it brings to the filling. However, if you enjoy a bit of crunch, feel free to use chunky peanut butter instead! Just keep in mind that it will alter the texture slightly, giving your pie a fun, unexpected twist.
How should I store the Costco Peanut Butter Chocolate Cream Pie?
You can store any leftover pie covered in the refrigerator for up to 5 days. This will help maintain its creamy texture and keep it fresh. Make sure it’s sealed tightly to avoid any fridge odors impacting the flavor.
Can I freeze the pie?
Absolutely! For longer storage, wrap slices tightly in plastic wrap and place them in an airtight container. The pie can be frozen for up to 2 months without losing its delicious taste. Just remember to thaw it slowly in the fridge overnight before serving to keep that lovely texture intact.
What if my filling is too runny?
If your filling seems too runny, it might be due to ingredients being too warm or overmixing. To remedy this, try chilling the mixture for about 30 minutes to see if it firms up. If it remains loose, consider folding in more whipped topping to help stabilize it. Refrain from applying heat to it, as that will further thin the mixture.
Are there any dietary considerations for this pie?
Yes, both allergies and dietary preferences are important to consider. The recipe contains dairy (cream cheese and heavy cream) and peanuts. For a dairy-free version, you can explore using plant-based cream cheese and whipped toppings. Always double-check ingredient labels to ensure they meet your dietary needs.
Can I add additional flavors or toppings?
Certainly! Personalizing your Costco Peanut Butter Chocolate Cream Pie is all part of the fun. Consider sprinkling crushed peanuts or chocolate shavings on top for extra crunch, or drizzling a bit of chocolate or caramel sauce before serving. You can even layer in banana slices for a delightful twist that pairs beautifully with the chocolate and peanut butter flavors!
Homemade Costco Peanut Butter Chocolate Cream Pie Delight
Ingredients
Equipment
Method
- In a medium heatproof bowl, combine the milk chocolate chips and heavy cream. Place the bowl over a pot of simmering water, stirring gently until the chocolate is fully melted and smooth, about 5-7 minutes.
- Remove from heat and let cool to room temperature.
- In a large mixing bowl, beat cream cheese, peanut butter, and powdered sugar until smooth and creamy, about 3-4 minutes.
- Fold in half of the frozen whipped topping.
- In another bowl, mix cream cheese with cooled chocolate mixture and powdered sugar until silky, about 2-3 minutes.
- Fold in remaining whipped topping.
- Spread half of the peanut butter mixture in the crust, then add the chocolate layer, smoothing it out.
- Finally, spoon remaining peanut butter filling over the top.
- Cover with plastic wrap and refrigerate for at least 4 hours.
- Decorate before serving, if desired.
Leave a Reply