
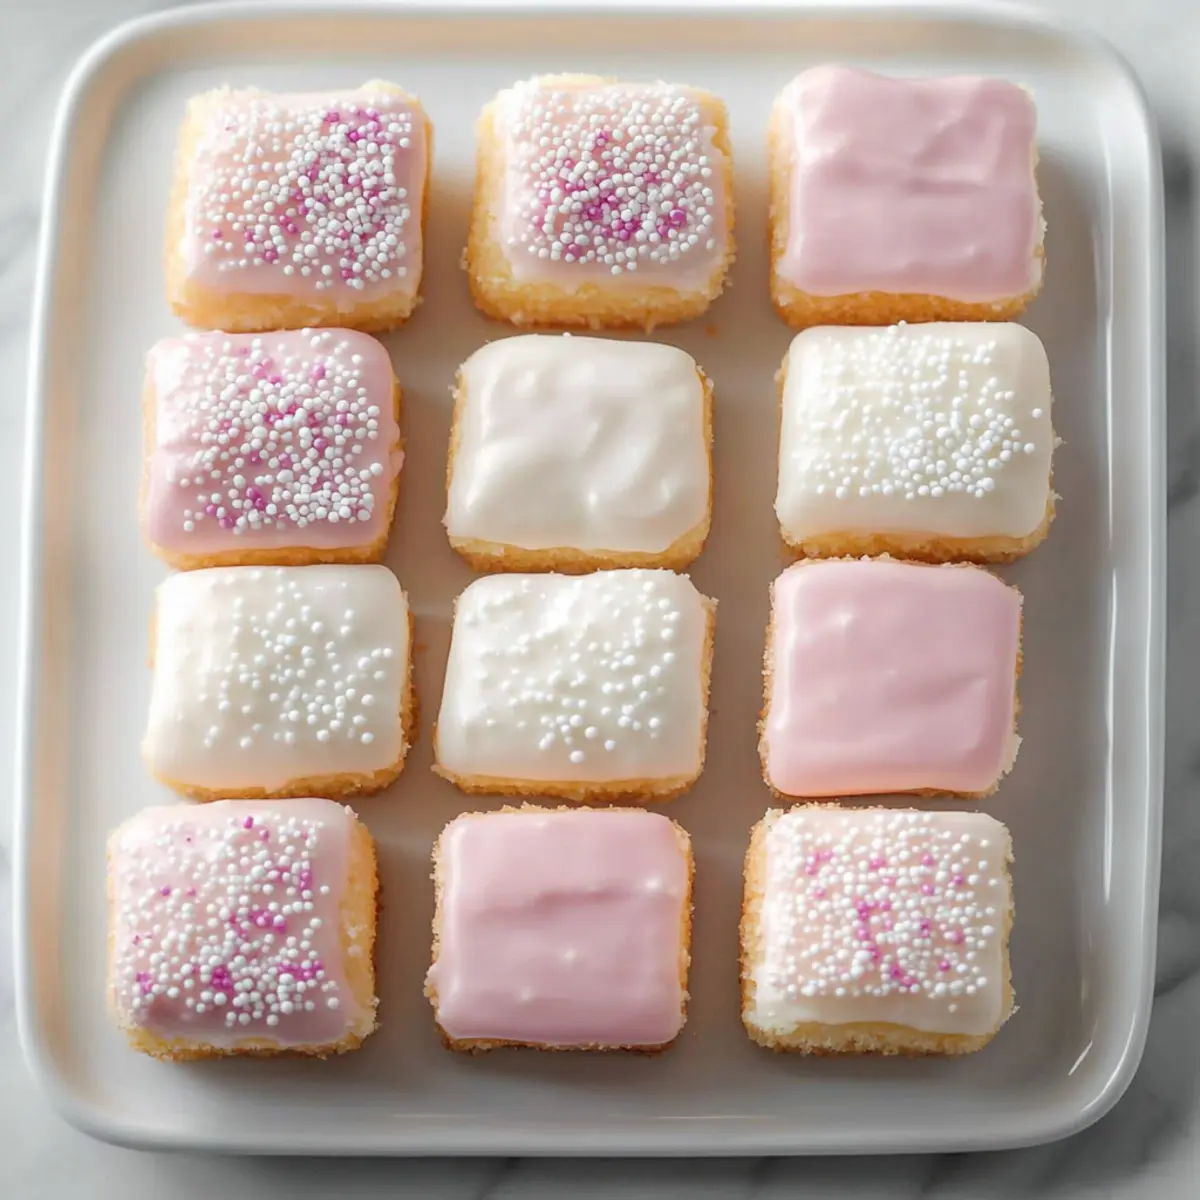
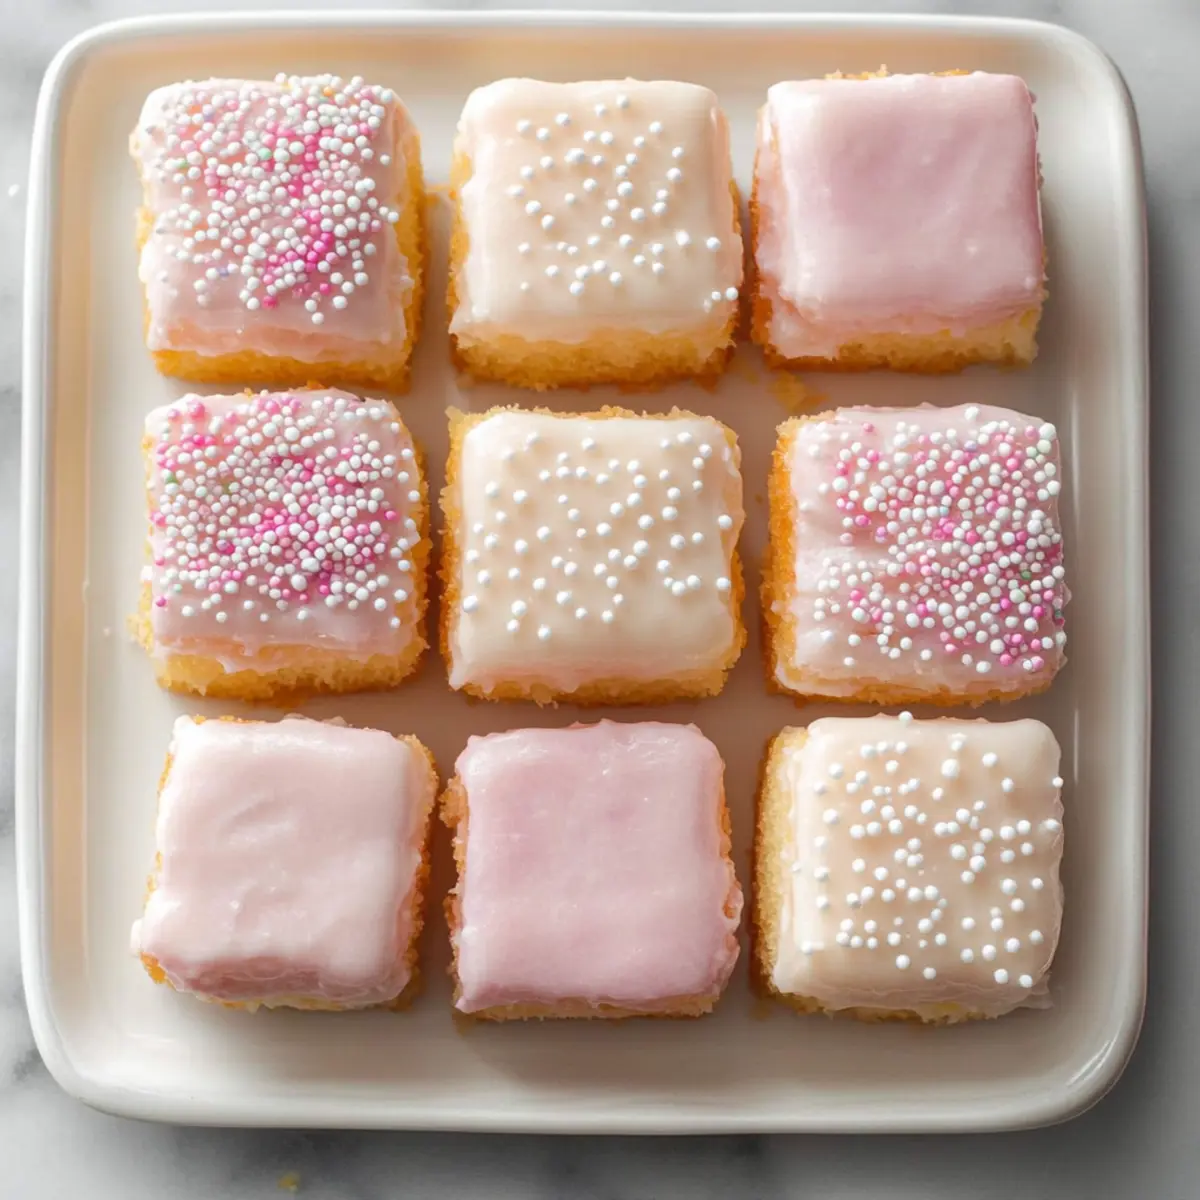
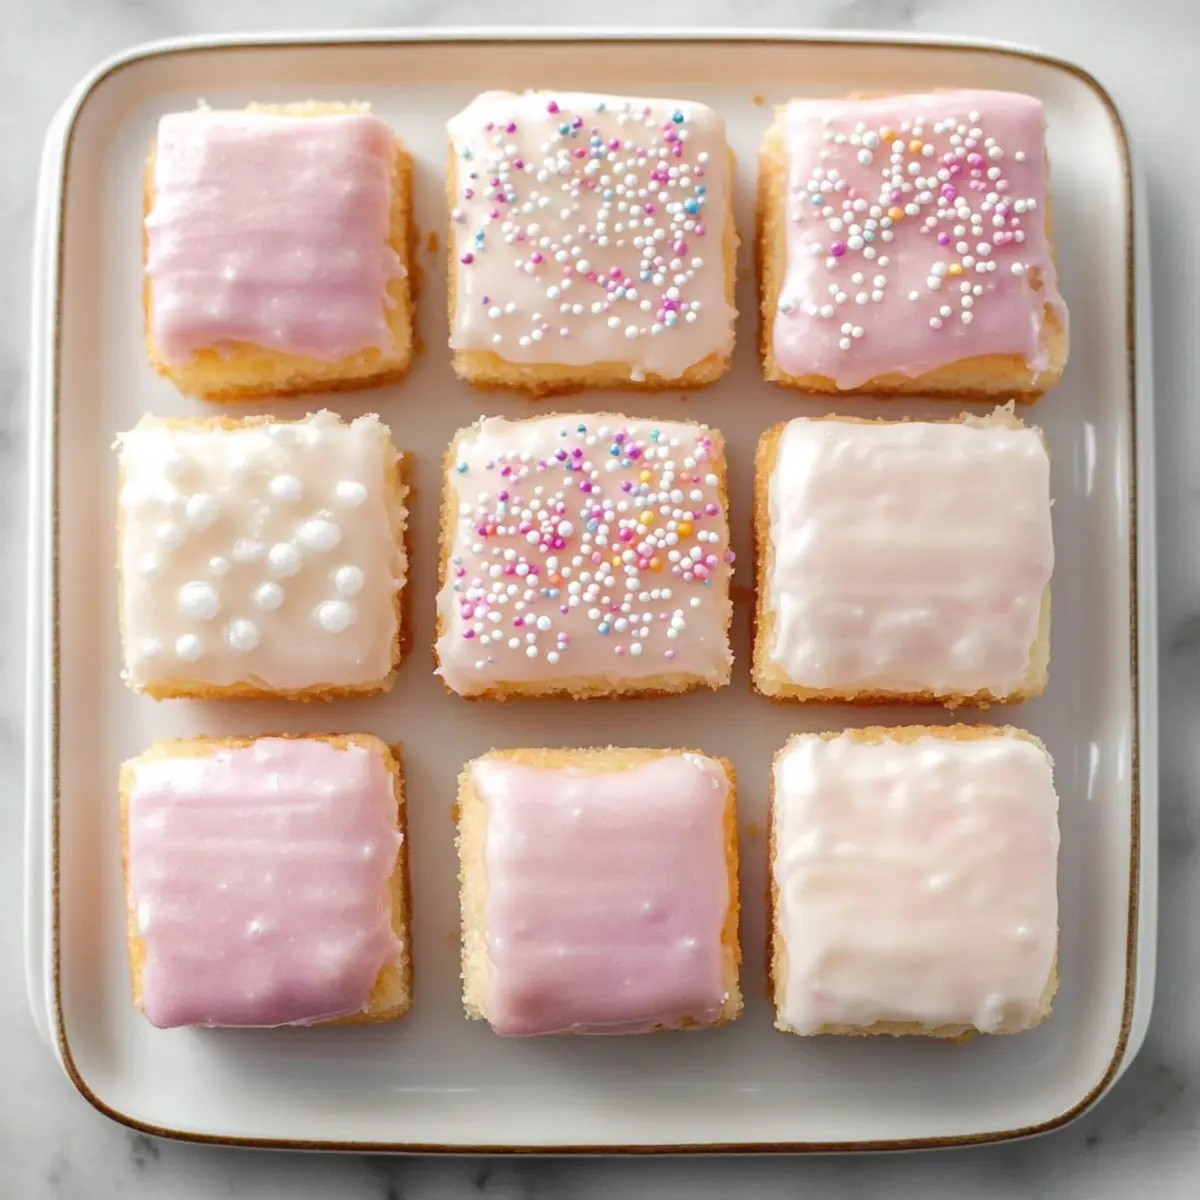
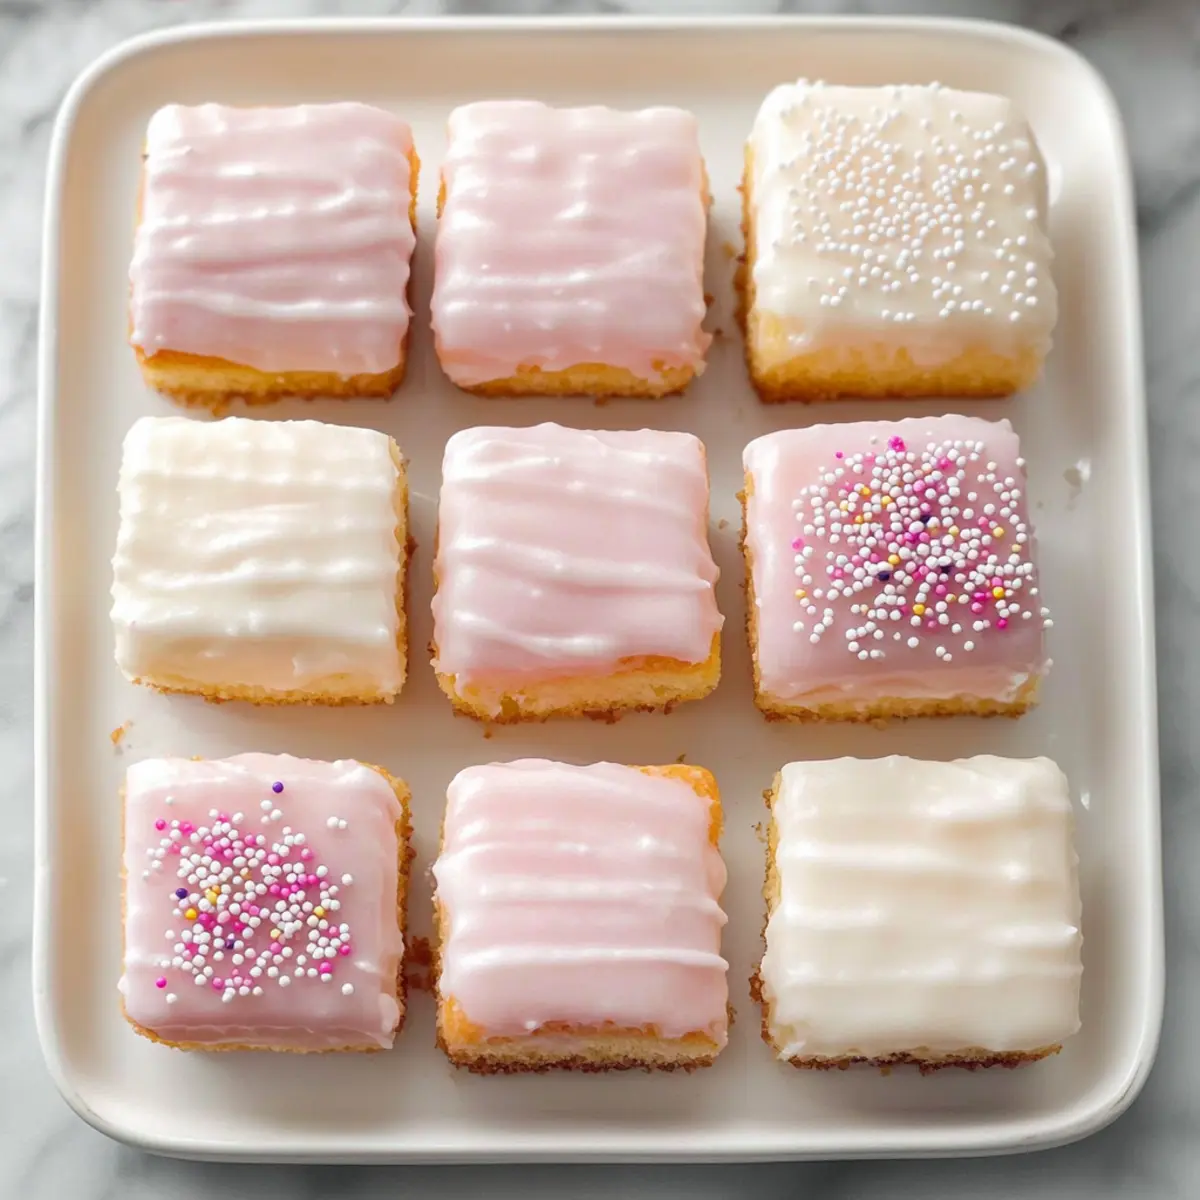
As I stood in my kitchen with an array of colors from sugary toppings, I couldn’t help but feel a rush of excitement. The Easiest Petit Fours are my secret weapon for transforming any gathering into a sweet celebration. No baking is required, meaning even the busiest home chef can whip up these charming bite-sized delights without a fuss. Picture this: a tender piece of cake, coated in creamy frosting or dreamy white chocolate, sprinkled with a little flair—perfectly elegant for parties or simply for indulging in an afternoon treat. Not only are these petit fours easy to make, but they also offer endless possibilities for personalization. Are you ready to impress your friends with these stunning little sweets? Let’s dive in!
Why Are These Petit Fours Perfect?
Simplicity in preparation means that you can create these stunning Easiest Petit Fours with ease, making them accessible for any skill level. Endless customization allows you to experiment with different cake flavors, toppings, and decorations that suit your style or event theme. No-Bake magic ensures you’ll save time, freeing you up to enjoy your gathering with friends and family. Imagine an afternoon filled with laughter as you serve these delightful treats, making them a surefire hit at any occasion. And remember, if you’re looking for other easy desserts, be sure to check out our guide on quick and tasty sweets for more inspiration!
Easiest Petit Fours Ingredients
For the Cake
• Pound Cake – Provides a pleasing structure and base flavor; you can swap it for sponge cake or angel food cake for a lighter finish.
For the Coating
• Vanilla Frosting – Adds a sweet, creamy coating that elevates the petit fours; melted white chocolate works wonderfully for a richer taste.
For Decorations
• Sprinkles or Icing – Boosts the visual appeal and adds fun textures; select colors that match your event theme for an extra touch of charm.
Get ready to create the Easiest Petit Fours that will surely wow your guests!
Step-by-Step Instructions for Easiest Petit Fours
Step 1: Prepare the Cake
If you’re using a homemade pound cake, bake it according to your recipe or package instructions, and let it cool fully on a wire rack, taking about 1–2 hours. This ensures a sturdy base for your Easiest Petit Fours. If you’re short on time, feel free to use a store-bought pound cake to save time.
Step 2: Cut the Cake
Once the pound cake has cooled completely, use a sharp knife to trim the edges and then cut it into small, uniform squares, about 1-inch in size. Aim for neat cuts to help your Easiest Petit Fours look polished and professional. Place the square pieces on a clean baking sheet lined with parchment paper for easy coating.
Step 3: Coat the Cake
In a saucepan, gently heat your vanilla frosting or white chocolate until it’s smooth and easy to dip. Dip each square of cake into the frosting or chocolate, ensuring they are thoroughly coated without losing too many crumbs. Use a fork to lift the coated pieces and allow the excess to drip down back into the bowl before placing them back on the parchment-lined baking sheet.
Step 4: Decorate
While the coating is still wet, add your choice of sprinkles or additional frosting decorations to each petit four for an extra touch of charm. Arrange the decorations creatively; this is your chance to personalize your Easiest Petit Fours!
Step 5: Set and Serve
Let the petit fours sit at room temperature for about 30–60 minutes, allowing the icing or chocolate to set and harden. Once they are firm to the touch, carefully transfer them to a serving platter. You can enjoy them immediately, or store them in an airtight container for up to 3 days to allow the flavors to mingle.
Easiest Petit Fours Variations & Substitutions
Feel free to let your creativity flow and customize these delightful Easiest Petit Fours for a unique twist!
-
Dairy-Free: Substitute regular frosting with coconut cream or dairy-free chocolate to cater to lactose sensitivities while still achieving that indulgent look.
-
Flavor Infusion: Use flavored pound cakes, like lemon or strawberry, to surprise your taste buds with aromatic notes in every bite. A zesty twist takes your petit fours to the next level.
-
Gluten-Free: Swap the regular pound cake for a gluten-free version, ensuring everyone can enjoy these delicious treats. There’s no need to miss out—everyone deserves a sweet indulgence!
-
Decadent Chocolate: Instead of vanilla frosting, opt for dark or milk chocolate for a richer experience. The glossy coating creates a luxurious finish that makes them truly irresistible.
-
Themed Colors: Customize the coating with colored chocolate to match event themes or holidays, enhancing their visual appeal and adding festive fun to your gatherings.
-
Nutty Delight: Sprinkle chopped nuts or toasted coconut on top of the frosting for an exciting texture contrast and an extra layer of flavor. It adds a delightful crunch that elevates the petit fours.
-
Spicy Kick: A hint of cinnamon or finely grated orange zest in the frosting can introduce a warming spice that pairs beautifully with the sweet cake, perfect for cozy gatherings.
-
Fruity Toppings: Top off your petit fours with fresh fruit or fruit puree to brighten the flavors and aesthetics. Berries or citrus slices add a refreshing burst to each bite.
Mix and match these variations to personalize your Easiest Petit Fours and create memorable delights that will wow your guests at home! If you’re looking for other easy sweets to try, don’t forget to explore our guide on easy dessert recipes for even more ideas!
Expert Tips for Easiest Petit Fours
-
Cool Completely: Always ensure your pound cake is fully cooled before cutting. A warm cake may crumble, making coating challenging.
-
Smooth Coating: For a professional finish, warm your frosting or chocolate gently until smooth. Avoid overheating to prevent burning.
-
Even Dips: Use a fork to lift each coated cake piece from the frosting or chocolate. This minimizes excess drips and keeps your Easiest Petit Fours looking pristine.
-
Creative Decor: While the coating is wet, go wild with sprinkles or fondant decorations. Personal touches make each petit four special for your occasion!
-
Storage Know-How: Keep decorated petit fours in an airtight container at room temperature. If refrigerated, allow them to come to room temperature before serving for better flavor and texture.
What to Serve with Easiest Petit Fours
Indulging in the delicate sweetness of these charming treats can be even more delightful with the right pairing.
- Fresh Fruit Salad: A medley of bright, juicy fruits adds a refreshing contrast to the rich sweetness of the petit fours. Try mixing berries with a drizzle of honey for extra flavor.
- Herbal Tea: The gentle flavors of chamomile or mint tea create a calming experience, enhancing the petite sweetness without overpowering it. It’s a perfect companion for an afternoon gathering.
- Coffee: The robust richness of coffee complements the light cake perfectly, making for a delightful pairing to serve after a meal or during a coffee break.
- Cheese Platter: A selection of creamy cheeses balances the sweetness of the petit fours. Add some honey and nuts for an assorted taste and texture experience.
- Sparkling Water: Infuse your bubbly water with slices of lemon or cucumber for a refreshing sip that cleanses the palate between these sweet bites.
- Chocolate Mousse: Pairing with a rich, velvety chocolate mousse offers an indulgent contrast that elevates the dessert scene at any gathering.
- Mini Cupcakes: For a dessert table with variety, serve these alongside petite cupcakes topped with fun frosting, creating a visual feast and catering to different tastes.
- Lemonade: The bright and tangy flavor of freshly squeezed lemonade complements the rich sweetness of the petit fours, creating a deliciously balanced pairing that guests will love.
Make Ahead Options
These Easiest Petit Fours are a fantastic option for meal prep, allowing you to enjoy delightful desserts without a last-minute rush! You can prepare the pound cake up to 24 hours in advance, simply bake, cool, and wrap it tightly in plastic wrap to maintain its moisture. Additionally, the coated cake squares can be made ahead and stored in an airtight container at room temperature for up to 3 days. When it’s time to serve, let the petite delights come to room temperature before enjoying them; they’ll taste just as fresh and inviting! By prepping in advance, you’ll save time and impress your guests with your well-thought-out, elegant treats.
How to Store and Freeze Easiest Petit Fours
Room Temperature: Store the Easiest Petit Fours in an airtight container at room temperature for up to 3 days, ensuring they remain fresh and delightful for your guests.
Fridge: If you want to keep them longer, refrigerate the petit fours in an airtight container for up to 1 week. Be sure to let them come to room temperature before serving for optimal texture.
Freezer: For longer storage, freeze the uncoated cake squares individually, then wrap in plastic and store in an airtight container for up to 2 months. Coat them when ready to enjoy for the best results.
Reheating: These treats are best enjoyed at room temperature; however, if you prefer a softer texture, gently warm them in the microwave for about 10 seconds, then enjoy!
Easiest Petit Fours Recipe FAQs
What type of cake should I use for the Easiest Petit Fours?
Absolutely! You can use pound cake as the foundation for your petit fours, but I often recommend experimenting with sponge cake or even angel food cake for a lighter texture. Each option brings its own lovely flavor profile to these delightful treats!
How should I store my Easiest Petit Fours?
Store your Easiest Petit Fours in an airtight container at room temperature for up to 3 days. If you want to keep them longer, refrigerate them for up to 1 week, but let them come to room temperature before serving. This will help maintain that perfect texture!
Can I freeze the Easiest Petit Fours?
Definitely! For the best results, freeze uncoated cake squares individually on a baking sheet until solid. Then wrap each piece in plastic wrap and place them in an airtight container. They can be frozen for up to 2 months. When you’re ready to enjoy, coat them with frosting or chocolate while still frozen for a delightful treat!
What should I do if my coating is too thick?
No worries! If your frosting or white chocolate is too thick for dipping, try gently reheating it in a microwave or over low heat until it thins out to your desired consistency. Be sure to stir frequently to avoid burning—this will give you that lovely, smooth coating that makes these petit fours shine.
Are there any allergy considerations for the Easiest Petit Fours?
It’s important to check ingredients, especially if you have guests with dietary restrictions. The basic recipe is vegetarian, but make sure to use allergy-friendly frosting and chocolate alternatives if needed. You can also try using gluten-free cake options or dairy-free frosting to cater to those who may have specific dietary needs. The more the merrier when it comes to enjoying these treats with everyone!
Easiest Petit Fours That Will Wow Your Guests at Home
Ingredients
Equipment
Method
- Prepare the Cake: Bake the pound cake according to your instructions, then let it cool completely for 1-2 hours.
- Cut the Cake: Trim the edges of the cooled pound cake and cut it into 1-inch squares.
- Coat the Cake: Heat the frosting or white chocolate until smooth. Dip each square and let excess drip off.
- Decorate: Add sprinkles or icing while the coating is still wet.
- Set and Serve: Let the petit fours sit for 30-60 minutes to set before serving.
Leave a Reply