
As I stood by the kitchen counter, a flourish of pastel colors caught my eye, instantly transporting me to a whimsical springtime garden. This delightful feeling inspired my creation of Easter Bunny Coconut Tails, those charming no-bake treats that bring joy to any Easter celebration. In just 45 minutes, these fluffy, sweet coconut bites come together effortlessly, making them the perfect quick fix for busy families eager to indulge in a homemade dessert. Not only are they a gluten-free and vegetarian-friendly option, but they also offer a fun, nostalgic twist to traditional Easter sweets. You won’t want to miss out on this easy dessert that’s sure to have everyone hopping back for more! Are you ready to make some magic in your kitchen?
Why are Easter Bunny Coconut Tails a Must-Try?
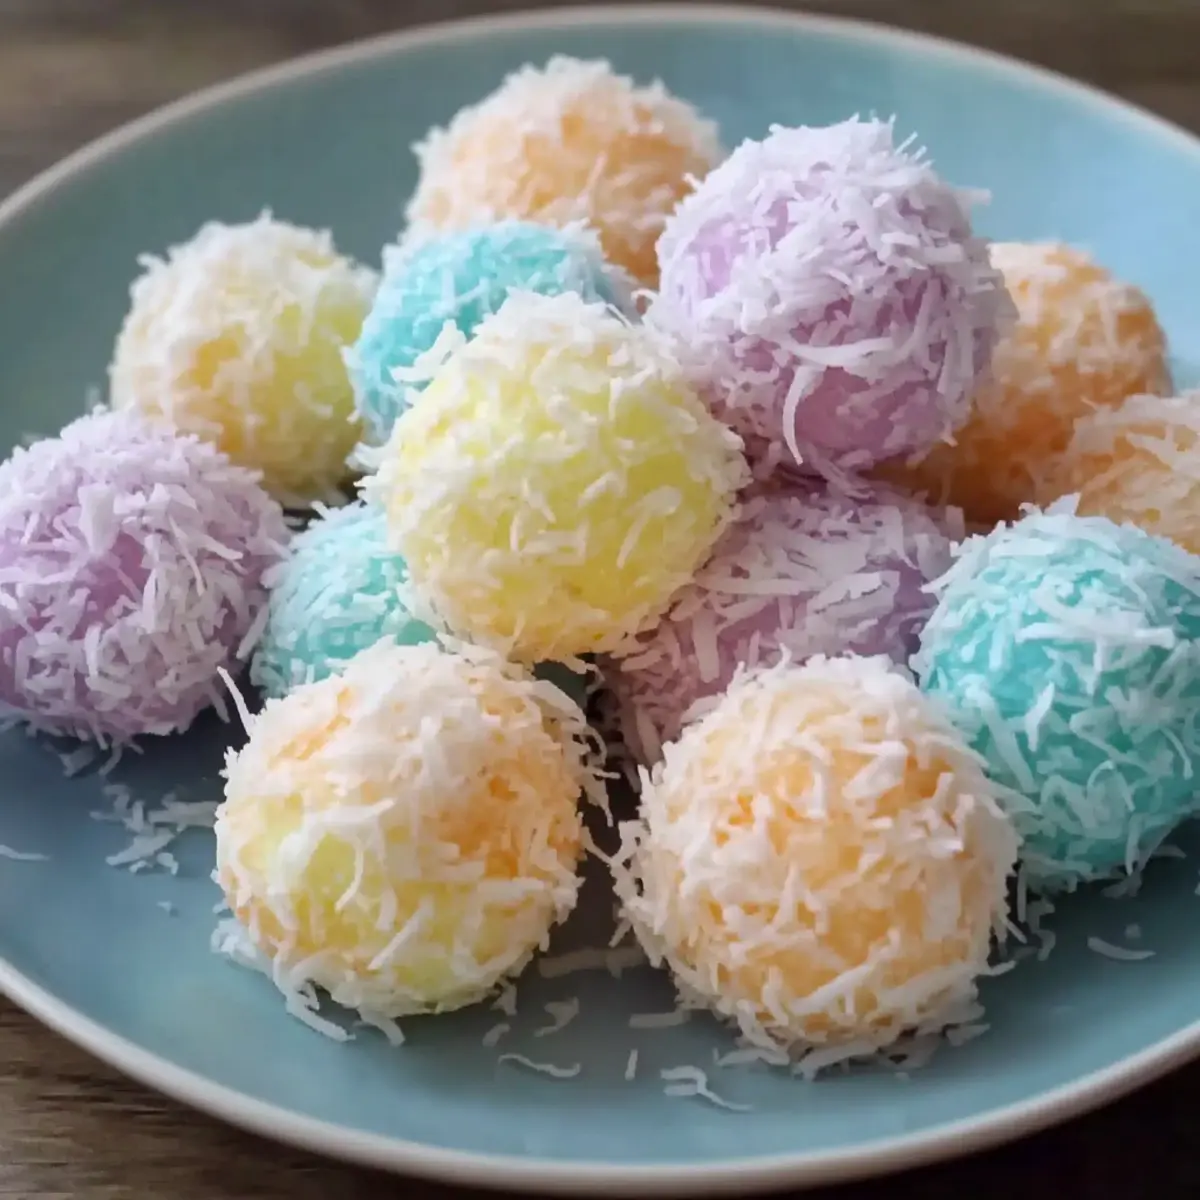
Adorable Presentation: These delightful treats are not just tasty—they’re a feast for the eyes! With their cute, bunny tail shapes and pastel colors, they make for an Instagram-worthy addition to your Easter table.
Effortless Preparation: You’ll love how simple these coconut tails are to whip up. With no baking involved, they come together in just 45 minutes, perfect for those last-minute dessert cravings.
Taste of Nostalgia: Each bite is a sweet reminder of childhood delights, offering a chewy texture and yummy coconut flavor that everyone will adore.
Diet-Friendly Delight: Being gluten-free and vegetarian makes these treats accessible to a wide range of dietary preferences, ensuring all your guests can enjoy them. Want more fabulous ideas? Check out our easy dessert collection for additional crowd-pleasers.
Make-Ahead Magic: Plan ahead with this recipe, as the mixture can be prepped up to 2 days in advance, allowing you to focus on other Easter festivities while still serving a homemade delight!
Easter Bunny Coconut Tails Ingredients
Get ready to create these delightful no-bake treats!
For the Coconut Base
- Shredded Coconut – Provides the main structure and texture; use sweetened for extra sweetness, or unsweetened for a less sugary option.
- Sweetened Condensed Milk – Acts as the glue to hold the tails together; can be replaced with dairy-free condensed milk for a vegan variation.
- Vanilla Extract – Enhances overall flavor; for a bolder taste, opt for pure vanilla extract instead of imitation.
For Color and Coating
- Gel Food Coloring (optional) – Adds pastel colors for a cheerful presentation; keep colors light to maintain that festive Easter vibe.
- Extra Shredded Coconut (for rolling) – Used to coat the formed tails, adding both texture and decoration for those adorable coconut bites!
Step‑by‑Step Instructions for Easter Bunny Coconut Tails
Step 1: Prepare Base Mixture
In a large mixing bowl, combine 3 cups of sweetened shredded coconut, 1 can of sweetened condensed milk, and 1 teaspoon of pure vanilla extract. Mix everything together until the mixture is sticky and holds its shape, which should take about 2-3 minutes. If the mixture feels too dry, add a teaspoon of milk to achieve the right consistency.
Step 2: Color the Mixture
If you’d like to add a fun twist to your Easter Bunny Coconut Tails, divide the mixture into smaller bowls. Add a few drops of gel food coloring to each bowl, incorporating pastel shades that evoke the happy spring season. Mix gently until the coconut is evenly colored, being careful not to over-mix to keep those delightful colors bright and separate.
Step 3: Form the Tails
Using a tablespoon, scoop out portions of the colored coconut mixture and roll them into 1-inch tail shapes. Make sure they resemble cute little bunny tails! Once formed, roll each tail in extra shredded coconut to give them a delightful, fluffy coating. This should take about 5-10 minutes, depending on how many tails you make.
Step 4: Chill
Line a tray with parchment paper and place the formed tails on it, ensuring they are spaced apart to prevent sticking. Refrigerate the tray for at least 30 minutes, allowing the tails to firm up and hold their shape perfectly. You’ll know they’re ready when they’re no longer sticky to the touch, making them easier to enjoy later.
Step 5: Serve or Store
Once chilled, your Easter Bunny Coconut Tails are ready to be served! Present them on a cheerful pastel platter, or package them up for gatherings. If you have any leftovers, store them in an airtight container in the fridge for up to 3-4 days to keep them fresh and tasty. Enjoy your delightful no-bake treats!
How to Store and Freeze Easter Bunny Coconut Tails
-
Room Temperature: Easter Bunny Coconut Tails should not be stored at room temperature as they can become too soft. Instead, keep them chilled for optimal texture.
-
Fridge: Store your coconut tails in an airtight container in the fridge for up to 3-4 days, ensuring they remain fresh and delicious for your next Easter gathering.
-
Freezer: For longer storage, freeze the formed tails in a single layer on a tray, then transfer them to a freezer-safe container once firm. They can be stored for up to 1 month.
-
Reheating: Simply thaw the frozen tails in the fridge overnight before serving. They are best enjoyed cold, bringing versatility and joy to your dessert table!
What to Serve with Easter Bunny Coconut Tails?
Elevate your Easter feast with delightful pairings that will bring out the cheerful spirit of your dessert!
-
Fresh Fruit Salad: A medley of seasonal fruits adds refreshing brightness that complements the sweetness of the coconut tails. Think strawberries, blueberries, and kiwi to create a rainbow on your table.
-
Chocolate Dipped Peeps: These iconic Easter treats offer a fun contrast to the chewy coconut, giving a chocolatey twist that kids and adults alike will enjoy. They also add a festive touch with their vibrant colors!
-
Springtime Vegetable Platter: Crisp baby carrots, radishes, and snap peas provide a crunchy contrast to the soft, chewy tails. Pair with a creamy dip for a delightful appetizer.
-
Mint Lemonade: The coolness of mint combined with the tartness of lemonade creates a refreshing drink that perfectly matches the sugary flavor of the coconut tails. It’s like a sip of springtime!
-
Bunny Themed Cupcakes: These whimsical treats are another festive dessert option that ties into the Easter theme. Their playful designs will charm guests and pair beautifully with the coconut tails for a delightful dessert spread.
-
Charming Charcuterie Board: Create a board filled with cheeses, meats, nuts, and dried fruits that offer varying textures and flavors. This savory selection balances the sweetness of the coconut tails, making each bite a unique experience.
-
Mini Cookies: Including a variety of small cookies, like shortbreads or sugar cookies, can add a fun element to your dessert table. They provide guests with options and can be decorated to fit the Easter theme.
-
Coffee or Tea: Warm beverages like a rich coffee or herbal tea make great companions for your sweet treats, providing a comforting finish to your Easter gathering.
Let your creativity bloom this season with these delectable pairings that enhance the joy of your Easter Bunny Coconut Tails!
Easter Bunny Coconut Tails: Customize Your Treats
It’s time to let your creativity shine and add a personal twist to these delightful coconut bites!
-
Dairy-Free: Swap sweetened condensed milk for coconut cream or dairy-free condensed milk to cater to lactose intolerant friends. This maintains the rich sweetness while ensuring everyone can indulge.
-
Delectable Mix-Ins: Add mini chocolate chips or colorful sprinkles to the coconut mixture before forming the tails. This gives a delightful surprise with every bite!
-
Nutty Flavor Boost: Incorporate almond or hazelnut extract along with the vanilla for a deliciously unique flavor. It adds an unexpected layer that makes these treats even more special.
-
Citrus Zest: Brighten the flavor profile by adding a teaspoon of lime or orange zest to the mixture. This fruity touch enhances the coconut and gives a refreshing twist.
-
Textural Variations: Try mixing in chopped nuts or dried fruits like cranberries or apricots to create varied textures. Not only does this add crunch, but it also elevates the flavor experience.
-
Heat It Up: For those who love a kick, sprinkle in a dash of cayenne pepper or chili powder with the coconut mixture. The warmth pairs surprisingly well with the sweetness, delivering a memorable flavor burst.
-
Fruity Accents: Blend in roasted strawberries or raspberries into the mixture. These vibrant fruits bring both color and a natural sweetness that complements the coconut nicely.
-
Coconut Flour Coating: Instead of rolling the tails in shredded coconut, try using toasted coconut flour for a more sophisticated look and flavor. It adds a delightful crunch that complements the chewy texture.
Ready to experiment? With these ideas, every batch of Easter Bunny Coconut Tails can become a unique treat, not to mention a memorable springtime experience! If you’re looking for more inspiration, check out our easy dessert collection for delightful ideas you can customize.
Make Ahead Options
Easter Bunny Coconut Tails are a fantastic treat to prep ahead for your busy holiday celebrations! You can prepare the coconut base mixture up to 2 days in advance; simply mix the shredded coconut, sweetened condensed milk, and vanilla extract in a bowl and store it in an airtight container in the refrigerator. This not only saves time but helps the flavors meld beautifully! When you’re ready to serve, scoop and shape the mixture into tails, roll them in extra shredded coconut, then chill for at least 30 minutes to ensure they hold their shape perfectly. This way, your adorable treats will be just as delightful as if made fresh on the day of your Easter gathering!
Expert Tips for Easter Bunny Coconut Tails
-
Sticky Mixture: Ensure your coconut mixture is sticky enough to hold its shape; if it feels too dry, simply add a teaspoon of milk to achieve the right texture.
-
Gentle Coloring: When adding gel food coloring, mix gently to keep those pastel shades bright and avoid any muddy hues. You want vibrant Easter Bunny Coconut Tails!
-
Chill for Texture: Always refrigerate the tails after forming them to ensure they set properly and achieve the delightful texture that keeps everyone coming back for more.
-
Cute Presentation: To wow your guests, serve the tails on a pastel platter with mint leaves and a sprinkle of powdered sugar for a festive touch.
-
Make-Ahead Convenience: Prep the coconut mixture up to 2 days in advance, then form and chill the tails on the day of serving for the freshest treat!
Easter Bunny Coconut Tails Recipe FAQs
What type of shredded coconut should I use for Easter Bunny Coconut Tails?
Absolutely! Use sweetened shredded coconut for a deliciously sweet treat. If you prefer a less sugary option, you can substitute with unsweetened shredded coconut for a more natural taste.
How should I store my Easter Bunny Coconut Tails?
To keep your delightful coconut tails fresh, store them in an airtight container in the fridge for up to 3-4 days. This ensures they maintain their sweetness and texture while preventing them from becoming too soft.
Can I freeze Easter Bunny Coconut Tails, and if so, how?
Very! To freeze your coconut tails, first, place them on a tray in a single layer and freeze until firm, about 1-2 hours. Once set, transfer them into a freezer-safe container or zip-top bag. They can be stored for up to 1 month. Remember to thaw them in the fridge overnight before serving.
What should I do if my coconut mixture is too dry?
No worries! If your mixture isn’t sticky enough, gradually add a teaspoon of sweetened condensed milk or milk until you reach the desired consistency. This will help the tails hold together perfectly, making them easier to shape.
Are Easter Bunny Coconut Tails safe for people with allergies?
It’s essential to check the labels when shopping for ingredients. The recipe is gluten-free and vegetarian-friendly, but if anyone has a dairy allergy, simply use dairy-free condensed milk or coconut cream as a substitute for sweetened condensed milk.
What’s the best way to enjoy Easter Bunny Coconut Tails?
Serve these adorable treats chilled for the best texture and taste. They look fantastic on a pastel platter garnished with mint leaves and a sprinkle of powdered sugar. Using mini forks or toothpicks for easy grabbing adds a fun touch to your Easter celebration!
Easter Bunny Coconut Tails: Fun, Easy No-Bake Treats
Ingredients
Equipment
Method
- In a large mixing bowl, combine 3 cups of sweetened shredded coconut, 1 can of sweetened condensed milk, and 1 teaspoon of pure vanilla extract. Mix everything together until the mixture is sticky and holds its shape, which should take about 2-3 minutes.
- If the mixture feels too dry, add a teaspoon of milk to achieve the right consistency.
- If you'd like to add a fun twist, divide the mixture into smaller bowls. Add a few drops of gel food coloring to each bowl, incorporating pastel shades.
- Scoop out portions and roll them into 1-inch tail shapes, then roll each tail in extra shredded coconut.
- Line a tray with parchment paper and place the formed tails on it. Refrigerate for at least 30 minutes.
- Once chilled, serve or store in an airtight container in the fridge for up to 3-4 days.
Leave a Reply