
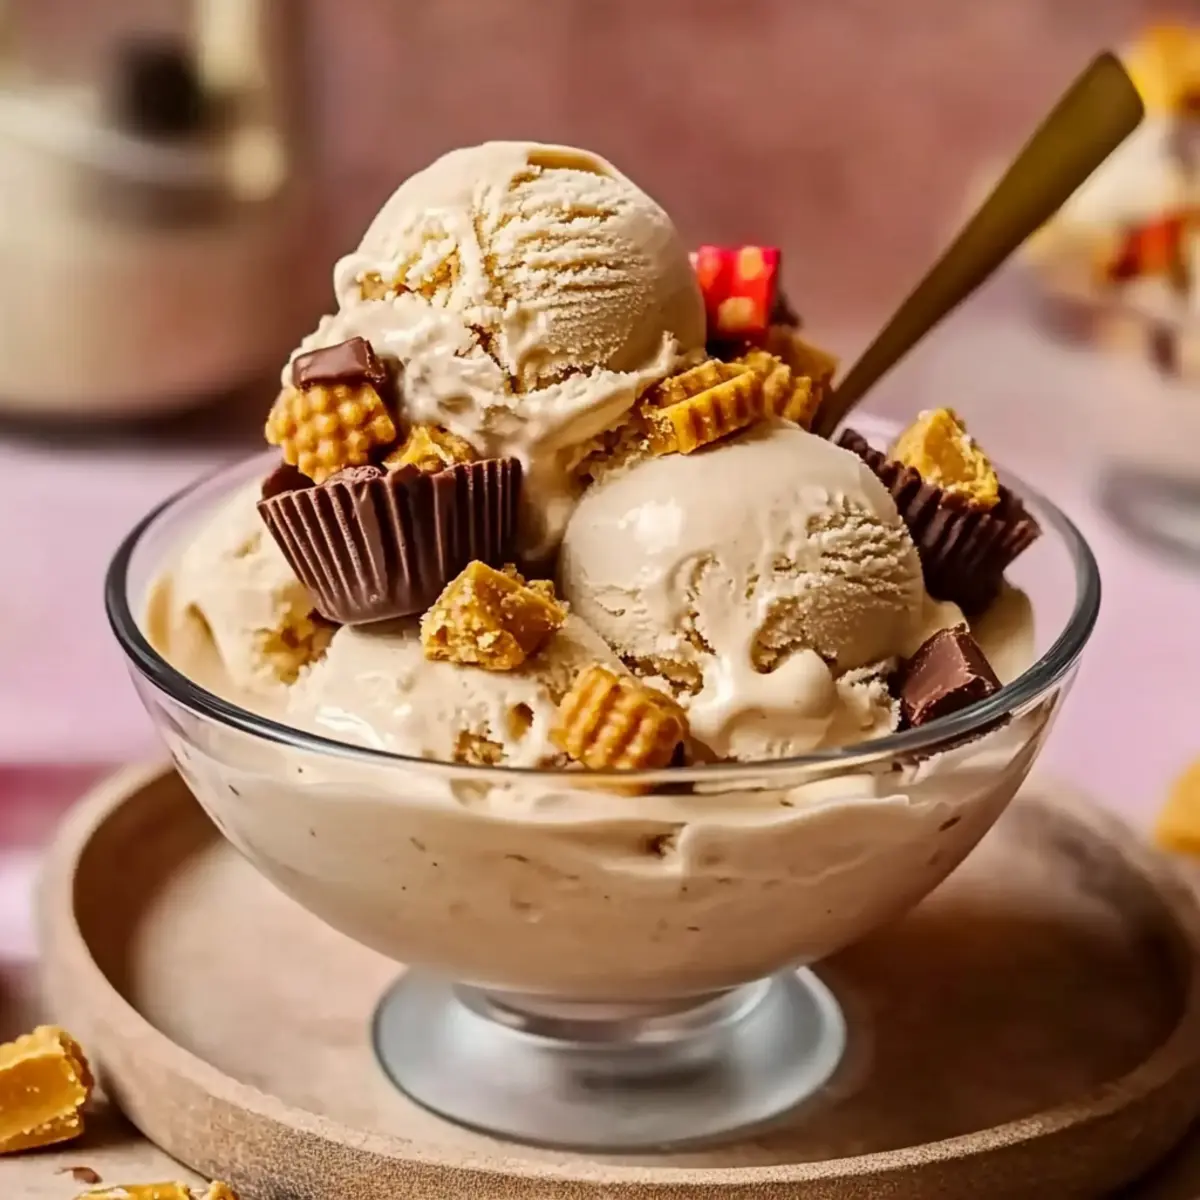
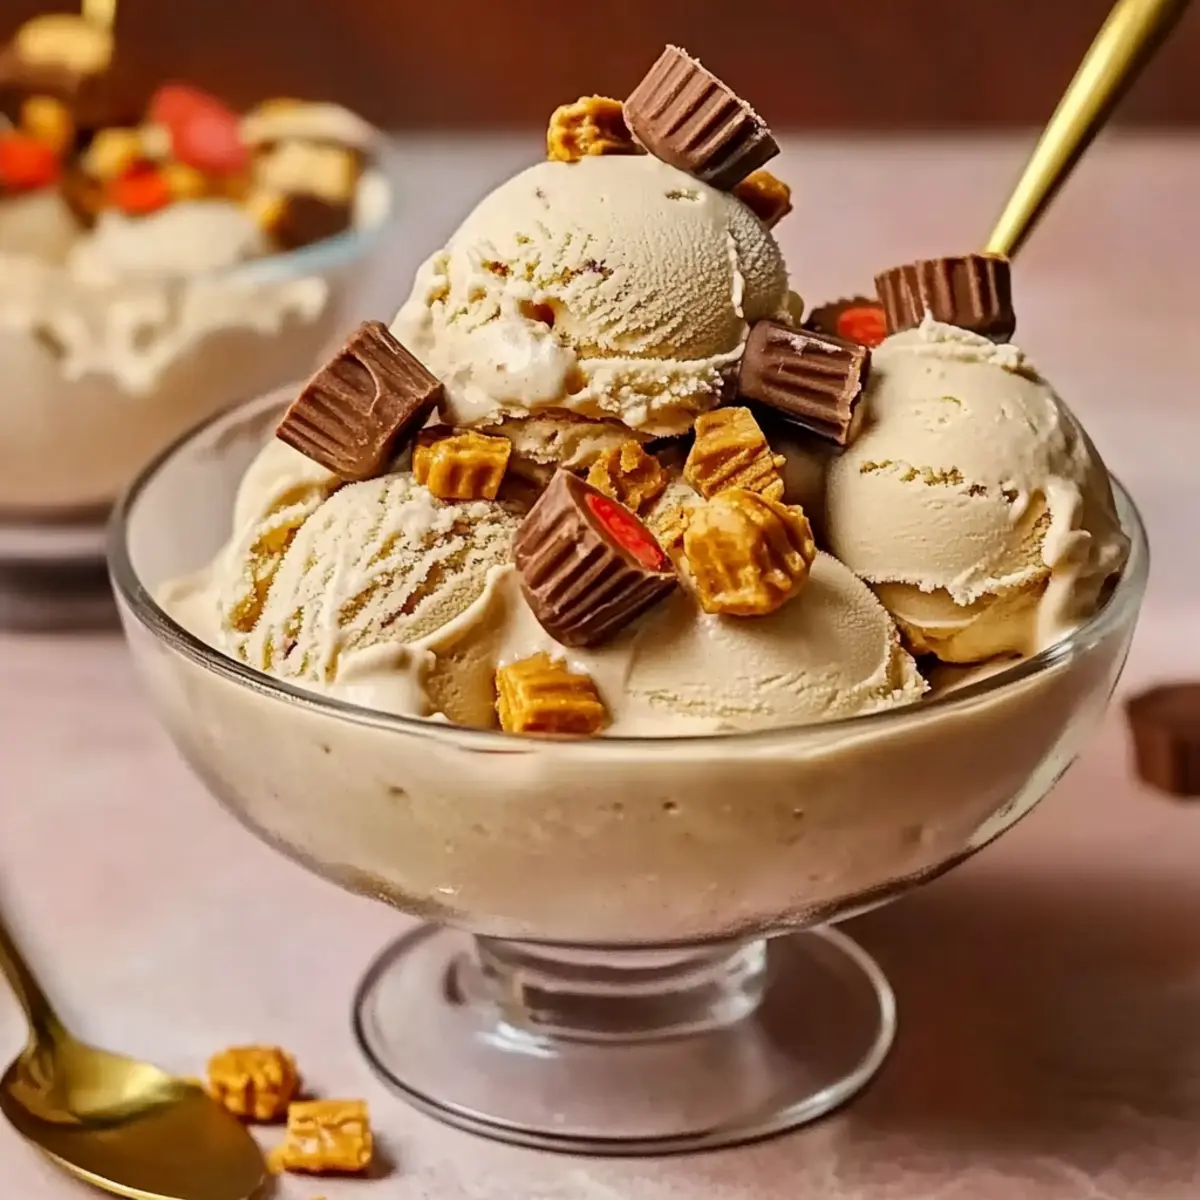
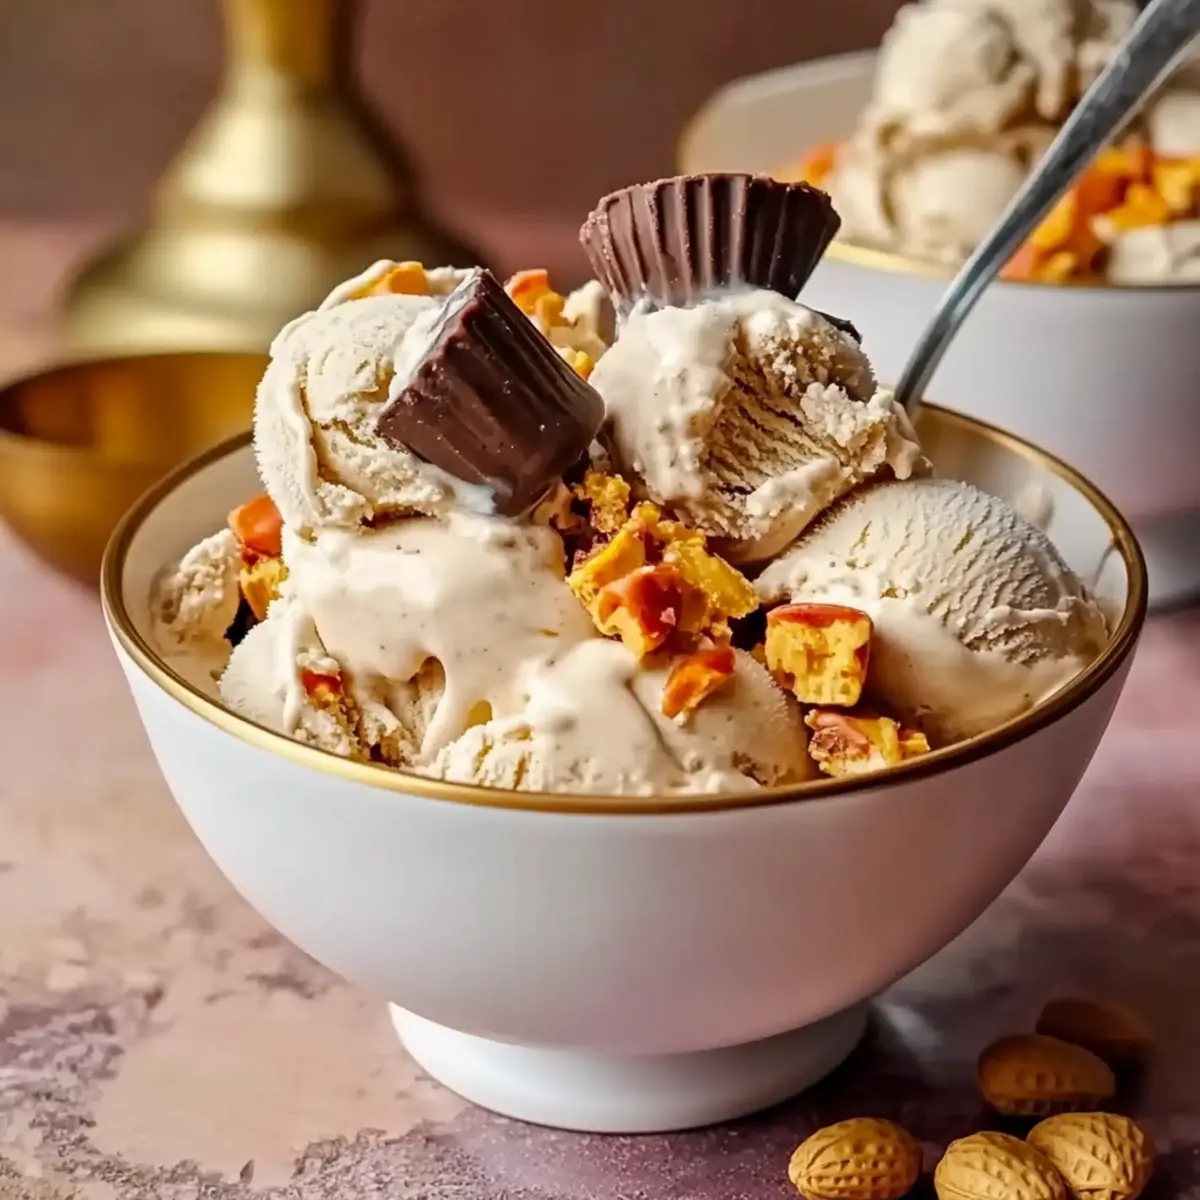
As I stood in my kitchen, the rich aroma of peanut butter wafted through the air, taking me back to my childhood days of sneaking chocolate treats from the pantry. Today, I’m thrilled to share my creamy Ninja Creami Peanut Butter Cup Ice Cream recipe with you. This no-bake dessert is not only a nostalgic treat but also a breeze to whip up in just 10 minutes of prep time. You’ll find it’s the perfect solution for those warm afternoons when you crave something sweet yet homemade, making it an irresistible addition to your summer menu. With its luscious, velvety texture and delightful bursts of mini peanut butter cups, it’s destined to be a crowd-pleaser. Ready to satisfy your sweet tooth? Let’s dive into this indulgent yet simple recipe!
Why Is This Ice Cream So Special?
Creamy Bliss: Imagine scooping into a velvety bowl of peanut butter cup ice cream, where each bite transports you back to childhood memories of sweet treats.
Quick Preparation: With just 10 minutes of prep, this no-bake delight is perfect for a spontaneous dessert craving. No need to wait hours; it’s ready when you are!
Versatile Mix-ins: Want to get creative? Substitute with your favorite nut butter or experiment with different candies. Your options for customization are endless!
Crowd-Pleasing Treat: It’s light, indulgent, and offers a delightful texture that brings smiles to everyone at the table. Serve it chilled and see the joy unfold!
For a fun twist on classic desserts, check out my Pumpkin Cupcakes with Maple Cream Cheese Frosting or try the delicious Thai Peanut Chicken for a savory complement!
Ninja Creami Peanut Butter Cup Ingredients
For the Ice Cream Base
• Whole Milk – Provides liquid and creaminess; use full-fat for best texture.
• Heavy Cream – Adds richness to achieve that delectably soft-serve texture; opt for full-fat for maximum creaminess.
• Creamy Peanut Butter – The main flavor base; be sure to choose quality brands for the most delicious results.
• Granulated Sugar – Sweetens the ice cream base; can substitute with sweeteners based on dietary preferences.
• Cream Cheese – Adds essential creaminess and stabilizes the mixture; always use full-fat for optimal results.
• Vanilla Extract – Enhances the flavor profile; using pure vanilla is recommended for that deep, inviting taste.
• Fine Sea Salt – Balances out the sweetness; add just a pinch for flavor enhancement.
For the Mix-ins
• Mini Peanut Butter Cups – These delightful chunks provide bursts of flavor and texture; feel free to swap in any chocolate or nut butter treats.
Enjoy crafting this homemade ice cream; the creamy indulgence of Ninja Creami Peanut Butter Cup ice cream is bound to enchant your taste buds!
Step‑by‑Step Instructions for Ninja Creami Peanut Butter Cup Ice Cream
Step 1: Prepare the Base
In a microwave-safe bowl, combine the creamy peanut butter and softened cream cheese. Microwave this mixture for 20-30 seconds until warm, allowing it to soften further. Whisk it vigorously until smooth and well blended, creating a silky base for your Ninja Creami Peanut Butter Cup ice cream.
Step 2: Combine Ingredients
Next, add the granulated sugar and a pinch of fine sea salt to the peanut butter mixture. Whisk until fully integrated, then gradually pour in the heavy cream and whole milk. Mix continuously until you achieve a homogeneous and creamy consistency, ensuring everything is beautifully combined. Finally, stir in the vanilla extract for an extra burst of flavor.
Step 3: Freeze the Base
Pour the combined mixture into the Ninja Creami pint, stopping at the max fill line to allow for expansion during freezing. Secure the lid tightly, then place it in the freezer for at least 24 hours. This step is crucial as the mixture needs to freeze solid to create that perfect creamy ice cream texture.
Step 4: Process in Ninja Creami
Once fully frozen, remove the pint from the freezer and set it in the Ninja Creami machine. Select the ‘ICE CREAM’ setting and process until you achieve a smooth, creamy texture. If the ice cream appears crumbly or too thick, simply add 1 tablespoon of milk and re-spin until completely smooth, ensuring that your Ninja Creami Peanut Butter Cup ice cream is irresistibly creamy.
Step 5: Mix-in Peanut Butter Cups
Create a well in the center of your processed ice cream and add the chopped mini peanut butter cups. Utilize the ‘MIX-IN’ cycle of the Ninja Creami to evenly distribute the delightful chunks throughout the creamy ice cream. This will ensure each bite is filled with rich peanut butter and chocolate goodness.
Step 6: Serve or Store
For an enticing soft-serve experience, serve your Ninja Creami Peanut Butter Cup ice cream immediately in chilled bowls. If you prefer a firmer texture, transfer it back to the freezer for an additional 1-2 hours. When ready to enjoy later, remember to re-process for a freshly creamy scoop that’s just as delicious as the first!

What to Serve with Ninja Creami Peanut Butter Cup Ice Cream
Elevate your dessert experience with delightful sides that perfectly complement the creamy indulgence of this homemade treat.
-
Chocolate Sauce: Drizzle this warm, rich topping over your ice cream for an extra touch of decadence that chocolate lovers will adore.
-
Salted Caramel Brownies: These fudgy treats bring a sweet and salty contrast that pairs beautifully with the creamy texture of your ice cream.
-
Fruit Salad: A refreshing mix of seasonal fruits adds a burst of freshness that balances the richness of the peanut butter cup ice cream.
-
Peanut Butter Cookies: Add an extra layer of flavor with chewy, homemade peanut butter cookies that echo the ice cream’s delightful peanut butter flavor.
-
Espresso or Coffee: A cup of strong brewed coffee enhances the sweet flavors while balancing the creaminess, making for an indulgent dessert experience.
-
Whipped Cream: Elevate each scoop with a cloud of fluffy whipped cream that brings a light and refreshing component to your creamy dessert.
-
Milkshakes: Blend the ice cream with a splash of milk for a luscious milkshake that’s perfect for those lazy, sunny afternoons.
Don’t forget to serve all these delicious sides in chilled dishes for an extra special treat!
Make Ahead Options
These delicious Ninja Creami Peanut Butter Cup Ice Cream treats are perfect for busy home cooks looking to save time during the week! You can prepare the ice cream base up to 24 hours in advance by combining all ingredients and letting the mixture freeze solid in the Ninja Creami pint. This prepped base can be stored in the freezer, ensuring it remains just as creamy and delightful upon serving. When you’re ready to indulge, simply process it in your Ninja Creami using the ‘ICE CREAM’ setting, and throw in the mini peanut butter cups during the ‘MIX-IN’ cycle. You’ll have the same beloved flavors ready to enjoy without the stress of last-minute preparation!
Tips for the Best Ninja Creami Peanut Butter Cup Ice Cream
-
Full-Fat Requirement: Always use full-fat dairy products to achieve that rich, creamy texture that elevates the Ninja Creami Peanut Butter Cup experience.
-
Avoid Natural Peanut Butter: Stick to regular creamy peanut butter; natural varieties can separate and disrupt the smooth texture you’re aiming for.
-
Freezer Temperature Matters: Keep your freezer below -18°C / 0°F for proper freezing; this ensures your ice cream will be perfectly textured and easy to scoop.
-
Re-processing for Freshness: If storing leftovers, re-process the ice cream in the Ninja Creami before serving to restore its creaminess and smoothness for each scoop.
-
Pinch of Salt: A small amount of fine sea salt not only enhances the flavor but also balances the sweetness, bringing out the best in your delicious dessert.
Ninja Creami Peanut Butter Cup Variations
Feel free to get creative with this delightful recipe and make it your own!
- Nut Butter Swap: Replace creamy peanut butter with almond or cashew butter for a nutty twist. Each nut butter offers a distinct flavor and brings its own creamy goodness.
- Sweetness Adjust: Reduce granulated sugar or swap it for honey or maple syrup to cater to your dietary needs, providing a unique twist to your flavors.
- Mix-in Magic: Add crushed cookies or candies to the mix for an exciting texture variation that’s sure to thrill chocolate lovers. Imagine the crunch against the creamy base!
- Frozen Fruit Addition: Blend in berries or banana slices for a fruity touch, giving your ice cream a delightful contrasting flavor profile. The juicy bursts will elevate each scoop!
- Chocolate Swirl: Incorporate chocolate syrup or fudge into the mixture before freezing for a decadent marbled effect, enhancing both taste and presentation.
- Dairy-Free Delight: Substitute whole milk and heavy cream with coconut milk for a luscious dairy-free version that still captures that creamy essence. It’s a tropical treat waiting to happen!
- Spicy Kick: Add a pinch of cayenne or chili powder for a surprising heat layer that contrasts the sweetness beautifully. Your adventurous friends will be impressed!
- Textural Contrast: Incorporate candied nuts or pretzel pieces for that crunchy bite, enriching your ice cream with a fun, varied texture throughout every scoop.
These variations can transform your Ninja Creami Peanut Butter Cup ice cream experience. If you’re in the mood for something a little more savory, give my delicious Garlic Butter Beef a try! For a delightful side, you might enjoy Honey Butter Skillet Corn to pair with your treats.
Storage Tips for Ninja Creami Peanut Butter Cup Ice Cream
Fridge: Store any leftover ice cream in the fridge for up to 3 days, but it’s best enjoyed fresh for optimal creaminess.
Freezer: Keep the Ninja Creami Peanut Butter Cup ice cream frozen for up to 2 weeks in an airtight container. This will help to maintain its delightful texture and prevent ice crystals from forming.
Re-heating: If you prefer a softer texture, take the ice cream out of the freezer and let it sit at room temperature for 10-15 minutes before serving. Re-process in the Ninja Creami if it has hardened too much.
Airtight Storage: Always ensure the ice cream is stored in an airtight container or the Ninja Creami pint to lock in freshness and prevent freezer odors from affecting its rich flavor.
Ninja Creami Peanut Butter Cup Ice Cream Recipe FAQs
How do I select the best peanut butter for this recipe?
Absolutely! For the richest flavor, choose creamy peanut butter that doesn’t separate, avoiding natural styles. Look for a brand with simple ingredients and a smooth texture. Reading labels helps ensure you get high-quality peanut butter for the best results.
What is the best way to store leftover Ninja Creami Peanut Butter Cup ice cream?
To maintain its delightful texture, store any leftovers in the Ninja Creami pint or an airtight container. It can stay good for up to 2 weeks in the freezer. Just remember to re-process it in the Ninja Creami before serving to restore that creamy consistency!
Can I freeze this ice cream for longer?
Yes, indeed! If you wish to save it for a more extended period, you can freeze it for up to 3 months. Just make sure to use a suitable airtight container to prevent freezer burn. When you’re ready to indulge again, let it soften at room temperature for a few minutes before serving.
What should I do if the ice cream turns out crumbly?
If your ice cream appears crumbly after processing, don’t worry! Simply add 1 tablespoon of milk and re-spin in the Ninja Creami. The extra moisture will help achieve that dreamy, smooth texture you’re aiming for, so just keep mixing until it’s perfect!
Are there any dietary considerations I should be aware of with this recipe?
Very! If you’re serving this treat to others, be conscious of allergies, particularly to dairy or peanuts. For a nut-free version, consider using sunflower butter as a delicious alternative. You can also look for dairy-free cream cheese or milk substitutes if anyone has dairy sensitivities.
How do I tell if my ice cream is ready to serve?
When you’re ready to enjoy your Ninja Creami Peanut Butter Cup ice cream, look for a smooth, creamy texture that is easy to scoop. If you prefer a firmer texture, let it freeze for an additional 1-2 hours before serving. Always keep an eye on it to avoid over-freezing!
Ninja Creami Peanut Butter Cup Ice Cream Bliss You’ll Love
Ingredients
Equipment
Method
- In a microwave-safe bowl, combine the creamy peanut butter and softened cream cheese. Microwave for 20-30 seconds until warm and whisk until smooth.
- Add granulated sugar and a pinch of fine sea salt to the mixture. Whisk, then gradually pour in the heavy cream and whole milk, mixing until creamy. Stir in vanilla extract.
- Pour the mixture into the Ninja Creami pint, secure the lid, and freeze for at least 24 hours.
- Remove from the freezer, place the pint in the Ninja Creami, select 'ICE CREAM' setting, and process until smooth. If crumbly, add 1 tablespoon of milk and re-spin.
- Create a well in the ice cream and add chopped mini peanut butter cups. Use 'MIX-IN' cycle to evenly distribute.
- Serve immediately in chilled bowls for soft-serve or freeze for 1-2 hours for a firmer texture. Re-process if needed for creamy scoops later.
Leave a Reply